manuals.online logo
Brands
  1. Home
  2. •
  3. Brands
  4. •
  5. Pifco
  6. •
  7. Heater
  8. •
  9. Pifco PE108 User manual

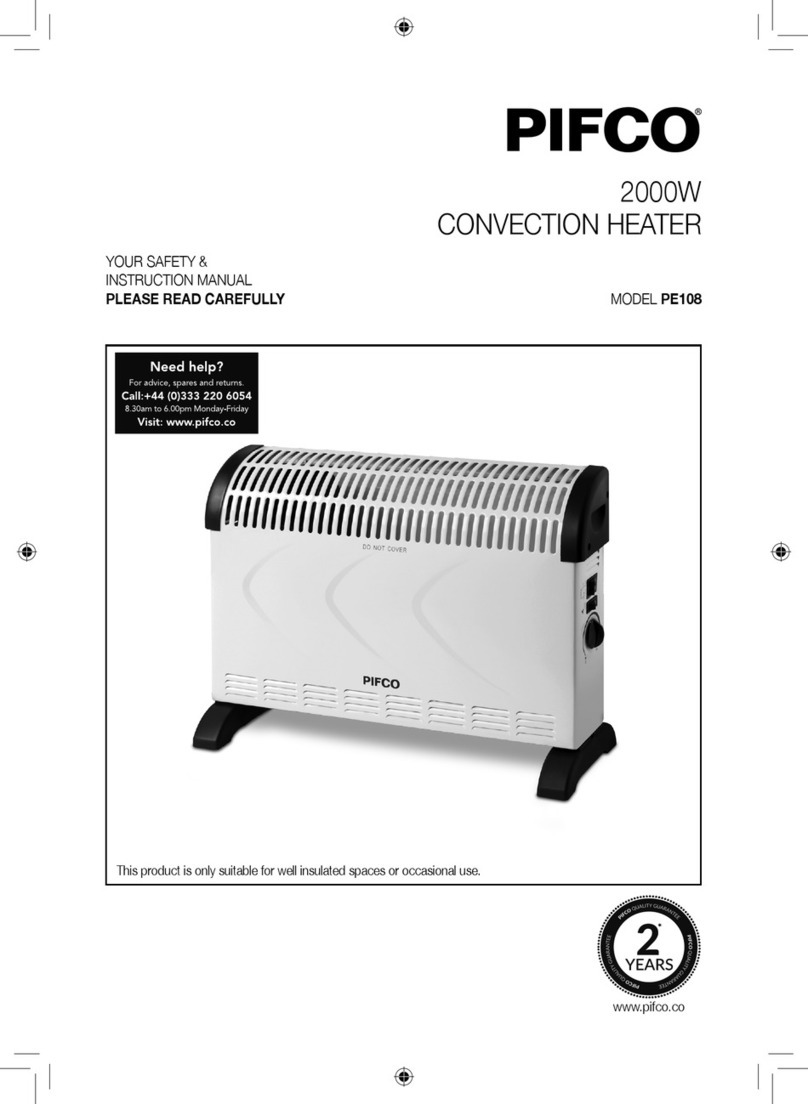
Pifco PE108 User manual

WL41001
The product may differ from the one illustrated
TO:
CUSTOMER SERVICES DEPARTMENT
PIFCO
SUTTON HOUSE,
BERRYHILL ROAD,
FENTON
STOKE ON TRENT
STAFFORDSHIRE,
ST4 2NL.
2000W Convection Heater PE108
Please place post-
age stamp here
Parts Identication
Technical Data
This product is guaranteed for 12 months from the date of the original pur-
chase.
If any defect arises due to faulty materials or workmanship the faulty products
must be returned to the place of purchase. Refunds or replacement is at the
discretion of the store.
The following conditions apply:
The product must be returned to the retailer with the original proof
of purchase.
The product must be installed and used in accordance with the instructions
contained in this instruction guide.
It must be used only for domestic purposes.
It does not cover wear and tear, damage, misuse or consumable parts.
PFD has no responsibility for incidental or consequential loss or damage.
Valid in the UK and Eire only.
Guarantee.
Product Helpline. 0871 221 3615 For all your product needs.
Models PE108
Rated power Input: 2000W
Motor Power : 20W
Rated Voltage : AC 220-240V 50Hz
1
4
3
2
5
1. Handles
2. 2 Heat Control Switches
3.Thermostat Control knob
4. Feet (Turbo model only)
5. Output Vents
6. Heater Body
7.Air vents
6
7
IMPORTANT Read these instructions fully before using the heater.
Retain these instructions for future reference.
ASSEMBLY OF THE HEATER
Before using the heater, the feet (supplied
separately in the carton), must be tted
to the unit. These are to be attached
to the base of the heater using the 4
self-tapping screws provided, taking care
to ensure that they are located correctly
in the bottom ends of the heater side
mouldings
Product Helpline. 0871 221 3615 For all your product needs.
Made by or on behalf of R K Wholesale Limited under licence from
Spectrum Brands (UK) Limited. Pifcois the registered trade mark
of Spectrum Brands (UK) Limited
Product Helpline. 0871 221 3615 For all your product needs.
Important Information
Check that the mains voltage corresponds with the rating of the appliances
Do Not Immerse any of this appliance in water or any other liquid.
Do Not Cover this appliance.
Do not touch hot surfaces
Do not leave any appliance unattended while it is operation.
Allow to cool before moving or storing.
Do not operate the appliance with a damaged cord or plug or after the appliance has
been damaged in any manner.
The use of accessories with this product is not recommended
Do not use outdoors or in wet or damp environments.
Do not let the cord hang over the edge of a table or counter or let it come into
contact with any hot surfaces.
Do not pull plug out by the power cord.
No liability can be accepted for any damage caused by non compliance with the
instructions or any other improper use or mishandling.
Never use the appliance near a bath, shower or a swimming pool.
Never place ammable objects or clothing on top of the heater.
Allow a 50cm safe area around the heater on the top and sides and a 120cm
safe area at the front of the appliance.
Never use this appliance in a room with explosive gas such as petrol or while using
ammable glues. sprays or solvents.
To Prevent overheating of the appliance ensure that there is adequate ventilation at
all times
Check all inlets and outlets from time to time for accumulated dust.
If overheating should occur, switch off at the appliance and wall socket then remove
the plug and allow to cool fully before inspecting or moving.
Do not insert any foreign objects into the grills por interior of this appliance.
Keep the rear grill clear of any draped fabric or curtains.
This appliance is not intended to be used by children or the inrm without adequate
supervision and/or training.
There are no user serviceable components in this appliance all servicing and repairs
must be carried out by fully qualied personnel
How to use Your Heater
Choose a suitable location for the heater, taking into account the safety instructions.
Insert the plug of the heater into a suitable socket.
Turn the thermostat knob fully in a clockwise direction to the maximum setting.
Turn on the heating elements by means of the rocker switches on the side panel.
When the heating elements are on the switches will illuminate.
For maximum heat output both switches should be on.
When the desired room temperature has been reached, the thermostat knob should
be turned slowly anti-clockwise until the thermostat is heard to click off and the
lights on the element switches are seen to go out.After this the heater will keep the
air temperature in the room at the set temperature by switching on and off
Automatically.
Cleaning your heater
Always unplug the heater from the wall socket and allow it to cool down before
cleaning.
Clean the outside of the heater by wiping with a damp cloth and buff with a dry cloth.
Do not use any detergents or abrasives and do not allow any water to enter the
heater.
Storing your Heater
When the heater is not used for long periods of time it should be protected from
dust and stored in a clean dry place.
Disposal instructions for Pifco items in accordance with the WEEE directive.
Appliances bearing the symbol shown here may not be disposed of in domestic
rubbish.
You are required to dispose of old electrical and electronic appliances like this
separately.
Please visit www.recyclemore.co.uk, or www.recylcenow.co.uk for access to
information about the recycling of electrical items.The WEEE directive, introduced
in August 2006, states that all electrical items must be recycled, rather than taken
to landll. Please arrange to take this appliance to your
Disposal of the unit
Product Helpline. 0871 221 3615 For all your product needs.
ELECTRICAL SAFETY
Class 1 Conguration
The wires in the mains lead are coloured in accordance with the following code:
GREEN/YELLOW: EARTH (E)
BLUE: NEUTRAL (N)
BROWN: LIVE (L)
Class 1 Conguration
As the colours of the wires in the mains lead of this appliance may not correspond
with the coloured markings identifying the terminals in your plug, proceed as follows:
The wire which is coloured GREEN & YELLOW (or coloured GREEN) must be
connected to the terminal in the plug which is marked with the letter “E” or by the
earth symbol .
The wire which is coloured BLUE (or coloured BLACK) must be connected to the
NEUTRAL terminal which is marked with the letter “N”.
The wire which is coloured BROWN (or coloured RED) must be connected to the
LIVE terminal which is marked with the letter “L”.
Always ensure that the Mains Cord is xed into the plug through the Cord Guard
or Cable Clamp, (plug wiring diagram above), and that the Cord Guard screws are
tightened to clamp the cord (outer sheath and inner coloured wires) into position in
the plug.
Make sure that the plug top is also tted securely.
This appliance must be protected by a 13 Amp fuse in a 13 Amp type (BS1363) plug.
Should you need to replace the fuse, use only a 13Amp ASTA approved BS1362 fuse
(13A).
OPERATIONAL GUIDELINES
It is important to ensure the correct Plug Adaptor is used when operating
in a country not using the UK 13 Amp socket system. If in doubt, consult a qualied
electrician.
Model no:
Serial no:
Batch no:
Name:
Address:
Date Purchased:
E-mail Address:
IMPORTANT
This warranty is invalid if alterations have been made to this certicate
Dealer Stamp/Details:
If you would NOT like to receive special offers and promotions from PFD and it’s associated
companies please tick this box

Other manuals for PE108

1

Other Pifco Heater manuals

Pifco P42001 Mounting instructions

Pifco

Pifco P42001 Mounting instructions

Pifco P22001 User manual

Pifco

Pifco P22001 User manual

Pifco PE108 Mounting instructions

Pifco

Pifco PE108 Mounting instructions

Pifco PH0129-9T User manual

Pifco

Pifco PH0129-9T User manual

Pifco P43004Y User manual

Pifco

Pifco P43004Y User manual

Pifco P44009 User manual

Pifco

Pifco P44009 User manual

Popular Heater manuals by other brands

FIBERGLASS SPECIALTIES EQAS-CH Installation, operation & service procedures

FIBERGLASS SPECIALTIES

FIBERGLASS SPECIALTIES EQAS-CH Installation, operation & service procedures

Reznor UDA Series Installation operation & maintenance

Reznor

Reznor UDA Series Installation operation & maintenance

EOS Bi-O Mat U Assembly and operating instruction

EOS

EOS Bi-O Mat U Assembly and operating instruction

Sawo PNX3-45Ni2 manual

Sawo

Sawo PNX3-45Ni2 manual

cecotec Ready Warm 6550 Turbo Convection Design instruction manual

cecotec

cecotec Ready Warm 6550 Turbo Convection Design instruction manual

DR. Heater DR-238 owner's manual

DR. Heater

DR. Heater DR-238 owner's manual

anko FH221B instruction manual

anko

anko FH221B instruction manual

Crane EE-7589 instruction manual

Crane

Crane EE-7589 instruction manual

Slant/Fin KICKER TK-70 quick start guide

Slant/Fin

Slant/Fin KICKER TK-70 quick start guide

RHINO H02073 Instruction booklet

RHINO

RHINO H02073 Instruction booklet

BriskHeat HotPoly Tote TTH Series instruction manual

BriskHeat

BriskHeat HotPoly Tote TTH Series instruction manual

ecofort ecoQ Sole 360 instructions

ecofort

ecofort ecoQ Sole 360 instructions

Futura FCV1000 user manual

Futura

Futura FCV1000 user manual

Sabiana CB-Touch operating instructions

Sabiana

Sabiana CB-Touch operating instructions

DR. Heater DR-998 Elite Series owner's manual

DR. Heater

DR. Heater DR-998 Elite Series owner's manual

IRSAP THE RADIATOR COMPANY Athena Fitting instructions

IRSAP

IRSAP THE RADIATOR COMPANY Athena Fitting instructions

STIEBEL ELTRON CK 150-1 Plus Operation and installation

STIEBEL ELTRON

STIEBEL ELTRON CK 150-1 Plus Operation and installation

Stanley ST-45-KFA-E manual

Stanley

Stanley ST-45-KFA-E manual

manuals.online logo
manuals.online logoBrands
  • About & Mission
  • Contact us
  • Privacy Policy
  • Terms and Conditions

Copyright 2025 Manuals.Online. All Rights Reserved.