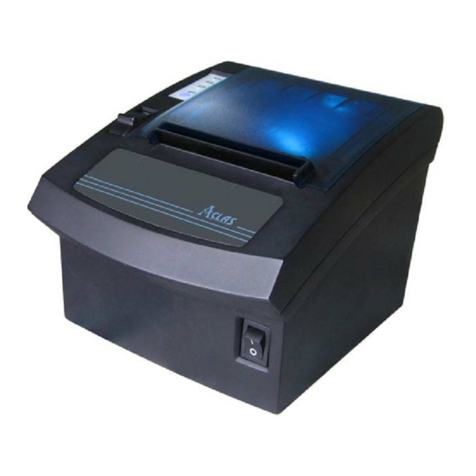
Pinnacle Technology PP7X Series User manual

PP7X PRINTER
OPERATION MANUAL
Pinnacle Technology Corp.


CONTENTS
1 FEATURES ....................................................................................................................................................... 1
2 SPECIFICATIONS............................................................................................................................................ 1
3 ACCESSORIES................................................................................................................................................. 2
4 GET TO KNOW THE PRINTER...................................................................................................................... 2
5 DRAWER PORT DEFINITION........................................................................................................................ 5
6 INSTALLATION AND MAINTENANCE ....................................................................................................... 6
6.1 Paper Installation ............................................................................................................................... 6
6.2 Print Test Page ................................................................................................................................... 8
6.3 Thermal Printer Head Cleaning ......................................................................................................... 8
6.4 Communication Board Replacement ................................................................................................. 9
7 MODEL: PP7XU............................................................................................................................................. 11
7.1 Printer Driver Installation ................................................................................................................ 11
7.2 How to Know the Connecting Port.................................................................................................. 16
7.3 Software Description ....................................................................................................................... 18
8 MODEL: PP7XW4/PP7XW2.......................................................................................................................... 19
8.1 Wireless 433MHz Base Station ....................................................................................................... 19
8.2 Wireless 433 USB Dongle/2.4G ...................................................................................................... 21
8.2.1 USB Dongle Driver Installation............................................................................................... 21
8.2.1 How to Know the Connecting Port.......................................................................................... 21
8.3 Printer Driver Installation ................................................................................................................ 23
8.4 Software Description ....................................................................................................................... 24
9 MODEL: PP7XE ............................................................................................................................................. 26
9.1 Printer Driver Installation ................................................................................................................ 26
9.2 Software Description ....................................................................................................................... 30
10 MODEL: PP7XD..................................................................................................................................... 31
10.1 How to Know the Connecting Port.................................................................................................. 31
10.2 Printer Driver Installation ................................................................................................................ 32
11 MODEL: PP7X3.............................................................................................................................................. 33
11.1 How to Know the Connecting Port.................................................................................................. 33
11.2 Printer Driver Installation ................................................................................................................ 33
11.3 Software Description ....................................................................................................................... 34
12 MODEL: PP7XWB ................................................................................................................................. 35
12.1 BT Driver Installation...................................................................................................................... 35
12.2 How to Know the Connecting Port.................................................................................................. 45
12.3 Printer Driver Installation ................................................................................................................ 46
12.4 Software Description ....................................................................................................................... 47
13 DIP SWITCH........................................................................................................................................... 48
14 COMMANDS.......................................................................................................................................... 50
15 COMMAND SAMPLE (hex command) ................................................................................................. 72

1
1FEATURES
※ Original patented oblique paper-sensor. Detect the paper precisely, even if the paper is stuck to the end
of paper slot or paper roll is in different position (desktop or hang on the wall).
※ Special paper cutter design (the movable cutter is on the upper side). In this case, paper jam problem
can be solved by simply opening the printer cover. Currently ordinary printers cannot solve the paper
jam problem easily, only by pull back the gear to return the cutter.
※ With black mark sensor.
※ Optional automatically Paper-cutter module.
※ Unique mechanism to make paper installation easily.
※ With water-proof design. The rubber sticker in the paper outlet is able to prevent from water, oil.
※ Support with ESC/POS command collection, in addition to Aclas protocol.
※ POS printer: supermarket, restaurants, retails to print the sales receipt.
※ Can work as a fiscal printer, by adding optional displays (client&operator) and functional keys.
2SPECIFICATIONS
Print Method thermal print
Resolution 203dpi
Speed 150mm/s (PP7MX); 250mm/s (PP7HX)
Printer Head Life 50km
Effective Width 72mm
Paper Width 80mm±0.1
Paper Feed roll feeding
Power Supply DC24V 2AAdapter (AC100~240V)
Interface
1 cash drawer interface compatibles with EPSON
1 USB port (PP7XU)
1 parallel port (PP7XD)
1 Ethernet port (PP7XE)
1 RS232 port (PP7XW4/PP7X3/PP7XW2/PP7XWB)
Work Temperature 0℃~ 40℃
Work Humidity 5% ~ 85%
Weight approx. 0.82kg
Size 196.5*145*135mm

2
3ACCESSORIES
4GET TO KNOW THE PRINTER
Power indicator light
To prompt error
To prompt the paper is run out
Press this key to advance paper
PC Disk User manual
Adapter
Power switch
The switch to open the upper cover

3
INTERFACE:
Connect to charger Connect to drawer USB port
[Model: PPXU]
[Model: PP7XW4]
Connect to charger Connect to drawer RS232 port
Connect to charger Connect to drawer RS232 Port
[Model: PP7X3]
Connect to charger Connect to drawer RS232 Port
[Model: PP7XW2]

4
Connect to charger Connect to drawer Parallel port
[Model: PP7XD]
Connect to charger Connect to drawer Ethernet port
[Model: PP7XE]
Connect to charger Connect to drawer RS232 Port
[Model: PP7XWB]

5
5DRAWER PORT DEFINITION
The drawer port definition is similar to EPSON. The definition of 6PIN port is as follows:
The definition of 4PIN port (Pinnacle self-defined) is as follows:
1
2
3
4
5
6
DRAWER
PHONE6P6C
12
C12
102/2KV/DIP
GND
DRAWER_SW#
P+24V
DRAWER2#
DRAWER1#
P+24V
DRAWER2#
DRAWER_SW#
Aclas Drawer
1
2
3
4
DRAWER
PHONE4C
DRAWER1

6
6INSTALLATION AND MAINTENANCE
6.1 Paper Installation
¾Paper roll diemnsion:
Unit: mm
Note: Bad quality thermal paper may quickly damage the thermal printer head, please use high quality
thermal paper. (Bad quality thermal paper: roughness paper surface may quickly wear the pinter head; bad
sensetive result in selecting ‘dark’ density level, which may reduce the life time of the printer head.)
¾Installation:
When there is no paper in the printer, the light ‘Paper Out’ will be on, and you need to install paper
immediately.
The switch
1. Push the switch as the arrow shows in
the picture to open the cover.
2. Place the paper roll into the paper
house.
Right Wrong
Φ80
Φ80

7
4. Pull out the leading age of paper and
close the printer cover.
5. Tear off the spear paper and finish
paper replacing.
3. Let the paper parallel with the
alignment line.
The alignment line

8
6.2 Print Test Page
Press key ‘Feed’ and hold it, and then power on the machine at the same time, it will print a piece of Test
Page. The information of this Test Page includes the printer’s model, version, IP address (Ethernet port), ID and
the default setting of the dip switch when leave factory.
6.3 Thermal Printer Head Cleaning
The thermal printer head is probably dirty, if part of letters is not printed distinctly. Please clean the thermal
printer head by alcohol dabbed swab, otherwise heat will be hard to dissipate, which may damage the printer head.
Note: High-quality thermal paper is able to reduce possibilities of polluting the printer head, and almost
no need to clean it.
Attention: Do not touch the thermal printer head.
Thermal Printer
Head

9
6.4 Communication Board Replacement
Note: Make sure that PP7X is powered off when you are changing the communication board. Power
off PP7X for more than 10s, then the communication board can be replaced.
Use the cross screwdriver unscrew these two screws.
Take off the communication board and replace it.
Note: we suggest that you should
tighten the two screws side by
side to avoid damaging the main
board.

10
You can change the following communication boards according to your needs. And after replacement,
please refer to the corresponding chapter according to the model.
USB port module
[
Model: PP7XU
]
Parallel
p
ort module
[Model: PP7XD]
433MHz wireless port module
[Model: PP7XW4]
P-tooth wireless
communication port module
[Model: PP7XW2]
BT wireless
communication port module
[
Model: PP7XWB
]
RS232 port module
[Model: PP7X3]
Ethernet port module
[Model: PP7XE]

11
7MODEL: PP7XU
7.1 Printer Driver Installation
Connect the PP7X to PC. Click ‘Aclas printer.exe’ on the CD-disk, which is packed along with your
computer. Install the printer driver as follows:
Click ‘Next’
Click ‘Next’
Click ‘Next’

12
Click ‘Browse’ to select
the destination location.
Click ‘Next’
Here shows the
destination location.
Click ‘Install’

13
Note:If it is USB printer, please tick the box and click“NEXT”.If not, please directly click “NEXT”.
Click ‘Next’
选择如第 3.2 章,计算机
自动识别的端口
Choose this item
Click ‘Next’

14
Click ‘Finish’ to
finish USB driver
installation.
Click‘Install’

15
Finally, click ‘Finish’ to finish printer driver installation.
Click ‘Finish’

16
7.2 How to Know the Connecting Port
After you install USB driver, restart computer, and connect the PP7X to the computer. Then, you can follow
steps below to know which port is connected.
Right click ‘My Computer’ icon on the desktop, and choose ‘Manage’:
Choose ‘Manage’
Choose ‘Device Manager’
Here you can see the
connecting port.

17
①Select the connecting port
②Click it.
Other manuals for PP7X Series
1
This manual suits for next models
7
Table of contents
Other Pinnacle Technology Printer manuals

Pinnacle Technology
Pinnacle Technology KP7MX Assembly instructions

Pinnacle Technology
Pinnacle Technology KP7X User manual

Pinnacle Technology
Pinnacle Technology Aclas PP8X Assembly instructions

Pinnacle Technology
Pinnacle Technology ACLAS PP7M21NX User manual

Pinnacle Technology
Pinnacle Technology PP7MX Assembly instructions

Pinnacle Technology
Pinnacle Technology PP7X Series User manual

Pinnacle Technology
Pinnacle Technology PP7MX Installation instructions