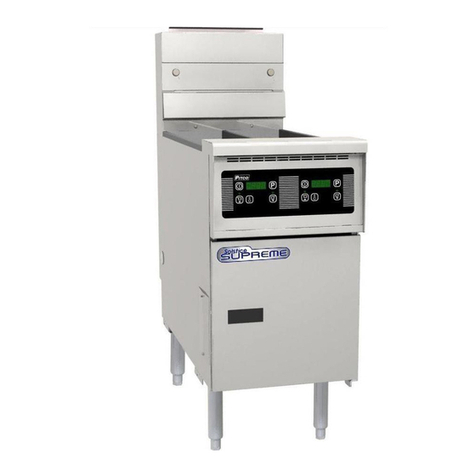
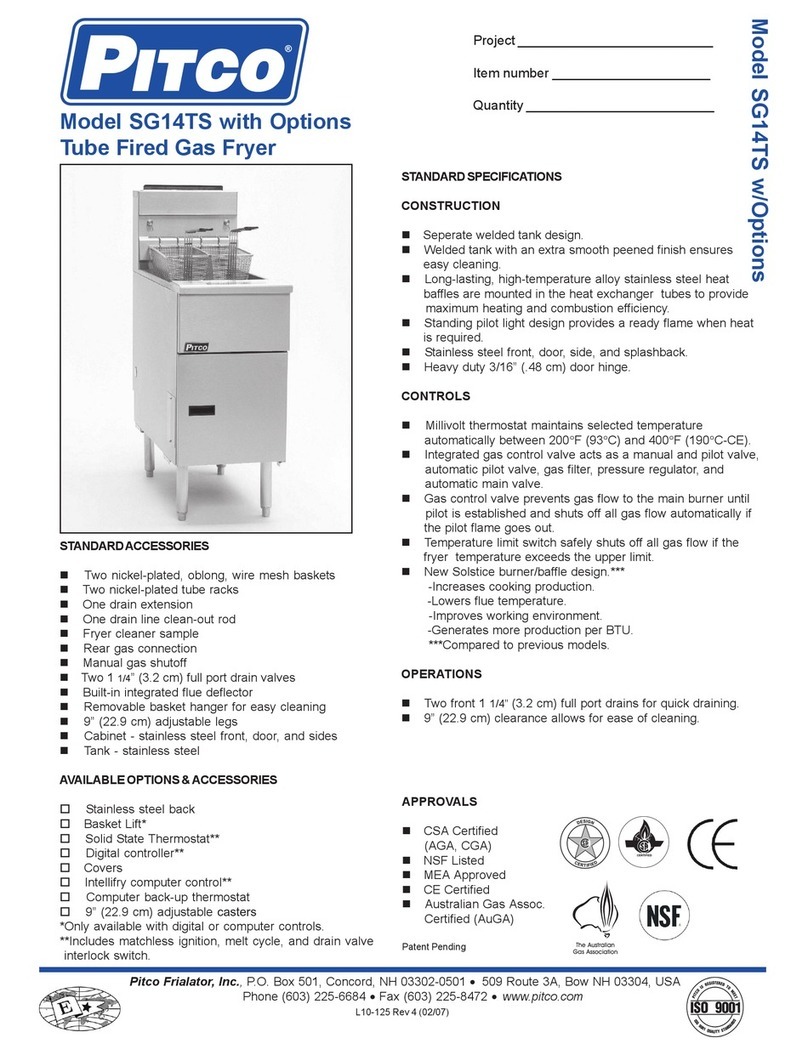
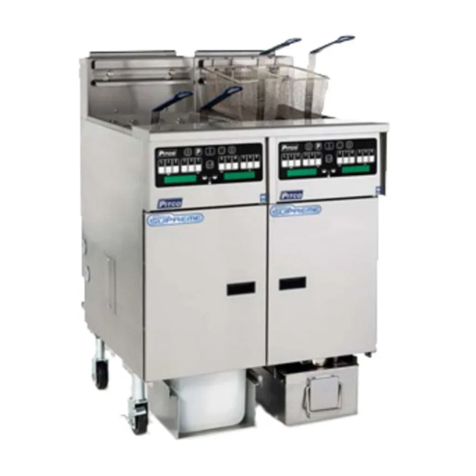
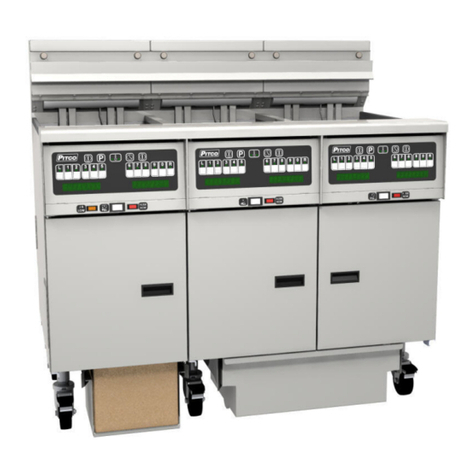
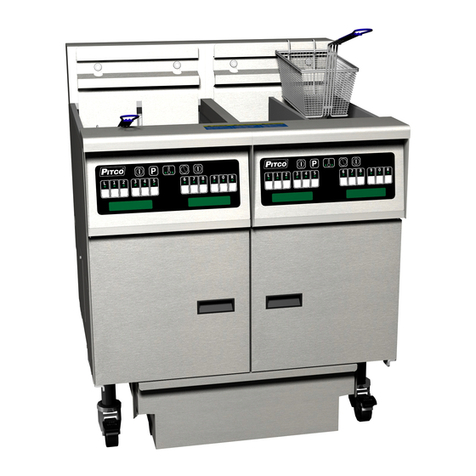
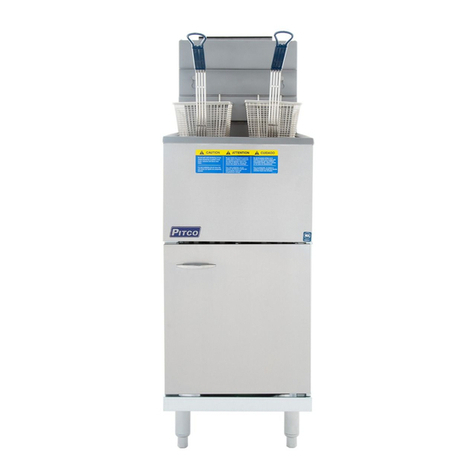
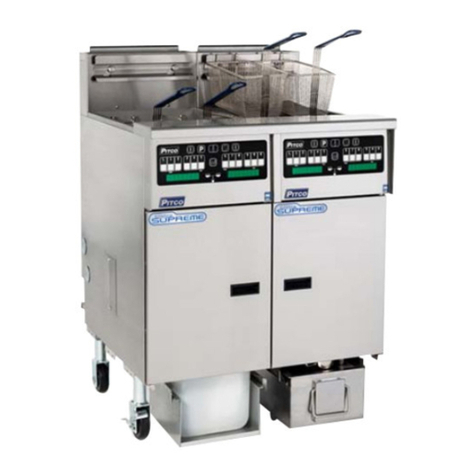
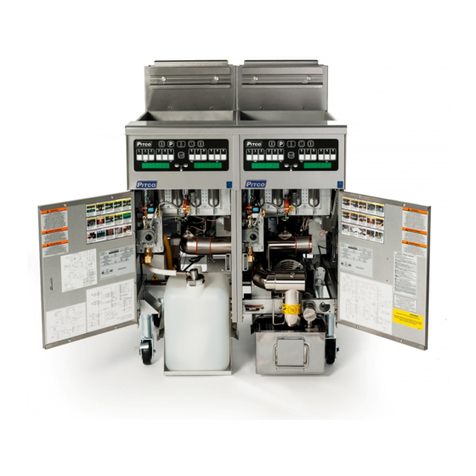
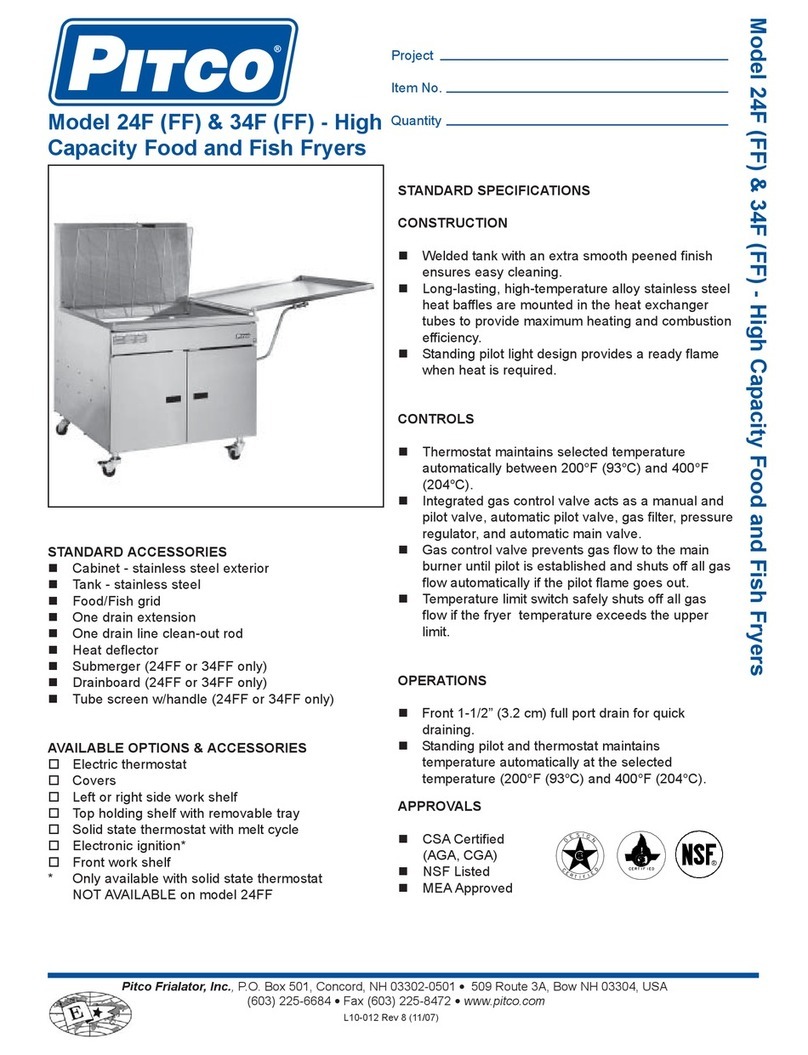
Pitco SG Series Owner's manual

There's Always Something Cooking!
InstallationandOperationManual
ForGasFryers
ALL OPTIONS
CoveringModels
SG&SGF
14,14R,14T,18,18F,24P,24F,34P&34F
3LWFR)ULDODWRU,QF 32%R[-FW,,&RQFRUG1+ 5RXWH$%RZ1+
)$;
/ 5 www.pitco.com
)5$1&$,6 (1*/,6+)5$1d$,6
(63$f2/
R5 (07/13)

TO THE PURCHASER, OWNER AND STORE MANAGER
Please review these warnings prior to posting them in a prominent location for reference.
TO THE PURCHASER
Post in a prominent location the instructions to be followed in the
event that an operator smells gas. Obtain this information from your
local gas supplier.
FOR YOUR PROTECTION
DO NOT store or use gasoline or other flammable vapors and liquids
in the vicinity of this or any other appliance.
Do not spray aerosols in the vicinity of this appliance when it is in
operation.
WARNING
Improper installation, operation, alteration, adjustments, service or
maintenance can cause property damage, injury or death. Read the
installation, operating and maintenance instructions thoroughly before
installing, operation, servicing this appliance.
WARNING
Installation, maintenance and repairs should be performed by a Pitco
Authorized Service and Parts (ASAP) company technician or other
qualified personnel. Installation, maintenance or repairs by an
unauthorized and unqualified personnel will void the warranty.
WARNING
Installation and all connections must be made according to local
codes in force. In the absence of local codes in North America, the
installation must conform with the National Fuel Gas Code, ANSI
Z223.1/NFPA 54 or the Natural Gas and Propane Installation Code
CSA B149.1 as applicable. In Australia, the appliance must installed
in compliance with AS/NZS 5601.
WARNING
During the warranty period if a customer elects to use a non-original
part or modifies an original part purchased from Pitco and/or its
Authorized Service and Parts (ASAP) companies, this warranty will be
void. In addition, Pitco and its affiliates will not be liable for any
claims, damages or expenses incurred by the customer which arises
directly or indirectly, in whole or in part, due to the installation of any
modified part and/or received from an unauthorized service center.
WARNING
This appliance, when installed, must be electrically grounded in
accordance with local codes, or in the absence of local codes, with the
National Electrical Code, ANSI/NFPA 70, or the Canadian Electrical
Code, CSA C22.2, as applicable
WARNING
Adequate means must be provided to LIMIT the movement or this
appliance without depending on the gas or electrical cord connection.
Single appliances equipped with legs must be stabilized by installing
anchor straps. All appliances equipped with casters must be
stabilized by installing restraining chains.
WARNING
DO NOT alter or remove structural material on the appliance to
accommodate placement under a ventilation hood.
WARNING
If the appliance is equipped with a power cord and it is damaged, it
must be replaced by a Pitco Authorized Service and Parts (ASAP)
company technician, or a similarly qualified person in order to avoid a
hazard.
WARNING
The power supply must be disconnected before servicing, maintaining
or cleaning this appliance.
WARNING
The appliance is NOT jet stream approved. DO NOT clean the
appliance with a water jet.
WARNING
DO NOT attempt to move this appliance or transfer hot liquids from
one container to another when the unit is at operating temperature or
filled with hot liquids. Serious personal injury could result if skin
comes in contact with the hot surfaces or liquids.
WARNING
DO NOT use an open flame to check for gas leaks!
WARNING
DO NOT sit or stand on this appliance. The appliance’s front panel,
tank, splash back, tank cover, work shelf, drain board is not a step.
Serious injury could result from slipping, falling or contact with hot
liquids.
WARNING
NEVER use the appliance as a step for cleaning or accessing the
ventilation hood. Serious injury could result from slips, trips or from
contacting hot liquids.
WARNING
The oil/shortening level should NOT fall below the minimum indicated
level line at any time. The use of old shortening can be dangerous as
it will have a reduced flash point and be more prone to surge boiling.
WARNING
The contents of the crumb catch and/or filter pan of any filter system
must be emptied into a fireproof container at the end of the frying
operation each day. Some food particles can spontaneously combust
into flames if left soaking in certain oil/shortening materials.
WARNING
Completely shut the appliance down when shortening/oil is being
drained from the appliance. This will prevent the appliance from
heating up during the draining and filling process. Serious injury can
occur.
WARNING
This appliance is intended for indoor use only.
WARNING
DO NOT operate appliance unless all panels and access covers are
attached correctly.
WARNING
It is recommended that this appliance be inspected by a qualified
service technician for proper performance and operation on a yearly
basis.
WARNING
There is an open flame inside this appliance. The unit may get hot
enough to set nearby materials on fire. Keep the area around the
appliance free from combustibles.
WARNING
DO NOT supply the appliance with a gas that is not indicated on the
data plate. If you need to convert the appliance to another type of fuel,
contact your dealer.
WARNING
If gas flow to appliance is interrupted, or pilots extinguish, wait 5
minutes before attempting to relight the pilot to allow any residual gas
in appliance to dissipate.
WARNING
Ensure that the appliance can get enough air to keep the flame
burning correctly. If the flame is starved for air, it can give off a
dangerous carbon monoxide gas. Carbon monoxide is a clear
odorless gas that can cause suffocation.
WARNING
Never add oil to the appliance when it is at operating temperature.
Splashing hot oil can cause severe injuries.
WARNING
Never add water to hot oil. Violent boiling can occur causing severe
injury.
WARNING
This appliance is intended for professional use only and should be
operated by fully trained and qualified personnel.
WARNING
To avoid splashing of hot liquid when installed, this fryer must be
restrained either by the manner of installation, or with adequate ties to
prevent tipping.
WARNING
An appliance equipped with casters and a flexible gas line must be
connected to the gas supply with a quick disconnect device. In North
America, gas appliances equipped with casters must be installed with
connectors that comply with the Standard for Connectors for Movable
Gas Appliances, ANSI Z21.69.CSA 6.16 Latest Edition. This connection
should include a quick disconnect device that complies with the Standard
for Quick Disconnect Devices for Use With Gas Fuel ANSI Z221.41.CSA
6.9 Latest Edition. In Australia, an appliance equipped with casters and a
flexible gas line must be connected to the gas supply with a quick
disconnect device that complies with AS 4627. The hose must comply
with AS/NZS 1869 and be class B or D and have a restraining cable. The
restraining cable must not exceed 80% of the length of the flexible gas
line.

1
/ 5HY
INSTALLATION
Althoughitispossibleforyoutoinstallandsetupyournewfryer,itisSTRONGLYrecommendedthatyouhaveit
donebyqualifiedprofessionals. Theprofessionals thatinstallyour newfryerwill knowthelocal buildingcodesand
ensurethat yourinstallation issafe.
WARNING
DONOTobstructtheflowofcombustion/ventilationorairopeningsaround
thefryer. Adequateclearancearoundthefryerisnecessaryforservicingand
properburner operation. Ensure thatyoumeetthe minimum clearances
specifiedinthismanual.
InstallationClearances
Thefryerneedsclearancearounditforproperoperation. Adequate clearancesallowfor servicingandproperburner
operation. Theclearancesshownbelowareforcookerinstallationincombustibleandnoncombustibleconstruction.
Combustible Non-Combustible
Construction Construction
Back 6'' 0''
Sides 6'' 0''
Floor - Combustible 9'' 9''
Countertop must beconstructedofanon-combustiblematerialforSG14Ccountertopfryerinstallations.
In addition to the clearances required for proper fryer operation, there must be at least 21 inches of aisle space
in front of the fryer to remove/install the filter pan/module.
WARNING
Thefryermustbeproperlyrestrained toprevent movementortipping. Thisrestraintmustpreventthe
fryerfrommovementsthatwouldsplashhotliquidsonpersonnel,whichcouldcausesevereburnsor
injuries. Alwayswearoilproofgloveswhenmovingorhandlingequipmentorhot liquids.
Leveling
Whenyoureceiveyour fryerit iscompletely assembled. Thefryer willneed tobeleveledonceitisin place. Leveling
thefryer isdonewith a largepair of waterpumppliers. The castersprovidethe necessaryheightto meet sanitation
requirementsandassureadequateairsupplytotheburner.
a. Adjustthe height andlevelthefryer by adjustingtheleveling devices on thecasterwith the waterpump
pliers.
b. Movethe fryer to the desired location and lockthewheelsusingthe locking devices on the sides ofthe
casters.
CHECKING YOUR NEW FRYER
Your new fryer has been carefully packed into one crate. Every effort has been made to ensure that your fryer is
deliveredtoyouinperfectcondition. Asyouunpackyournewfryer,inspecteachofthepiecesfordamage. Ifsomething
isdamaged, DO NOTsignthe billoflading. Contact the shipperimmediately,the shipper isonlyresponsible for 15
daysafter delivery. Check the packinglistenclosed with your fryertoensure that you havereceivedall of the parts
tothe fryer. If you are missing anyparts,contactthe dealer from whom the fryer waspurchased.
CAUTION
Toprevent equipmentdamage,don't tiltthefryer onto anytwoof it'scastersor pulltheunit bytheflue
vents.
Locateyour Pitco Frialator warranty and fillintheserial number of the fryerandthedate received. You will find the
serialnumberon theplateinsidethedoor. Put yourwarrantycardinasafeplace forfuturereference. DONOTreturn
thecard to Pitco Frialator.
(1*/,6+
R5 (07/13)

2
/ 5HY
FuelTypes-Eachfryerisequippedtoworkwithonetype offuel. Thetype offuelwithwhichtheapplianceisintended
tooperate isstampedon thedataplate attachedtothe insideofthe door.
NOTICE
NEVERusean adaptortomakeasmallergassupply linefitthecookerconnection.
Thismaynotallowpropergasflowforoptimumburneroperation,resulting inpoor
cookerperformance.
QuickDisconnectGasConnection
Gasfryersequipped withcasters mustbeinstalledwithconnectorsthatcomply withtheStandardforConnectorsfor
MovableGasAppliances,ANSIZ223.1LatestEdition,andAddendaZ21.69ALatestEdition. Thisconnectionshould
includea quick disconnectdevicethat complies withtheStandard forQuickDisconnect Devices forUseWith Gas
Fuel, ANSI Z223.1Latest Edition. When installingaquick disconnect youmust also installameans for limitingthe
movement of the fryer. This device will prevent the gas line or the quick disconnect from being strained. The
restrainingdeviceshouldbe attachedto thecooker onthe backpanel.
FuelSupplyLineLeakandPressureTesting
Thefuelsupplysystemmustbetestedbeforethefryerisused. Ifthefuelline isgoingtobetestedatapressuregreater
than(>)1/2 PSIG(3.45kPa), makesurethat thefryeris disconnectedfromthe fuelline. Ifthe fuellineis tobetested
atapressure equaltoorlessthan(<)1/2PSIG(3.45kPa), thefryercanbeconnected buttheunit'sgasvalvemustbe
shut. Testall gas line connectionsforleaks with asolutionof soap and waterwhenpressure is applied.
ELECTRICAL CONNECTION
Theelectrical service usedbythe fryer mustcomplywith local codes. Ifthereare no local codesthatapply, refer to
theNational Electrical Code (NEC),ANSI/NFPA70to install the service. InCanadarefer to CSA Standard C22.1
andlocalcodes. Wiringdiagramsareprovidedinside thefryer controlbox. The powerrequirements forthe fryerare
shownbelow.
NorthAmerica International
InputVoltage 120 VAC, 60Hz 220 (or 240) VAC, 50Hz
Currentperfryer 0.5Amps 0.5Amps
FilterSystem 7.0Amps 4.0Amps
Thefryermustbe groundedin accordancewith localcode;ifthereis nota localcode,complywithNEC ANSI/NFPA
No.70-1990. Itisadvisedthatthispowersupplybepluggedintoawallreceptaclethatiscontrolledbytheventilation
control. Thiswillprevent the fryer from being operated without the ventilator on.
c. Oncetheunitis inplace, checkand readjustthe levelnessasnecessary.
GAS CONNECTION
Yourfryerwill giveyou peakperformance whenthegassupplylineisof sufficientsize toprovide thecorrectgasflow.
ThegaslinemustbeinstalledtomeetthelocalbuildingcodesorNationalFuel GasCodeANSIZ223.1LatestEdition.
InCanada,install thefryerinaccordancewith CAN/CGA-B149.1or.2andlocalcodes. Gaslinesizingrequirements
canbedeterminedbyyourlocalgascompanybyreferringtoNationalFuelGasCode,AppendixC,TableC-4(natural
gas)and TableC-16 (propane). Thegasline needstobe largeenough tosupplythe necessaryamountof fuelto all
applianceswithoutlosing pressuretoanyappliance.
WARNING
NEVERsupply thefryerwith agasthat isnotindicatedon thedataplate. Using theincorrectgas typewill
causeimproperoperation. Ifyouneedtoconvertthe fryerto anothertypeoffuel,contactyourdealer.
R5 (07/13)

3
/ 5HY
Table1-2 VentilationandFireSafetyReferences
TOPIC UNDERWRITERSLABORATORY NATIONALFUELGAS
DOCUMENT CODE DOCUMENT
(;+$867+22'6 $16,8/ $16,1)3$
32:(59(17,/$7256 $16,8/ $16,1)3$
),/7(581,7 $16,8/ $16,1)3$
$16,8/
TYPES OF FIRE EXTINGUISHERS
AND DETECTION EQUIPMENT
&2 $16,8/ $16,1)3$
'5<&+(0,&$/ $16,8/ $16,1)3$
:$7(5 $16,8/ $16,1)3$
)2$0 $16,8/ $16,1)3$
635,1./(56 $16,8/ $16,1)3$
602.('(7(&7256 $16,8/ $16,1)3$
),5('(7(&7,217+(50267$76 $16,8/ $16,1)3$
Gaspressurecheck
Gaspressureshouldbemeasuredattheburnermanifoldandshouldmatchthepressurerequirement
VENTILATION AND FIRE SAFETY SYSTEMS
Yournewfryer musthaveproperventilationtofunctionsafely andproperly. Exhaustgastemperaturescanreachas
highas1000°F. Therefore,itisveryimportanttoinstallafiresafetysystem. Yourventilationsystemshouldbedesigned
toallowforeasycleaning. Frequentcleaningoftheventilationsystemandthefryerwillreducethechancesoffire. Table
1-2providesalist ofreference documentsthat provideguidance onventilationandfiresafety systems. Thistable is
notnecessarilycomplete. Additionalinformationcanbeobtained fromCSAInternational,8501EastPleasantValleyRoad,
Cleveland,OH44131.
Excessiveventilation causes drafts, which will interferewiththeproper operation of the pilotandtheburner.
Leaveat least18 inchesofopen spacebetweenthe fryer'sflue vent openingand theintakeof theexhausthood.
CAUTION
Ensurethat yourventilationsystemdoesnot causeadown draftatthe fryer'sflue
opening. Downdrafts will not allow the fryer toexhaust properly and will cause
overheatingwhichmaycausepermanentdamage. Damagecausedbydowndraftswill
notbecoveredunder equipmentwarranty. NEVERallow anythingtoobstructthe
flowofcombustiblesorventilationexitingfromthefryerflue. DONOTputanything
ontop oftheflue area.
NOTICE
NEVERconnect theblowerdirectlyto theflueopenings. Thedirect flowofair will
causepoortemperaturerecovery,poorignition,inefficientoperationofthefryer,and
couldextinguishthepilot.
(1*/,6+
R5 (07/13)

4
/ 5HY
listedonthedata platemounted ontheinsideofthe fryerdoor..
LIGHTINGINSTRUCTIONS
D)LOONHWWOHEHIRUHOLJKWLQJ
E7XUQFRPELQDWLRQJDVYDOYHNQREWR³21´SRVLWLRQ
F1. Solid State Thermostat: Switch melt switch to desired position. Turn the Thermostat
knob to desired temperature. Turn the power switch to the "ON" position, the fryer is equipped
with a matchless ignition system and will automatically light the pilot, and heat up to set
temperature.
2. Digital Controller: Press the button on the controller panel to turn fryer ON, the fryer is
equipped with a matchless ignition system and will automatically light the pilot, and heat up to
set temperature.
3. ComputerController: Pressthe buttonon the controllerpanel to turnfryerON, thefryeris
equippedwith a matchlessignitionsystem and willautomatically light thepilot,and heat uptoset
temperature.
G'HOLJKWLQJZDLWPLQXWHVEHIRUHDWWHPSWLQJWRUHOLJKWWKHSLORWWRDOORZIRUDQ\JDVLQWKHIU\HUWR
GLVVLSDWH
WARNING
DO NOTTURN COMBINATION GAS VALVE KNOB TO THE “ON” POSITION UNTIL
VESSELIS FULLOFWATER OR SHORTENING. TURNINGTHE KNOB TO “ON” WITHVESSEL
EMPTYWILLDAMAGE THEVESSELOR COMPONENTSAND VOID WARRANTY.
INITIALCLEANING
Whenthe fryerisshipped, manyof itspartsare coveredwitha thincoatof oilfor protection. Beforethefryer isready
forcookingitmustbecleaned. Thiswillremovetheoilcoatingandanyforeignmatterthatmayhaveaccumulatedduring
storageandshipment. Performthecleaningasdescribedbelow.
a. FillthetankwithwaterandaddonepacketofPitcofryercleaneroramilddetergent,andturngasvalveknob
to ON position.
b. 1. SolidState Thermostat: Turnmelt switchtothe "MELT"position. Turnthe Thermostat
knobtothelowesttemperaturesetting(2500F). Turnthepowerswitchtothe"ON"position,
thefryer is now in the boil-out modewhichwillprevent the fryer from boiling over. Note:
donotleavethefryerunattendedduringthisoperation. Oncethefryerhasheatedupto
approximately1950F, allow itto operate for15 minutes toallowany buildupin thetankto
soften.
2. DigitalController: Pressthe buttononthecontrollerpaneltoturnfryerON. Thefryer
willautomaticallyswitch into the boil-out mode which will prevent the fryer from boiling
over. Note:donotleavethefryerunattendedduringthisoperation. Oncethefryerhas
heatedup toapproximately1950F,allow itto operate for15minutes toallowany buildup
inthe tank to soften.
3. ComputerController: Pressthe button onthe controllerpaneltoturnfryerON. The
fryerwill automatically switch into the boil-out mode which willprevent the fryer from
boilingover. Note:donotleavethefryerunattendedduringthisoperation. Oncethefryer
hasheateduptoapproximately 1950F,allow itto operatefor 15minutestoallowanybuild
upinthetank to soften.
NOTE
Donotleavethefryerunattendedduringcleaning. Neverletthe
waterlevelgobelowthe"MinLevel"markonthebackofthetank.
R5 (07/13)

5
/ 5HY
c. Whilewearing protectivegloves,use thefryercleaning brushtoscrub theinsideof thefryerto remove
protective coating.
d. Whencleaning iscomplete,turn offthefryer mainburnersand turngasvalve knob tothe OFF
position. Whilewearingprotectivegloves,drainthewaterintoacontainersuitableforhotwateranddispose
of it.
e. Whenthetankhas cooled,rinse itthoroughly withcoolwater. Continuetorinsethetank untilthe cleaner
hasbeen rinsed, thoroughlyfromthe tank.
f. Usingacleandrycloth,wipeoutallofthewater. Beverythoroughremovingthewater,becauseanyresidual
water will cause hot oil to splatter out of the fryer.
CAUTION
Mildsteeltanksmustbewipeddown/coatedwithoiltokeepthetankfromrusting.
g. Nowthat the tank is clean,youare ready to fill andoperatethe fryer.
WARNING
Gas units installed with casters must have a restraining device. This device must be connected at all times
that the fryer is connected to the gas supply. If it is disconnected for any reason, it must be reconnected.
Fillingthefryerwithsolidshortening
a. Makesurethedrainvalveiscompletelyclosed.
b. Cutthesolidshorteninginto1" (2.54CM)sqarecubesandcompletelypackfrytankuptooillevelmarkwith
cubesmakingsuretherearenoairpockets.
c.1. SolidStateThermostat: Switchmeltswitchtomeltposition. TurntheThermostat
knobtodesiredtemperature. Turn thepower switchtothe"ON"position.
(Note:if usingsolidshortening, setmelt switch tothe ONposition)
2. Digital Controller: Press the button on the controller panel to turn fryer ON,
(Note: if using solid shortening, ensure digital controller is programming is set on the solid
shortening melt cycle setting, by following digital programming instructions in manual)
3. ComputerController: Pressthe buttononthecontrollerpaneltoturnfryer ON,
(Note:ifusing solidshortening, ensurecomputer controllerisprogrammingisseton thesolid
shorteningmeltcyclesetting,by followingdigital programminginstructions in manual)
d. Allowunit to heattooperating temperature,unitis now readyforuse.
Fillingthefryerwithliquidshortening
a. Makesurethedrainvalveiscompletelyclosed.
b. Fill thefryerwith shorteningupto the oillevel mark indicatedonthe backsplashof the frytank.
F Oncethefryerhasbeenfilledwithshortening,turntheunitONandallowtoheatuptosettemperature.
THERMOSTATCALIBRATION
(1*/,6+
R5 (07/13)

6
/ 5HY
62/,'67$7(7+(50267$7D6HWWKHWKHUPRVWDWGLDOFRPSXWHURUGLJLWDOFRQWUROOHUWR
R)
E5HPRYHIU\HUWXEHUDFNDQGSODFHDWKHUPRPHWHUDERYHIU\HUWHPSHUDWXUHSUREH
F&RPSDUHWKHUPRPHWHUUHDGLQJWRWKHUPRVWDWRUFRQWUROOHUVHWWLQJLIUHDGLQJVDUHQRWFORVHFRQWDFW
ORFDOZDUUDQW\VHUYLFHDJHQW
G:KHQWKHFDOLEUDWLRQFKHFNLVFRPSOHWHUHPRYHWKHWKHUPRPHWHUDQGUHSODFHWKHWXEHVFUHHQ
FryerShut-Down
Therearetwoshutdownmodesoffryeroperation,STANDBYandCOMPLETE. Thestandbymoderemovestheability
forthefryer'smainburnersto cycle.Complete shutdownturns offthe gassupplytothefryer. Shutdownthefryerby:
STANDBY Turnthe thermostator controller OFF. Thecooker isnow in
Standbyandcanremainthiswayforonly briefperiods of
time. NEVERleavethecookerinstandbyovernight.
COMPLETE To completelyshut downthe cooker,push andturn thegas
valveto the OFF position. The fryer isnowcompletely
shutdownandcan becleaned andfiltered.
R5 (07/13)

7
/ 5HY
(1*/,6+
R5 (07/13)

8
/ 5HY
R5 (07/13)

9
/ 5HY
(1*/,6+
R5 (07/13)

10
/ 5HY
R5 (07/13)

11
/ 5HY
FILTERPROCEDURES
NOTE
WhenworkingwithhotoilALWAYSwearoil-proof,insulatedgloves.
WARNING
NEVER • Runthefiltersystemwithoutafilterbag/paper.
NEVER • Emptythe oilfromthefryerbefore turningOFFthe fryerburners.
NEVER • StoretheUFMFilter Unit anywhereotherthanin the fryerfiltercavity.
a. Slidethe filterpanout. Carefullyremove filtered residue off the filter media. Examine the filter media for
cloggedortornareas. Refer tofiltermediareplacementinstructionsfollowingthis section. Reinstallthepan.
b. TurnthefryerthatistobefilteredOFF(SeeStandbyShutdown). Removethebasketsfromthefryertank(s).
Usetheclean outbrushtoliftout thetubescreens. Ifthereareexcesscrumbsinthefryertank,removethem
withthecrumb scoop.
c. Ifyouhavereplacedthefiltermediaorremovecrumbsanddebris,sprinkle PrecoatFilterAidonthefilterpaper.
d. Check thedrainspout to ensure that itisin the drain towerandoverthe filter pan opening.
e. Slowlyopenthegreenhandleddrainvalveforthetankbeingfiltered. Ifnecessaryusetheclean-brush toclear
thecrumbs fromthe drain. Usethebrush toclean thesidesof thetank astheoil drains.
WARNING
Thisfilterpanisonlylargeenoughtoholdthecontents
ofone(1)tankatonce,duringthefilterprocess.
f. Whenthetankisempty,closethegreenhandleddrainvalve. Opentheredhandled returnvalve tothe tank
you are filtering. This will start the pump and return the oil to the bottom of the fry tank.
g. When bubblesare seen comingout oftheoil returnspout,close theredhandled valveto turn thepump off.
If necessaryadd moreoil tothe tankto returnthe oil level tothe fillmark. Thefryer is nowready foruse.
DRAINING A TANK
Thefiltersystem isalso usedto drainthefryers. Youwillneedacontainer capableof holding4000F oilandprotective
gloves.
a. Rotatethedraindown spout so thatitextends in the containerthatyou want to draintheshortening into.
b. Openthegreen handleddrainvalve forthe tank tobe drained. Theoilwill drainintothe containeryou have
shosen. Whenthecontainerisfullorthefrytankisempty,closethegreenhandleddrainvalve. Ifthecontainer
wasfull repeat this step untilfryertank is empty.
c. Once tankis completelyempty addnew shortenningandfollowfryerstartupprocedures.
(1*/,6+
blue
blue
blue
blue
shortening
R5 (07/13)

12
/ 5HY
WARNING
Thepowersupplymust bedisconnectedbefore servicingorcleaningthe
appliance.
FILTER MEDIA REPLACEMENT
The filter module stores neatly under the fryer when not in use. The unit is very easy to use and allows for quick
installationandfiltration,evenunderthebusiest conditions. Followthe proceduresbelow tochange thefilter media.
WARNING
Atoperatingtemperature,theshorteninginthefryermaybehotterthan
375°F(190°C). Thishot,meltedshorteningwillcausesevereburns. Donot
letthehotshorteningtouchyourskinorclothing. Alwayswearinsulatedoil-
proofgloveswhen workingonthefiltersystem. Itwillbeeasierandsaferif
thefilterassemblyhascooledtoroomtemperaturebeforehandlinganyfilter
parts.
a. Withthefilter pan empty ofoil, removethe filter media bygraspingthe filter pan handleandgently pull the
assemblytowardthefrontofthefryer.
b. Separatethefilterpickuptubefromthefilterpickupscreenassemblybypullinguponthepickuptubejustabove
whereit connectstothe pickupscreenassembly. Lift pickuptube and swingit to theleft, until itrests onthe
lefthandsideof the filter pan.
c. Grabfilterscreenpickupassemblylifthandlesandcarryittoatrashbarrelandshakeoffheavydiscardanydebris
thatmay be builtuponthe top of theassembly.
d. Unscrewthefilterpaperclipbracket fromthefilterpapersupportscreenandslidethefilterpapersupportscreen
outofthefilter paper clip bracket.
e. Removefilterpapersupportscreenfrom thefilterenvelope.
f. Allofthefilterpickupassemblypartscanbewashedin adishwasher orapotsink. Flushoutthesuctiontube
assemblywithhotwater. After cleaning,itisveryimportanttothoroughlydrythepartsbeforereassembling.
Water and oil do not mix. Water in hot oil will cause the oil to splatter.
g. Startreassemblingthefilterpickupassemblybyslidingthe newfilterpaperontothefilterpapersupportrack.
Ensurethattheholeinthefilter papergoes overthe pickup tubeassembly threadedconnector.
h. Fold theopen endofthebagin twofolds. The firstfoldshould beapproximately 1inchfrom theend andthe
secondshouldbeovertheedgeoftherackassembly.
i. Slide theclipscreen overthefolded endof thefilterpaper. Ensure theopeningof theclipscreen goesover
thepickuptube connection. Screwthe suctiontubeconnectionontothe threadedconnection.
j. Placethefilterpickupassemblyintothefilterpanandslidethefilterpanassemblyback intothefryer cabinet.
k. Filterunitisnow ready for use.
R5 (07/13)

13
/ 5HY
FRYER CLEANING
Daily
Yourfryershouldbecleaneverydaytomaintainpeakperformanceandappearance. Performtheproceduresbelow
everyday.
a. Wipeupany shorteningthatspillsontotheexteriorof thefryer. Thisshouldbedone witha cleansoftcloth
while the oil is still warm.
b.Usewarmwaterwithamilddetergenttocleansurfaces. Becarefulnottogetwaterintheshorteningandto
removeanydetergent from the frytank.
c.Useanonabrasivescouringpowderorpadtocleanstainsifnecessary.
Weekly(Boilout)
Thefryer shouldbethoroughly cleaned onceaweek. This cleaningshouldinclude a completedrainingof thefryer
and a boil out. This would also be a good time to check the filter media for damage.
CAUTION
Completelyshutdownthefryerwhentheoilistobereplacedbywater,and
whentheheatingportionofthecleaningiscomplete. Thiswillpreventthe
heating system from coming on during the oil draining and water filling
procedure.
a. Draintheoilfromthefryerusingthefryerdrainprocedures. Whentheoil hasbeenpumpedintotheoilshuttle,
disconnectthefilter pan and removefromthefryer.
WARNING
Donotusethefilterpantodraincleaningwaterinto. Theonlywaytoremove
liquidfromthefilter panisviathefilter pump. Donotuse thefilter pumpto
pumpwater. Watercanremaininthefilterlinesandmix withhot oilduring
filterprocedurescreatingaproblem.
b. Removetuberack/meshtubescreensandremoveanylarge debrisfromthe bottomofthefrytank. Close
the drain valve and fill thefrytankwithwater and noncaustic detergent. For best results use Pitco Fryer
Cleanerpart numberP6071397.
c. Placea largepanunder the drain. Thispanwill beusedto catchthecleaning water. The panmustbe of
sufficient size to hold all of the water.
d. Restartyourfryer. Whenthewatertemperaturereaches212°FthecomputerwillautomaticallygointoBoil
mode. Toget the fryer out of BOIL mode youmust turn the fryer power off.
e. Afterthe water hasreacheda slow boil,turnthe fryer off. Allow thefryerto soak for20minutes to soften
shorteningdepositsandcarbon. Usefryerbrushto removeanyresiduefromtank,heatingtubes,andside
walls. Performthe dailycleaningprocedures.
f. Drainthewaterintothepanbyslowlyopeningthegreenhandleddrainvalve.
g. Wipethetankdrywithcleanclothwipes. Closethedrainvalveandremovethelargecontainer.
h. Refill the fryer.
(1*/,6+
blue
R5 (07/13)

In the event of problems with or questions
about your order, please contact the Pitco
Frialator factory at:
(603)-225-6684 World Wide
Website Address: www.pitco.com
In the event of problems with or questions about
your equipment, please contact the Pitco Frialator
Authorized Service and Parts representative
(ASAP) covering your area, or contact Pitco at the
number listed to the left.
MAILING ADDRESS – P.O. BOX 501, CONCORD, NH 03302-0501
SHIPPING ADDRESS – 10 FERRY STREET, CONCORD, NH 03301
L20-206 R4 (06/13)
R5 (07/13)

Il y a Toujours Quelque Chose qui Mijote chez Nous !
Manueld’InstallationetdeFonctionnement
PourFriteusesàGaz
TOUTESOPTIONS
Modèles
SGetSGF
14,14R,14T,18,18F,24P,24F,34Pet34F
)5$1d$,6
3LWFR)ULDODWRU,QF 32%R[-FW,,&RQFRUG1+ 5RXWH$%RZ1+
)$;
/ 5 www.pitco.com

À L’ATTENTION DE L'ACHETEUR, DU PROPRIÉTAIRE ET DU GÉRANT
Lire ces mises en garde avant de les afficher bien en vue pour référence.
AVIS À L’ACHETEUR
Afficher en évidence les instructions à suivre si un utilisateur sent
une odeur de gaz. Cette information est disponible auprès de votre
fournisseur local de gaz.
MESURE DE SÉCURITÉ
NE PAS entreposer ni utiliser d’essence ni autres vapeurs ou liquides
inflammables àproximité de cet appareil ou de tout autre appareil.
AVERTISSEMENT
L’installation, le réglage, la modification, la réparation ou l´entretien
incorrects de cet appareil peuvent causer des dommages matériels,
des blessures ou la mort. Lire attentivement les instructions
d´installation, de fonctionnement et d´entretien avant de procéder à
son installation ou entretien.
AVERTISSEMENT
L’installation, l’entretien et les réparations doivent être effectués de
préférence par un technicien Pitco agréé entretien et pièces
détachées ou un autre technicien qualifié. Toute installation,
entretien ou réparation effectuée par une personne non autorisée et
non qualifiée annule la garantie.
AVERTISSEMENT
L’installation et tous les raccordements doivent obligatoirement être
effectués conformément aux codes locaux en vigueur.
En Amérique du Nord, en l’absence de codes locaux, l’installation
doit se conformer au code national relatif au gaz combustible,
ANSI Z223.1/NFPA 54, ou au code d’installation relatif au gaz
naturel et au propane, CSA-B149.1 : si applicables. En Australie,
et appareil doit être installé conformément à la norme AS/NZS
5601. AVERTISSEMENT
Si, pendant la période de garantie, un client utilise une pièce qui n’est
pas d’origine ou modifie une pièce d'origine achetée auprès de Pitco
et (ou) de ses prestataires d’entretien et de pièces détachées
autorisées, la présente garantie sera nulle et non avenue. De plus, ni
Pitco ni ses filiales ne seront responsables d’aucune plainte,
dommages ou frais encourus par un client et qui découleraient,
directement ou indirectement, en tout ou en partie, de l'installation
d’une pièce modifiée et (ou) obtenue auprès d'un centre de réparation
non agréé. AVERTISSEMENT
Cet appareil doit obligatoirement être mis à la terre électriquement
conformément aux codes locaux ou, en l’absence de code local,
conformément au National Electrical Code, ANSI/NFPA 70 ou au Code
canadien de l'électricité CSA C22.2, selon le cas, et le tuyau doit être
conforme à la norme AS/NZS 1869 et être de classe B ou D.
AVERTISSEMENT
Cet appareil doit obligatoirement disposer de moyens adéquats pour
LIMITER ses déplacements indépendamment des raccordements au
gaz ou à l’électricité. Les appareils simples équipés de pieds doivent
obligatoirement être stabilisés à l’aide de sangles d’ancrage. Tous
les appareils à roulettes doivent obligatoirement être stabilisés par
des chaînes de retenue. AVERTISSEMENT
Tout appareil à roulettes équipé d’un flexible de gaz doit
obligatoirement être raccordé à la source de gaz par l’intermédiaire
d’un raccord à débranchement rapide conforme à la norme ANSI
Z24.41. En Australie, le raccord à débranchement rapide doit être
conforme à la norme AS4627.
AVERTISSEMENT
NE PAS modifier une partie structurelle de l’appareil afin de pouvoir
placer l’appareil sous une hotte d’extraction.
AVERTISSEMENT
Si le cordon d'alimentation équipant cet appareil est endommagé, il
doit obligatoirement être remplacé par un technicien Pitco agréé
entretien et pièces détachées ou une personne de qualification
similaire, afin d'éviter un danger.
AVERTISSEMENT
Débrancher le cordon d’alimentation avant toute réparation ou
nettoyage de cet appareil.
AVERTISSEMENT
Cet appareil n’est pas agréé pour un nettoyage au jet d’eau. NE PAS
nettoyer cet appareil avec un jet d’eau
AVERTISSEMENT
NE PAS tenter de déplacer cet appareil ou de transférer des liquides
chauds entre la cuve à graisse vers un autre récipient quand
l'appareil est à température de fonctionnement ou contient des
liquides chauds. Vous risquez de vous brûler grièvement si la peau
touche des surfaces ou des liquides chauds.
AVERTISSEMENT
NE JAMAIS se servir d’une flamme nue pour chercher une fuite de
gaz! AVERTISSEMENT
NE PAS s'asseoir ni monter sur cet appareil. Ni le panneau avant, ni
la cuve, ni la plaque anti-éclaboussures, ni le couvercle de la cuve, ni
le plan de travail de l'appareil, ni la plaque collectrice ne sont des
marchepieds. Des blessures graves risquent d’être causées par une
glissade, une chute ou un contact avec des surfaces ou des liquides
chauds. AVERTISSEMENT
NE JAMAIS se servir de l'appareil comme marchepied pour le
nettoyage de la hotte d’extraction ou l’accès à celle-ci. Des blessures
graves risquent d’être causées par une glissade, une chute ou un
contact avec des surfaces ou des liquides chauds.
AVERTISSEMENT
Le niveau d’huile ou de shortening (graisse végétale) NE doit JAMAIS
descendre en dessous du niveau minimum requis. Utiliser une huile
usagée risque d’être dangereuse et réduira son point d’inflammabilité
et elle sera plus susceptible de bouillir et de déborder.
AVERTISSEMENT
Le contenu du collecteur de miettes et/ou du bac de filtrage de tout
système de filtrage devra être vidé dans un contenant difficilement
inflammable à la fin de chaque journée. Certaines particules de
nourriture risquent de s’enflammer spontanément si elles demeurent
dans certaines huiles trop longtemps.
AVERTISSEMENT
Éteindre complètement l’appareil lorsque l’huile ou le shortening est
en train d’être purgé de l’appareil. Ceci évitera que l’appareil ne
chauffe pendant le processus de purge puis de remplissage et évitera
tout risque de blessures graves.
AVERTISSEMENT
Cet appareil est destiné à un usage intérieur exclusivement.
AVERTISSEMENT
NE PAS faire fonctionner cet appareil si tous les panneaux et
couvercles d'accès ne sont pas correctement fixés.
AVERTISSEMENT
Il est recommandé que cet appareil soit inspecté une fois par an par
un technicien qualifié pour en vérifier les performances et le bon
fonctionnement WARNING
Il y a une flamme nue à l’intérieur de l’appareil. Cet appareil est
susceptible d’atteindre des températures très élevées risquant
d’enflammer des matériaux placés à proximité. Veiller à ce qu’il n’y
ait aucun élément combustible à proximité de l’appareil.
AVERTISSEMENT
NE PAS alimenter l’appareil avec un gaz ne figurant pas sur la plaque
signalétique. S’il est nécessaire de convertir l'appareil pour un autre
type de combustible, communiquer avec votre revendeur.
AVERTISSEMENT
Si l’alimentation en gaz de l’appareil est interrompue ou si la
veilleuse s’éteint, attendre 5 minutes avant de tenter de rallumer la
veilleuse afin de permettre au gaz se trouvant à l’intérieur de
l’appareil de se dissiper AVERTISSEMENT
Veiller à ce que l’alimentation en air de l’appareil soit suffisante pour
que la veilleuse brûle correctement. Si la flamme manque d’air, elle
dégagera de l’oxyde de carbone, qui est un gaz dangereux. L’oxyde
de carbone est un gaz incolore et inodore qui peut provoquer
l’asphyxie. AVERTISSEMENT
Ne jamais ajouter d’huile à l’appareil lorsqu’il a atteint sa température
de fonctionnement. Éclabousser de l’huile brûlante risque de
provoquer des blessures graves.
AVERTISSEMENT
Ne jamais ajouter d’eau à l’huile lorsqu’elle est chaude. Ceci risque
de provoquer une violente ébullition et de provoquer des blessures
graves. AVERTISSEMENT
Cet appareil est destiné aux professionnels et ne devrait être utilisé
que par du personnel formé et qualifié.
AVERTISSEMENT
Pour éviter d’éclabousser tout liquide brûlant une fois que la friteuse
est installée, veiller à ce que la friteuse soit fixée lors de son
installation ou retenue en place par un dispositif de fixation afin
d’éviter qu’elle ne puisse se renverser.
AVERTISSEMENT
En Amérique du Nord, les appareils à gaz à roulettes doivent
obligatoirement être installés avec des raccords conformes à la plus
récente édition de la norme US de raccords pour appareils à gaz
mobiles ANSI Z21.69 ou de la norme canadienne CSA 6.16. Ce
raccord doit comporter un dispositif de débranchement rapide
conforme à la plus récente édition de la norme de raccords à
débranchement rapide pour gaz (ANSI Z21.41 ou CSA 6.9). En
Australie, les appareils à gaz équipés de roulettes et d’un flexible de
gaz doivent être raccordés au gaz avec un dispositif de
débranchement rapide conforme à la norme AS 4627 et comporter un
câble de retenue pour éviter tout déplacement de l’appareil. Le câble
de retenue ne doit pas dépasser 80 % de la longueur du flexible de
gaz. Le câble de retenue doit être conforme à la norme AS/NZS 1869
et doit être de classe B ou D et doit être fixé au panneau arrière de
l’appareil.

/ UHY
INSTALLATION
Bienqu’ilvous soit possible d’installer votre nouvelle friteuse, ilestVIVEMENTconseilléque des professionnels
qualifiéseffectuentl’installation.Lesprofessionnelsquiinstallerontlanouvellefriteuseconnaissentlaréglementation
localeet lescodes dubâtimenten vigueuret procéderontàl’installationentoute sécurité.
AVERTISSEMENT
NEPASgênerlaventilationnilefluxdesgazdecombustionenbouchantlesouvertures
d’aérationautourdelafriteuse.Ildoityavoirunespacesuffisantautourdelafriteusepour
accéderàcettedernièreeteffectuertouteréparationnécessaireetafind’assurerlebon
fonctionnementdubrûleur.Veillercequecetespacesoitconformeauxdimensionsdelanotice.
Distancesdesécurité
Ildoityavoirunespacesuffisantautourdelafriteuseafind’assurersonbonfonctionnement.Cetespaceestnécessaire
pouraccéderàcettedernièreeteffectuertouteréparationnécessaireetafind’assurerlebonfonctionnementdubrûleur.
Lesdimensionsindiquéesci-dessoussontpourl’installationdel’appareildansunenvironnementcombustibleetnon-
combustible.
Construction Construction
Combustible Non-Combustible
Dos 6po.(15cm) 0po.(0cm)
Côtés 6po.(15cm) 0po.(0cm)
Sol-Combustible 9po.(22,8cm) 9po.(22,8cm)
Il doit également y avoir un espace d’au moins 21 po. (53 cm) devant la friteuse afin de pouvoir retirer ou installer le filtre et
lesélémentsassociés.
Lecomptoir doit êtreconstruit avecun matériau non-combustible pour lescomptoirs destinésà accueillir desfriteuses
SG14C.L’espace autourde la friteuse doit nonseulement êtresuffisant afinque l’appareilfonctionne à plein rendement,
mais il doit également y avoir une distance de 50 cm devant la friteuse afin de pouvoir retirer ou installer le bac ou module
defiltrage.
AVERTISSEMENT
Lafriteuse doitêtrefermementfixée.Pour évitertoutrisque deblessuresgraves, fixez
lafriteuse afin qu’elle ne puisseêtredéplacéeou penchée et risquer d’éclabousserle
personnelavecdel’huilebouillante.Veillezàtoujoursporterdesgantsétanchesàl’huile
lorsquevoustransportezoudéplaceztout appareilouliquidechaud.
Miseà niveau
Votrefriteuseestdéjàcomplètementassembléeàsaréception.Unefoisenplace,lafriteusedoitêtremiseàniveau.Il
estpossibledemettreà niveaula friteuseàl’aided’unepairedepincesmultiprises.Les roulettessont d’unehauteur
suffisante.Cettehauteurestconformeauxcodessanitairesetauxbesoinsenairdubrûleur.
a. Réglez la hauteur et le niveau de la friteuse en réglant les roulettes à l’aide des pinces multiprises.
b. Déplacezla friteuse afin de la placeràl’emplacementdésiré puis bloquez les roues enverrouillantles
dispositifs de blocage situés sur les côtés des roues.
c. Aprèsavoirinstallé lamachine,vérifiezquecettedernièreest àniveauoucorrigezsi nécessaire.
VÉRIFICATION DE LA NOUVELLE FRITEUSE
Votrenouvellefriteuseaétéemballée avecprécautiondans unecaisse.Toutaétéprévuafinque lafriteusevous soit
livréeenparfaitecondition.Lorsquevousdéballezvotrenouvellefriteuse,vérifieztouteslespiècesafindevousassurer
qu’ellesnesontpasendommagées.Siunedespiècesaétéendommagée,veuillezNEPASsignerleconnaissement(lettre
detransport).Contactezimmédiatementletransporteurcarcederniernepeutêtretenuresponsablequependantles15
jourssuivantlalivraison.Vérifiez lebordereau d’expéditionfourniaveclafriteuseafindevousassurer quevous êtes
enpossessiondetouteslespièces.Sidespiècess’avèrentmanquantes,contactezlerevendeurauprèsduquelvousavez
achetélafriteuse.
ATTENTION
Afind’éviterd’endommagerl’appareil,nepaspencherlafriteusesur
deuxdecesrouesnitirersurlecarneauouconduitdefumée.
CherchezlagarantiePitcoFrialatoretinscrivezlenumérodesériesurlafriteuseetladatederéception.Le numérode
sériesetrouvesurlaplaqueàl’intérieurdelaporte.Conservezlagarantiedansunendroitsûrafindepouvoirlaconsulter
ultérieurement.NE PAS renvoyer la carte à Pitco Frialator.
)5$1d$,6

/ UHY
Typesdecarburants:Chaquefriteuseestéquipéeafindefonctionneravecunseultypedecarburant.Letypedecarburant
destinéà cetappareilest indiquésurla plaquesignalétiquefixée àl’intérieurde laporte.
REMARQUE
NEJAMAISutiliserunadaptateurafinderaccorderuntuyaudegazpluspetit.Vousrisquezdenuireau
rendementdelamachineenaubonfonctionnementdubrûleurenempêchantundébitdegazoptimal.
Raccorddegazàdéconnexionrapide
Lesfriteusesàgazàroulettesdoiventêtreinstalléesavecdesconnecteursconformesàladernièreéditiondelanorme
ANSIZ223.1 et de l’addenda Z21.69Aconsacréeauxconnecteurs pour appareils à gazmobiles.Ce raccord doit
comporterundispositifàdéconnexionrapideconformeàladernièreéditiondelanormeANSIZ223.1pourlesdispositifs
àdéconnexionrapideutilisésavecdesappareilsàgaz.Lorsquevousinstallezundispositifàraccordrapide,ilvousfaut
égalementinstallerun dispositiflimitant ledéplacement delafriteuse.Cedispositiféviteraque letuyau ouleraccord
àdéconnexionrapidenesetendeexcessivement.Ledispositifderetenuedoitêtrefixéàlafriteuse,audosdupanneau
arrière.
Fuiteauniveaudutuyaud’alimentationengazetvérificationdelapression
Lecircuit d’alimentation doitêtretesté avant d’utiliserlafriteuse. Si vouscompteztester le tuyaud’alimentationen
gazàunepressionsupérieureà1/2PSIG(3.45kPa),veillezàcequecedernieraitétédébranchédelafriteuse.Sivous
compteztesterletuyaud’alimentationengazàunepressionégaleouinférieureà1/2PSIG(3.45kPa),lafriteusepeut
êtreraccordéemaislacommandedegazdelafriteusedoitêtrefermée.Unefoislapressionrétablie,testeztouslestuyaux
degazafindevousassurerqu’ils necomportentaucunefuiteaveclel’eausavonneuse.
RACCORDEMENTÉLECTRIQUE
L’alimentationélectriquedelafriteusedoitêtreconformeauxcodesdevotrelocalité.Enl’absencederéglementation
locale,reportez-vousauCodeélectriquenationaldesÉtats-Unis(NEC)etauxnormesANSI/NFPApourl’installation
électrique.AuCanada,reportez-vousàlanormeCSAC22.1etàlaréglementationdevotrelocalité.Lesdiagrammes
decâblagessontvisiblesàl’intérieurdelaboîtedecommandedelafriteuse.Lescaractéristiquestechniquesdelafriteuse
sontindiquéesci-dessous:
AmériqueduNord International
Tensiond'entrée 120 VCA,60Hz 220(ou 240)VCA,50Hz
Courantparfriteuse 0.5ampères 0.5ampères
SystèmedefiltrageUFM 7.0ampères 4.0ampères
La friteusedoitêtremiseàlaterreconformémentàlaréglementationlocale.Enl’absencederéglementationlocale,suivez
leCodeélectriquenationaldesÉtats-Unis(NEC)etlanormeANSI/NFPANo.70-1990.Ilestrecommandédebrancher
lecordond’alimentationsuruneprisemuralecontrôléeparlacommandedeventilation.Celaempêcheraainsilafriteuse
defonctionnersansqueleventilateur nesoit allumé.
RACCORDEMENT DU GAZ
Votrefriteuseoffreunrendementoptimallorsqueletuyaud’alimentationengazestd’unetaillesuffisanteafindepermettre
undébitdegazadéquat.Letuyaudegazdoitêtreinstalléconformémentauxcodesdubâtimentdevotrelocalitéetàla
normeANSIZ223deladernièreéditionduCodenationald’installationdesappareilsàgaz.AuCanada,installezlafriteuse
conformémentauxnormesCAN/CGA-B149.1ou2etàlaréglementationlocale.Latailledutuyaudegazpeutêtredéterminée
parlacompagniedugazdevotrelocalitéenseréférantauCodenationald’installationdesappareilsàgaz,paragraphe
C,tableauC-4 (gaznaturel) ettableau C-16(propane).Letuyaudegazdoit êtresuffisamment largeafin d’alimenter
pleinementtouslesappareilssansqu’ilneseproduiseunepertedepressionauniveaudecesderniers.
AVERTISSEMENT
NE JAMAIS alimenter en gaz la friteuse avec un gaz ne figurant pas sur la plaque
signalétique.L’emploidetoutautregazentraîneraundysfonctionnementdelamachine.
Sivousdevezconvertirlamachineafindel’utiliseravecungazdifférent,contactezvotre
revendeur.
Other manuals for SG Series
1
This manual suits for next models
10
Table of contents
Languages:
Other Pitco Fryer manuals

Pitco
Pitco SG User manual

Pitco
Pitco VF35 User manual

Pitco
Pitco SEH50 User manual

Pitco
Pitco E12 Service manual

Pitco
Pitco E7 User manual

Pitco
Pitco SGH50 User manual

Pitco
Pitco Frialator SF14 UFM Guide

Pitco
Pitco Frialator SG 18 User manual

Pitco
Pitco SSHLV14 Series User manual

Pitco
Pitco SE Series User manual

Pitco
Pitco E400 User manual

Pitco
Pitco SE14 User manual

Pitco
Pitco E14X User manual

Pitco
Pitco ME14S-C/MFD User manual

Pitco
Pitco Frialator SG 14 User manual

Pitco
Pitco 14T User manual

Pitco
Pitco PE14D User manual

Pitco
Pitco SELV14 User manual

Pitco
Pitco E14B Instruction Manual

Pitco
Pitco SG14C Owner's manual