Planeta Pullmaster-II Manual

PLANETA
1861
Heben ohne Grenzen
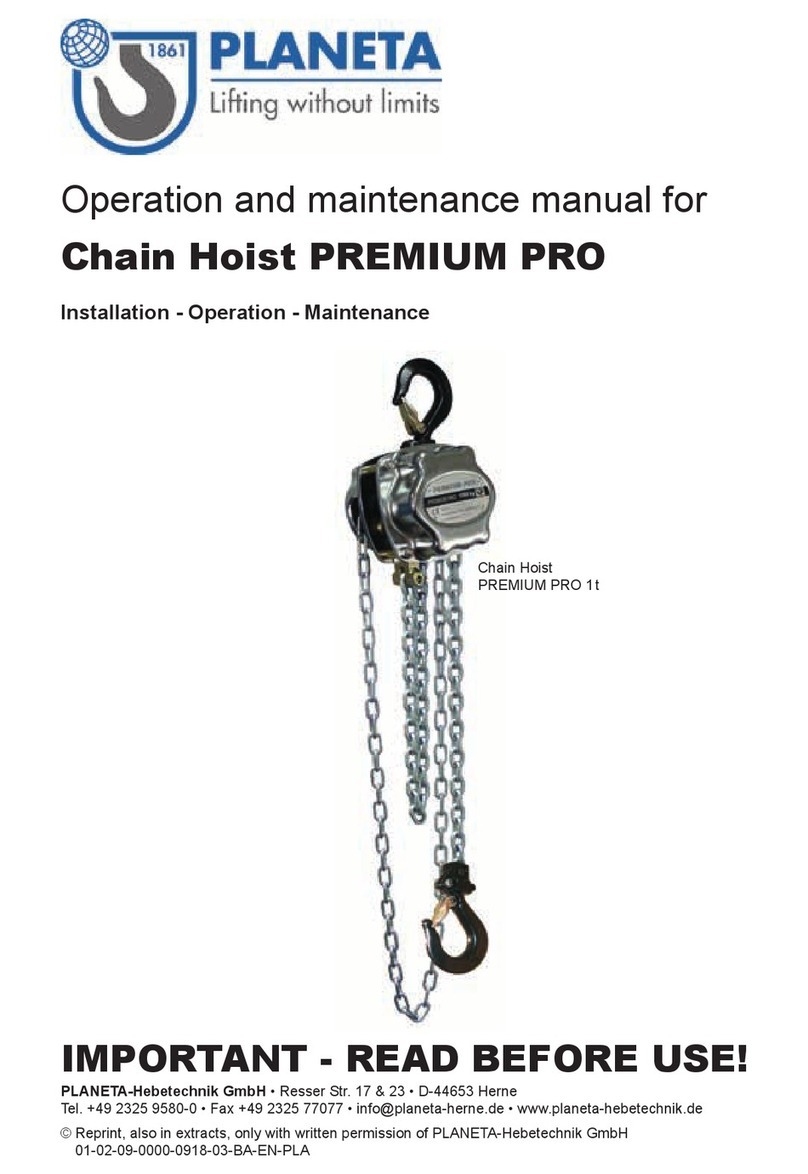
Operating and maintenance instructions for:
Pullmaster-II chain hoist
Installation – Operation – Maintenance
© Copying, even in part, is only allowed with the written permission of PLANETA-Hebetechnik GmbH
01-02-11-0000-0221-00-BA-EN-PLA
IMPORTANT - READ BEFORE USE!
PLANETA-Hebetechnik GmbH •Resser Str. 17 & 23 • D-44653 Herne


3
Table of contents Page
SAFETY INSTRUCTIONS...............................................................................................4
I. General...................................................................................................................5
II. Important notes ......................................................................................................5
III. Particular safety instructions ..................................................................................6
IV. Installation information ...........................................................................................6
A. Before commissioning........................................................................................6
B. Installation and inspection before each use.......................................................7
C. Important notes..................................................................................................7
V. Inspections, repair and maintenance .....................................................................8
Additional inspection ..............................................................................................8
Adjusting the brakes...............................................................................................8
Checking the chains and hook ...............................................................................8
Maintenance.........................................................................................................10
Lubricationspecication .......................................................................................10
VI. Technical data ......................................................................................................11
VII. Spare parts for Pullmaster-II chain hoist .............................................................12
VIII. Spare parts list for Pullmaster-II chain hoist ........................................................13
IX. Annual checks for statutory accident prevention..................................................19
CE DECLARATION OF CONFORMITY ........................................................................20

4
SAFETY INSTRUCTIONS
1. Read the manu-
al!
2. NEVER lift
an excessive
load!
3. NEVER lift
over people!
4. NEVER pull
the chain
across sharp
edges!
5. NEVER
operate the
equipment
when it is
defective!
6. NEVER carry
people!
7. NEVER throw
the hoist
8. NEVER use
the load chain
for slinging
purposes
9. NEVER work
up to the end
of the chain!
10. NEVER attach
the load with
the tip of the
hook!
11. NEVER work
with a chain
that is twisted or
damaged!
12. NEVER work
without a
hook safety
catch!
13. NEVER
remove the
warning
notices

5
I. General
These operating and maintenance instructions are intended to provide you with
important instructions for the safety and reliability of your chain hoist. They are not a
substitute for the industrial safety regulations and the accident prevention regulations
issued by the employer’s liability insurance associations and the many standards,
which may differ in the respective countries.
Pleaseobservethecountry-specicrulesandregulations.
In Germany, the currently valid industrial safety regulations, the regulations of the
DGUV employer’s liability insurance association and the legal regulations of the
community for machinery 2006/42/EC (Machinery Directive) apply.
Intellectual property
Designs, drawings and technology are the sole property of the manufacturer.
It is expressly prohibited to copy or utilise this type of information, or pass it on to third
parties, without express written permission.
II. Important notes
– Before installation and use, you must read through the operating manual and make
it available to the operator of the equipment.
– The operator must be properly instructed in how to use the equipment.
– Never exceed the working load limit (WLL) on the product label plate.
– Do not pull chains over edges.
– Never use the product to carry people or lift loads over areas where there could be
people.
– The equipment must be inspected once a year by aqualiedexpert, more
frequently in harsher operating conditions.
Thecompanymustensurethattestcerticatesareissued.
– Before use, inspect the equipment for damage, loose bolts or twisted chains and
rectify any faults.
– Repairs to hoists may only be performed by the manufacturer or by a trained
service partner, using original spare parts.
– Failure to observe the instructions in the manual, improper use, corrosion due to
inadequateprotectionorunauthorisedmodicationstotheproductwillvoidthe
guarantee.
– Risk of corrosion due to it being continuously subjected to unfavourable weather
conditions,suchashighhumidityorharmfulenvironmentalinuences,e.g.
atmospheres with acidic vapours, corrosive gases or a high concentration of dust
will lead to premature wear. This does not constitute entitlement to a warranty
claim.
– We would be happy to provide you or your specialist dealer with further information
or parts lists.

6
III. Particular safety instructions
Certain work and activities are not allowed whilst using the chain hoists, because it is
dangerous to life and can cause injuries and damage to the machine, e.g.:
– You must read the operating manual before commissioning
– NEVER lift more than the prescribed rated load
– NEVER lift the load over people
– NEVER pull the chain across sharp edges
– NEVER operate the equipment when it is damaged
– NEVER use the equipment to lift or carry people
– NEVER throw the equipment
– NEVER use the load chain for rigging purposes
– NEVER work up to the end of the chain
– NEVER attach the load with the tip of the hook
– NEVER work with a chain that is twisted or damaged
– NEVER work without a hook safety catch
– NEVER remove the warning notices
– NEVER use the chain as a carrying sling
– NEVER leave suspended loads unattended
– NEVER pull suspended loads at an angle
– NEVER use the chain hoist to free stuck or seized loads
IV. Installation information
A. Before commissioning
– Chain hoists made movable by means of a trolley or which were already delivered
with a trolley are subject to the German industrial safety regulation (BetrSichV) and
the DGUV regulations for cranes. Theymustbecheckedbyacertiedinspector
before initial commissioning (load-bearing capacity over 1 t).
– Never use the chain hoist at temperatures below -20 degrees Celsius or above
+60 degrees Celsius.

7
B. Testing before each use
– Hang the chain hoist with the hook in the support structure and turn once.
– The hand chain and load chain must hang down freely without any bends or twists.
– Pull the hand chain all the way through once.
– Inspecting the load brake: Raise the load slightly and hold it in place. If the load
holds securely, raise it further. During lowering, the load must not slip when the
hand chain is stopped.
– If all goes well, operation can be initiated.
– Important for equipment with multiple chain strands: Load hook
block shall not be passed through the chain loop. This can
be recognised from the twisted chain. The respective second
chain link in a row is not evenly aligned. If the weld seams of
the chain links do not run in the same direction, the hook block
must be folded back through the chain loop.
– The last chain link must be attached to the housing, or be
equipped with a chain end stopper.
C. Important notes
– Check that the delivered chain hoist corresponds with your order, that it is compete
andthatallscrewsandnutsarermlytightened.
– Make sure that no transport damage has occurred.
– Check whether the load-bearing structure supporting the hoisting equipment is of
the correct type and strength for the required loads. A statics appraisal must be
obtained for on-site load-bearing constructions, if necessary.
– Never attach the top hook just on the tip to the load support structure.
Always load the chain in a straight pull!
– Before use, the hooks must undergo a special check for wear, bending or other
damage.
– Ensure that the hook is suspended properly.
Do not apply loads to the tip, do not overload!
– When the minimum load (approx. 10% of the rated load) is attached, the brake
engages automatically.
– The chain hoist is only suitable for raising and lowering vertically.
– To move the load, pull the hand chain up or down.
NEVER

8
V. Inspections, repair and maintenance
Regular visual inspection must be carried out by authorised, trained personnel
according to the legal regulations. Also pay attention to any unusual working noises!
Additional inspection: more than one visual inspection is required for the braking
system. Brake tests should be executed as follows:
– Attach the load (rated load)
– Lift the load
– Lift and lower the load to various heights
– Check whether holding of the load is guaranteed in any position.
Adjusting the brakes
(see adjacent illustration):
– (A) Setting with highest braking effect
– (B) Release of the brake by slowly turning from
position (A),
Insertion of the safety split pin
– Change the friction plates if the disc thickness is less
than 1 mm.
If it is discovered that parts are not okay when the chain hoist is being dismantled, they
should be replaced with corresponding original parts.
The names of the individual replacement parts can be obtained from the list on the
following pages. The proper order number, name and carrying capacity of the device
shouldbespeciedwhileorderingtheparts.
In case of doubt, the defective part should be sent in for inspection.
Please check the chain regularly at short intervals.
Check for wear, nicks, cuts, cracks, gauges, bednings, cross-sectional deviations and
other damages.
Chains and hook
– The chains and hooks must be inspected on a regular basis! Clean the chain before
inspection. Lightly oil the load chain from time to time! Never oil or grease the
brake!
– The threaded chain must not creak under load.
– Check the chain for elongation! The inner length (t) of a worn chain link, the
smallest wire diameter (D) and the length over 11 chain links are measured using a
calliper, whereby the chain must be kept taut.
If the measured dimension then exceeds the dimension (a) stated in the following
table, then the chain must be replaced. The diameter must not be less than
dimension (D), do not exceed the spacing (t) on an individual link.

9
Load
bearing
capacity
Max. measurement over Min. chain link
diameter (D)
1 chain link
(t)
11 chain links
(a)
0.5t 15.5mm 170.5mm 4.5mm
1t & 2t 18.6mm 204.7mm 5.4mm
1.5t & 3t 24.8mm 272.8mm 7.2mm
5t & 10t 31.0mm 341.0mm 9.0mm
If the chain needs replacement, it is assumed that the chain sprocket is also affected.
This must also be checked for wear.
Hook test (items 30, 34): Hooks can be bent open or elongated due to an
impermissible heavy load and improper handling of the equipment.
If the original dimension "G" is exceeded by 10%, the hook must be replaced.
Since the hooks vary due to forging tolerances, actual dimension "G" on
the equipment in question must be measured by the operator before initial
commissioning, and entered in the following table.
Load-
bearing
capacity
Hook opening "G"
Max. x 1.1
Normal Maximum Measured
0.5t 28mm 30.8mm mm mm
1t 32mm 35.2mm mm mm
1.5t 38mm 41.8mm mm mm
2t 40mm 44.0mm mm mm
3t 45mm 49.5mm mm mm
5t 50mm 55.0mm mm mm
10t 64mm 70.4mm mm mm
Caution: For any repairing works never perform any welding work or other hot
treatment directly on hooks or chains!
The material properties are otherwise changed, possibly causing accidents.
Jaw span
a = 11 links

10
Measurement must be carried out as follows:
– Measure from metal to metal in the hook opening, not including
the hook safety catch.
– The abrasion of the hook surface must not exceed 10 %
of the actual value.
– Determine the lateral torsion of the hook!
Intheeventoftwistingthatexceeds10degreesbeyondatness,
the hook must be replaced.
– Check the hook safety catch for tight closure and smooth
operation! Replace if damaged!
– Excessivedamageduetochemicalorcorrosiveinuences
require replacement of the hooks.
– Do not repair a hook by welding or grinding!
These tests are to be carried out qualied specialists for hoisting equipment only. If you
do not have this knowledge, please contact your supplier or us. We perform regular
testing, also within the framework of the Maintenance Agreement.
Maintenance
When you stop using the equipment, pay attention to the following:
– Wipe off dirt and water, lightly oil the chain and the rotating parts of the hooks.
– From time to time - depending on the frequency of use - check whether there is still
asufcientamountofgreasethegearwheels.
Lubrication specication
Put a thin coat of Molykote grease on all mechanically moving parts (gear wheels, etc.).
Exception: Brake components must not be lubricated!
When not in use, hang the chain hoist up in a dry place.
Please note that safe and problem-free operation is only guaranteed if original spare
parts are used.
If you would like to have the device checked or repaired within the scope of the
guarantee, please send in the device in the assembled condition.
If you are sending in dismantled devices, we are unfortunately no longer able to accept
warranty claims.
Torsion

11
VI. Technical data
TYPE PULLMASTER-II ... 0.5 1 1.5 2 3 5 10
Load bearing capacity t 0.5 1 1.5 2 3 5 10
Standard lift m 3 3 3 3 3 3 3
Min. height (A) mm 285 332 410 470 550 640 737
Hand chain pulling force daN 26.2 32.4 33 33 40.2 42 43.8
Hand chain operating length m 2.5 2.5 2.5 2.5 2.5 2.5 2.5
Reel path for 1m lift m 25.52 41.48 44.79 44.79 82.95 89.59 154.86
Number of chain falls 1 1 1 2 2 2 4
Chain size mm 5 x 15 6 x 18 8 x 24 6 x 18 8 x 24 10 x 30 10 x 30
C (dimensions) mm 120 147 181 158 202 228 373
B mm 116 136 147 136 148 178 178
D mm 28 32 38 40 44 50 64
Weight with standard lift kg 7.5 11.5 15.8 16 22 37 68
Weight per metre of additional lift kg 1.34 1.6 2.2 2.4 3.6 5.2 9.6
Subject to technical changes.

12
VII. Pullmaster-II chain hoist spare parts
32
31
68
30
27
2222
20
6 4
29
9
3
3
10
33
41
63 64
66
67
61
44
52
52
52
52
52
52
58
56
53
70
5557
59
51
54
53
18
18 4
12
11
37
37
36
36
26
25 24
76
75
72
72
36
36
36
36
50 49 48
45
35
35
17
19
37
37
77
37
61
37
35
35
35
35
38
15
13 12
42
43
65
62
28
23
21 10
47
46
45
34
34
2
14
16
34
34
34
34
39
40
8 7
5
1
26 25 24 Pullmaster II - 2–5t
Pullmaster II - 0.5–1.5t
Pullmaster II - 10t
Pullmaster II - 2–5tPullmaster II - 10t Pullmaster II - 0.5–1.5t
71 71
76
74
78
73
74
73
64
67
60
69

13
VIII. Pullmaster-II chain hoist spare parts list
Components for Pullmaster-II 0.5t
Item Number Description Article no.
1 4 Rivets 0201401 Pieces
2 1 Type plate 0201402 Pieces
5 3 Self-locking nut 0201405 Pieces
6 1 Housing cover 0201406 Pieces
7 1 Lock washer 0201407 Pieces
8 1 Pinion shaft 0201408 Pieces
9 1 Gear wheel 0201409 Pieces
10 2 Double gear wheel 0201410 Pieces
11 1 Right side panel 0201411 Pieces
12 2 Chain guide roller 0201412 Pieces
13 1 Chain end mounting 0201413 Pieces
14 1 Pin 0201414 Pieces
15 1 Safety split pin 0201415 Pieces
16 1 Chain wiper 0201416 Pieces
17 1 Load chain sprocket 0201417 Pieces
19 - Load chain 0201419 m
20 1 Left side panel 0201420 Pieces
21 1 Lower brake hub 0201421 Pieces
23 1 Ratchet wheel 0201423 Pieces
27 1 Hand chain wheel 0201427 Pieces
28 - Hand chain 0201428 m
29 1 Castle nut 0201429 Pieces
30 1 Safety split pin 0201430 Pieces
31 1 Hand wheel cover 0201431 Pieces
32 3 Self-locking nuts 0201432 Pieces
Items not listed here are only available in the assembly!
Complete parts for PULLMASTER II 0.5 t
Item Number Description Article no.
51 1 Support hook mounting,
complete including items 3, 4, 18 0201451 Set
52 1
Hook security catch,
complete including items 34, 35,
36, 37
0201452 Set
53 1 Safety catch, complete including
items 24 (2x), 25 (2x), 26(2x) 0201453 Set
54 1 Friction plates set,
complete including items 22 (2x) 0201454 Set
55 1 Support hook,
complete including items 33, 52 0201455 Set
56 1
Load hook,
complete including items 38, 39,
40, 52
0201456 Set

14
Components for Pullmaster-II 1t
Item Number Description Article no.
1 4 Rivets 0201501 Pieces
2 1 Type plate 0201502 Pieces
5 3 Self-locking nut 0201505 Pieces
6 1 Housing cover 0201506 Pieces
7 1 Lock washer 0201507 Pieces
8 1 Pinion shaft 0201508 Pieces
9 1 Gear wheel 0201509 Pieces
10 2 Double gear wheel 0201510 Pieces
11 1 Right side panel 0201511 Pieces
12 2 Chain guide roller 0201512 Pieces
13 1 Chain end mounting 0201513 Pieces
14 1 Pin 0201514 Pieces
15 1 Safety split pin 0201515 Pieces
16 1 Chain wiper 0201516 Pieces
17 1 Load chain sprocket 0201517 Pieces
19 - Load chain 0201519 m
20 1 Left side panel 0201520 Pieces
21 1 Lower brake hub 0201521 Pieces
23 1 Ratchet wheel 0201523 Pieces
27 1 Hand chain wheel 0201527 Pieces
28 - Hand chain 0201528 m
29 1 Castle nut 0201529 Pieces
30 1 Safety split pin 0201530 Pieces
31 1 Hand wheel cover 0201531 Pieces
32 3 Self-locking nuts 0201532 Pieces
Items not listed here are only available in the assembly!
Complete parts for PULLMASTER II 1 t
Item Number Description Article no.
51 1 Support hook mounting,
complete including items 3, 4, 18 0201551 Set
52 1
Hook security catch,
complete including items 34, 35,
36, 37
0201552 Set
53 1 Safety catch, complete including
items 24 (2x), 25 (2x), 26(2x) 0201553 Set
54 1 Friction plates set,
complete including items 22 (2x) 0201554 Set
55 1 Support hook,
complete including items 33, 52 0201555 Set
56 1
Load hook,
complete including items 38, 39,
40, 52
0201556 Set

15
Components for Pullmaster-II 1.5t
Item Number Description Article no.
1 4 Rivets 0202001 Pieces
2 1 Type plate 0202002 Pieces
5 3 Self-locking nut 0202005 Pieces
6 1 Housing cover 0202006 Pieces
7 1 Lock washer 0202007 Pieces
8 1 Pinion shaft 0202008 Pieces
9 1 Gear wheel 0202009 Pieces
10 2 Double gear wheel 0202010 Pieces
11 1 Right side panel 0202011 Pieces
12 2 Chain guide roller 0202012 Pieces
13 1 Chain end mounting 0202013 Pieces
14 1 Pin 0202014 Pieces
15 1 Safety split pin 0202015 Pieces
16 1 Chain wiper 0202016 Pieces
17 1 Load chain sprocket 0202017 Pieces
19 - Load chain 0202019 m
20 1 Left side panel 0202020 Pieces
21 1 Lower brake hub 0202021 Pieces
23 1 Ratchet wheel 0202023 Pieces
27 1 Hand chain wheel 0202027 Pieces
28 - Hand chain 0202028 m
29 1 Castle nut 0202029 Pieces
30 1 Safety split pin 0202030 Pieces
31 1 Hand wheel cover 0202031 Pieces
32 3 Self-locking nuts 0202032 Pieces
Items not listed here are only available in the assembly!
Complete parts for PULLMASTER II 1.5 t
Item Number Description Article no.
51 1 Support hook mounting,
complete including items 3, 4, 18 0202051 Set
52 1
Hook security catch,
complete including items 34, 35,
36, 37
0202052 Set
53 1 Safety catch, complete including
items 24 (2x), 25 (2x), 26(2x) 0202053 Set
54 1 Friction plates set,
complete including items 22 (2x) 0202054 Set
55 1 Support hook,
complete including items 33, 52 0202055 Set
56 1
Load hook,
complete including items 38, 39,
40, 52
0202056 Set

16
Components for Pullmaster-II 2t
Item Number Description Article no.
1 4 Rivets 0201601 Pieces
2 1 Type plate 0201602 Pieces
5 3 Self-locking nut 0201605 Pieces
6 1 Housing cover 0201606 Pieces
7 1 Lock washer 0201607 Pieces
8 1 Pinion shaft 0201608 Pieces
9 1 Gear wheel 0201609 Pieces
10 2 Double gear wheel 0201610 Pieces
11 1 Right side panel 0201611 Pieces
12 2 Chain guide roller 0201612 Pieces
13 1 Chain end mounting 0201613 Pieces
14 1 Pin 0201614 Pieces
15 1 Safety split pin 0201615 Pieces
16 1 Chain wiper 0201616 Pieces
17 1 Load chain sprocket 0201617 Pieces
19 - Load chain 0201619 m
20 1 Left side panel 0201620 Pieces
21 1 Lower brake hub 0201621 Pieces
23 1 Ratchet wheel 0201623 Pieces
27 1 Hand chain wheel 0201627 Pieces
28 - Hand chain 0201628 m
29 1 Castle nut 0201629 Pieces
30 1 Safety split pin 0201630 Pieces
31 1 Hand wheel cover 0201631 Pieces
32 3 Self-locking nuts 0201632 Pieces
Items not listed here are only available in the assembly!
Complete parts for PULLMASTER II 2 t
Item Number Description Article no.
51 1 Support hook mounting,
complete including items 3, 4, 18 0201651 Set
52 1
Hook security catch,
complete including items 34, 35,
36, 37
0201652 Set
53 1 Safety catch, complete including
items 24 (2x), 25 (2x), 26(2x) 0201653 Set
54 1 Friction plates set,
complete including items 22 (2x) 0201654 Set
57 1
Support hook,
complete including items 41, 42,
43, 52
0201657 Set
58 1
Load hook,
complete including items 44, 45 (2x),
46, 47, 48 (2x), 49 (2x), 50 (2x), 52
0201658 Set

17
Components for Pullmaster-II 3t
Item Number Description Article no.
1 4 Rivets 0201701 Pieces
2 1 Type plate 0201702 Pieces
5 3 Self-locking nut 0201705 Pieces
6 1 Housing cover 0201706 Pieces
7 1 Lock washer 0201707 Pieces
8 1 Pinion shaft 0201708 Pieces
9 1 Gear wheel 0201709 Pieces
10 2 Double gear wheel 0201710 Pieces
11 1 Right side panel 0201711 Pieces
12 2 Chain guide roller 0201712 Pieces
13 1 Chain end mounting 0201713 Pieces
14 1 Pin 0201714 Pieces
15 1 Safety split pin 0201715 Pieces
16 1 Chain wiper 0201716 Pieces
17 1 Load chain sprocket 0201717 Pieces
19 - Load chain 0201719 m
20 1 Left side panel 0201720 Pieces
21 1 Lower brake hub 0201721 Pieces
23 1 Ratchet wheel 0201723 Pieces
27 1 Hand chain wheel 0201727 Pieces
28 - Hand chain 0201728 m
29 1 Castle nut 0201729 Pieces
30 1 Safety split pin 0201730 Pieces
31 1 Hand wheel cover 0201731 Pieces
32 3 Self-locking nuts 0201732 Pieces
Items not listed here are only available in the assembly!
Complete parts for PULLMASTER II 3 t
Item Number Description Article no.
51 1 Support hook mounting,
complete including items 3, 4, 18 0201751 Set
52 1
Hook security catch,
complete including items 34, 35,
36, 37
0201752 Set
53 1 Safety catch, complete including
items 24 (2x), 25 (2x), 26(2x) 0201753 Set
54 1 Friction plates set,
complete including items 22 (2x) 0201754 Set
57 1
Support hook,
complete including items 41, 42,
43, 52
0201757 Set
58 1
Load hook,
complete including items 44, 45 (2x),
46, 47, 48 (2x), 49 (2x), 50 (2x), 52
0201758 Set

18
Components for Pullmaster-II 5t
Item Number Description Article no.
1 4 Rivets 0201801 Pieces
2 1 Type plate 0201802 Pieces
5 3 Self-locking nut 0201805 Pieces
6 1 Housing cover 0201806 Pieces
7 1 Lock washer 0201807 Pieces
8 1 Pinion shaft 0201808 Pieces
9 1 Gear wheel 0201809 Pieces
10 2 Double gear wheel 0201810 Pieces
11 1 Right side panel 0201811 Pieces
12 2 Chain guide roller 0201812 Pieces
13 1 Chain end mounting 0201813 Pieces
14 1 Pin 0201814 Pieces
15 1 Safety split pin 0201815 Pieces
16 1 Chain wiper 0201816 Pieces
17 1 Load chain sprocket 0201817 Pieces
19 - Load chain 0201819 m
20 1 Left side panel 0201820 Pieces
21 1 Lower brake hub 0201821 Pieces
23 1 Ratchet wheel 0201823 Pieces
27 1 Hand chain wheel 0201827 Pieces
28 - Hand chain 0201828 m
29 1 Castle nut 0201829 Pieces
30 1 Safety split pin 0201830 Pieces
31 1 Hand wheel cover 0201831 Pieces
32 3 Self-locking nuts 0201832 Pieces
Items not listed here are only available in the assembly!
Complete parts for PULLMASTER II 5 t
Item Number Description Article no.
51 1 Support hook mounting,
complete including items 3, 4, 18 0201851 Set
52 1
Hook security catch,
complete including items 34, 35,
36, 37
0201852 Set
53 1 Safety catch, complete including
items 24 (2x), 25 (2x), 26(2x) 0201853 Set
54 1 Friction plates set,
complete including items 22 (2x) 0201854 Set
57 1
Support hook,
complete including items 41, 42,
43, 52
0201857 Set
58 1
Load hook,
complete including items 44, 45 (2x),
46, 47, 48 (2x), 49 (2x), 50 (2x), 52
0201858 Set

19
Components for Pullmaster-II 10t
Item Number Description Article no.
1 4 Rivets 0201901 Pieces
2 1 Type plate 0201902 Pieces
5 3 Self-locking nut 0201905 Pieces
6 1 Housing cover 0201906 Pieces
7 1 Lock washer 0201907 Pieces
8 1 Pinion shaft 0201908 Pieces
9 1 Gear wheel 0201909 Pieces
10 2 Double gear wheel 0201910 Pieces
11 1 Right side panel 0201911 Pieces
12 2 Chain guide roller 0201912 Pieces
13 1 Chain end mounting 0201913 Pieces
14 1 Pin 0201914 Pieces
15 1 Safety split pin 0201915 Pieces
16 1 Chain wiper 0201916 Pieces
17 1 Load chain sprocket 0201917 Pieces
19 - Load chain 0201919 m
20 1 Left side panel 0201920 Pieces
21 1 Lower brake hub 0201921 Pieces
23 1 Ratchet wheel 0201923 Pieces
27 1 Hand chain wheel 0201927 Pieces
28 - Hand chain 0201928 m
29 1 Castle nut 0201929 Pieces
30 1 Safety split pin 0201930 Pieces
31 1 Hand wheel cover 0201931 Pieces
32 3 Self-locking nuts 0201932 Pieces
Items not listed here are only available in the assembly!
Complete parts for PULLMASTER II 10 t
Item Number Description Article no.
51 1 Support hook mounting,
complete including items 3, 4, 18 0201951 Set
52 1
Hook security catch,
complete including items 34, 35,
36, 37
0201952 Set
53 1 Safety catch, complete including
items 24 (2x), 25 (2x), 26(2x) 0201953 Set
54 1 Friction plates set,
complete including items 22 (2x) 0201954 Set
59 1
Support hook,
complete including items 60, 61,
62, 63, 64, 65, 66, 67, 68, 69
0201959 Set
70 1
Load hook,
complete including items 71 (2x),
72 (2x), 73 (2x), 74 (2x), 75, 76 (2x),
77, 78
0201970 Set

IX.
Annual inspections for statutory accident prevention
Type of test Test date Name/signature
of the tester Findings
This manual suits for next models
7
Table of contents
Other Planeta Chain Hoist manuals
Popular Chain Hoist manuals by other brands

Yale HOISTS
Yale HOISTS LEW-1 Series OPERATING & MAINTENANCE INSTRUCTIONS WITH PARTS LIST

TBEI
TBEI Rugby HR-520 Installation & operation manual

CM
CM Shopstar Operating, Maintenance & Parts Manual

Hamron
Hamron 334-004 operating instructions

Far Tools
Far Tools EP 750 Original manual

Urrea
Urrea POEL01 User manual and warranty