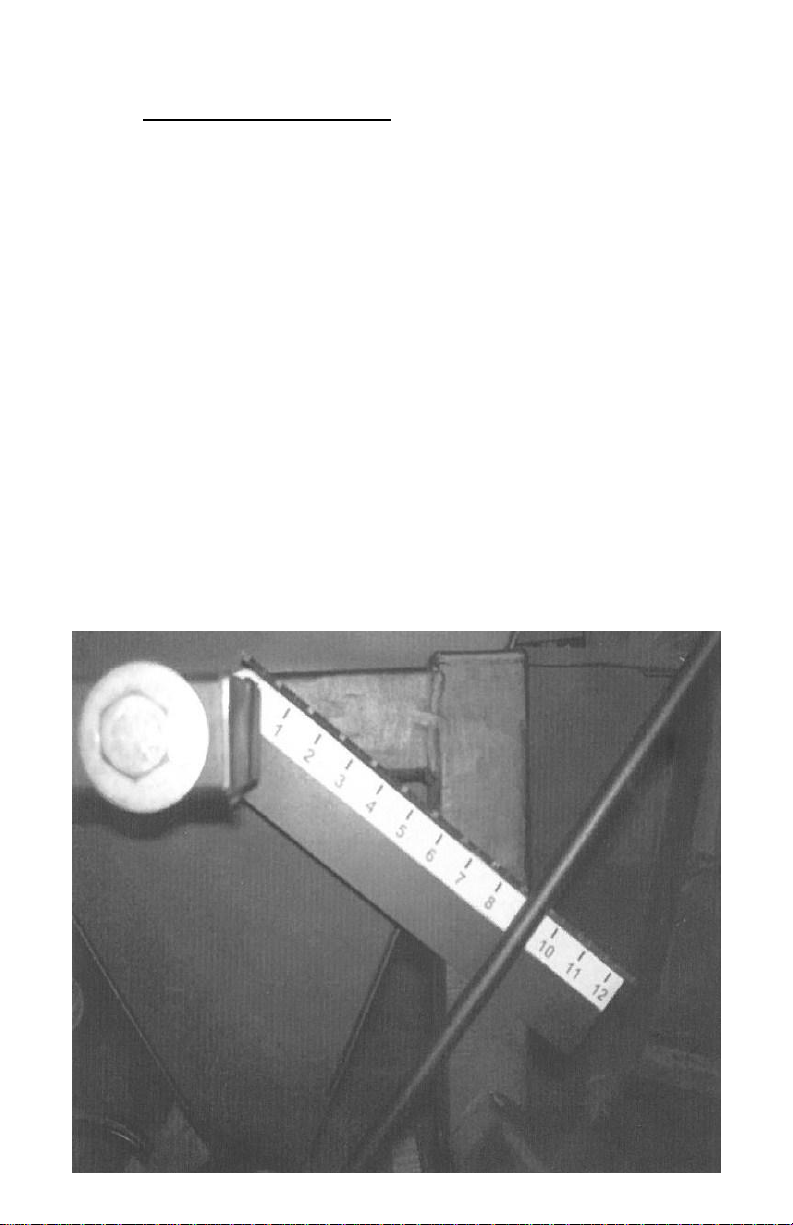
There is a set bolt on the upright receiver which can be used
to tighten the 1-point hitch inside the receiver. We have
found that the unit works best if the set bolt is tightened
after each adjustment of the 1-point hitch. This helps to
keep the unit from wobbling side-to-side or “fish tailing”
during use.
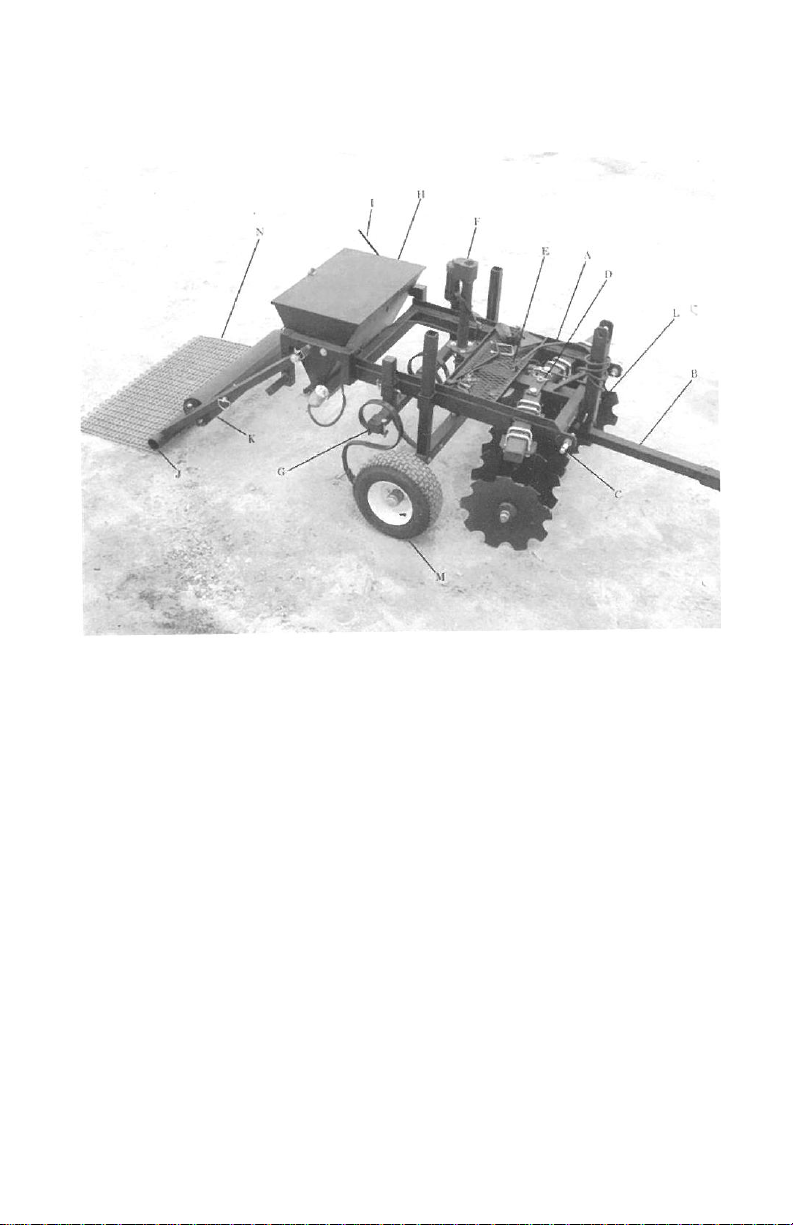
(See “L” on diagram
Please Note: If your unit wobbles from side to side or
Begins fish-tailing during use, there are several things you can do
to eliminate the problem.
Slow down and reduce pulling speed (<4mph)
Add weight to seeder.
Tighten set bolt on 1-point hitch.
Tighten coupler to 2” ball using set-bolt underneath
coupler
Reduce the cutting angle of disc to light mode.
Level the unit as much as possible using the upper holes on the
1-point hitch
Lower the drag and/or cultipacker behind seeder.
C. Each unit also comes with a 3-Point Hitch which is
located on the main frame. By removing the 1-point
hitch completely, the PLOMASTER™ is ready for 3-
point hook-up on the lift pins provided
D. You will notice a pin for adjusting the angle of cut of the
ADJUSTABLE DISC. There are three (3) different settings,
Light Disc Mode, Medium Disc Mode and Heavy Disc
Mode.
D. The first hole from the front of the unit is for light
discing (Light Disc Mode) such as re-seeding or aerating.
The middle hole, which is the optimal angle of cut for
discing (Medium Disc Mode), is used for most applications
with and ATV.
The third hole, which is the Heavy Disc Mode, is used for
heavy, deep discing on rough ground or where the ground
needs to be thoroughly broken up using the 3-point hitch on
tractor.
E. The TOOL OR CARRYING RACK has multiple uses.
It can carry extra bags of seed, tools, coolers and the tank
for the spray attachment. You will also notice how easy it...