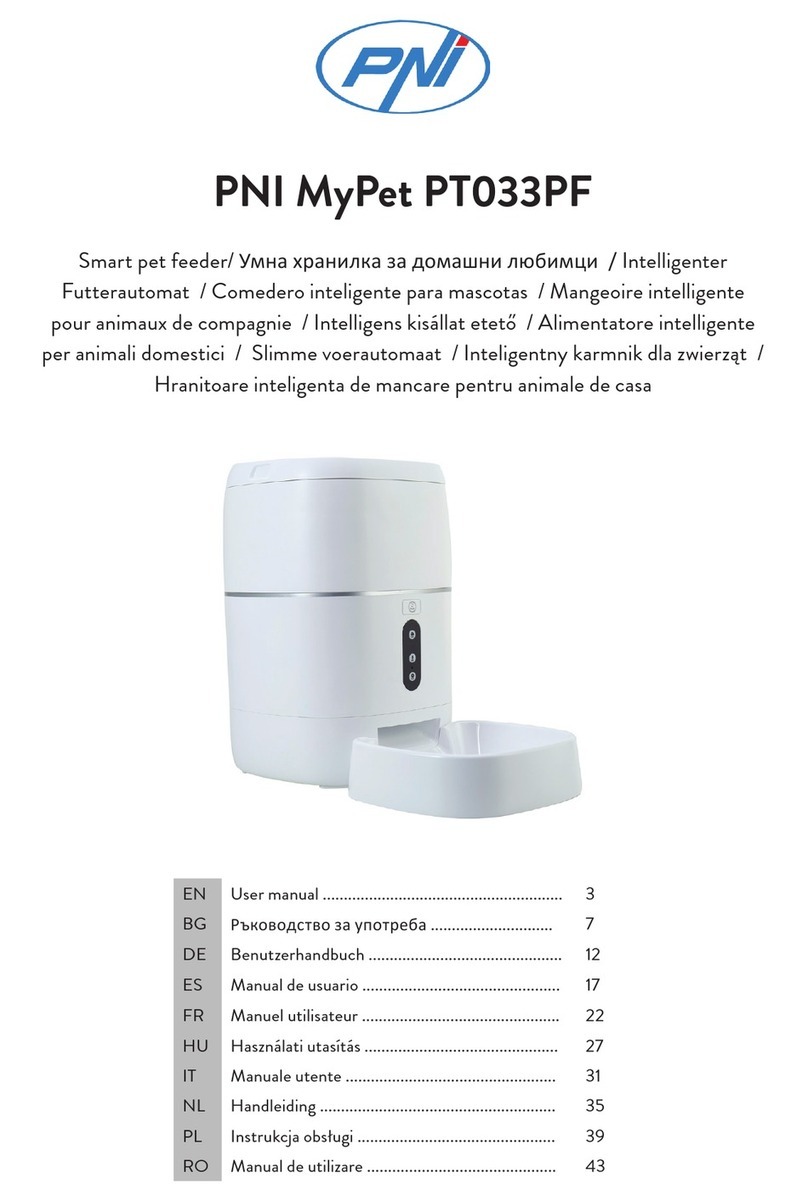
PNI MyPet User manual

1
Manual de utilizare
Hranitoare automata pentru animale PNI MyPet
Taste Panou Control
•CLOCK –
afiseaza ora (ora curenta)
•TIMER – comuta intre timpii presetati de hranire
•VOL – seteaza portia de hrana
•SET – intra in modul SET, valideaza timpii de hranire setati si avanseaza spre
urmatoarea setare. Apasat odata cu tasta VOL actioneaza hranirea manuala
•START – porneste programul de hranire, confirma ora si setarile timpilor de hranire
•DAY – seteaza numarul zilelor pentru hranire
•REC – inregistreaza mesajul vocal
•PLAY – reda mesajul vocal inregistrat
•ON SWITCH – opreste hranitoarea. Pentru atunci cand nu va fi utilizata pentru o
perioada mai lunga de timp. Prin actionarea acestui buton se vor reseta timpii si
setarile de hranire
Instructiuni
1. Deschideti compartimentul bateriilor (sub dispozitiv)
2. Introduceti 4 baterii tip D. NU folositi baterii ieftine sau vechi pe baza de Zinc-Carbon
3. Inchideti compartimentul bateriilor si porniti dispozitvul de pe butonul ON de langa
compartimentul bateriilor.
4. Hranitoarea va face o rotatie completa pana cand se va afisa ”12:00”
intermitent
5. Aveti la dispozitie 90 secunde pentru a seta ora curenta pentru ca hranitoarea sa
functioneze corect. Daca au trecut cele 90 de secunde, pe ecran va fi afisat (1
07). Pentru a reveni, opriti hranitoarea, asteptati 1 minut apoi continuati de la
pasul 3.
Panou de control LCD Display
PM
TIMER
CLOCK
Cifra-1 Cifra-2 Cifra-3 Cifra-4

2
1) 6HWDUHRUDFXUHQWD
1) Cifrele vor pulsa intermitent
2) Apasati tasta CLOCK pentru a seta ora
3) Apasati tasta TIMER pentru a seta minutele
4) Apasati tasta SET pentru a confirma ora
Pe ecran se va afisa ora in format de 12 sau 24 ore.
5) Apasati tasta CLOCK pentru a schimba afisarea cu 12 sau cu 24 ore
6) Apasati tasta START pentru a confirma ora setata
7) Se va afisa (1 07) in mod intermitent si puteti seta timpii de hranire
2) 6HWDUHWLPSLGHKUDQLUHVLQXPDUXOGHKUDQLULSH]L
1) Se afiseaza (1 07) pulsand intermitent. Cifra-1 indica numarul de hraniri pe zi,
Cifra-3 & Cifra-4 indica orele de hranire.
2) Este afisat primul timp de hranire (1 07)=(prima hranire la ora 07:00)
3) Cu (1 07) afisat intermitent, tineti apasat 2 secunde tasta SET pana cand Cifra-3 si
Cifra-4 incepe sa clipeasca intermitent (07)
4) Apasati tasta TIMER pentru a seta ora de hranire. Indicatorul (P)din coltul stanga
sus indica faptul ca sunteti pe afisajul cu 12 ore PM
5) Apasati tasta SET pentru confirmarea primei ore de hranire
6) Repetati pasul 4 pentru a seta urmatoarea ora de hranire
7) Apasati tasta START daca doriti ca hranirea sa fie de 2 ori pe zi
8) Daca doriti ca hranirea sa fie de mai multe ori pe zi, NU APASATI tasta START
si repetati pasul 4 apoi apasati tasta START.
Nota:Daca ati apasat tasta SETa treia oara insa nu doriti 3 hraniri pe zi, apasati
tasta TIMER apoi tineti apasat 2 secunde tasta SET
Pentru a o lua de la capat, nu apasati tasta SET dupa a doua hranire, apasati
tasta START pentru a incheia numarul de hraniri pe zi.
3) 6HWDUHSRUWLHKUDQD
1) Apasand tasta VOL se afiseaza marimea portiei de hrana.
2) Apasati timp de 2 secunde tasta SETCifra-4 va clipi.
3) Apasati tasta VOL pentru a seta marimea portiei
Note:
a) 3RUWLDGHKUDQD1 POGHKUDQD, 2 PO POHWF
b) &LIUD 0repre]LQWD 10 portiLFDUHLQVHDPQD PO
4) Apasati tasta START pentru a confirma marimea portiei.

) 6HWDUHQXPDU]LOHSHQWUXKUDQLUH
1) Apasati tasta DAY iar in partea stanga a ecranului aveti afisat numarul de zile
in care hranitoare va functiona pana la oprire. Daca este afisata cifra 0,
hranitoarea va functiona continuu fara sa se opreasca.
2) Pentru a schimba aceasta setare, apasati tasta DAY apoi apasati timp de
2 sec
unde tasta SET pana cand indicatorul zilelor va clipi intermitent.
3) Apasati tasta DAY pentru a schimba numarul zilelor. Tineti apasat tasta DAY
pentru a trece mai repede prin numarul zilelor.
4) Daca setati numarul intre 1 si 99 zile, atunci la ora 06:00 dupa ultima zi de
hranire, hranitoarea va va avertiza prin semnal sonor.
5) Pentru a repeta acelasi program fara alte modificari, apasati tasta START
6) Pentru a hrani fara oprire, setati numarul zilelor 0.
NotD:
a) 'DFDDYHWLDILVDWSHHFUDQLQGLFDWRUXO7,0(5VLFHOHODOWHFLIUHSURJUDPXO
KUDQLUHDLQFHSXW.
b) 'DFDDYHWLLQGHVIDVXUDUHXQSURJUDPGHKUDQLUH, LOSXWHWLRSULDSDVDQG tastele
SET si START in acelasi timp.
) Inregistrare mesaj vocal pentru a reda la timpii de hranire
1) Tineti apasat tasta REC iar LED-ul rosu se va aprinde
2) Inregistrati mesajul (maxim 6 secunde)
3) Dupa ce ati terminat, luati degetul de pe tasta REC
) Redare mesaj vocal inregistrat
1) Apasati tasta PLAY
2) Se va reda mesajul inregistrat anterior
3) La fiecare hranire, mesajul inregistrat se va repeta de 3 ori
) Alarma hranire
1) Hranitoarea are o ALARMA(XQ beepFRQWLQXX) care va anunta cand s-a incheiat
programul de hranire si nu va mai continua.
2) Alarma va porni a doua zi la ora 06:00 dupa incheierea programului
3) Pentru oprirea alarmei apasati orice tasta
4) Pentru a reporni programul de hranire apasati tasta START
3

4
)+UDQLUHPDQXDOD
Apasati tastele SET si VOL in acelasi timp
Se va elibera doar o cantitate de 60cc hrana (1/4 dintr-o cupa)
Celelalte setari nu se vor modifica.
Important:
a) Setarile din fabrica sunt:
a)Numarul de zile = 0 (0 = hranire continua),
b)Numarul de hraniri pe zi = 2 (2 hraniri pe zi)
c)Portia de hrana = 1 (60ml de hrana)
b) +UDQLWRDUHDYD vibra DSUR[LPDWLY15 secXQGH LQWLPpXOKUDQLULLSHQWUXDGLVWULEXL
KUDQDPDLHILFLHQW
c) 'DFDDX]LWL FDWHYDEHHSXUL (10 in total) VLKUDQLWRDUHQXOLYUHD]DKUDQD DWXQFL
VHQ]RUXOGHFRPSDUWLPHQWSUHDSOLQ aIRVWGHFODQVDW.
A6,*85$7,9$&$1868175(6785,'(+5$1$,1&$3$&8/+5$1,72$5(,.
d) 1XIRORVLWLKUDQLWRDUHDLQFRQGLWLLGHVRDUHSXWHUQLF
6HQ]RUXOGHFRPSDUWLPHQW SRDWHILGHFODQVDWVLKUDQLWRDUHDQXYDPDLOLYUDKUDQD
) 'HVFKLGHUHDVLLQFKLGHUHDFDSDFXOXLVXSHULRU
1) Pentru a debloca capacul hranitoarei, rotiti butonul de deasupra pana cand
6$*($7$ de pe acesta indica spre ODFDWXOGHVFKLV

5
2) Pentru a bloca capacul hranitoarei, rotiti butonu de deasupra pana cand
6$*($7$ de pe acesta indica spre ODFDWXOLQFKLV
CXUDWDUH
Cand compartimentul de hrana devine murdar cu resturi de hrana, puteti scoate
compartimetul de hrana de sub capacul superior pentru a putea fi curatat.
Folositi o carpa umeda pentru a curata baza hranitoarei care contine panoul de control
si bateriile. A NU se curata in contact direct cu apa.
Puteti spala capacul si compartimentul de hrana cu apa calduta cu sapun.
A NU SE SPALA IN MASINA DE SPALAT VASE !!!

6
$VDPEODUHDVLGH]DVDPEODUHDUH]HUYRUXOXLGHKUDQD
A. 'H]DVDPEODUH
Deschideti clemele cu arc de pe margini.Folositi ambele maini si impingeti cu
degetele mari clemele in jos pentru a elibera rezervorul pe care il ridicati cu
degetele in acelasi timp.
Aveti grija cand eliberati clemele, deoarece arcurile sunt puternice si va pot rani
degetele.
B. AVDPEODUH
Aliniati rezervorul cu baza hranitoarei. Apoi impingeti clemele in afara pentru a
putea pozitiona rezervorul pe baza.
Asigurati-va ca ati prins clemele bine peste rezervor.
&OHPHUH]HUYRU

7
FAQ & 'HSDQDUH:
a) &HDVXOSRDWHILDILVDWLQIRUPDWFX 12 RUHVDXFX 24RUH
,QGLFDWRUXO(PM ) YDILDILVDWGXSDDPLD]DLQIRUPDWXOFXRUH
b) =LOHOHGHKUDQLUHSRWILPRGLILFDWHRULFDQG GDUSURJUDPXODQWHULRUYDILLQORFXLWVL
YDWUHEXLVHWDWGLQQRXGHODSULPD]L
c) TLPSLLGHKUDQLUHVLSRUWLDSRWILPRWLILFDWH RULFDQGVLYRUILYDODELOHSHQWUXWRDWH
]LOeOHGLQSURJUDP
d) OGDWDFHSURJUDPXODLQFHSXW, ]LOHOHDILVDWHIRUVFDGHD FDWH XQDLQILHFDUH]L
OD RUD0:00 SDQDFHSURJUDPXOYDOXDVIDUVLW. $SRLYDUHYHQLODQXPDUXOLQLWLDOGH]LOH
VLDODUPDYDDYHUWL]DVRQRU. 'RDUDSDVDWL START SHQWUXDUHSRUQLSURJUDPXO
e) 'DFDLQGLFDWRUXOWLPSXOXLGHKUDQLUH VLFHOHODOWHFLIUHVXQWDILVDWHSXOVDWRULXLQVHDPQD
FDQXDIRVWVHWDWQLFLXQSURJUDPGHKUDQLUH
f) &DQGLQGLFDWRUXOWLPSXOXLGHKUDQLUHVLFHOHODOWHFLIUHVXQWDILVDWHSHHFUDQ
LQVHDPQDFDH[LVWDXQSURJUDPLQGHVIDVXUDUH
g) &DQGLQdLFDWRUXOFHDVXOXLHVWHDILVDWSHHFUDQHVWHDILVDWDRUDFXUHQWD
h) Atunci cand indicatorul LED emite semnal luminos intermitent, nivelul
bateriilor este scazut si trebuie inlocuite.
i) 'DFDSHHFUDQDYHWLDILVDW ( Err ), LQVHDPQDFDQXVHLQFKLGHFRUHVSXQ]DWRU
FDSDFXOFRPSDUWLPHQWXOXLGHKUDQD
7UHEXLHVD FXUDWDWLUHVWXULOHGHKUDQD FDUHEORFKHD]DFDSDFXO.
1) Opriti hranitoarea, VFRDWHWLKUDQDGLQDFHDVWDVLLQWRDUFHWLRFXVXVXOLQMRV
2) &XUDWDWLDPEHOHEDODPDOHDOHFDSDFXOXLFXRSHULHPRDOH
3) 'XSDFXUDWDUHUHSRUQLWLKUDQLWRDUHDVLUHXPSOHWLFXKUDQD
NotD: 9DWUHEXLVDVHWDWLGLQQRXSURJUDPXOVLWLPSLLGHKUDQLUH

1
Quick Start Guide
Large-capacity Automatic Pet Feeder PNI MyPet
Control Panel Keys
•CLOCK –displays clock (current time)
•TIMER – switches between preset feeding times
•VOL – sets the feeding volume/portion-size
•SET – enters SET mode, and confirms any feeding times you enter and advances to
the next setting. Also used with VOL key to perform manual feedings
•START – starts the feeding schedule, confirms the clock and feeding-time settings
•DAY – sets the number of days to feed
•REC – records your personal voice message
•PLAY – plays back your personal voice message
•ON SWITCH – turns the feeder off. For when the feeder will not be used for an
extended period of time. Turning this switch off WILL RESET all time and feeding
settings
Getting Started
1. Open the battery door (under the unit)
2. Insert four D-size alkaline batteries into the battery tray. Do NOT use old or -cheap-
carbon batteries
3. Close the battery door and switch on the feeder. The ON Switch is next to the
battery door (under the unit)
4. The feeder will cycle once until ”12:00” is flashing on the LCD display
5. You now have 90 seconds to set the current-time in order for the feeder to work
properly. If longer than 90 seconds passes then (1 07) will be displayed on the
LCD. Simply turn the switch to Off, wait 1 minute, then repeat from step-3
Control Panel LCD Display
PM
icon
TIMER
CLOCK
Digit-1 Digit-2 Digit-3
Di it
4

2
1) Setting the Current Time
1) All digits should now be flashing
2) Press the CLOCK key to set the HOUR
3) Press the TIMER key to set the MINUTE
4) Press the SET key once to confirm the time
Now the display will show either 12 or 24 to indicate the display mode
5) Press the CLOCK key to change between 12 or 24-hour display mode
6) Press the START key to CONFIRM the clock setup
7) (1 07) will be flashing and you must now set the feeding times
2) Setting the Feed Time and Number of Feedings per Day
1)(1 07) should now be flashing. Digit-1 is the feeding number (times per day),
Digits-3 & 4 are the feeding time (in hours)
2)The display shows the 1st feeding time (1 07)=(1st feeding at 7am)
3)With (1 07) Flashing, press and hold (for 2 seconds) the SET key until Digit-3 & 4
start flashing (07)
4)Press the TIMER key to set the desired hour for feeding. Note the ( P ) in the top
left corner stands for PM when using 12 hour time
5)Press the SET key to confirm your setting and proceed to the 2nd feeding time
6)Repeat step-4 to set the desired hour for feeding the SECOND feeding time
7)At this point if you want to only feed 2 times per day Press the START key and
you’re finished
8)If you wish to feed a 3rd or 4th time each day, do NOT press the START key and
repeat from step-4
Tip: If you pressed the SET key a 3rd time, but you did not want to feed 3 times per
day, just press the TIMER key and then press and hold the SET key (for 2 seconds)
to start over, remember not to press the SET key after the Second feeding, press
the START key to end your number of feedings per day.
3) Setting the Volume/Portion-Size
1) Press the VOL key to display feed-volume/portion-size
2) Press and hold (for 2 seconds) the SET key until Digit-4 blinks
3) Press the VOL key to set the desired volume
Note:
a) A Feed-volume of 1 equals ¼ cup (60cc) of food, 2 means ½ cup (120cc)
of food, 3= ¾ cups (180cc) and so on.
b) The number 0represents 10 portions which is equal to 2.5 cups
( liters).
4) Press the START key to confirm the volume/portion size

3
Features
¾12 or 24 hour clock display
¾Feed according to your set time
¾Amount of food dispensed is adjustable
¾6 second personal voice message recorder
¾Personal Voice message calls your pet when its feeding time
¾The 4 Feeding times can be set for any time of day or night
¾D-size alkaline batteries (4pc’s required) lasts over 1 year
¾Red LED indicates Low batteries
Control Panel Keys
•CLOCK –displays clock (current time)
•TIMER – switches between preset feeding times
•VOL – sets the feeding volume/portion-size
•SET – enters SET mode, and confirms any feeding times you enter and advances to
the next setting. Also used with VOL key to perform manual feedings
•START – starts the feeding schedule, confirms the clock and feeding-time settings
•DAY – sets the number of days to feed
•REC – records your personal voice message
•PLAY – plays back your personal voice message
•ON SWITCH – turns the feeder off. For when the feeder will not be used for an
extended period of time. Turning this switch off WILL RESET all time and feeding
settings
Getting Started
1.
Open the battery door (under
the unit)
2.
Keep the ON switch set to OFF
3.
Insert four D size alkaline batteries into the battery bay. Do NOT use old or
substandard carbon batteries
4.
Close the battery door and switch ON the feeder. The ON Switch is next to
the
battery
door
5.
The feeder will cycle one time until “12:00” is flashing on the LCD displa
y
6.
You now have 90 seconds to set the current-time in order for the feeder to wo
rk
properly. If longer than 90 seconds passes then (1 07) will be displayed on
the
LCD. Simply turn the switch to Off, wait 1 minute, then repeat
from step-3

4
General Operation
1)
To review the settings
2) Press
the TIMER key to cycle through and view the feedin
g times.
Only the feeding times per day that are set will be displayed.
Digit-1 is the
feeding number each day, Digit-3 & 4 are the feeding times (in hours). Example:
(1 07)=(1st feeding at 7am)
3) Press
the VOL key once to view the volume/portion-size and feeding day(s
)
remaining
4) Press
the DAY key to display feeding day(s) remainin
g
5) Press the CLOCK key once to display the current time, the CLOCK icon wi
ll
now turn ON
6) If no key is pressed for more than 8 seconds, the display will sw
itch back to
show the next feeding time with the timer icon flashing.
Note:
a) Using
the TIMER key to cycle through the feeding times will only display to
the number of feedings you set. The sequence w
ill repeat after the last one is
displayed.
b)
Only the 1
st
feeding time will be displayed if you’ve set just 1 feeding
c)
A flashing timer-icon means the feeding-time has not been reached while
a
solid timer icon means the feeding-time has already passed
d)
The volume and day display shares the same screen so Digit-1 & 2 are th
e
feeding day(s) remaining while Digit-4 is the Volume/Portion-size
4) Setting the Current Clock Time
1) Press
the CLOCK key to display
the clock
The time and clock icon will now be displayed
2)
Press and hold (for 2 seconds) the SET key until all digits bl
ink
Control Panel LCD Display
PM
icon
TIMER
CLOCK
Digit-1 Digit-2 Digit-3
Di it
4

5
3) Press
the CLOCK key
to set the HOUR
4) Press
the TIMER key to set the MINUT
E
5) Press
the SET key once to confirm the time
The display will show either 12 or 24 to indicate clock display mode
6) Press
the CLOCK key to change between 12 or 24 hour display mo
de
7) Press
the START key
to confirm the clock setup
5) Setting the Feed Time and Number of Feedings per Day
1) Press
the TIMER key to display the feeding-
time
2)
Press and hold (for 2 seconds) the SET key until Digit-3 & 4 start flashing
The display will show the 1
st
feeding time. Example: (1 07)=(1st feeding at
7am)
3) Press
the TIMER key to set the desired HOUR for feeding. Note the (P) in
the
top left corner for PM using 12
hour time
4) Press
the SET key to confirm your setting and proceed to the 2
nd
feeding
time
5)
Repeat step-3 to set the desired hour for feeding the SECOND feeding time
6)
At this point if you want to only feed 2 times per day Press the START key
and
your finis
hed
The last feeding-number shown is the number of times to feed per day
.
The timer will now automatically start and the TIMER icon will turn
ON.
7)
If you wish to feed a 3
rd
or 4
th
time each day do NOT press the START ke
y and
repe
at from step-3
Tip: If you pressed the SET key a 3
rd
time, but you did not want to feed 3 times
per day, just press the TIMER key and then press and hold the SET key (for 2
seconds) to start over, remember not to press the SET key after the second
feeding, press the START key to end your number of feedings per day.
Note:
a)
If all four feeding-times have been set, the process will terminate and the
schedule will start automatically. The next feeding time will then be displaye
d.
(If only 1 feeding-time has been set then the feeding-timer display w
ill not
change even if you press the TIMER
key.)
b)
Feeding-times must be set in ascending order otherwise the remainin
g
number of the feeding(s) will no
t be served.
6) Setting the Volume/Portion-Size
1) Press
the VOL key to display feed-volume/portion-size
2)
Press and hold (for 2 seconds) the SET key until Digit-4 flas
hes
3) Press
the VOL key to set the desired volume/portion-si
ze

6
Note:
a) A Feed-volume of 1 equals ¼ cup (60cc) of food, 2 means ½ cup (120cc)
of food, 3= ¾ cups (180cc) and so on.
b) The number 0represents 10 portions which is equal to 2.5 cups
( liters).
4) Press the START key to confirm the volume setup
7) Setting the Number of Days to Feed
1) Press the DAY key and the left side of the LCD shows the number of days your
Automatic Feeder will feed for until it stops. The default setting of (0) means the
feeder will feed continuously and never stop
2) To change the number of days to feed, press the DAY key then press and hold
the SET key (for 2 seconds) until the days flash on the LCD
3) Press the DAY key to change the number of days. Hold down the DAY key to
speed through the numbers
4) If you set a number of days to feed (1 to 99 days) then at 6am after the last day
the feeder Alarm will start beeping
5) To repeat the same schedule without any changes, just press the START key
6) To feed continuously, set the number-of-days to 0
Note:
a) When the timer-icon and all the numbers on the LCD display are continuously
ON, the feeding schedule has started.
b) Once a feeding schedule has started, you can force it to end by pressing the
SET and START keys together.
8) Record Voice Message to be played at feeding times
1) Press and hold the REC key, the Red LED will turn on
2) Speak your message. You have up to 6 seconds
3) When finished, release the REC key
9) Play back recorded Voice Message
1) Press the PLAY key
2) Your recorded message will now play
3) At each Feeding your recorded message will play and repeat 3 times
10) Feeding Alarm
1) Your PF-10 Automatic Pet Feeder has an ALARM (a continuous beeping) to
alert you to when your feeding schedule has ended and no more food will be
dispensed
2) The Feeding Alarm will start at 6:00AM the next day to avoid disturbing anyone
during the night
3) You can press any key to stop the alarm

7
4) To restart your original feeding schedule, press the START key
11) To manually feed your pet
Press the SET and VOL keys together, once
Only ¼ cup (60cc) will be dispensed. The normal schedule and quantity will not be affected
Important Notes:
a) Power-on default settings are:
a)Number of Days to Feed=0 days (0=continuous),
b)Number of Feedings per Day=2 feedings and
c)Volume/Portion-size=1 (¼ Cup/60cc)
b) The feeder will vibrate for about 15 seconds during food delivery to help the
unit dispense food more efficiently
c) If you hear a few beeps (10 in total) and the feeder-drum isn’t moving then
the Tray-Full detector has been triggered.
MAKE SURE THE FOOD SLIDE AREA IS CLEAR OF FOOD.
d) Do not use the feeder under strong sun light as the Tray-Full detector can be
activated by bright light making the feeder act like the food-tray is full and stop
delivering food

8
12) Opening and Closing the food cover
1)
To open ( Unlock ) the food cover Automatic Pet Feeder, rotate the roun
d dial
so the ARROW points towards the Open Lock
2)
To close ( Lock ) the food cover Automatic Pet Feeder, rotate the round di
al so
the ARROW points towards the Closed Lo
ck
Care and Cleaning
When the food tank starts getting dirty and there is a lot of loose food at the bottom of
the food tank, you can remove the food cover and food tank for cleaning.
Use a soft damp cloth to clean the feeder base which contains the control panel and
batteries. Never get this part wet and do NOT wash with running water.
You can wash the Food Cover and Food Tank in warm soapy water. DO NOT put these
parts in the dishwasher or they will be permanently damaged !!!

9
Assembly and Disassembly of Food Tank
A. Disassembly
You need to open the spring loaded locks. Use both hands and your thumbs to
push both locks down to release the food tank. As you push the locks down use
your fingers to lift the food tank up.
The springs are very strong so be careful not to let the locks snap back and hurt
your fingers.
B. Assembly
Line up the food tank with the feeder base. Then, press the locks out with your
thumbs so the food tank can seat onto the feeder base. The locks are spring
loaded so be careful not to pinch your fingers. Make sure the locks securely lock
onto the food tank.
Food Tank Locks

10
FAQ & Troubleshooting:
a)
The clock can display in either 12 or 24-hour displa
y format
The (PM ) icon will show in the afternoon under the 12-hour display mode
b)
The feeding-days can be changed at any time but the previous schedule w
ill be
replaced and will start from the 1
st
new feedi
ng day set
c)
The feeding-times and feeding-volume can be changed at any time and the new
settings will be for the rest of the feeding day/s schedul
e
d)
Once the schedule has started, the DAYS displayed will be reduced by 1 every day
at 0:00 (midnight) until the end is reached. It will then revert back to the origin
al
number of set DAYS and the Feed Alarm will sound. Just press the START
key to
start your original program/settings aga
in
e)
If the timer-icon is OFF and all numbers are flashing then no feeding schedul
e has
bee
n set
f)
When the timer icon is ON and all numbers on the LCD display are not flashing
then the schedule has started
g)
When the Clock icon is ON the current time is displa
yed
h) W
hen the Red (LOW BATT) light FLASHES,the batteries are low and must
be
repl
aced
Change all the batteries as soon as possible. You will have to reprogram all your settings agai
n
when the batteries are changed
i)
When the LCD display shows ( Err ), the food delivery door is not closing prop
erly.
You need to remove any food
that jams the door.
1)
Switch OFF the Auto Feeder, remove all food, turn your Auto Feeder upside
down
2)
Clean both doors hinges with a soft brush
3)
After cleaning switch ON the Auto Feeder and refill with food
Note: You will have to reprogram all your original settings before you can use
your feeder again
j)
Always use the Quick Setup Guide for fast easy programming. If you want more
advanced features, use the this Instruction Manual

1
Használati útmutató
Automatikus etető állatok számára PNI MyPet
Vezérlőpult billentyűzete
•CLOCK –
megjeleniti az órát (jelenlegi óra)
•TIMER – bekapcsolja a beállított adagolási időt
•VOL – beállítja a meghatározott adag ételt
•SET – SET módba lép, megerősíti a beállított adagolási időt, és tovább lép a következő
beállításra. A VOL gomb lenyomása által az etetés manuálisan történik.
•START – Elindítja az adagolási programot, megerősíti az óra és az adagolási időt.
•DAY – beállítja az etetés napjainak számát
•REC – rögzíti a hangüzenetet
•PLAY – lejátsza a rögzített hangüzeneteket
•ON SWITCH – megállítja az etetést. Ha hosszabb idejig nem fogják használni
E gomb megnyomásával az adagolási idők és beállítások visszaállíthatók
Előirások
1. Nyissa ki az elemtartót (készülék alatt)
2. Helyezzen be 4 D típusú elemet. NE használjon olcsó elemeket vagy Cink-Szén
alapú elemeket.
3. Zárja be az elemtartót és indítsa el a készüléket ON gomb lenyomásával, amely
az elemtartó mellett helyezkedik el.
4. Az etető egy teljes forgatást fog elvégezni míg addig amíg ”12:00” megjelenik
5. 90 másodperce van, hogy beállítsa az aktuális időt, hogy az etető megfelelően
működjön. Ha eltelt 90 másodperc , a képernyőn megjelenik (1 07).
Visszatérés esetén kapcsolja ki az etetőt, várjon 1 percet, majd folytassa a 3.
lépéstől.
Vezérlőpult
LCD Kijelző
PM
TIMER
CLOCK
Szám-1 Szám-2 Szám-3 Szám-4

2
1) Jelenlegi óra beállítása
1) A számjegyek szakaszosan fognak villognak
2) Nyomja meg CLOCK, hogy beállítsa az órát.
3) Nyomja meg TIMER, hogy beállítsa a perceket
4) Nyomja meg SET , hogy megerősítse az óra beállítását
A kijelzőn a 12 vagy 24 órás idő látható.
5) Nyomja meg CLOCK ,hogy, a kijelzőn megváltoztassa a 12 vagy 24 órás időt
6) Nyomja meg START , hogy megerősítse a beállított órát
7) Szakaszosan meg fog jeleni (1 07) és be tudja állítani az adagolási időt.
2) Az adagolási idő beállítása és a napi adagok száma
1) A kijelzés (1 07) villog.1- szám jelenti a napi adagolási időt, a 3 & 4 számok
jelentik az etetési órákat
2) Meg van jelenitve az első etetési idő (1 07)=(első etetés 07:00)
3) (1 07) szakason villogva , tartsák lenyomva 2 másodpercig a SET gombot
amíg a 3 és 4 számok szakaszosan vilagítani fognak (07)
4) Nyomja meg TIMER , hogy beállítsa az etetési időt. A kijelző (P) a bal sarokban
fent azt jelzi, hogy a 12 órás PM kijelzőn tartózkodik
5) Nyomja meg SET , hogy megerősítse az első etetési időt.
6) Ismételje meg a 4 lépést, hogy beállítsa a következő etetési időt.
7) Nyomja meg START , ha az etetés naponta kétszer legyen.
8) Ha azt szeretné, hogy több etetési idő legyen naponta , NE nyomja meg START
gombot és ismételje meg a 4 lépést majd nyomja meg a START.
Megjegyzés :Ha megnyomta a SET gombot harmadszor, de nem kíván 3 napi
etetést, nyomja meg TIMER majd nyomja 2 másodpercig a SET gombot.
Hogy előről kezdje ne nyomja meg a SET gombot a második adagolás után,
nyomja meg a START gombot a napi adagok számának bezárásához.
3) Az etetési adagolás beállítása
1) Nyomja meg VOL megjelenik az adagolás mennyisége.
2) Nyomja meg 2 másodpercig a SET4 szám villogni fog .
3) Nyomja meg VOL , hogy beállítsa az adagolás mennyiségét
Adagolás:
a) Adagolás mennyisége 1 POetetés, 2 PO POstb
b) 0 szám 10 adagolást jelent ami PO jelent
4) Nyomja meg a START , hogy megerősítse az adagolás mennyiségét

) Állítsa be az etetés napjainak számát
1) Nyomja meg DAY és a napok száma jelenik meg a képernyő bal oldalán
amelyben a táplálkozás a megállásig működik. Ha a 0 szám van
megjelenitve ,az etető folyamatosan fog működni megállás nélkül.
2) Hogy megváloztassa ezt a beállítást , nyomja meg DAY majd nyomja meg 2
másodpercig a SET amíg a napi kijelző szakaszosan fog villogni
3) Nyomja meg DAY, hogy megváloztassa a napok számát . Nyomja meg a DAY
hogy gyorsabban áthaladjon a napok számán.
4) Ha a számot 1 és 99 nap között állítja be, akkor 06:00 óráig az etetés utolsó napja
után , az etető hangjelzést fog leadni.
5) Ugyanazt a programot változtatások nélkül kívánja megismételni, nyomja a START
6) A megállás nélküli etetéshez állítsa be a napok számát 0-ra.
Megjegyzés:
a) Ha a TIMER jelző és a többi számjegy megjelenik a képernyőn, elindul az
etetőprogram.
b) Ha egy etetési program folyamatban van, le tudja állítani a SET és START
gombok segítségével ugyanabban az időben.
) Hangüzenet-felvétel lejátszási időpontokban
1) Tartsa lenyomva a REC gombot majd a piros LED fel fog kapcsolodni
2) Rögzítse a hangüzenetet (maximum 6 másodperc)
3) Miután elvégezte,vegye le a kezét a REC gombról.
) Hangfelvétel lejátszása
1) Nyomja meg a PLAY gombot
2) A korábban rögzített üzenet lejátszásra kerül
3) Minden egyes etetésnél a rögzített üzenet háromszor megismétlődik
)Riasztói etetés
1) Az etetőnek egy RIASZTÓJA van (folyamatos sípolás ) ami azt jelenti , hogy az
etetési program véget ért, és nem fog folytatodni.
2) A riasztás el fog indulni a következő nap 06:00 -kor a program befejezése után
3) Hogy leállítsa a riasztót nyomjon meg bármely gombot
4) Hogy újból elindítsa az etetési programot nyomja meg a START gombot
3
Table of contents
Languages:
Other PNI Pet Care Product manuals