point pro Series User manual

Artist
Kitchen Machine
POKM67AW1800
User Manual
Kitchen

GB
Thank you for purchasing your new POINT PRO SERIES Artist Kitchen
Machine. These operating instructions will help you use it properly and
safely.We recommend that you spend some time reading this
instruction manual in order that you fully understand all the operational
and keep this instruction manual for future reference.
SE
Tack för att du köpt en artistiska köksmaskin från POINT PRO SERIES.
Denna bruksanvisning hjälper dig att använda den på ett korrekt och
säkert sätt.Vi rekommenderar att du tar dig tid att läsa igenom denna
bruksanvisning för att till fullo förstå alla driftfunktioner som den
erbjuder.Läs noga igenom alla säkerhetsinstruktioner före användning
och spara sedan bruksanvisningen för framtida bruk.
DK
Tak for købet af din nye Artist køkkenmaskine fra POINT PRO SERIES.
Denne brugsanvisning er beregnet til at hjælpe dig med at bruge
apparatet korrekt og sikkert.Vi anbefaler, at du læser denne
brugsanvisning, så du får en fuld forståelse af, hvordan alle funktionerne
virker.Læs alle sikkerhedsinstruktioner nøje før brug, og gem denne
brugsanvisning til senere reference.
NO
Takk for at du kjøper din nye POINT PRO SERIES Artist kjøkkenmaskin.
Denne bruksanvisningen vil hjelpe deg med å bruke den på en trygg og
riktig måte.Vi anbefaler at du tar deg tid til å lese gjennom hele
bruksanvisningen for å bli fortrolig med alle funksjonene den har.Les alle
sikkerhetsanvisningene nøye før bruk, og oppbevar bruksanvisningen for
fremtidig referanse.
FI
Kiitos, kun valitsit uuden POINT PRO SERIES Artist -keittiökoneen.
Nämä käyttöohjeet auttavat sinua käyttämään sitä oikein ja
turvallisesti.On suositeltavaa käyttää aikaa tämän käyttöoppaan
lukemiseen, jotta ymmärrät täysin, mitä toiminnallisia ominaisuuksia
tuote tarjoaa.Lue kaikki turvallisuusohjeet huolellisesti ennen laitteen
käyttöä ja säilytä käyttöopas myöhempää käyttöä varten.
2

GBNOFIDKSE
page 4 - 13Instruction Manual – english
side 14- 23Bruksanvisning – norsk
sivu 24 - 33Käyttöopas – suomi
sida 44 - 53Bruksanvisning – svenska
side 34 - 43Brugsanvisning – dansk
3

SAFETY WARNINGS
For your continued safety and to reduce the risk of injury or electric shock,
please follow all the safety precautions listed below.
1. Read all the instructions carefully before using this appliance and keep
them for future reference.
2. Unplug the appliance from the mains supply when not in use, when
removing orattaching beaters/ dough hook/ whisk, and before cleaning any
part of the appliance.
3. Avoid contacting moving parts. Keep hands, hair, clothing, as well as
spatulas and other utensils away from the dough hooks / beaters during
operation to reduce the risk of injuryto persons, and/or damage to the
appliance.
4. This appliance is for household use only. Do not use it for professional
catering.Do not use the appliance for any purpose not expressly specifiedin
this manual.
5. Do not leave the appliance unattended while it is operating.
6. Before using this appliance ensure that the voltage of your electricity supply
is the same as that indicated on the rating plate of the appliance.
7. Never use an extension cable and be careful not to allow the power cable
come into contact with the rotating dough hooks and respectively wire
beaters.
8. Do not operate the appliance with a damaged mains cable or mains plug or
after the appliance or any attachment has been damaged.Seek qualified
technicians for assistance.
9. Do not immerse the motor unit or the mains cable or plug in liquids.
10. Ensure that the mains cable does not touch any hot surface andthat it
doesnot overhang the edge of your work surface.
11. If the mains cable is damaged it must be replaced by the manufacturer,its
service agent, or similarly qualified persons in order to avoid a hazard.
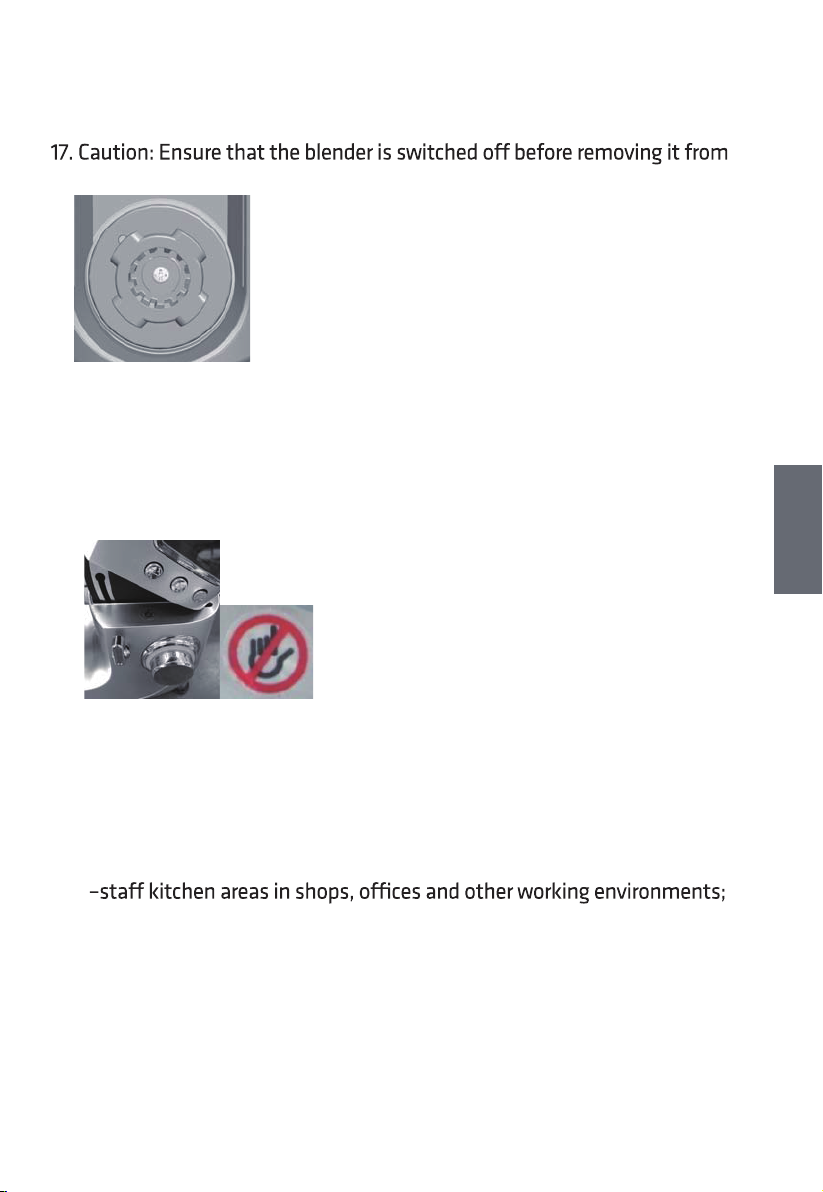
12. Never release the beaters or dough hooks or whisk when operating the
appliance.
13. Only use one attachment at atime.
14. This appliance can be used by children aged from 8years and above and
persons with reduced physical, sensory or mental capabilities or lack of
experience and knowledge if they have been given supervision or
instruction concerning use of the appliance in a safe way andunderstand
the hazards involved. Children shall not play with the appliance. Cleaning
and user maintenance shall not be made by children without supervision.
4

15. Do not misuse the product.It may cause injury if misuse.
16. Care should be taken when handling the sharp cutting blades,empty the
bowl and during cleaning.
the stand.
18. Warning: After detaching the accessory,do not touch themoving shaft!
19. Be careful if hot liquid is poured into the blender as it can be ejected out of
the appliance due to a sudden steaming.
20. Do not operate the appliance formore than 7 minutes at one time. Allow
the appliance to cool down for at least 30 min before next use.
21. Warning: Don’t touch at anytime!
22. The appliance must be plugged into an earthed electrical socket.
23. If you have to use an electrical extension lead, it must be earthed and you
should make sure that no-one can trip over it.
24. Do not put any accessories containing metal in a microwave oven.
25. This appliance is intended to be used in household and similar applications
such as:
–farm houses;
–by clientsin hotels, motelsand other residential type environments;
–bed and breakfast type environments.
5
GB

Product Overview
1. Release button for multifunction head
2. Speed control switch
3. “+” button
4. “OK” button
5. “-” button
6. LCD display
7. Power outlet for blender
8. Cover
9. Removable cover for mincer power outlet
9-1. Multifunction head
10. Release button for Cutter housing
11. Power outlet for mincer
12. Bowl cover
13. Stainless steel bowl (Max. 6.7L)
10-1. Whisk
11-1. Dough hook
12-1. Mixer blade
6

LCD:
Speed range: P-0-1-2-3-4-5-6-7-8. (9 speed for selections.)
Timer range: 00:00-10:00. The maximal setting time is 10 minutes.
For the setting time within 5 minutes:
The time show on the LCD will increase (+)/decrease (-) by 30 seconds
intervals when you press “+”/ “-” button each time.
For the setting time between 5-10 minutes:
The time show on the LCD will increase (+)/decrease (-) by 1minute
intervals when you press “+”/ “-” button each time.
Tips:
The speed control switch light is solid white colour when in standby
mode, and will start to flash when working.
In standby mode, the light for speed control switch will turn o after
3 minutes.
The column indicates the actual power level during working, when
the power reaches 1200W and more, the POWER column will get to
position A and beyond it. The light of the speed control switch will
turn to red from white color and start flashing, accompanied with BB
sound.
We recommend that the user not use for long time when the
machine is in warning status
7
GB

A.
Mixing/Kneading/Beating/Emulsifying/Whisking(See figure B)
Operation:
Installing the bowl: (See figure A)
1. Press the release button (1) by turning it anti-clockwise, the
multifunction head will open and lift up to a vertical position.
2. Install the bowl on the appliance by turning it clockwise, you will hear
a click sound when it is locked in the correct position.
3. To lower the head of the appliance (9-1) press the button (1) and lower
until a click is heard.
4. Before using for the first time, clean all parts of the accessories with
soapy water, rinse and dry.
5. Place the appliance on a flat, clean and dry surface.
8

Depending on the nature of the ingredients, the bowl (13) with its
cover can be used to prepare up to 2.3 kg of dough.
1. Press the release button (1) by turning it anti-clockwise, the
multifunction head (9-1) will open and lift up to a vertical position.
2. Fit the bowl (13) onto the appliance by turning clockwise, until it locks
in position with a click sound and place the ingredients in it (see
figure B).
4. Fit the desired accessory (10-1,11-1,12-1), locating the shaft pin in the
groove and turn it a quarter turn towards you (anti-clockwise) to lock
it in position (see figure B).
5. Lower the multifunction head of the appliance to horizontal position
and press button again (a click should be heard).
6. During preparation, you can add ingredients through the opening of
the cover.
7. To stop the appliance, turn the control (2) back to “0” position.
Important
Check that all the outlet covers (8, 9) are fitted, the appliance will not
operate if the cover (8) is not correctly fitted.
The appliance has a thermostat which will be activated if the motor gets
and disconnect the plug from the power socket and wait for about
30minutes before turning on appliance again.
This appliance has many optional accessories, such as POINT PRO
Accessories model POAC001, POAC002, POAC003, POAC005, POAC006,
POAC008.
POAC001
Cookie set
POAC002
Juice extractor
POAC003
Blender attachment
POAC005
Slicer & Shredder
POAC006
Meat grinder
POAC008
Cubic attachment
9
GB
3. Position the cover on the bowl with the filling opening at the front of
the appliance (see figure B).

How to use “the timer”:
1. Select the attachment you need.
2. Install the attachment on the main appliance.
3. Plug in and power on. The light of LCD turns on. The appliance is now in
standby mode. That means time shown is “00:00”, and speed shown
as “0”.
4. Press button “+”/“-” to set the food processing time (30 seconds - 10
minutes), and then press “OK” button. The target time has been set.
5. Rotate the speed control switch, and the appliance will start to work
with speed you selected. The timer will start to count down (…3.2.1).
6. The appliance will stop working while the set time is reached. The
timer will then go back to “00:00”, accompanied by a “Beep” sound
and the LCD will flash for 3 seconds.
Caution:
If you don’t set the time, the timer will count up (1.2.3.4…10minutes).
The appliance will stop working when the timer reaches 10 minutes.
Cleaning:
1. Unplug the appliance.
2. Never immerse the motor until in water or put it under running water
wipe it with a soft dry or slight damp cloth.
3. For easier cleaning, quickly rinse the accessories after use.
4. The bowl and the accessories are dishwasher safe.
Code
E03
Explanation The solution
The cover (8) is removed from the
appliance. Or the multifunction head
(9-1) has been released. The LCD
keeps flashing.
Install the cover. Or lockthe
multifunction head of the
appliance to the horizontal
position.
Fault code on LCD:
10

Processing Guide
Accessory Food Maximum Operation
timeSpeeds Preparation
Whisk /
Egg white
Cream
(include
38% fat)
12 pcs 3 minutes 5-8
5 minutes
250 ml 3-5 minutes 5-8
/
Dough
hook
Flour
/
Salt 21 g
1500 g
Yeast 9 g
Sugar 6 g 1-2
Water
(43ºC) 858 g
Lard 42 g
Mixer blade
Flour 100g
/
Castor
sugar 100 g
Margarine 100 g
Egg 2 pcs
3minutesPork 2000g
11
GB
42g

Specification
Model: POKM67AW1800
Operating voltage: AC220-240V 50/60Hz
Power consumption: 1800W
This symbol on the product or in the instructions means that
your electrical and electronic equipment should be disposed at
the end of its life separately from your household waste.
There are separate collection systems for recycling in the EU.
For more information, please contact the local authority or your
retailer where you purchased the product.
12

Imported and Exclusively marketed by:
Power International AS,
PO Box 523, N-1471 Lørenskog, Norway
Power Norge:
https://www.power.no/kundeservice/
T: 21 00 40 00
Expert Danmark:
https://www.expert.dk/kundeservice/
T: 70 70 17 07
Power Danmark:
https://www.power.dk/kundeservice/
T: 70 33 80 80
Punkt 1 Danmark:
https://www.punkt1.dk/kundeservice/
T: 70 70 17 07
Expert Finland:
https://www.expert.fi/tuki/asiakaspalvelu/
T: 020 7100 670
Power Finland:
https://www.power.fi/tuki/asiakaspalvelu/
T: 0305 0305
Power Sverige:
https://www.power.se/kundservice/
T: 08 517 66 000
13
GB

SIKKERHETSADVARSLER
Følg alle forholdsreglene som er oppført nedenfor for din egen sikkerhet
og for å redusere risikoen for personskade eller elektrisk støt.
1. Les alle anvisningene nøye før du tar i bruk apparatet, og oppbevar dem
for fremtidig referanse.
eller fester vispene/ eltekroken/ kremvispen og før rengjøring av
apparatet.
3. Unngå å berøre bevegelige deler. Hold hender, hår, klær samt slikkepott
og annet tilbehør, borte fra vispene/ eltekrokene under bruk for å
redusere risikoen for personskade og/ eller skade på mikseren.
4. Dette apparatet er kun til husholdningsbruk. Det må ikke brukes til
profesjonell catering. Bruk ikke apparatet til andre formål enn de som
er uttrykkelig oppgitt i brukerveiledningen.
5. La ikke apparatet stå uten tilsyn når det er i bruk.
6. Før du bruker dette apparatet, må du sørge for at spenningen i
strømforsyningen er den samme som angitt på merkeskiltet på
apparatet.
7. Bruk aldri skjøteledning, og være forsiktig slik at strømledningen ikke
kommer i kontakt med eltekrokene og trådvispene når de roterer.
8. Ikke bruk apparatet hvis strømledningen eller støpselet er ødelagt, og
bruk ikke apparatet med ødelagt tilbehør. Oppsøk kvalifiserte
teknikere for å få hjelp.
9. Ikke senk motorenheten, ledningen eller støpselet ned i væske.
10. Sørg for at strømledningen ikke er nær noen varm overflate, og at den
ikke henger over kanten på arbeidsflaten.
11. Hvis strømledningen er skadet, må den skiftes av produsenten, av
produsentens servicerepresentant eller av en tilsvarende kvalifisert
person for å unngå fare.
12. Løs aldri ut vispene, eltekrokene eller kremvispene når apparatet er i
bruk.
13. Du kan bare bruke ett tilbehør av gangen.
14. Dette apparatet kan brukes av barn fra og med åtte år og personer
med reduserte fysiske, sensoriske eller mentale evner eller mangel på
erfaring og kunnskap hvis de er under tilsyn eller har mottatt
instruksjoner om bruk av apparatet på en sikker måte og forstår faren
dette innebærer. Barn skal ikke leke med apparatet. Barn må ikke
foreta rengjøring og vedlikehold uten tilsyn.
14

15. Ikke misbruk produktet. Det kan forårsake skade ved misbruk.
16. Vær varsom når du håndterer de skarpe skjærebladene, tømmer bollen
og rengjør.
stativet.
22. Apparatet må kobles til en jordet stikkontakt.
23. Hvis du må bruke en skjøteledning, må den være jordet, og du må
sørge for at ingen kan snuble i den.
24. Ikke sett noe tilbehør som inneholder metall inn i en mikrobølgeovn.
25. Dette apparatet er beregnet for bruk i husholdninger og lignende
bruksområder, som:
– kjøkken for ansatte i butikker, kontorer eller arbeidsmiljøer
– gårdshus
– av kunder på hoteller, moteller og andre lignende miljø
– enkle overnattingssteder
18. Advarsel: Når Tilbehøret Er Demontert Må Du Aldri Berøre Den
Bevegelige Akselen!
19. Vær forsiktig hvis varm væske helles i mikseren da den kan bli kastet
ut av apparatet på grunn av plutselig dampdannelse.
20. Apparatet må ikke brukes sammenhengende lengre enn 7 minutter
om gangen. La apparatet avkjøles i minst 30 minutter før neste bruk.
21. Advarsel: Ikke berør denne delen av maskinen.
15
NO

1. Utløserknapp for flerfunksjonelt hode
2. Hastighetsbryter
3. «+»-knapp
4. «OK»-knapp
5. «-»-knapp
6. LCD-skjerm
7. Strømuttak for blender
8. Deksel
9. Avtakbart deksel for kvernstrømuttak
9-1. Flerfunksjonelt hode
10. Utløserknapp for skjærehus
11. Strømuttak for kvern
12. Lokk til bolle
13. Bolle i rustfritt stål (maks. 6,7 l)
10-1. Visp
11-1. Eltekrok
12-1. Blenderblad
Produktoversikt
16

Hastigheter: P-0-1-2-3-4-5-6-7-8. (9 for noen valg.)
Tidtaker: 00:00–10:00. Maksimal tidsinnstilling er 10 minutter.
For tidsinnstilling opptil 5 minutter:
Tiden som vises på LCD-skjermen øker (+) eller reduseres (-) med 30
sekunder hver gang du trykker på knappene «+»/«–».
For tidsinnstilling mellom 5 og 10 minutter:
Tiden som vises på LCD-skjermen øker (+) eller reduseres (-) med 1 minutt
hver gang du trykker på knappene «+»/«–».
LCD:
Tips:
Hastighetskontrollbryteren lyser hvitt i ventemodus og begynner å
blinke i drift.
I ventemodus slukkes lyset for hastighetskontrollbryteren etter 3
minutter.
Kolonnen indikerer faktisk eektnivå under bruk. Når eekten når
1200 W og mer, kommer STRØM-kolonnen i posisjon A og videre.
Lyset på hastighetskontrollbryteren skifter farge til rød fra hvit og
begynner å blinke sammen med en pipelyd.
Vi fraråder bruk over lang tid når maskinen er i advarselsstatus.
17
NO

1. Trykk utløserknappen (1) ved å dreie den mot klokken, så vil det
flerfunksjonelle hodet åpnes og løftes opp til loddrett stilling.
2. Sett bollen på apparatet ved å vri den med klokken. Du hører et klikk
når den er låst i riktig posisjon.
3. Senk hodet på apparatet (9–1), trykk knappen (1) og senk ned til du
hører et klikk.
Drift:
Sette inn bollen: (Se figur A)
4. Før førstegangsbruk må du rengjøre alle delene og alt tilbehør med
såpevann og deretter skylle og tørke.
5. Plasser apparatet på et flatt, rent og tørt underlag.
Mikse/elte/vispe/piske (Se figur B)
18
A.

Viktig
Kontroller at alle uttaksdeksler (8, 9) er montert. Apparatet fungerer ikke
hvis dekselet (8) ikke er montert på riktig måte.
Apparatet har en termostat som aktiveres hvis motoren blir overladet.
Dersom termostaten er aktivert, slår du av apparatet, kobler pluggen fra
stikkontakten og venter i 30 minutter før du slår på apparatet igjen.
Dette apparatet støtter mye tilleggsutstyr, som for eksempel POINT
PRO-tilbehørmodell POAC001, POAC002, POAC003, POAC005, POAC006,
POAC008.
POAC001
Småkakesett
POAC002
Saftpresse
POAC003
Blender
Tilbehør
POAC005
Stor råkostkvern
POAC006
Kjøttkvern
POAC008
Kubetilbehør
Avhengig av ingrediensene kan bollen (13) med dekselet brukes til å
lage opptil 2,3 kg deig.
1. Trykk utløserknappen (1) ved å dreie den mot klokken, så vil det
flerfunksjonelle hodet (9-1) åpnes og løftes opp til loddrett stilling.
2. Sett bollen (13) på apparatet ved å vri med klokken til den låses på
plass med et klikk, og hell i ingrediensene (se figur B).
4. Monter ønsket tilbehør (10-1,11-1,12-1), finn akselpinnen i sporet, og vri
den en kvart omdreining i din retning (mot klokken) for å låse den på
plass (se figur B).
5. Senk det flerfunksjonelle hodet på apparatet i horisontal posisjon, og
trykk utløserknappen motorhodet igjen (Du skal høre et klikk).
6. Mens apparatet er i gang kan du tilsette ingredienser gjennom
åpningen på forsiden.
7. Vri kontrollen (2) tilbake til posisjonen «0» for å stoppe apparatet.
19
NO
3. Plasser dekselet på bollen med påfyllingsåpningen på forsiden av
apparatet (Se figur B).

Rengjøring:
1. Koble fra apparatet.
2. Senk aldri motoren i vann, og ikke legg den under rennende vann. Tørk
den med en myk, tørr eller lett fuktet klut.
3. Det blir enklere å rengjøre hvis du skyller tilbehøret raskt etter bruk.
4. Bollen og tilbehøret kan vaskes i oppvaskmaskin.
Kode
E03
Beskrivelse Løsning
Dekselet (8) er ikke satt på
apparatet. Eller det
flerfunksjonelle hodet (9-1) er
frigjort. Lyset i LCD-skjermen
blinker.
Sett på dekselet. Eller lås
det flerfunksjonelle hodet
på apparatet i vannrett
stilling.
Feilkode på LCD-skjermen:
Slik brukes «tidtakeren»:
1. Velg tilbehøret du skal bruke.
2. Sett tilbehøret på hovedenheten.
3. Koble til strøm og slå på. LCD-skjermen lyser. Apparatet er nå i
ventemodus. Det betyr at den viste tiden er «00:00», og hastighet
vises som «0».
4. Trykk knappene «+»/«-» for å stille inn behandlingstid (30
sekunder–10 minutter), og trykk deretter «OK»-knappen. Tiden er
angitt.
5. Drei hastighetsbryteren, så vil apparatet begynne med hastigheten du
har valgt. Tidtakeren begynner å telle ned (... 3, 2, 1).
6. Apparatet vil stoppe når den innstilte tiden nås. Tidtakeren går da
tilbake til «00:00», du hører et pip, og LCD-skjermen blinker i 3
sekunder.
Forsiktig:
Hvis du ikke stiller inn tiden, vil tidtakeren telle oppover (1, 2, 3, 4 … 10
minutter).
Apparatet stopper når tidtakeren når 10 minutter.
20
Other manuals for pro Series
29
This manual suits for next models
2
Table of contents
Languages:
Other point Kitchen Appliance manuals

point
point pro Series User manual

point
point POVSVC03 User manual

point
point POVSVS04 User manual

point
point pro Series User manual

point
point POFDH001W User manual

point
point pro Series User manual

point
point pro Series User manual

point
point BAKEASSIST User manual

point
point pro Series User manual

point
point POMF17SS User manual