manuals.online logo
Brands
  1. Home
  2. •
  3. Brands
  4. •
  5. POLA G
  6. •
  7. Toy
  8. •
  9. POLA G Bavarian Craftsman's tree User manual

POLA G Bavarian Craftsman's tree User manual

Sa. Nr. 405 570 0
D
F
GB
330997
Verwenden Sie nur POLA G-Cement.
Machen Sie sich vor dem Zusammenbau gut mit den Einzelteilen des Bausatzes vertraut.
Trennen Sie die Einzelteile erst dann ab, wenn sie gebraucht werden.
Verwenden Sie beim Zusammenbau wenig Klebstoff.
Sie werden dann mehr Freude an einem sauberen Modell haben.
Sollte trotz werkseitiger sorgfältiger Prüfung ein Teil fehlen oder fehlerhaft sein,
kreuzen Sie bitte das Teil in der Anleitung an und schicken Sie diese bitte an
POLA-Vertrieb: Gebr. FALLER GmbH, Abt. Kundendienst, Kreuzstrasse 9,
78148 Gütenbach.
Sie erhalten dann umgehend Ersatz.
Use POLA G-Cement only.
Familiarize yourself well with the components of the kit before assembly.
Do not tear off the components until the moment you need them.
Use glue sparingly on assembly, then you will enjoy your neat model even more.
If a part is missing or defective despite careful checking at the factory, please tick
the part concerned in your instructions and send it to:
POLA-Vertrieb; Gebr. FALLER GmbH, Abt. Kundendienst, Kreuzstrasse 9,
D-78148 Gütenbach, Germany.
You will receive replacement promptly.
Que utilisez la colle POLA G -Cement.
Avant l’assemblage, essayer de bien retenir les différentes pièces du jeu de construction.
Ne séparer les pièces particulières qu’au moment de les utiliser.
Utiliser peu de colle pour l’assemblage, vous aurez d’autant plus de plaisir avec un modèl propre.
Si, malgré un contrôle soigneux á l’usine, une pièce devait manquer ou être défectueuse,
marquer cette pièce d’une croix dans les instructions et envoyer ces dernières à:
POLA-Vertrieb; Gebr. FALLER GmbH, Abt. Kundendienst, Kreuzstrasse 9,
D-78148 Gütenbach ( R.F.A. ).
On vous la remplacera aussitôt.
Bayerischer
Handwerkerbaum
Bavarian
Craftsman’ s tree
Mât d’artisans
bavarois
Für die Montage benötigen Sie Plastik-Klebstoff
und Sekundenkleber.
Wir empfelen:
POLA - G - Cement (Art. Nr. 330593)
FALLER-Sekundenkleber EXPERT-RAPID (Art. Nr. 170500)
FALLER-Spezial-Seitenschneider (Art. Nr. 170688)
FALLER-Bastelmesser (Art. Nr. 170687)
Pattex
For mounting you need plastic cement
and split-second modelling cement.
Our recommendation:
POLA - G - Cement (Art. Nr. 330593)
FALLER split-second modelling cement EXPERT-RAPID (Art. Nr. 170500)
FALLER special side cutter (Art. Nr. 170688)
FALLER modeller’ s knife (Art. Nr. 170687)
Pattex
Pour le montage, utiliser de la colle plastique
et de la coller rapide.
Nous vous recommandons les produits suivants:
Colle POLA - G - Cement (Art. Nr. 330593)
Colle rapide FALLER-RAPID (Art. Nr. 170500)
Pince coupante diagonale spéciale FALLER (Art. Nr. 170688)
Couteau de bricolage FALLER (Art. Nr. 170687)
Pattex
2
Bei den angegebenen Maßangaben vier Löcher (jeweils 90 °
versetzt) mit Hilfe eines Bohrers (Duchmesser ca. 1 mm)
oder ähnlichem vorstechen.
Please drill 4 holes (each 90° misaligned to the next hole)
with a drill (diameter approx. 1mm) at the shown positions.
Tracer aux cotes indiquées quatre trous (décalés
respectivement de 90°) à l’aide d’un foret (diamètre env. 1
mm) ou similaire.
Oberteil und Unterteil mit POLA - G - Cement zusammen-
kleben ! Große Bohrungen in einer Linie ausrichten !
Bottom part and top part should be glued together with
POLA - G -Cement ! Big drill holes must be aligned !
Coller la partie supérieure et la partie inférieure avec du
ciment POLA - G ! Aligner les grands alésages sur une ligne !
Das Isolierband ansetzen und nach Oben abrollen.
Der Abstand zwischen den Isolierbandstreifen
beträgt ca. 20 mm.
Alle überklebten Löcher müssen wieder durch-
stoßen werden !
Unroll the insulating tape from the bottom to the
top. The distance between the insulating tape
stripes is appr. 20 mm.
All holes which have been covered by the
insulating tape must be broken through again !
Appliquer le ruban isolant et le dérouler vers le haut.
L’écart entre les bandes du ruban est d’env. 20 mm.
Tous les trous surcollés doivent à nouveau être
percés !
200mm
50mm
A
B
A
RICHTIG
CORRECT
CORRECT
FALSCH
WRONG
INCORRECT
Schneiden Sie die markierten Verbindungsstege nicht ab. Diese werden in den Holzmast gedrückt.
Do not cut off the especially marked connecting bars. Leave them on the figure and carefully push them into the wooden mast.
Ne pas couper les barrettes de liaison. Elles seront enfoncées dans le pylône en bois !
3
Die vier Haken in die vor-
gestoßenen Löcher eindrehen.
Die Kunststoffteile mit
Sekundenkleber kleben.
Turn the 4 hooks into the already
broken through holes.
The plastic parts should be glued
with split-second modelling
cement.
Visser les quatre crochets dans
les trous tracés. Coller les pièces
en matière synthétique avec de la
colle rapide.
Figuren mit Hilfe einer Zange vorsichtig aus der Platte heraustrennen und mit Sekundenkleber auf den angegebenen
Halterungen festkleben !
Cut the figures with the help of a pair of plummers out of the figures plate and glue them carefully with split-second model-
ling cement into the plastic parts !
Retirer les figurines prudemment avec des pinces de la plaque et les coller sur les support indiqués avec de la colle rapide !
C
D
B
C
Inhalt Tüte Contenu sachet
Contents bag Inhoud zakje
Inhalt Tüte Contenu sachet
Contents bag Inhoud zakje
2/5
3/1A 3/1A
3/1E
3/5
3/1F
3/1G
3/1H
3/1I
3/1B ca.
18 mm
3/1C
3/1D
3/1B
3/1C
3/1D 3/1E
3/5
3/1F
3/1G
3/1H
3/1I
A 09
A 09
A 07
A 07
A 15
A 03
A 03
A 05
A 05
A 13
A 14
A 12
A 11
A 11 A 12
A 17
A 10
A 10
A 08
A 08
A 16
A 04
A 04
A 06
A 06
A 01
A 01
A 02
A 02
A 19 A 19 A 20
A 18
A 20
A 15 A 16
A 13 A 14
A 17 A 18
4
4 x
4 x 4 x
EF
GH
E
E
F
G
IJK
Feingegliederte Kette in acht Teile à 66 mm (25 Glieder) trennen !
Cut the fine chain into 8 parts of 66 mm each (25 links) !
Séparer la chaîne à maillons fins en huit parties de 66 mm chacune (25 maillons) !
Mit Hilfe einer Pinzette ein Kettenglied vorsichtig aufbiegen und nach
anbringen von Position I wieder schließen (siehe Pos. K) !
Open one of the links carefully with the help of tweezers and close
this link again after attaching Position I (see Pos, K) !
A l’aide d’une pincette, déplier prudemment un maillon de chaîne et le
refermer après application de la position I (voir pos. K) !
I
J
04-11
1/1
2/3
3/3
Deco
E
E
Inhalt Tüte Contenu sachet
Contents bag Inhoud zakje
5
K
L
Weiß-blaues und gelb-weißes Stoffband in je 4 Stücke à 200 mm abschneiden und die Mitte des Stoffbandes mit
Bleistift markieren.
Cut 4 pieces each (length 200 mm each) of the white-blue and yellow-white fabric ribbon and mark the middle of
the fabric ribbon with a pencil.
Couper la bande d’étoffe blanc-bleu et jaune-blanc en 4 pièces de 200 mm et marquer le milieu de la bande
avec un crayon.
Der Kranz wird nun vorsichtig gebogen und mit POLA - G - Cement zusammengeklebt. Diese Klebestelle gut
zusammendrücken (z. B. mit Hilfe einer Wäscheklammer) und austrocknen lassen (ca. 10 Minuten).
Carefully bend the wreath and glue it together with POLA - G - Cement. This glueing point must be pushed
together strongly (e. g. by means of a clothes-peg) and should dry out for appr. 10 minutes.
Recourber ensuite prudemment la couronne et la coller avec du ciment POLA - G. Bien comprimer le point de
collage (p. ex. à l’aide d’une pince à linge) et le laisser sécher (env. 10 minutes).
Die Markierung der Stoffbänder wird nun mit Pattex oder mit sehr wenig Sekundenkleber auf dem Kunststoffteil
fixiert. Danach wird zuerst die linke Seite des Bandes auf der Mittelmarkierung mit Pattex oder sehr wenig
Sekundenkleber festgeklebt und dann die rechte Seite (siehe Abb.).
Attach the marked points of the fabric ribbons carefully with Pattex or with very little split-second modelling
cement to the plastic part. After this first glue the left side of the fabric ribbon to the middle mark and then the
right side (see fig.).
Fixer à présent le marquage des bandes d’étoffes avec du Pattex ou très peu de colle rapide sur la partie en
matière synthétique. Coller ensuite d’abord la partie gauche de la bande sur le marquage médian avec du
Pattex ou très peu de colle rapide et ensuite la partie droite (voir fig.).
M
N
O
L
M
N
Weiß-Blau
White-Blue
Blanc-Bleu
Gelb-Weiß
Yellow-White
Jaune-Blanc
Weiß-Blau
White-Blue
Blanc-Bleu
Gelb-Weiß
Yellow-White
Jaune-Blanc
K K K
3/4
6
O
P
H
D
Q
P
Den Kranz nur auf die
Bodenplatte legen !
Position the wreath on
the socket !
Placer juste la couronne
sur la plaque de fond !
Der Kranz wird von unten her an den Haken befestigt !
The wreath will be attached to the hooks from the bottom !
Fixer la couronne à partir du bas sur le crochet !
7
R
S
T
3/2
R
R
R
R
M
S
Der Kranz wird nun vorsichtig gebogen und mit POLA - G - Cement zusammengeklebt. Diese Klebestelle gut
zusammendrücken (z. B. mit Hilfe einer Wäscheklammer) und austrocknen lassen (ca. 10 Minuten).
Carefully bend the wreath and glue it together with POLA - G - Cement. This glueing point must be pushed
together strongly (e. g. by means of a clothes-peg) and should dry out for appr. 10 minutes.
Recourber ensuite prudemment la couronne et la coller avec du ciment POLA - G. Bien comprimer le point de
collage (p. ex. à l’aide d’une pince à linge) et le laisser sécher (env. 10 minutes).
Die Markierung der Stoffbänder wird nun mit Pattex oder mit sehr wenig Sekundenkleber auf dem Kunststoffteil
fixiert. Danach wird zuerst die linke Seite des Bandes auf der Mittelmarkierung mit Pattex oder sehr wenig
Sekundenkleber festgeklebt und dann die rechte Seite (siehe Abb.).
Attach the marked points of the fabric ribbons carefully with Pattex or with very little split-second modelling
cement to the plastic part. After this first glue the left side of the fabric ribbon to the middle mark and then the
right side (see fig.).
Fixer à présent le marquage des bandes d’étoffes avec du Pattex ou très peu de colle rapide sur la partie en
matière synthétique. Coller ensuite d’abord la partie gauche de la bande sur le marquage médian avec du
Pattex ou très peu de colle rapide et ensuite la partie droite (voir fig.).
Weiß-Blau
White-Blue
Blanc-Bleu
Gelb-Weiß
Yellow-White
Jaune-Blanc
Weiß-Blau
White-Blue
Blanc-Bleu
Gelb-Weiß
Yellow-White
Jaune-Blanc
Mit Hilfe einer Pinzette ein Kettenglied vorsichtig aufbiegen und nach
anbringen von Position S wieder schließen (siehe Pos. T) !
Open one of the links carefully with the help of tweezers and close
this link again after attaching Position S (see Pos. T) !
A l’aide d’une pincette, déplier prudemment un maillon de chaîne et le
refermer après application de la position S (voir pos. T) !
J
4 x
8
8 x 6 x
U
Der Kranz wird von oben her an den Haken befestigt !
The wreath will be attached to the hooks from the top !
Fixer la couronne à partir du haut sur les crochets !
Grobgegliederte Kette in sechs Teile à 97 mm (31 Glieder) trennen !
Reststück in zwei Teile à 85 mm (27 Glieder) und zwei Teile à 32 mm (10 Glieder) trennen !
Cut the thick chain into six pieces of 97 mm each (31 links) !
Remaining piece of the chain should be cut in two pieces of 85 mm (27 links) and two pieces of 32 mm (10 links) !
Séparer la chaîne à maillons gros en six parties de 97 mm (31 maillons) !
Séparer la pièce restante en deux parties de 85 mm (27 maillons) et deux parties de 32 mm (10 maillons) !
V
WX
Q
T
Inhalt Tüte Contenu sachet
Contents bag Inhoud zakje
4/1
4/2
W
9
Y
Z
V
V
V
4/1
4/1
X
X
U
X
X
V
V
V
4/1
Y
10
a
b
Kette 32 mm
Chain 32 mm
Chaîne 32 mm
Kette 85 mm
Chain 85 mm
Chaîne 85 mm
Kette 32 mm
Chain 32 mm
Chaîne 32 mm
Kette 85 mm
Chain 85 mm
Chaîne 85 mm
Z
2/1
2/4
2/6
X
X
W W
a
11
3 x
3 x
cd
e
b
c
d
02-16
01-21
2/2
01-14 01-22
d
d
2/2
2/2
2/2
02-14
12
f
Inhalt Tüte Contenu sachet
Contents bag Inhoud zakje Inhalt Tüte Contenu sachet
Contents bag Inhoud zakje
e

This manual suits for next models

1

Other POLA G Toy manuals

POLA G 331779 User manual

POLA G

POLA G 331779 User manual

POLA G 331783 User manual

POLA G

POLA G 331783 User manual

POLA G 331767 User manual

POLA G

POLA G 331767 User manual

POLA G 331712 User manual

POLA G

POLA G 331712 User manual

POLA G 330934 User manual

POLA G

POLA G 330934 User manual

POLA G 331017/1 User manual

POLA G

POLA G 331017/1 User manual

POLA G 330945 User manual

POLA G

POLA G 330945 User manual

POLA G 331705 User manual

POLA G

POLA G 331705 User manual

POLA G 331723 User manual

POLA G

POLA G 331723 User manual

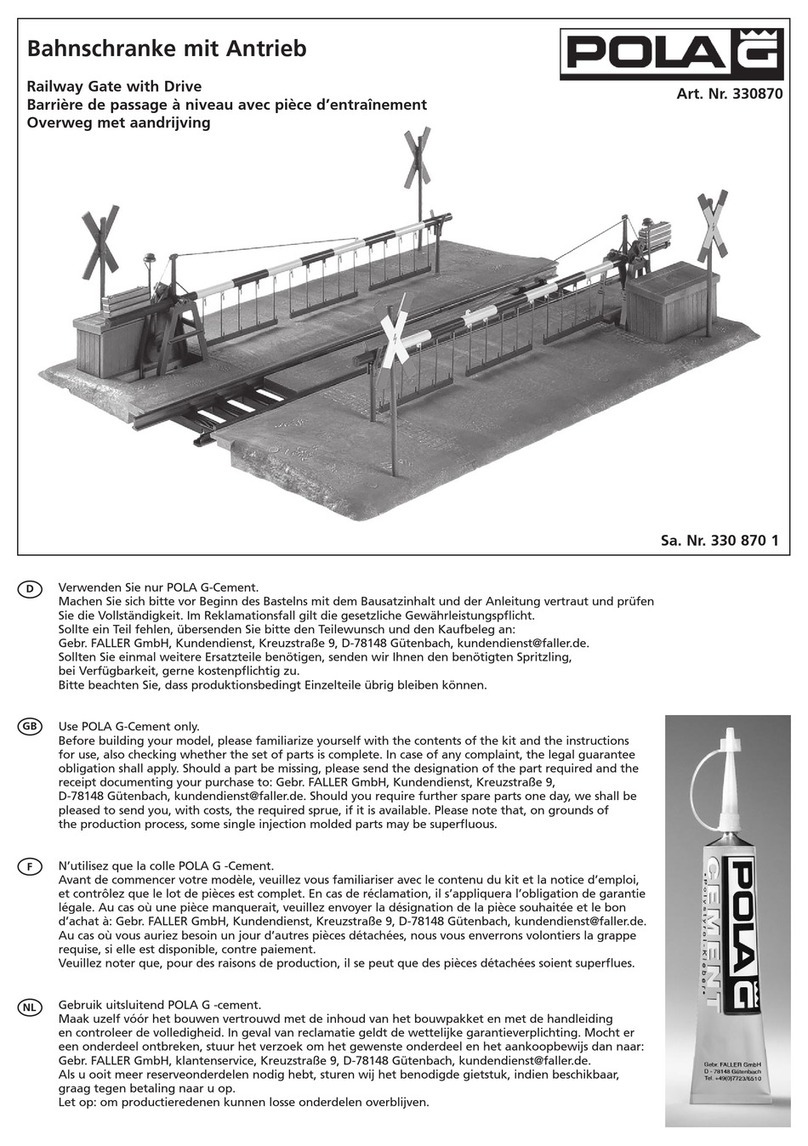
POLA G Railway Gate with Drive User manual

POLA G

POLA G Railway Gate with Drive User manual

POLA G Half-Timbered House with Stork’s Nest User manual

POLA G

POLA G Half-Timbered House with Stork’s Nest User manual

POLA G 330952 User manual

POLA G

POLA G 330952 User manual

POLA G Hans Meissel User manual

POLA G

POLA G Hans Meissel User manual

POLA G 331718 User manual

POLA G

POLA G 331718 User manual

POLA G Train operation equipment set 331746 User manual

POLA G

POLA G Train operation equipment set 331746 User manual

POLA G Hans Traub User manual

POLA G

POLA G Hans Traub User manual

POLA G 331755 User manual

POLA G

POLA G 331755 User manual

POLA G 330996 User manual

POLA G

POLA G 330996 User manual

POLA G Farm Shop User manual

POLA G

POLA G Farm Shop User manual

POLA G Hammersmith's shop User manual

POLA G

POLA G Hammersmith's shop User manual

POLA G Vegetables market stall User manual

POLA G

POLA G Vegetables market stall User manual

POLA G One-Family House User manual

POLA G

POLA G One-Family House User manual

POLA G 1946 User manual

POLA G

POLA G 1946 User manual

POLA G 330924 User manual

POLA G

POLA G 330924 User manual

Popular Toy manuals by other brands

VQ Model Junkers JU-52 instruction manual

VQ Model

VQ Model Junkers JU-52 instruction manual

LeapFrog Blue's Clues & You! Storytime With Blue instruction manual

LeapFrog

LeapFrog Blue's Clues & You! Storytime With Blue instruction manual

Eduard Spitfire Mk.XII landing flaps manual

Eduard

Eduard Spitfire Mk.XII landing flaps manual

Auhagen 14 488/1 manual

Auhagen

Auhagen 14 488/1 manual

Australian Railway Kits NSWGR C34 4-6-0 instruction manual

Australian Railway Kits

Australian Railway Kits NSWGR C34 4-6-0 instruction manual

Marklin Digital 60985 manual

Marklin Digital

Marklin Digital 60985 manual

Beyblade Bump King instructions

Beyblade

Beyblade Bump King instructions

Hubsan Spy Hawk H301S owner's manual

Hubsan

Hubsan Spy Hawk H301S owner's manual

LGB 20781 instruction manual

LGB

LGB 20781 instruction manual

Mega Bloks Call of Duty 06879 instructions

Mega Bloks

Mega Bloks Call of Duty 06879 instructions

Tomy 2037 quick start guide

Tomy

Tomy 2037 quick start guide

Jamara G230.4 Gyro Instruction

Jamara

Jamara G230.4 Gyro Instruction

Wishbone flip instructions

Wishbone

Wishbone flip instructions

KidKraft What's Cookin' Kitchen Assembly instructions

KidKraft

KidKraft What's Cookin' Kitchen Assembly instructions

LEGO STAR WARS 75135 Building instructions

LEGO

LEGO STAR WARS 75135 Building instructions

Chicco JOHNNY COUPE manual

Chicco

Chicco JOHNNY COUPE manual

Lionel Silver Bell Express owner's manual

Lionel

Lionel Silver Bell Express owner's manual

Eduard 32 556 Assembly instructions

Eduard

Eduard 32 556 Assembly instructions

manuals.online logo
manuals.online logoBrands
  • About & Mission
  • Contact us
  • Privacy Policy
  • Terms and Conditions

Copyright 2025 Manuals.Online. All Rights Reserved.