•Check the water level in the cooler. Confirm that the pump is
completely submerged in the water.
• Check for kinks. nsure there are no kinks in the hoses,
insulated tubing or therapy pad.
• Adjust the belt. nsure that the belt(s) holding the therapy
bladder to the body are not too tight and impeding flow.
• Check for obstructions. Turn the system off. Disconnect
couplings to ensure there is not an obstruction. Remove
anything lodged in the coupling or tubing. Also ensure there are
no obstructions at the bottom pump intake in the reservoir.
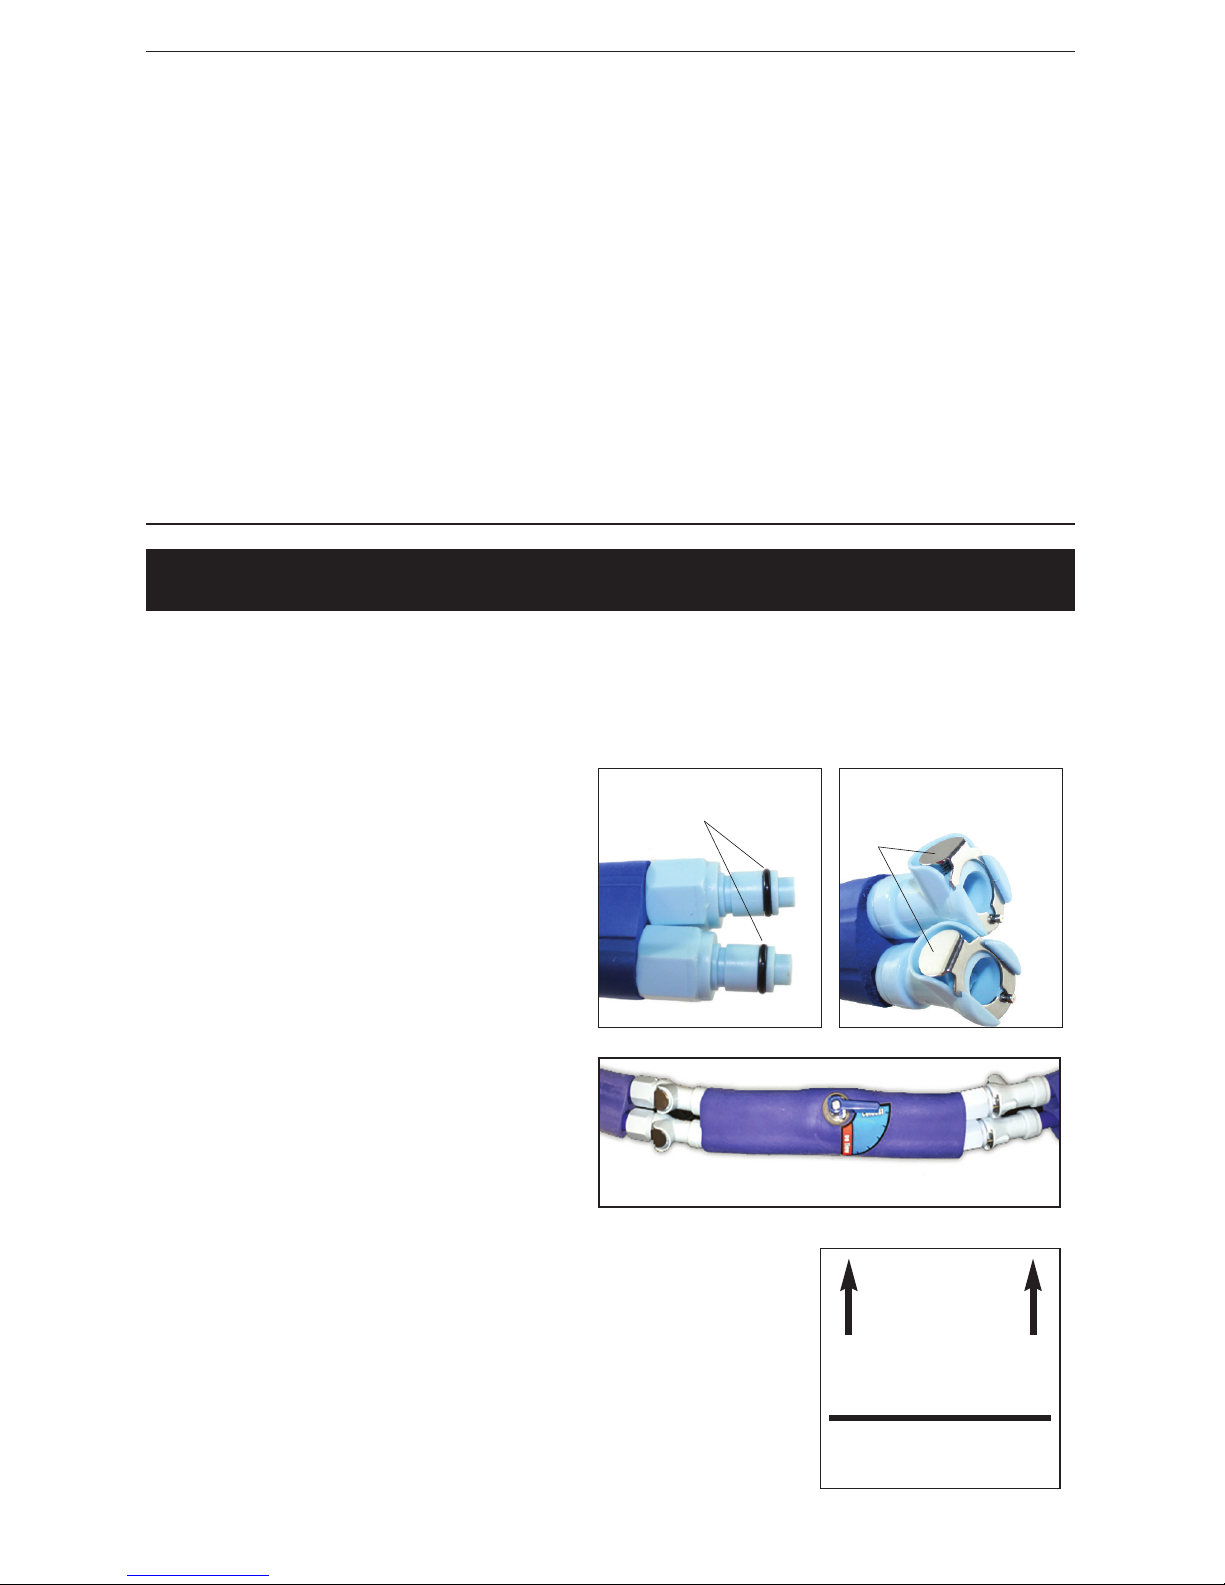
• Check the couplings. Confirm that the bladder is properly
connected. (Couplings should “click” when locked) Reseat
couplings between the hose and the bladder. Turn the system
off, disconnect couplings and reconnect. When connecting the couplings, be sure the
metal tab on the female coupling is pushed down before trying to connect.
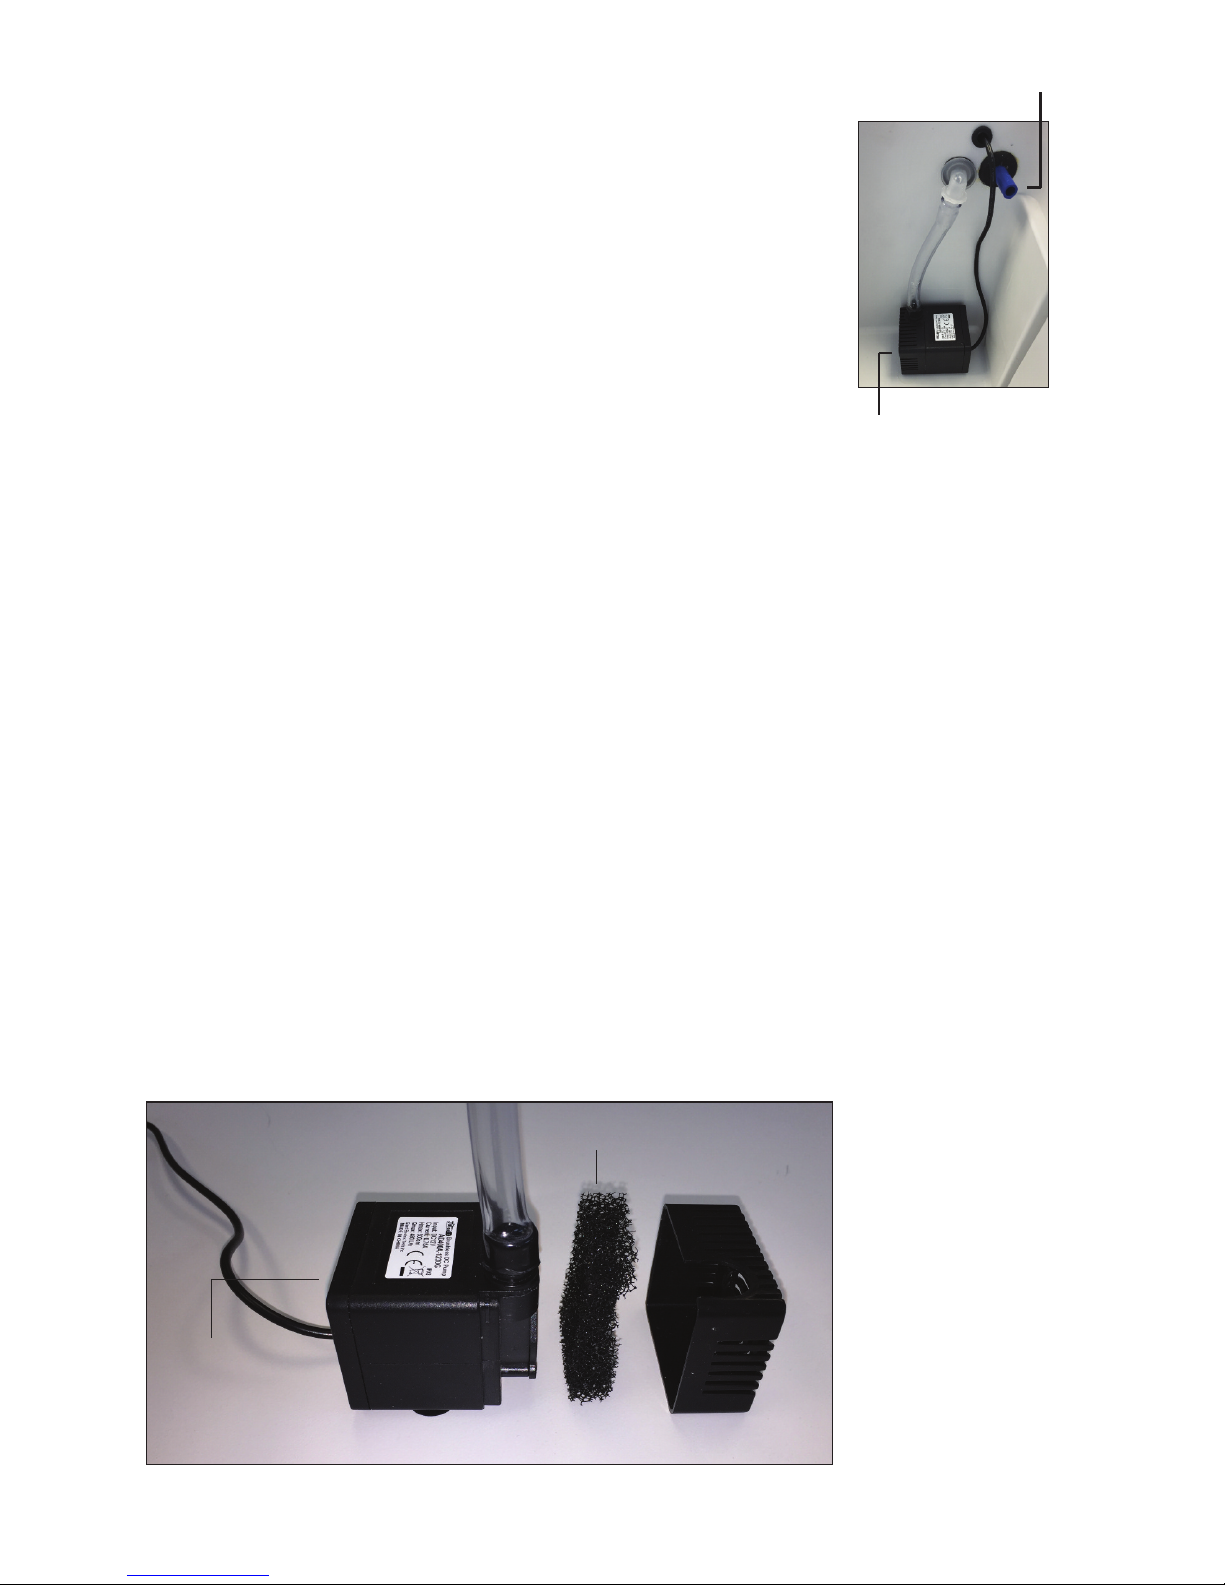
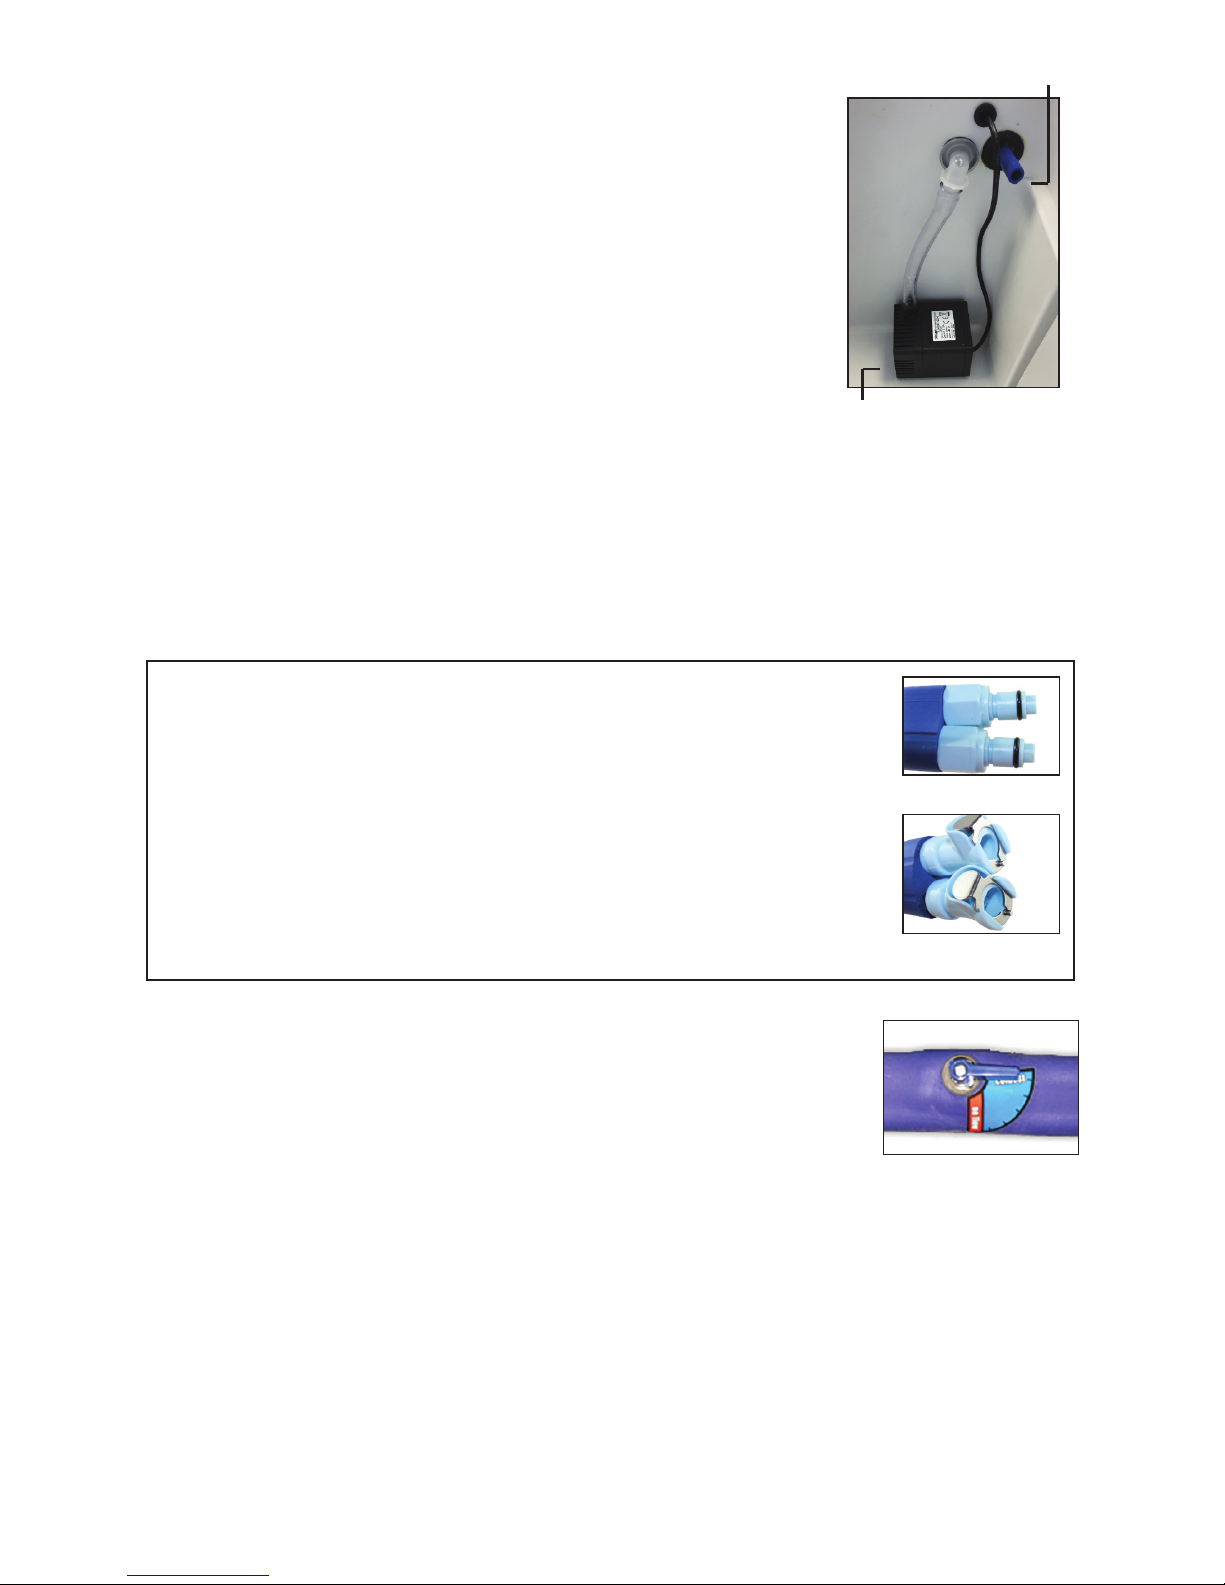
• Check the pump. Occasionally an air bubble can get lodged in the pump intake. The pump
is held to the bottom of the reservoir with suction cups. Pull the pump off the bottom and
turn the pump motor vertically to horizontally to dislodge any air bubble.
• Remove the bladder from the body and run the system with the bladder on a flat surface.
If there is flow, put on the target body part while running.
If water is flowing out the top water return flow tu e:
• Make sure the reservoir is filled with ice. Note the line inside the cooler.
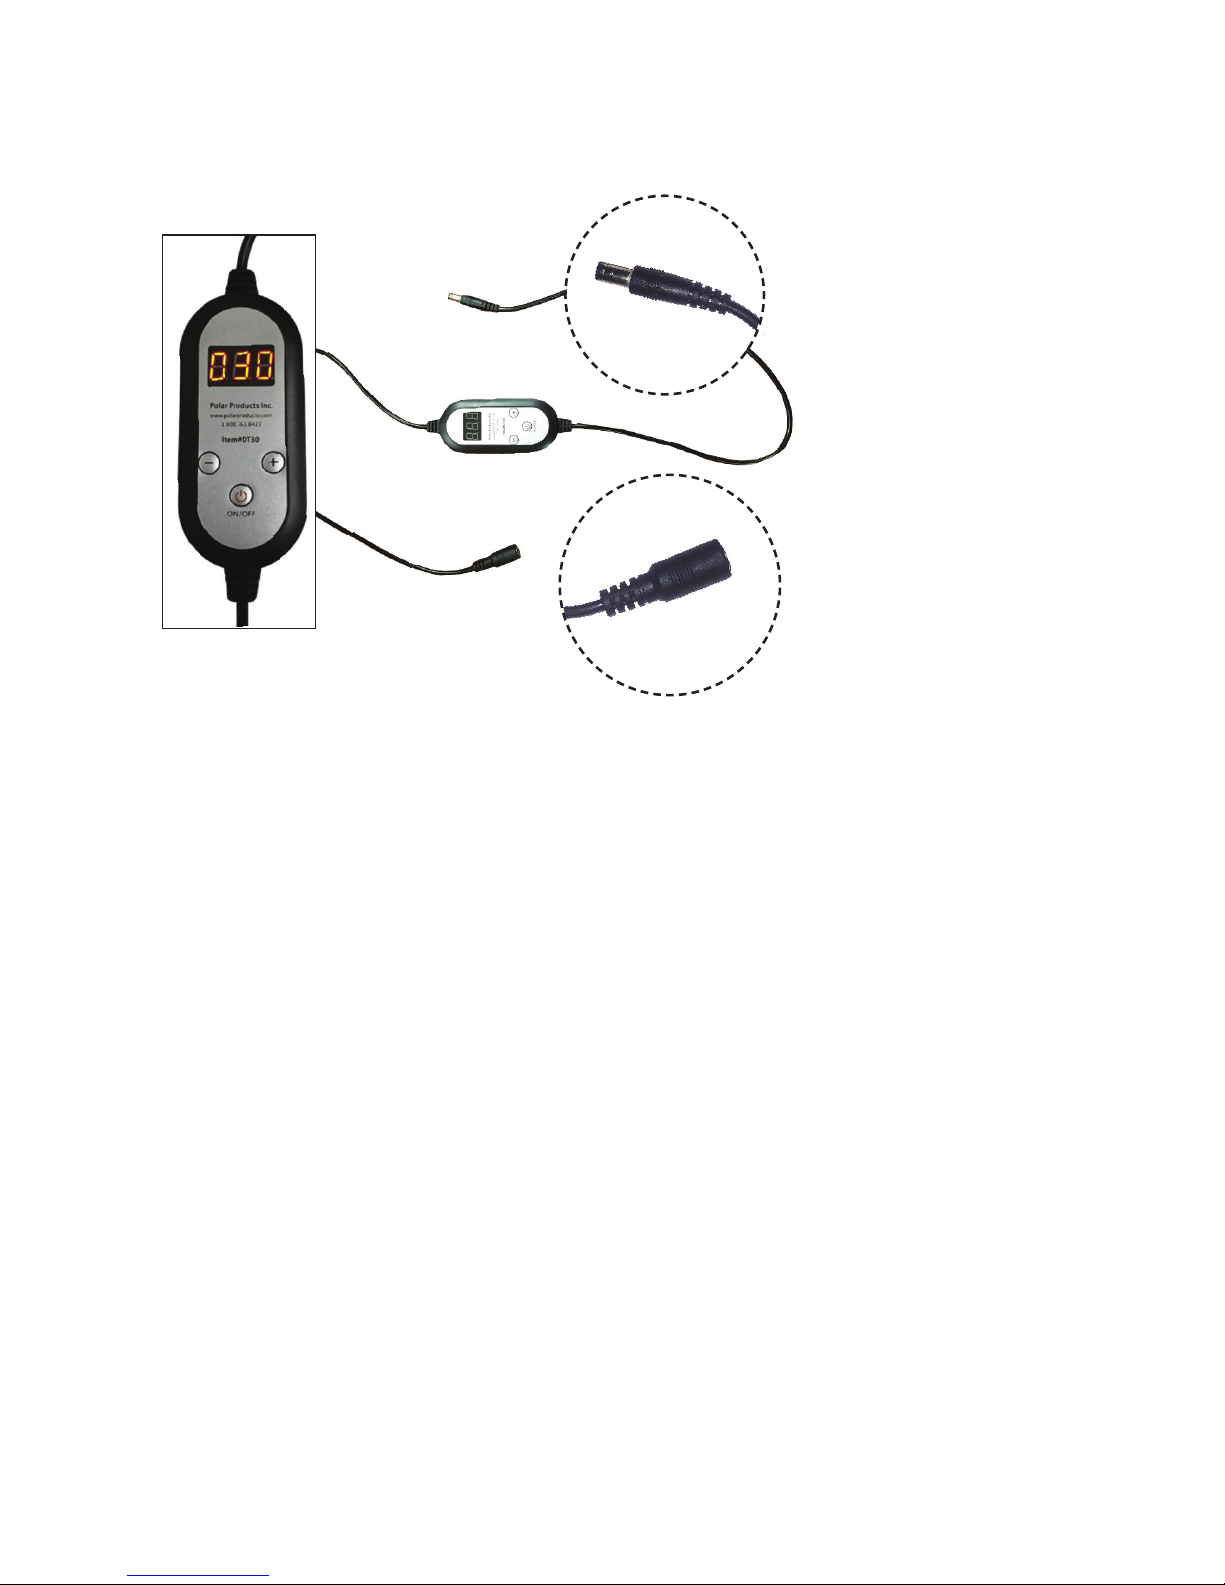
• If the optional temperature control attachment has been purchased
with the system: nsure that the temperature control is turned to
maximum cold (“COLD ST”)
If the unit is leaking at the couplings:
If a leak exists, turn off the unit. Disconnect and reconnect the couplings, make sure both
sides are clicked in properly. When connecting the couplings ensure that the silver tab
platform on the female coupling is pressed down prior to insertion. NOTE: Couplings have
rubber “O” rings that can become worn and dysfunctional. eplacement couplings may
need to be purchased from Polar Products.
If the unit is still not working:
Contact Polar Products Customer Service at 800.763.8423 for additional assistance. Be sure
to have the original invoice number, approximate date of purchase, and who the unit was
purchased from. Please note our warranty on page 10.
6
Water Return Flow Tube
Pump
Male Coupl ngs
Female Coupl ngs
T OUBLESHOOTING TIP
A good way to isolate the problem is to remove the couplings from the
insulated tubing attached to the reservoir. To do this simply turn off
the unit, pull off (or cut off) the couplings, place the end of the tubes
over a sink and then turn the system on. If water flows freely, there is
an obstruction in the coupling, bladder or bladder tubing. Couplings
can become blocked with minerals, hair, etc. Use a paper clip to clear
the blockage. A new coupling may be necessary. To reattach the
couplings, simply cut the tubing back to unused tubing and push the
coupling back into the tube.
Turn knob to “Coldest”