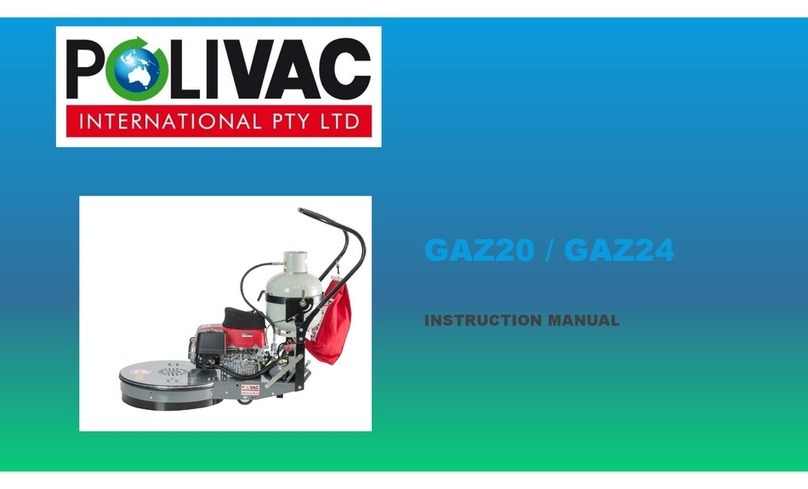
Polivac ST2100 User manual

1
POLIVAC GAS STRIPPER
STRIPPING MACHINE
ST2100
Operations Manual & Trouble Shooting Guide

2

3
OWNER’S MANUAL TABLE OF CONTENTS
Introduction ………………………………………….………………………. 4
Use & Care ………………………………………………….………………… 4
Safety Precautions ………………………………………………………… 4
Unpacking Instructions ………………………………….………………. 5
Machine Preparation ………….…………………………….……………. 5
Starting the Engine ………………………………………….……………. 5
Operation of Stripper ………………………………………..……………. 5
Stopping the Engine ……………………………………….……………… 5
Maintenance ……………………………………………………….………… 6
Do’s & Don’ts ………………………………………………………….…….. 7
Machine’s Bottom Diagram………………………………..……………. 8
Machine’s Top Diagram ………………………………….……………… 9
Parts List …..……………………………………………………….………… 10 & 11
Warranty Policy ..…………………………………………………….…….. 12
IMPORTANT
The following details should be recorded here for your records.
•Machine Model: _____________________________________________
•Machine Serial Number:_____________________________________________
•Motor Type: _____________________________________________
•Motor Serial Number: _____________________________________________
•Purchase Date: _____________________________________________
•Purchase From: _____________________________________________
•Invoice Number: _____________________________________________

4
INTRODUCTION
Congratulations on your purchase of a Polivac Gas Stripping Machine.
This machine has been designed to produce an optimum result with a minimum of effort and investment.
For you to receive the utmost from your investment and keep your machine serving you for many years to
come, you will need to establish a proper maintenance schedule.
Premature failure of the engine can be quite expensive and is the major reason for machine downtime.
It is essential that the items listed below are constantly addressed.
NB This manual should be read and implemented in conjunction
with the motor manufacturers manual.
1. OVERHEATING is the major cause of engine failure. Keep the cooling air debris filter clean.
Protect your machine and allow any foreign matter to build up on the cooling fins of the engine.
2. LOW AND DIRTY OIL is the next most common cause of the engine failure.
•Change the oil according to the motor manufacturers recommendations and check the
oil level and condition daily before each use.
3. YOUR GAS STRIPPER MUST NEVER BE TILTED ON TO THE LEFT HAD SIDE (VIEWING
FROM BEHIND THE UNIT).
•This will cause oil to seep into the carburettor and head of the engine, which will cause
excessive smoking and damage to the engine and regulator system.
USE AND CARE
Before using any new equipment, Polivac strongly recommends following safety precautions for all owners
and operators of gas-powered equipment.
SAFETY PRECAUTIONS
1. Polivac recommends the wearing of protective ear-wear as continuous exposure to high noise
levels may cause damage.
2. Do not touch the hot muffler/exhaust.
3. Do not allow any person to come in to contact with the rotating pad and keep other people
away from machine whilst it is in operation.
4. Do not leave machine unattended whilst running.
5. Do not leave machine accessible to untrained persons.
6. Do not operate the machine if the pad is off centre, damaged or missing. Substantial damage
to the floor, the machine or injury to personnel may result.
7. Vibration from machinery may cause numbness or tingling of the fingers in certain people.
Smoking, dampness, diet and heredity may contribute to the symptoms. Wearing warm
clothing gloves, exercising and refraining from smoking can reduce the effects of the machine.
8. The machine should be checked for any loose or damaged parts.
9. If a headache develops whilst machine is in operation it should be stopped and checked for
carbon monoxide emissions by a qualified repair agent.
10. If the smell of gas is evident, stop using the machine and take it outdoors. Have the source of
the leak repaired before continuing operation.
11. Never vent gas inside a building.
12. If your machine develops a high-pitched whistle, stop the engine and check the oil level. (Note
newer model are fitted with an alarm or cut off switch)

5
UNPACKING INSTRUCTIONS
Polivac gas buffers comes packaged in a palletised box designed to protect and secure the machine during
transportation. The machine is supplied with no gas cylinder. Before signing the delivery receipt, inspect the
packaging for damage (Remove box and check machine for damage). If damage is evident, note the damage
on the delivery receipt and contact your supplier.
MACHINE OPERATION
1. Adjust handle to a comfortable working height and tighten belts.
2. Check the engine oil level and condition.
3. Secure the gas cylinder on a machine (at the back of the machine) and lock the belts.
4. Fit and secure gas cylinder hose.
5. Open gas cylinder valve.
STARTING THE ENGINE
1. Set the throttle to the slow position.
2. With the gas cylinder valve open, engage the ignition key to the start position until the engine
begins operation, which shouldn’t be any longer than 4-5 seconds (in a normal weather
condition).
Run the engine at slow throttle position for approximately two minutes to allow efficient warm up. Advance to
full throttle and run machine. Preferably yourmachine should not be operated at anything less than full throttle
because a lower speed will cut down the incoming fresh air that is required for the cooling of the engine.
OPERATION OF STRIPPER
With the engine at full throttle, slowly bit the stripper forward until the brush/pad starts to contact the floor.
Then proceed to walk forward with the brush in full contact with the floor.
When stripping, avoid any loose surfaces, electrical points, door trims and any object which may come in a
contact with the brushes/pads other than the floor itself.
STOPPING THE ENGINE
1. Return the throttle to the extreme slow position.
2. Turn the ignition key back to OFF position & remove the key.
3. Remove the gas line hose from the cylinder.

6
MAINTENANCE
1. Prior to Use:
•Check the oil level and condition.
•Clean and/or replace engine and carburettor filters.
•Check brush/pad condition.
•Clear engine cooling vanes.
•Check all gas lines and fittings for damage, cuts or leaks.
2. 20 Hours / Weekly:
•Check brushes/pads and drive system for any loose or worn parts.
•Check drive belt for wear or slippage, adjust or replace as necessary.
•Check pulleys for tightness.
•Check handle bolts, wheel bolts and engine mounting bolts for tightness.
•Check throttle cable for wear.
•All point in 1.
3. 25 Hours 1 Bi-weekly:
•Change oil
•All points in 1 & 2.
4. 40 Hours / 1 Monthly:
•Recommended interval for carbon monoxide test.
•All points in 1, 2 & 3.
5. 100 Hrs / 16 Months:
•Change spark plug.
•All points in 1, 2, 3 & 4.
6. 300 Hours / Yearly:
•Return machine to authorised service centre for complete service.
•Valve clearance to be checked.
•All points in 1, 2, 3, 4 & 5.

7
IMPORTANT NOTICE
Polivac would like to direct your attention to the following issues so that correct and safe operation of your
gas-powered floor stripping is achieved. The superior performance of gas stripping has led to an increased
demand for the use of this type of floor maintenance equipment. This highlights the need for responsible
manufacturers, owners and operators to stress the importance of safety. These maintenance points are a
guideline to the upkeep of your machine. A more stringent program may be required depending on the type
and amount of use that your machine will be subject to.
DO’S
•DO check oil level before starting. It is importantthat the oil is maintained at the correct level for proper
lubrication and cooling of the engine. Consult the motor manufacturers manual for correct capacity
and oil specifications.
•DO check fuel level and hose connection before starting. The entire unit should be visually checked
for any loose or damaged hoses, fittings and connections.
•DO keep the debrisfilter clean (foamfilter on topof motor) and free of any dust or lint. Any obstructions
to the cooling system can cause excessive heating and premature failure of the engine.
•DO change the oil at least every month / 140 Hours. One of the primary functions od the oil is to cool
the motor. When the oil is dirty or not kept to adequate levels it cannot cool the motor efficiently and
can cause premature failure resulting in costly repairs and down time.
•DO check belt tension before starting. Incorrectly adjusted belts will cause slipping and premature
wear. The belt should have approximately movement when depressed.
•DO carry out routine maintenance as specified. This will prevent any unnecessary down time of your
machine.
•DO run the machine at full throttle. Running the machine at a lower speed will cut down the incoming
fresh air that is required for the cooling of the engine.
DON”TS
•DO NOT overfill the gas bottle. Overfilling will cause severe damage to the motor and the gas
regulator.
•DO NOT tip the machine over on its left-hand side. If it is tipped on this side the oil in the motor will
run through the carburettor. This will cause the inability of the unit to start or excessive smoking if it
does start.
•DO NOT use starting fluid to assist with hard to start engines. Starting fluids can leave a hot spot on
the piston, which will cause premature failure of the engine.
•DO NOT apply unnecessary pressure up or down on the stripping machine handle. Machine should
float easily across the floor.
•DO NOT over fill oil. Refer to the motor manufacturers manual for specifications and capacity.
•DO NOT strip any floor that has not been properly swept. Loose debris on the floor can become
hazardous flying missiles.
•DO NOT modify the unit in any way without the written permission of the Polivac International Pty.
Ltd. Any unauthorised modifications will void the warranty and Polivac International Pty. Ltd. Will not
be responsible for any damages to the unit or caused by the unit.
•DO NOT replace the brushes or make any adjustment whilst the motor is running or the gas is turned
on.

8
ST2100 GAS STRIPPER
GAS STRIPPER PARTS DIAGRAM

9
ST2100 GAS STRIPPER
GAS STRIPPER PARTS DIAGRAM

10
ST2100 GAS STRIPPER PARTS LIST
No.
CODE
QTY
DESCRIPTION
No.
CODE
QTY
DESCRIPTION
1
STR00
1
Body
52
GSS036
1
CIRCLIP
2
STR023
1
Splash Guard
53
STR025
1
SPACER
3
STR026
3
Abrasive Brush
54
STR015
1
BELT Aligner
4
AAA564
14
Bolt
55
GAS045
1
Washer Spring
5a
GAS041
1
Spring Washer
56
STR050
6
Bolt
5b
AAG236
14
Flat Washer
57
GAS045
6
Washer
6
STR002
1
B51 V-Belt
58
STR021A
2
Wheel Bracket
7
STR004
1
380J MBL- RIBSTAR
59
GAS069
6
Washer
8
STR003
1
B56 V-Belt
60
STR058
6
Locknut
9
STR052
1
Bolt 3/8 x 2
61
STR035
2
Circlip
10
GAS069
1
Washer Flat
62
VPV230
2
Bearing
11
PART OF
12
1
Big Spacer STR071
Small Spacer VPA782
63
STR013
2
Wheel
12
STR012
1
Pulley-Tensioner/Idler
64
VPV230
2
Bearing
13
GAS069
1
Washer
65
STR021
2
Wheel Axle Brackets
14
VPA782
3
Spacer
66
GAS086
1
½” Bolt
15
STR020
1
Clutch Lever Actuator
67
GAS054
1
Washer Spring
16
STR014
1
Clutch Cable
68
AAG470
1
½” Flat Washer
17
SLB043
1
Nut
70
STR053
1
5/16” Set Screw
18
AAG365
1
Washer
71
GAS045
1
Washer Spring
19
STR043
1
Spring
72
GAS049
1
5/16” Set Screw
20
GAS046
1
Washer
73
GAS045
1
Spring Washer
21
SLB043
1
Nylon Nut
74
AAA564
2
Set Screw
22
STR055
9
Counter Sunk Cap Head
75
SLB040
1
Washer
23
VPA412
3
Quick Release Adaptor
76
206784
1
Spacer
24
GAS031B
3
Circlip
77
GAS060
1
Bolt
25
VPV230
3
Bearing
79
AAG470
3
Washer
26
STR009
3
Pulley-Rear Brush/Drive
80
VPV555
1
Hand Grip Set of 2
27
STR010
3
Spring Clip
81
STR018
1
Handle
28
VPV230
3
Spacer
82
AAG236
1
Washer
29
GAS031A
1
Flat Washer
83
AAF140
1
Locknut
30
206784
2
Set Screw
84
STR059
2
Split Pin
31
SLB040
1
Circlip
87
OF 16
32
AAA564
1
Spacer
88
STR019
1
Clutch Lever
33
STR025
3
Skirt
89
GAS064
1
Wing Nut
34
STR025
6
Spacer
90
AAG365
1
Washer
35
STR024
1
Skirt
91
AAG365
1
Washer
36
GAS030
1
Counter Sunk Cap Head
92
GAS041
1
Bolt
37
GSS017
1
Bearing
93
GAS041
1
Bolt
38
VPA570
1
Bearing
94
AAG365
1
Washer
39
AAG470
1
Washer
95
GAS045
1
Washer –Spring
40
STR028
1
Belt Tensioner
96
SLB043
1
Locknut
41
GSS034
1
Circlip
97
GSS021
1
Gas Bottle Cage Assy.
44
GSS035
1
Bearing
98
STR027
1
Gas Bottle Hose
45
STR006
1
Pulley-Slave Drive
99
GSS029
1
Foam Support
46
AAF140
1
Nylon Nut
100
STR037
1
Foam Support
47
AAG236
1
Flat Washer
101
GSS013
1
Battery
48
STR031
1
Tension Rod
102
STR022
1
Battery Holder
49
SLB031
1
Nut
103
GAS042
4
R/Head

11
50
STR011
1
Shaft-Slave Pulley
105
STR030
1
Brass Elbow 45 Degree Fitting
51
GSS035
1
Bearing
106
GAS007
1
Throttle Cable
107
STR056
2
Bolt
129
GAS045
1
Washer Spring
108
GAS055
2
Nut
130
GSS043
1
Bolt
109
GAS062
2
Washer
131
GAS045
1
Washer Spring
110
GAS054
2
Washer Spring
132
STR054
1
Bolt
111
GAS055
2
Nut
133
STR054
1
Bolt
112
GAS058
4
Locknut
134
GAS045
1
Washer Spring
113
AAA564
2
Bolt
135
GSS028
1
Cowl Filter
114a
GAS041
1
Spring washer
136
STR001
1
Motor
114b
AAG236
2
Washer
137
GAS089
1
Key
115
GAS013
1
Gas Regulator
138
GSS044
1
Grub Screw
116
GAS034
1
Brass Fitting Elbow
139
STR005
1
Pulley-Motor
117
GAS077
1
Vacuum Line
140
STR038
1
Foam support
118
STR017
1
Weight (Locating Holes)
141
GAS018
1
Push Start Button
119
STR016
3
Weight (Locating Slots)
142
GAS060
4
Bolt
120
GAS035
1
Brass Fitting Elbow
143
GAS062
4
Washer
121
GAS070
1
Hose Clamp
144
GAS054
4
Washer Spring
122
STR039
1
Gas Hose Line
145
SLB045
4
Locknut
123
GAS070
1
Hose Clamp
146
SLB030
1
Bolt
124
GAS035
1
Brass Fitting Elbow
147
GAS042
1
Washer
128
STR054
1
Bolt
148
GAS058
1
Locknut

12
W
ARRANTY POLICY
1.
When
a
warranty
repair
is
requested,
the
purchaser
must
first
contact
any
of
Polivac’s
authorized
Service
Centres
with
proof
of
purchase
and
details
of
the
alleged
defect.
In
most
instances,
the
request
for
warranty
brought
to
the
attention
of
our
Service
Centres
or
Agents
is
handled
in
a
prompt
routine
manner
with
no
question
as
to
its
validity.
However,
some
requests
for
warranty
are
not
justified.
In
these
cases,
product
owners
will
be
made
aware
that
the
premature
failure
of
their
product
was
the
result
of
a
cause
not
covered
by
Warranty.
2.
The
Polivac
warranty
covers
only
DEFECTIVE
MATERIAL
and/or
DEFECTIVE
WORKMANSHIP.
It
does
not
cover
labour.
3.
Polivac
products
are
warranted
for
twelve
(12)
months
from
date
of
purchase
by
the
original
purchaser
against
faulty
workmanship
or
material.
The
warranty
covers
only
the
replacement,
repair
or
adjustment
of
any
part
which
in
the
opinion
of
Polivac
fails
because
of
a
fault
in
materials
or
workmanship:
a)
drive
motors
and
gearbox
assemblies
on
electrical
products
carry
a
two
(2)
years
warranty
b)
bodies
of
carpet
extraction
products
and
vacuum
cleaners
carry
a
three
(3)
years
conditional
warranty.
c)
battery
warranty
of
twelve
(12)
months
is
as
provided
by
the
manufacturer.
Terms
available
on
request.
4.
Where
the
product
has
been
rented
out
by
a
Hire
or
similar
company,
the
warranty
period
is
reduced
to
three
(3)
months.
5.
This
warranty
does
not
cover
service
calls,
travelling
time
or
consumable
parts
-
e.g.
drive
belts,
chains,
flexible
skirts
or
hoses,
dust
bags,
main
leads,
brushes,
buffers,
buffer
strips,
sanding
discs,
light
bulbs,
nozzles,
filters,
pressure
pumps,
piston
seals,
diaphragms,
squeegees
and
like
items.
6.
In
the
case
of
proprietary
components
used
by
the
manufacturer
in
the
product,
such
as
engines,
electrical
motors,
chargers
and
the
like,
Polivac
will
pass
on
any
warranty
provided
by
the
manufacture
of
such
items.
7.
Accidental
damage,
abuse,
misuse
or
neglect
of
the
product
is
not
covered
by
warranty.
8.
Fair
wear
and
tear
and
where
the
product
have
been
used
other
than
for
the
purpose
for
which
it
was
designed
is
not
covered
by
warranty.
9.
Use
of
non-approved
chemicals
and
detergents
in
the
product
will
void
the
warranty.
10.
Products
that
have
been
modified
are
not
covered
by
warranty.
11.
Products
that
have
not
been
serviced
at
their
recommended
intervals
by
an
authorised
Polivac
Service
Centre
or
Agent
are
not
covered
by
warranty
12.
Damage
to,
or
failure
of,
the
product
which
has
resulted
from
low
or
high
voltage,
the
use
of
an
incorrectly
sized
extension
lead,
or
a
coiled
electrical
extension
lead
is
not
covered
by
warranty.
13.
Repairs
carried
out
on
the
product
by
any
person
other
than
an
authorized
Polivac
repairer
will
void
the
warranty.
14.
All
freight
charges
to
and
from
the
manufacturer,
agent
or
service
centre
will
be
the
responsibility
of
the
owner.
15.
A
charge
for
traveling
time
and
labour
will
be
applicable
for
on-site
warranty
service.
16.
Polivac
reserves
the
right
to
replace
defective
parts
of
the
product
with
parts
or
components
of
similar
quality,
grade
and
composition
where
an
identical
part
or
component
is
not
available.
Goods
presented
for
repair
may
be
replaced
by
refurbished
goods
of
the
same
type
rather
than
being
repaired.
POLIVAC
WARRANTY
IS
SUBJECT
TO
THE
LAWS
AND
REGULATIONS
OF
THE
INDIVIDUAL
STATES
AND
COMMONWEALTH
TERRITORIES
OF
AUSTRALIA.
THIS
WARRANTY
IS
NOT
TRANSFERRABLE.
Table of contents
Other Polivac Floor Machine manuals

Polivac
Polivac GASS38KOH User manual

Polivac
Polivac Predator MK II User manual

Polivac
Polivac GAZ24 User manual

Polivac
Polivac Predator MK II User manual

Polivac
Polivac Predator MK I User manual

Polivac
Polivac GAZ20 User manual

Polivac
Polivac Stealth Series User manual

Polivac
Polivac Terminator User manual

Polivac
Polivac Predator MK III User manual

Polivac
Polivac GAZ20 User manual
Popular Floor Machine manuals by other brands

Edco
Edco 2-EC quick start guide

Advance acoustic
Advance acoustic Micromatic 14 E Instructions for use

Kärcher
Kärcher BR 55 W BAT manual

WerkMaster
WerkMaster viper Operation & service manual

COMAC
COMAC SIMPLA 50B-BT Use and maintenance manual

FIORENTINI
FIORENTINI BIG 38 Instructions for use and maintenance