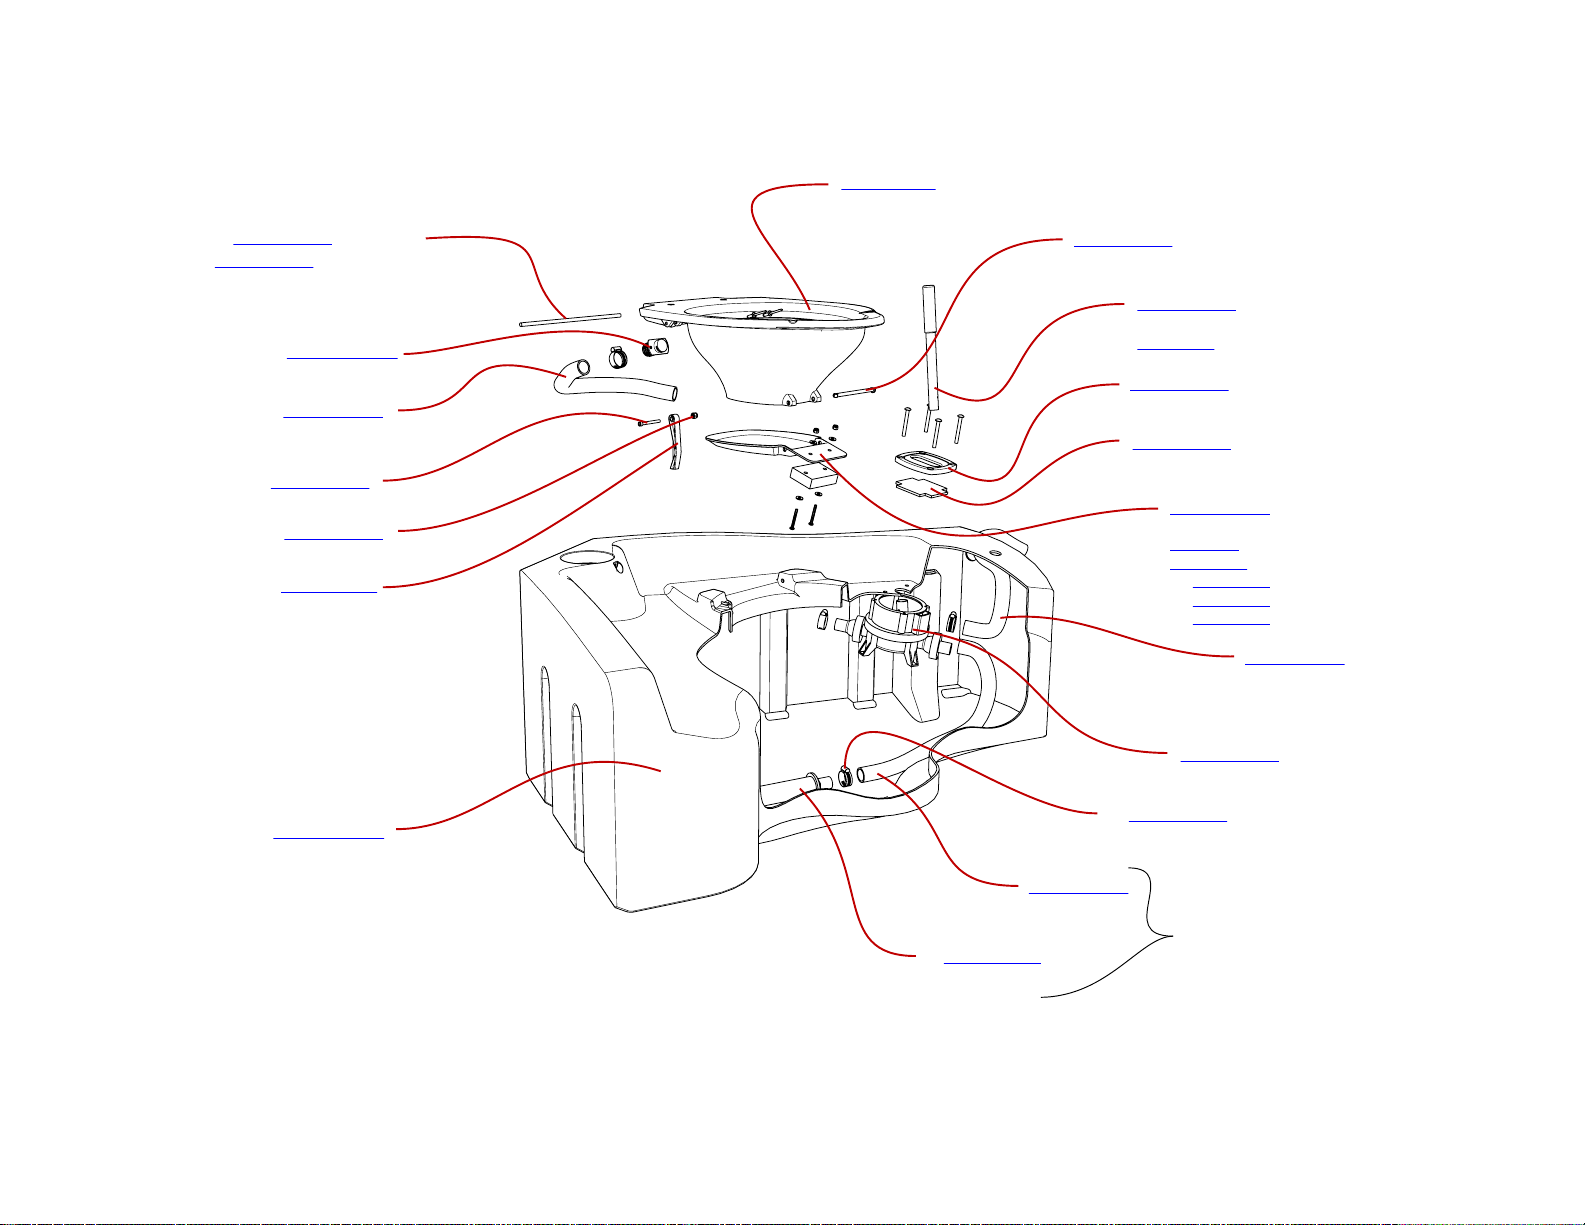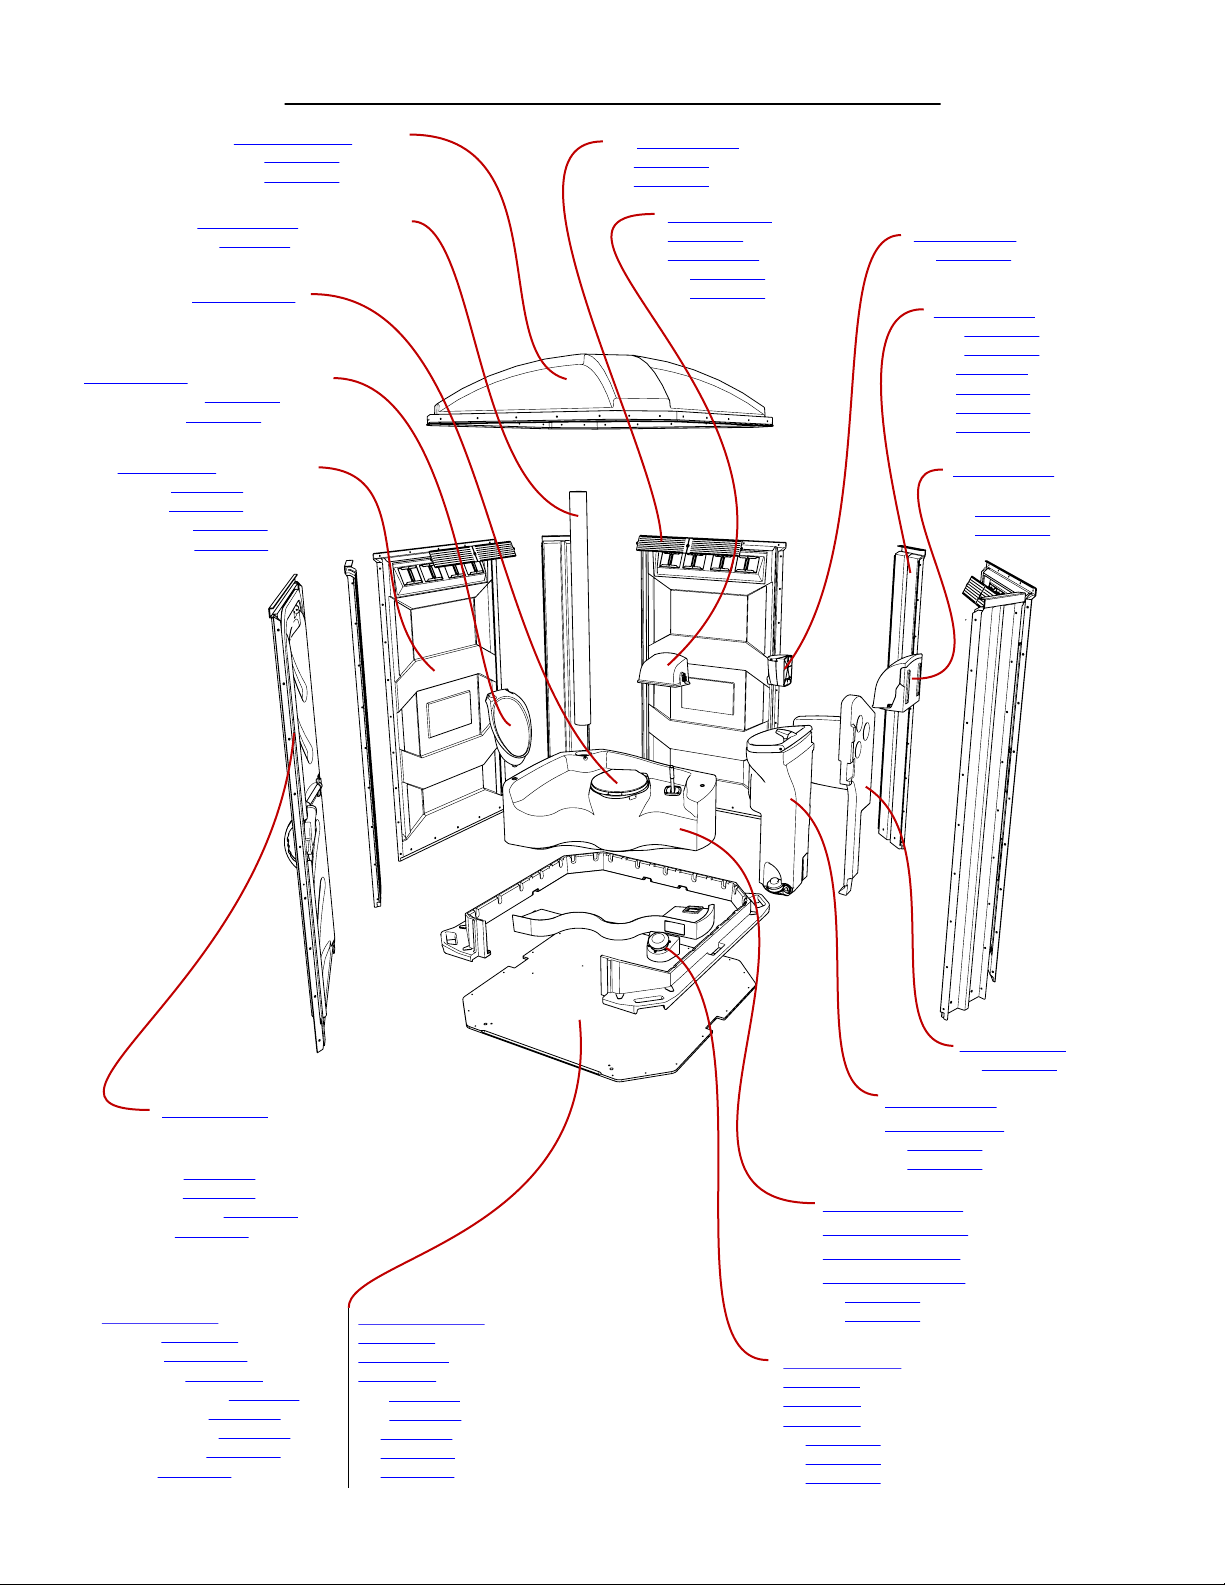
PC-000490 - T.P. Dispenser
PC-000760 - Rod
PC-000205M - Lock
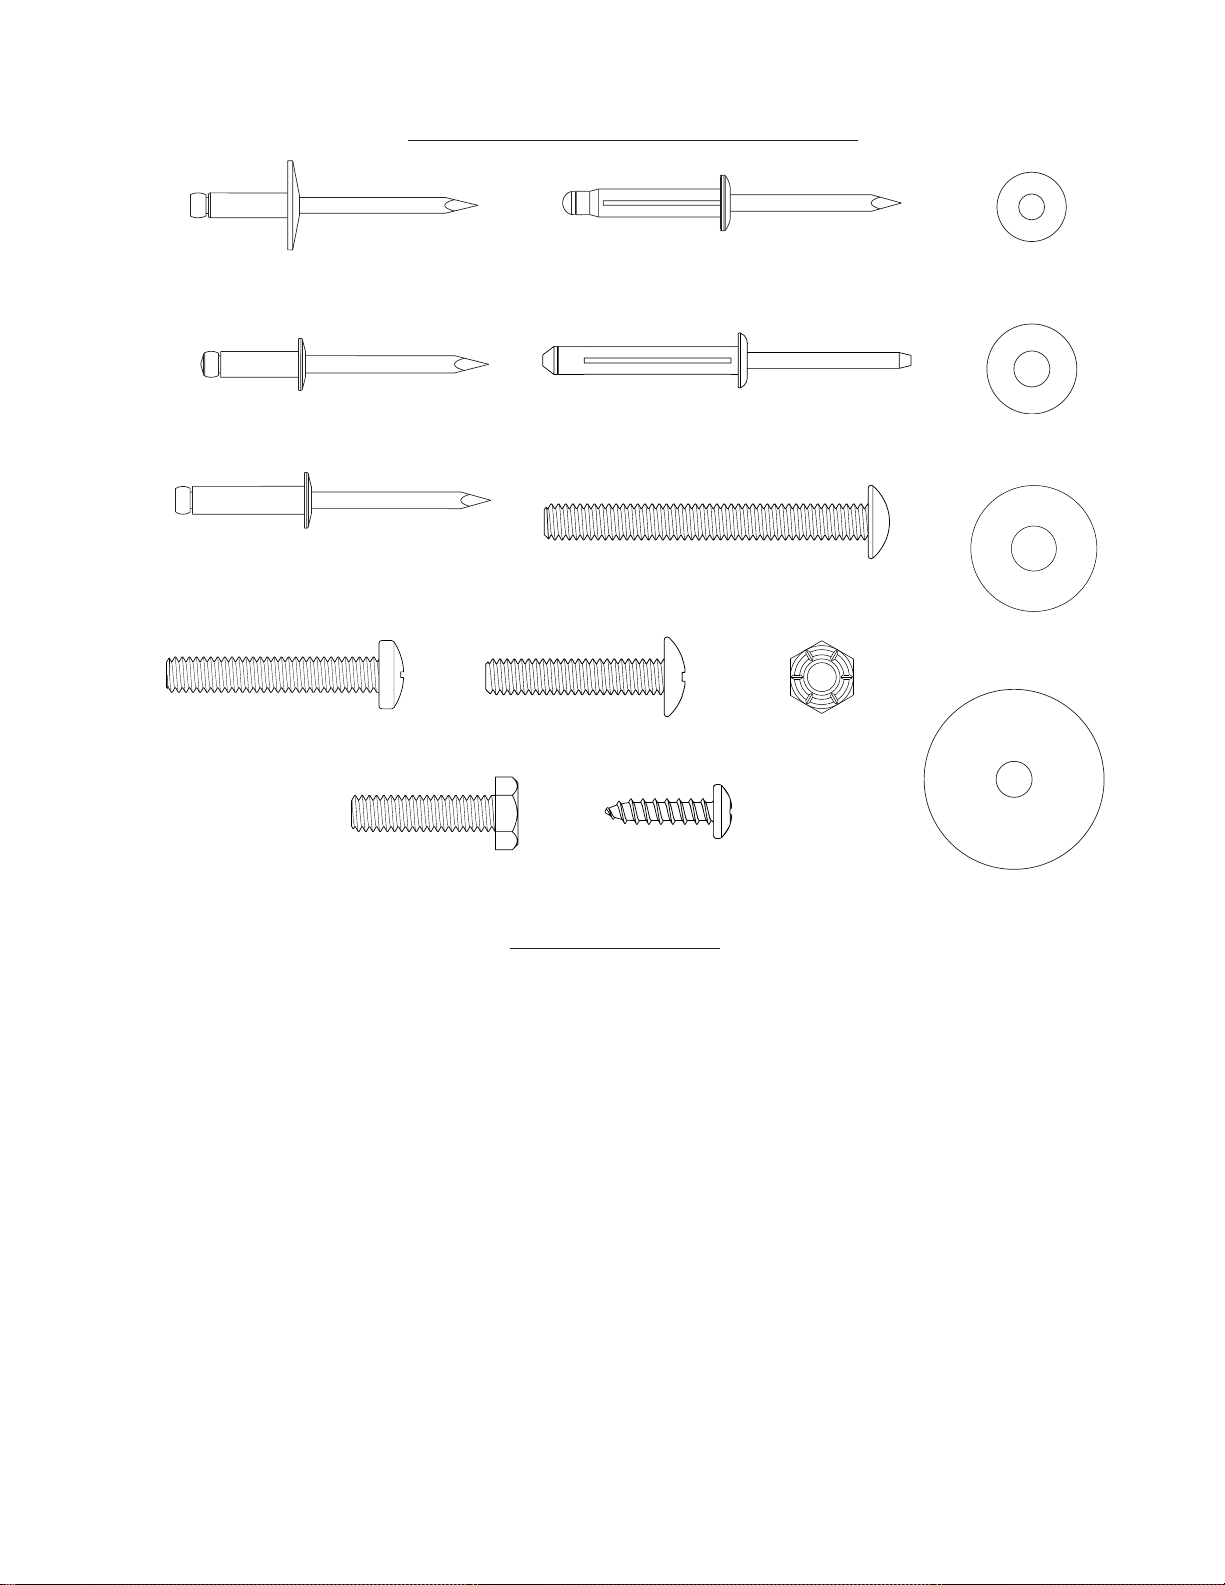
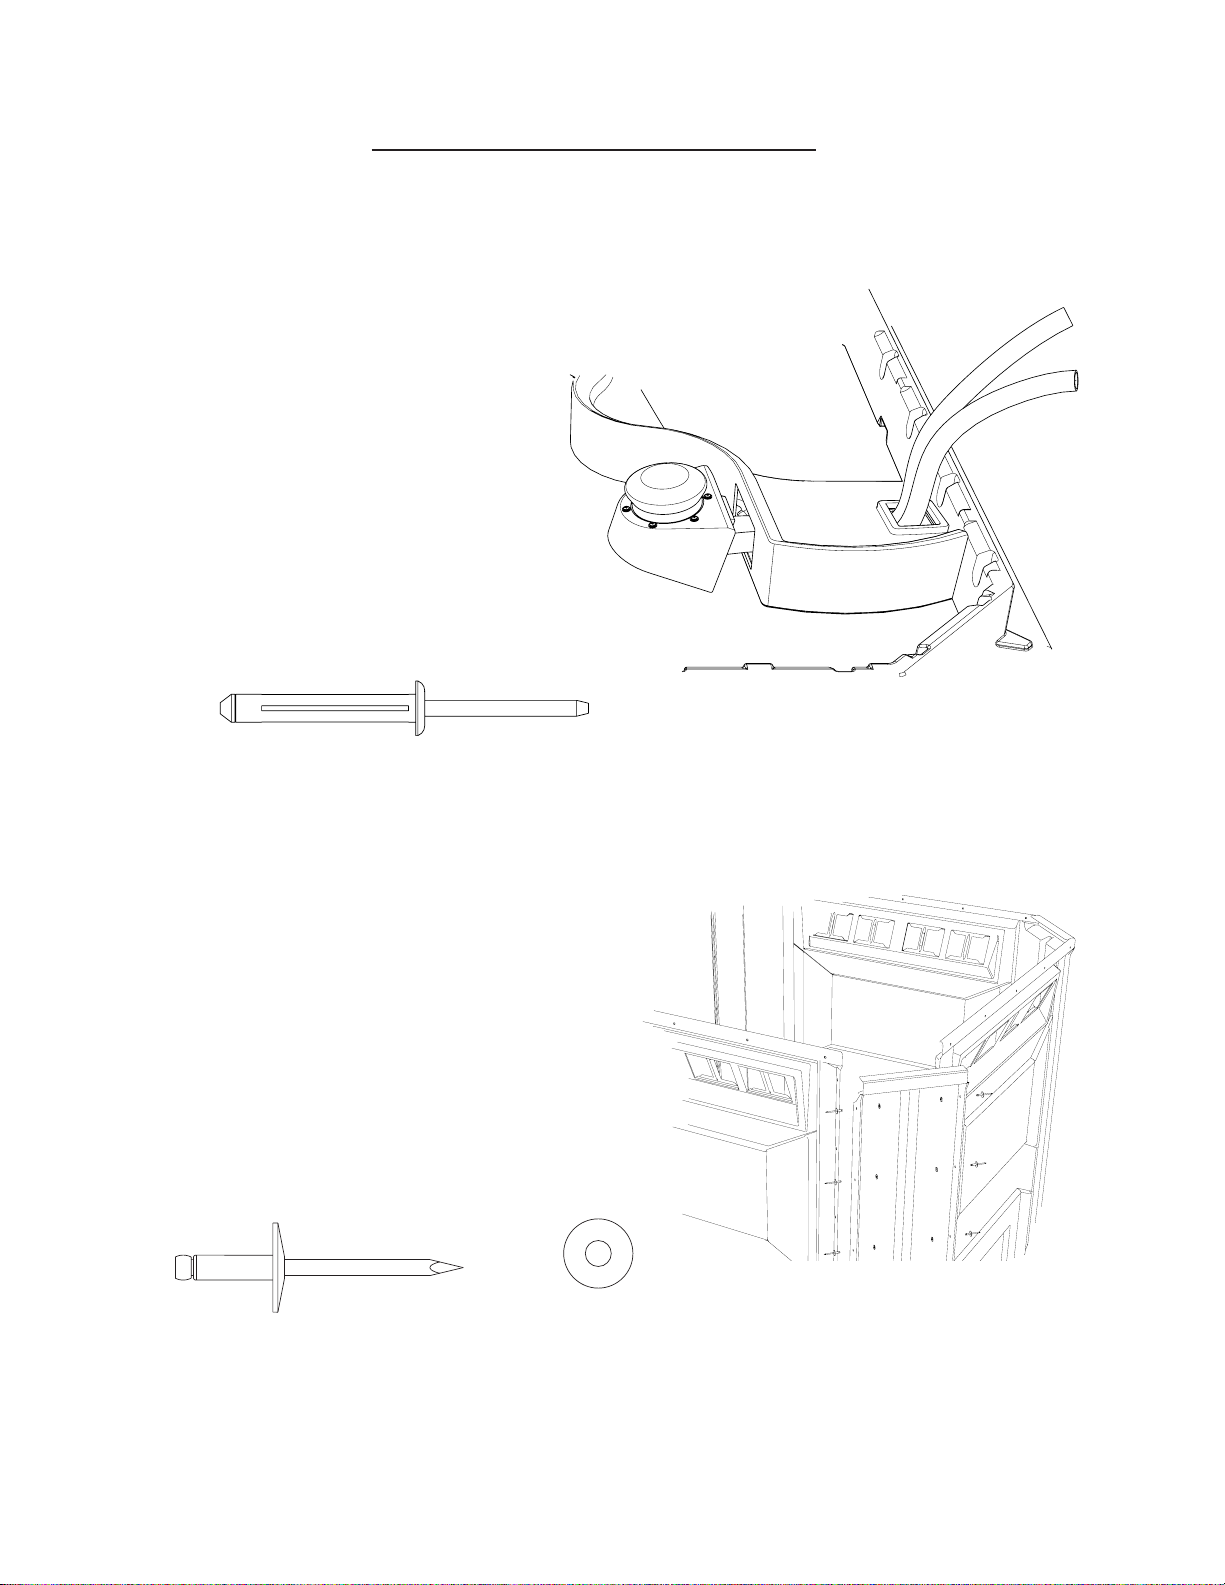
(4) PC-000100 - Rivet
(4) PC-000106 - Washer
(6) PC-000570 - Fly Screen
(9) PC-000100 - Rivet
(9) PC-000106 - Washer
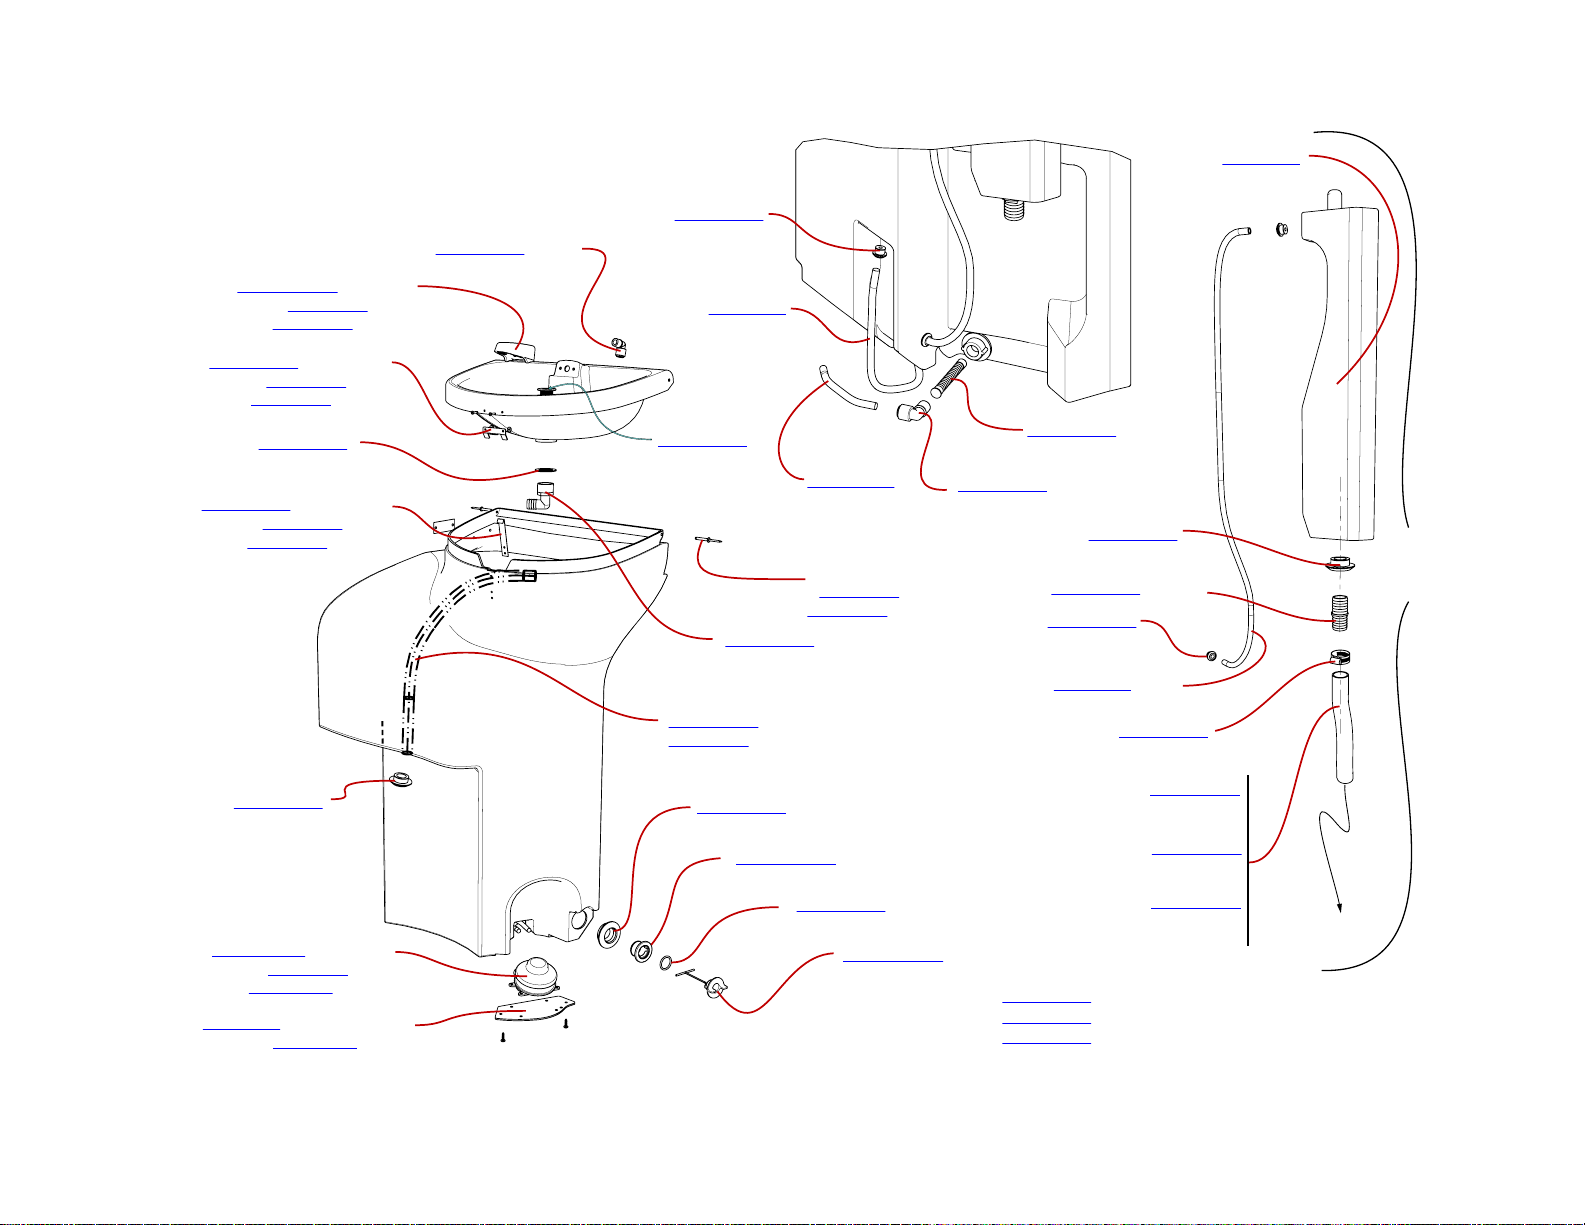
PH01-0010 - Corner Panel
(72) PC-000100 - Rivet
(72) PC-000106 - Washer
(8) PC-000121 - Washer
(8) PC-000123 - Washer
(8) PC-000139 - Bolt
(8) PC-000140 - Nut
PSD1-1000 - Soap Dispenser
(3) PC-000105 - Rivet
PH03-0008R - Roof
(28) PC-000100 - Rivet
(28) PC-000106 - Washer
PC-000531 - Vent Stack
(1) PC-000117 - Rivet
PC-000495 - Urinal (Optional)
(2) PC-000102 - Rivet
(2) PC-000106 - Washer
(3) PJ03-0002 - Side Panel
(15) PC-000121 - Washer
(15) PC-000123 - Washer
(15) PC-000139 - Bolt
(15) PC-000140 - Nut
PH03-0003 - Comfort XL
Front Assembly
(See Front Assembly Exploded View)
(2) PC-000174 - 1-1/4” Screw
(4) PC-000175 - 1-1/2” Screw
(6) PC-000123 - Washer
(6) PC-000140 - Nylon Lock Nut
PC-000204
Toilet Seat
PH04-0001C - Floor Complete
PH03-0001 - Base Surround
PH04-0001T - Tank Support
PH04-0002 - Floor Plate
(25) PC-000117 - Rivet
(20) PC-000121 - Washer
(2) PC-000174 - Screw
(2) PC-000123 - Washer
(2) PC-000140 - Nylon Lock Nut
TD04-1000 - Paper Towel
Dispenser
(4) PC-000100 - Rivet
(4) PC-000106 - Washer
PH04-0025 - Sink Surround
(3) PC-000105 - Rivet
FS3-0026PC - Static Sink OR
FS3-0026PFF - Fresh Flush Sink
(3) PC-000103 - Rivet
(3) PC-000106 - Washer
PH04-0009RFC - Recirc Foot Flush Tank or
PH04-0009RHC - Recirc Hand Flush Tank or
PH04-0009FFC - Fresh Foot Flush Tank or
PH04-0009FHC - Fresh Hand Flush Tank
(5) PC-000105 - Rivet
(5) PC-000106 - Washer
PH04-0024C - Foot Pump Housing w/pump
PH04-0024- Foot Pump Hosing
PC-000606 - Foot Pump
PC-000604 - Rubber Cover
(6) PC-000106 - Washer
(6) PC-000231 - Screw
(1) PC-000105 - Rivet
PH04-0001CF - Floor Complete-Foot Flush
PH03-0001 - Base Surround
PH04-0001TF - Tank Support - Foot Flush
PH04-0002 - Floor Plate
(25) PC-000117 - Rivet
(20) PC-000121 - Washer
(2) PC-000174 - Screw
(2) PC-000123 - Washer
(2) PC-000140 - Nylon Lock Nut
Comfort XLT - Flush Tank Parts Diagram
http://www.polyjohn.com/pj03-0002/
http://www.polyjohn.com/pc-000121/
http://www.polyjohn.com/pc-000123/
http://www.polyjohn.com/pc-000139/
http://www.polyjohn.com/pc-000140/
http://www.polyjohn.com/ph01-0010/
http://www.polyjohn.com/pc-000100/
http://www.polyjohn.com/pc-000106/
http://www.polyjohn.com/pc-000121/
http://www.polyjohn.com/pc-000123/
http://www.polyjohn.com/pc-000139/
http://www.polyjohn.com/pc-000140/
http://www.polyjohn.com/pc-000570/
http://www.polyjohn.com/pc-000100/
http://www.polyjohn.com/pc-000106/
http://www.polyjohn.com/pc-000490/
http://www.polyjohn.com/pc-000106/
http://www.polyjohn.com/pc-000100/
http://www.polyjohn.com/pc-000205m/
http://www.polyjohn.com/pc-000760/
http://www.polyjohn.com/ph03-0008r/
http://www.polyjohn.com/pc-000100/
http://www.polyjohn.com/pc-000106/
http://www.polyjohn.com/pc-000531/
http://www.polyjohn.com/pc-000117/
http://www.polyjohn.com/ph03-0003/
http://www.polyjohn.com/pc-000174/
http://www.polyjohn.com/pc-000175/
http://www.polyjohn.com/pc-000123/
http://www.polyjohn.com/pc-000140/
http://www.polyjohn.com/pc-000204/
http://www.polyjohn.com/ph04-0001c/
http://www.polyjohn.com/ph03-0001/
http://www.polyjohn.com/ph04-0001t/
http://www.polyjohn.com/ph04-0002/
http://www.polyjohn.com/pc-000117/
http://www.polyjohn.com/pc-000121/
http://www.polyjohn.com/pc-000174/
http://www.polyjohn.com/pc-000123/
http://www.polyjohn.com/pc-000140/
http://www.polyjohn.com/pc-000102/
http://www.polyjohn.com/pc-000106/
http://www.polyjohn.com/pc-000495/
http://www.polyjohn.com/psd1-1000/
http://www.polyjohn.com/pc-000105/
http://www.polyjohn.com/TD04-1000/
http://www.polyjohn.com/pc-000100/
http://www.polyjohn.com/pc-000106/
http://www.polyjohn.com/ph04-0025/
http://www.polyjohn.com/pc-000105/
http://www.polyjohn.com/FS3-0026PC/
http://www.polyjohn.com/pc-000103/
http://www.polyjohn.com/pc-000106/
http://www.polyjohn.com/FS3-0026PFF/
http://www.polyjohn.com/PH04-0009RFC/
http://www.polyjohn.com/pc-000105/
http://www.polyjohn.com/pc-000106/
http://www.polyjohn.com/PH04-0009RHC/
http://www.polyjohn.com/ph04-002C/
http://www.polyjohn.com/pc-000606/
http://www.polyjohn.com/pc-000604/
http://www.polyjohn.com/pc-000106/
http://www.polyjohn.com/pc-000231/
http://www.polyjohn.com/pc-000105/
http://www.polyjohn.com/ph04-0024/
http://www.polyjohn.com/ph04-0001cf/
http://www.polyjohn.com/ph03-0001/
http://www.polyjohn.com/ph04-0001tf/
http://www.polyjohn.com/ph04-0002/
http://www.polyjohn.com/pc-000117/
http://www.polyjohn.com/pc-000121/
http://www.polyjohn.com/pc-000174/
http://www.polyjohn.com/pc-000123/
http://www.polyjohn.com/pc-000140/
http://www.polyjohn.com/PH04-0009FFC/
http://www.polyjohn.com/PH04-0009FHC/