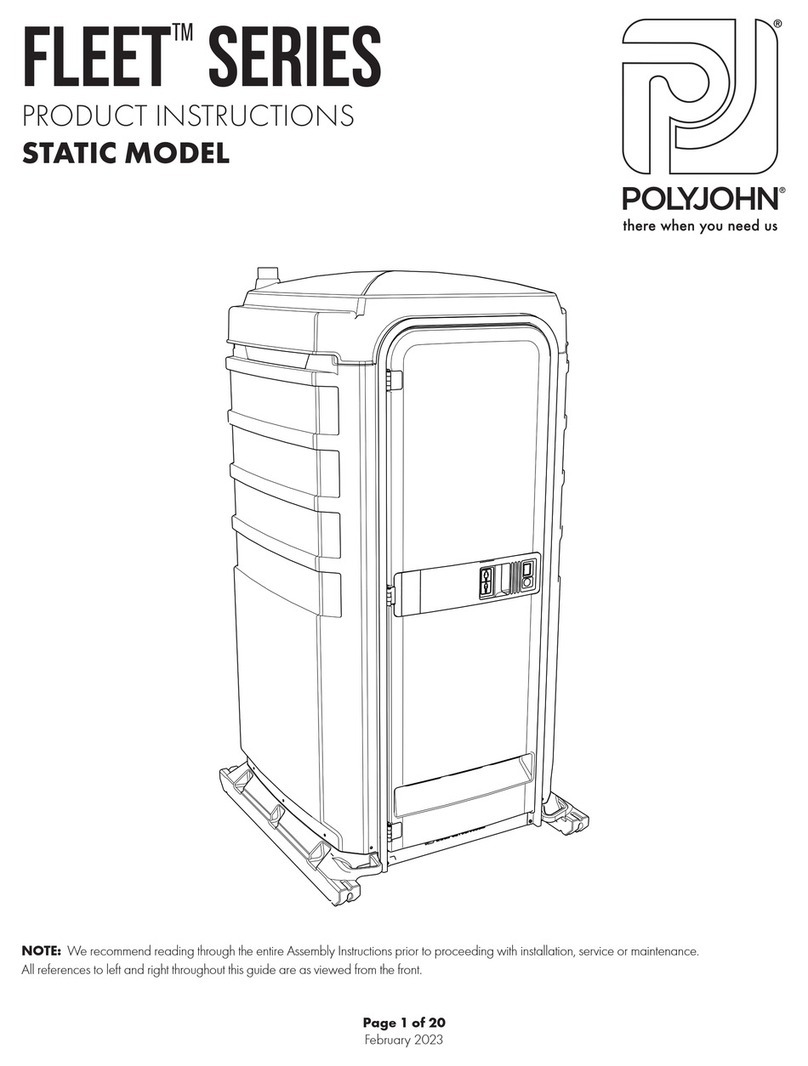
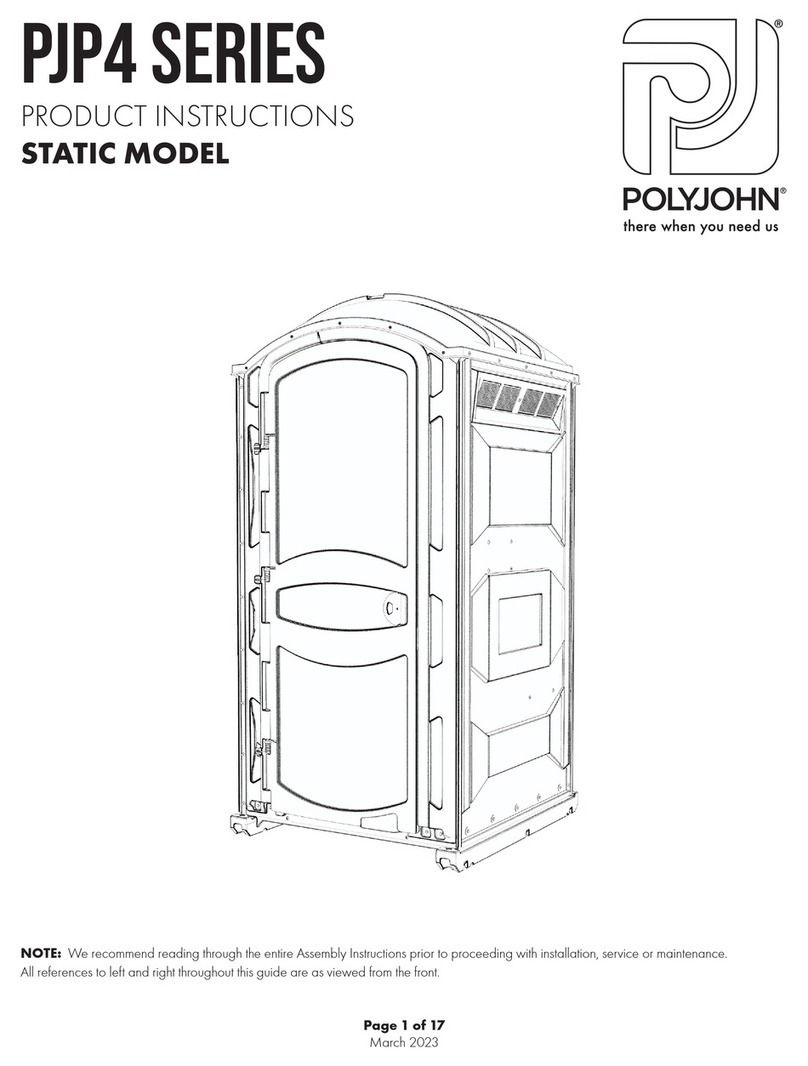
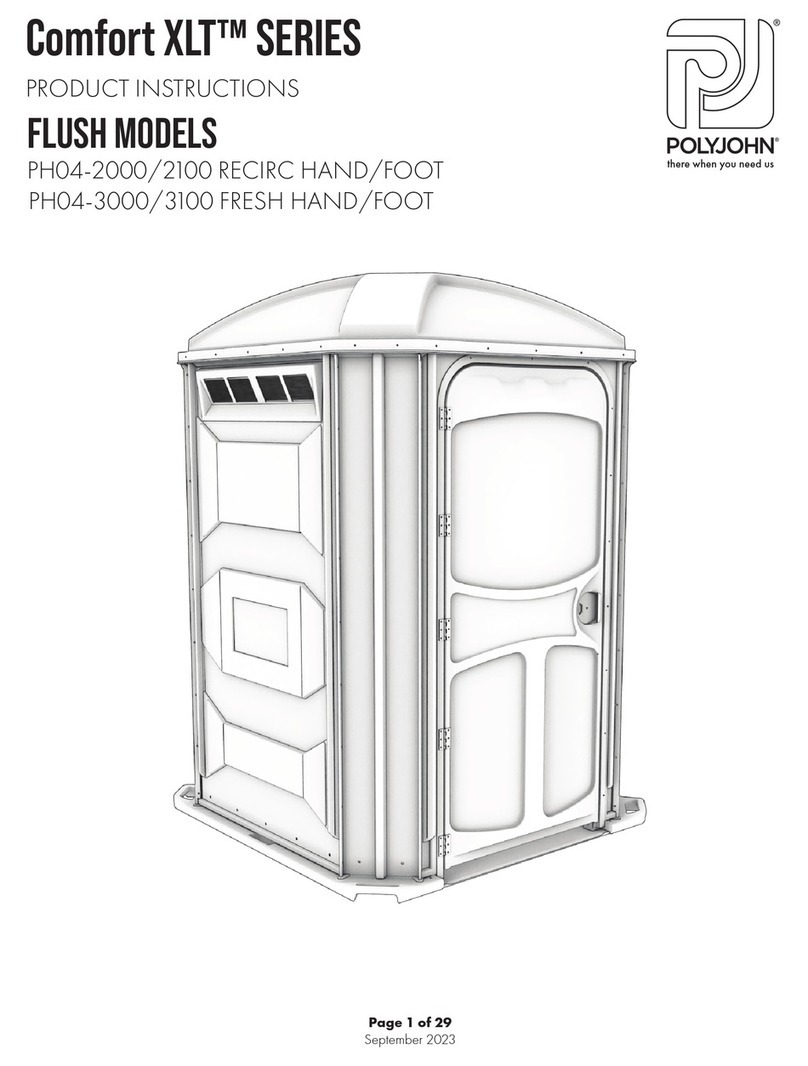
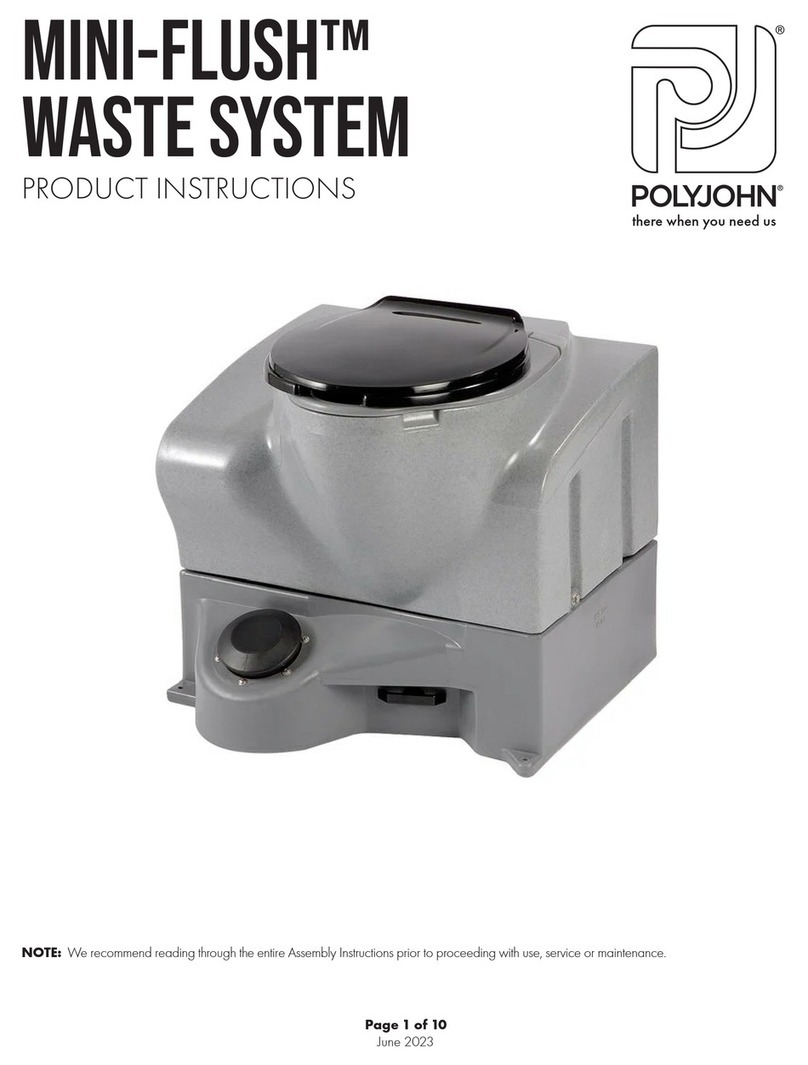
PolyJohn PJN3 Series Instruction sheet

Page 1 of 20
September 2022
PJN3 SERIES
pjn3 series
PRODUCT INSTRUCTIONS
STATIC MODEL
NOTE: We recommend reading through the entire Assembly Instructions prior to proceeding with installation, service or maintenance.
All references to left and right throughout this guide are as viewed from the front.
there when you need us

Page 2 of 20
September 2022
PJN3 SERIES
DIMENSION IMPERIAL METRIC
Exterior Height 91.0 in 231 cm
Interior Height 82.0 in 208 cm
Exterior Width 43.5 in 110 cm
Interior Width 41.0 in 104 cm
Exterior Length 47.0 in 119 cm
Interior Length 41.0 in 104 cm
Holding Tank 60.0 gal 227 ltr
Seat Height 19.0 in 48 cm
Weight (plastic base skid) 165.0 lb 74.25 kg
Side Panel Decal Area 12 in x 22.75 in 30 cm x 58 cm
Door Panel Decal Area 16 in x 21 in 40 cm x 53 cm
Optional Sink Tank Capacity 15 gal 56.8 ltr
Optional Recirculating Flush Tank Capacity 35 gal 132 ltr
PRODUCT SPECIFICATIONS

Page 3 of 20
September 2022
PJN3 SERIES
• When using air operated screw drivers or impact wrenches, be sure that the torque setting does not exceed 28 inch pounds.
• When using a battery-operated drill, set it to the lowest torque setting.
• Please follow the instructions in the order they are presented. It is suggested that you read through the entire assembly instructions
prior to proceeding with the assembly.
• All references to left, right, front and rear throughout the entire assembly instructions are as viewed from the front of the
restroom.
• All rivet holes drilled 13/64” dia.
• Use 1/4” disposable shim strips.
• The PJN3 Model restroom assembly will require two people.
• These instructions are for restrooms shipped unassembled. If you receive assembled units, please retain these instructions
for maintenance and repair purposes.
• We strongly suggest that these restrooms, as with all portable structures, be transported and handled with care. Dropping
the restroom when loading and unloading could cause damage to the door jamb and other components.
PRODUCT OVERVIEW
TOOLS REQUIRED FOR ASSEMBLY
Drill Socket WrenchRivet Gun with
3/16” tip
13/64” Drill Bit Phillips Cross-head
Screwdriver
Marker Tape Measure 7/16” Socket
Awl

Page 4 of 20
September 2022
PJN3 SERIES
FULL SIZE SCALE FASTENER DRAWINGS
(2) PC-000109 Rivet Small
Flange, Long
(2) PC-000104 Rivet Small
Flange, Long
(71) PC-000100 Rivet Large
Flange, Short
(2) PC-000102 Rivet Small
Flange, Short
(8) PC-000103 Rivet Large
Flange, Medium
(4) PC-000105 Rivet Small
Flange, Hollow Wall
(1) PC-000117 Rivet Small
Flange, Long Hollow Wall
(4) PC-000140 Nut
1/4”-20 Nylok
(19) PC-000192 Sems Assembly
1/4” x 1-1/4” Self Tapping
(80) PC-000106 Washer
3/16” Back-up
(4) PC-000123 Washer
1/4” x 5/8” Flat
(1) PC-000168 Washer
5/16” x 7/8” Flat
(4) PC-000367 Fastener
Nylon Push
(4) PC-000174 Screw
1/4” -20 x 1-1/4” Long
Optional - (1) Used in
FT02-1000 Recirculating Sink
Optional - PC-000158 Self
Tapping Screw
(1) Used in PSN1 Sink

Page 5 of 20
September 2022
PJN3 SERIES
CORNER MOLDINGS TO SIDE PANELS:
Refer to Figure 2. Place a wall panel on top, and one on each side of the tanks. The miter cut
end of the corner moldings go towards the top of the side panel. Slip the corner moldings
onto the edges of the top side panel. Lift and insert an edge of a side panel into the grooves
of the corner moldings. Insert awls into the second hole of the top and bottom edges to hold
the panel and moldings in place. NOTE: Drive all rivet heads from the front of the
restroom, to give the unit a uniform visual appearance. Rivet the 1/4” center hole
first using a PC-000100 rivet and a PC-000106 back-up washer. Repeat for the remaining
holes, then stand the three side panels and two corner moldings upright.
STEP 2:
Figure 2
DOOR JAMB AND FRONT ASSEMBLY TO BASE SKID:
Refer to Figure 1. To assemble the door jamb to the skid, stand two waste tanks on end about
four feet apart (as shown). Stand a base skid with the tank space toward the ground and the
four holes on the floor side of the base skid up. Position the front assembly on top of the tanks
with the bottom of the front assembly resting on the base skid. (You may need to add a 4” x
4” on the tank at the top of the front assembly to level the top with the base skid). Cut the strap
holding the door closed. Open the door and install a PC-000104 rivet into the hole where the
cut strap went through the door jamb. Match up the four holes in the door jamb with the four
holes in the base skid. Fasten the door jamb to the base skid with (4) PC-000174 screws, (4)
PC-000123 washers, and (4) PC-000140 nuts using a Phillips cross-head screwdriver and a
7/16” socket wrench. Drive (4) PC-000192 sems lag screws through the two holes on the left
and right sides of the front panel into the base skid. CAUTION: DO NOT OVER-TIGHTEN;
TIGHTEN ONLY UNTIL SNUG. Stand the skid and front assembly upright.
STEP 1:
Figure 1
PC-000174 Screw
4 used in this step
PC-000140 Nut
4 used in this step
PC-000192 Sems Assembly
4 used in this step
PC-000104 Rivet Small
1 used in this step
PC-000100 Rivet
18 used in this step
PC-000123 Washer
4 used in this step
PC-000106 Washer
18 used in this step
ASSEMBLY INSTRUCTIONS

Page 6 of 20
September 2022
PJN3 SERIES
WASTE HOLDING TANK INSTALLATION:
INSTALLATION OF STATIC TANK: Refer to Figure 3. Position the tank so that it is centered
between the left and right side wall panels and pushed up to the floor plate. There are drill
spots on each of the side wall panels. The top four in-line drill spots on the rear wall panel are
used to rivet the back of the holding tank to the rear wall panel. Of the top four drill spots on
each of the side wall panels, only the two closest to the rear are used to rivet the sides of the
holding tank to the side wall panels. While pushing the wall panels in flat against the tank, use
a 13/64” drill bit. Drill through the specified drill spots of the wall panels into the outer walls of
the tank. CAUTION: DRILL ONLY THROUGH THE OUTER WALL OF THE HOLDING
TANK. DO NOT DRILL THROUGH THE INSIDE TOP SURFACES OF THE TANK. From
the outside of the restroom one person will rivet through the drilled holes with PC-000103 rivets,
while another person inside the restroom puts PC-000106 back-up washers on the rivet stems.
STEP 4:
Figure 3
CABANA ASSEMBLY:
Place the holding tank into the opening in the base. Position the three side panels and corner molding sub-assembly around the base skid. IMPORTANT - The walls
of the cabana should be approximately 1/4” from the top surfaces of the base skid. Place 1/4” thick shims between the rear corners of the
cabana, and the base skid; this will make the cabana structure level with the front assembly. To connect the front assembly, corner moldings, and
side panels, begin at the front of the restroom. Insert a PC-000100 rivet through the center hole, while attaching a PC-000106 back-up washer from the back. Repeat
for the remaining holes. (For a uniform visual appearance, drive all rivet heads from the front). CAUTION: DO NOT PRE-DRILL HOLES IN THE BASE SKID; THE
PC-000192 SEMS LAG SCREWS ARE SELF-THREADING. DO NOT OVER-TIGHTEN THE SEMS LAG SCREWS; TIGHTEN ONLY UNTIL SNUG. On the
bottom of each wall panel, there are five predrilled holes, begin at the center hole of the rear panel. Use a 7/16” socket wrench, while pushing the rear wall panel against
the base skid, drive-in the lag screws. Then continue with the side wall panels, starting with the front edge of each side, working towards the back.
STEP 3:
PC-000100 Rivet
18 used in this step
PC-000106 Washer
18 used in this step PC-000192 Sems Assembly
15 used in this step
PC-000103 Rivet
8 used in this step
PC-000106 Washer
8 used in this step
ASSEMBLY INSTRUCTIONS
1
2
5678
4
3

Page 7 of 20
September 2022
PJN3 SERIES
ROOF INSTALLATION:
Position the roof over the wall panels, make sure the hole for the tank ventilation tube is above the corresponding hole in the holding tank. (The front and three side panels
are supplied with predrilled holes at the top center of each panel. The roof is supplied with five predrilled holes on each of the four edges.) Start with the front of the unit.
Align the predrilled top center roof holes to the center holes of the wall panels and front assembly. From the outside of the restroom one person will rivet PC-000100 rivets
through each of the four top center holes, while another person inside the restroom puts PC-000106 back-up washers on the rivet stems. Next, holding the roof firmly down,
using the remaining predrilled holes in the roof, drill 13/64” holes through to the wall panels and front assembly. The person on the outside will again, rivet the PC-000100
rivets through the drilled holes while another person puts the PC-000106 back-up washers on the rivet stems.
VENTILATION STACK INSTALLATION:
Force the vent stack up through the 4” diameter hole in the roof. (This is intended to be a tight fit.) Slide the vent stack down and into the 4” diameter recessed hole in the
holding tank so that it rests on the round ledge of the hole in the tank. Drill a 13/64” hole through the boss and vent stack. Fasten the vent stack in place with a PC-000117
rivet.
STEP 5:
STEP 7:
ASSEMBLY INSTRUCTIONS
PC-000100 Rivet
9 used in this step
FLY SCREEN INSTALLATION:
(Each of the three sidewall panels has two vent screens. On the surface of each vent screen
there is a date stamp symbol. The symbol goes toward the center of the sidewall panel, facing
the inside.)
For each of the three sidewalls, insert one screen from each side of the vent slot and overlap
the center holes at the date stamp symbol (as shown in Figure 4). IMPORTANT - Make sure
both screens together are centered in the vent slots. Drill a 13/64” hole through the
center hole of the screen and into the sidewall. Rivet the screen in place from the outside using
a PC-000100 rivet with a PC-000106 back-up washer on the inside. Using the hole at each
end of the screen as a guide, drill 13/64” holes through the vent screens and into the sidewall
panels. Rivet the screens in place using PC-000100 rivets on the outside with PC-000106
back-up washers on the inside.
STEP 6:
Figure 4
PC-000106 Washer
9 used in this step
PC-000100 Rivet
20 used in this step
PC-000106 Washer
20 used in this step
PC-000117 Rivet
1 used in this step

Page 8 of 20
September 2022
PJN3 SERIES
SLIDE LATCH, DOOR PULL INSTALLATION:
Refer to Figure 5. Follow steps as illustrated.
STEP 8:
ASSEMBLY INSTRUCTIONS
DOOR CHECK CABLE:
There are two holes located on the right inside surface of the door toward the top. Position the metal bracket on the end of the cable so the angle points toward the interior
of the restroom. Align the two outer holes of the bracket with the two holes in the door, rivet in place with (2) PC-000102 rivets. Locate the hole at the top, in the middle of
the door jamb and from the outside insert a PC-000104 rivet through the jamb. Attach the loop end of the cable, a PC-000168 washer, and a PC-000106 back-up washer
on the rivet stem and rivet in place.
DOOR CLOSURE INSTALLATION:
Refer to Figure 6. Place the door closure in the molded channel located at the
center of the door and push it into the molded pocket. Thread the ball end of the
cable through the hole in the door closure retainer clip. Position the door closure
retainer clip (as shown in Figure 6). Rivet in place with (2) PC-000105 bulbex rivets.
Go into the restroom and close the door. Refer to Figure 7. Place the barrel end
of the spring cable into the slot of the PC-000181plastic cable clip. Insert an awl
through the bottom hole of the cable clip and pull the clip so that awl is inserted into
the drilled hole in the door jamb. Lining up the top hole, rivet from the outside with a
PC-000109 rivet with a PC-000106 washer on the inside. Remove the awl and rivet
the bottom hole in the same manner.
STEP 9:
STEP 10:
PC-000104 Rivet
1 used in this step
PC-000106 Washer
1 used in this step
PC-000102 Rivet
2 used in this step
PC-000105 Rivet
2 used in this step
PC-000168 Washer
1 used in this step
Figure 5
Figure 6
Figure 7
PC-000109 Rivet
2 used in this step
PC-000106 Washer
2 used in this step
INSERT DOOR PULL INTO SLOT USING
NOTCHES TO GUIDE DOOR PULL
1
INSERT SLIDE LATCH
INTO DOOR PULL
2
USE SCREWDRIVER TO ASSIST
IN SLIDING THE LATCH
COMPLETELY INTO THE DOOR PULL

Page 9 of 20
September 2022
PJN3 SERIES
TOILET SEAT INSTALLATION:
Push the lid onto the seat (lining up the holes of the lid with those in the seat). Line up the holes
of the hinge bolts with those in the seat/lid. From the outer edge, push the pins through the holes
until flush. Place the seat/lid on to the tank (inserting the bolts through the holes in the tank). Use
pliers to tighten the nuts.
STEP 11:
ASSEMBLY INSTRUCTIONS
URINAL INSTALLATION:
OMIT THIS STEP IF OPTIONAL SINK IS BEING INSTALLED ON THE LEFT SIDE
WALL. Refer to Figure 8. Insert the drain spigot of the urinal into the hole on the left top surface
of the holding tank. Position the urinal so that it is level. There are two holes at the top of the
urinal. Drill 13/64” holes through those holes and through the side wall panel. From outside of
the restroom one person will rivet through the drilled holes with PC-000100 rivets, while another
person inside the restroom places PC-000106 back-up washers on the rivet stems.
TOILET PAPER DISPENSER INSTALLATION:
The double roll dispenser is mounted up on the right wall panel. Position the dispenser on the
top edge of the second raised panel directly below the fly screens at the desired location.
(If sink is installed on the right wall, position the dispenser towards the rear of the panel).
CAUTION: BE SURE THE LOCATION OF THE DISPENSER IS NOT IN THE WAY OF
PERSONS USING THE RESTROOM. Level the dispenser on the wall. Using the holes in the
back of the dispenser as a guide, mark the locations for the drill holes with a marker. Drill four
13/64” holes into the drill spots marked. From the outside rivet into the holes just drilled with (4)
PC-000100 rivets while someone places (4) PC-000106 back-up washers onto the rivet stems
on the inside.
MIRROR:
The mirror is mounted into the square recess on the inside of the door with (4) PC-000367 nylon push rivets.
CONVENIENCE HOVER HANDLE:
The convenience handle is mounted into the two square recesses on the inside of the door
with (2) PC-000105 bulbex rivets.
STEP 12:
STEP 13:
STEP 14:
STEP 15:
PC-000106 Washer
2 used in this step
PC-000106 Washer
4 used in this step
PC-000100 Rivet
2 used in this step
PC-000100 Rivet
4 used in this step
PC-000105 Rivet
2 used in this step
PC-000367 Fastener
4 used in this step
TS1-0001
Seat
TS1-0002 - Lid
(2) - Pin
(2) Hinge Bolt
(2) - Nut
Figure 8

Page 10 of 20
September 2022
PJN3 SERIES
The sink bowl is attached to the sink tank with (2) PC-000107 rivets that act as hinges.
To Open the Sink Top (follow instructions as illustrated on the right)
overview of optional sink installation
ASSEMBLY INSTRUCTIONS
LEFT WALL INSTALLATION
Refer to Illustrations. Before installing the sink, a 1-1/8” drain hole that will accept
the drain hose must be cut in the waste tank. This hole should be located on the top
left front edge of the waste tank approximately 16-1/2” up from the floor.(As shown
on the right, a 1-1/2” plug PC-000560, is available to cover the urinal drain hole.)
NOTE: Make sure the drain hole you are cutting as indicated above is
just below the urinal hole. From the exterior, drill two 13/64” holes (as shown
on the left) through the sidewall and the back of the sink, be sure the sink is pressed
flat against the sidewall. Fasten the sink to the side from the exterior with (2) PC-
000103 rivets and (2) PC-000106 back-up washers on the inside of the sink. Attach
sink to base skid: Drive (1) PC-000158 self-tapping screw in the pre-drilled hole in
the sink mounting plate. Perform a system check by adding a few gallons of water
to the sink. Depress the pump a few times to “prime” it. The pump has a built in check
valve that will hold the prime between uses.
RIGHT WALL INSTALLATION
Before installing the sink, a 1-1/8” drain hole that will accept the drain hose must be
cut in the waste tank. This hole should be located on the top right front edge of the
waste tank approximately 15-1/2” up from the floor.
From the exterior, drill two 13/64” holes through the sidewall and the back of the sink
(as shown on the left) be sure the sink is pressed flat against the sidewall.
Fasten the sink to the side from the exterior with (2) PC-000103 rivets and (2) PC-
000106 back-up washers on the inside of the sink. Attach sink to base skid: Drive
(1) PC-000158 self-tapping screw in the predrilled hole in the sink mounting plate.
Perform a system check by adding a few gallons of water to the sink. Depress the
pump a few times to “prime” it. The pump has a built in check valve that will hold the
prime between uses.
WINTERIZING SINK (IF INSTALLED)
• Drain all water from the tanks.
• Flush tank with a solution of chlorine and water.
• Depress the foot pump to clear lines.
optional sink installation
2. INSERT OBJECT INTO HOLE.
(THIS WILL PUSH LOCKING TAB ALLOWING
ACCESS TO INNER TANK FOR MAINTENANCE.)
3.OPEN SINK LID
1. APPLY DOWNWARD
PRESSURE ON LID
7”
2”
43-1/4”
42-3/4”

Page 11 of 20
September 2022
PJN3 SERIES
PARTS DIAGRAM
(4) PJ03-0011 - Corner Molding
(36) PC-000100 - Rivet
(36) PC-000106 - Washer
PJN3-0003 - Front Assembly
(4) PC-000174 - 1/4-20 x 1-1/4” Screw
(4) PC-000123 - Washer
(4) PC-000140 - 1/4-20 Nylon Lock Nut
(4) PC-000192 - Lag Screw PJN3-0001 - Complete Base
(5) PC-000
105- Rivet
P
JN3-0001T - Floor
(3) PJ03-0002 - Side P
anel
(15) PC-000192 - Lag Screw
PJN3-0008 - Waste Tank
(8) PC-000103 - Rivet
(8) PC-000106 - Washer
PC-000490 - T.P. Dispenser
(4) PC-000100 - Rivet
(4) PC-000106 - Washer
PC-000760 - Rod
PC-000205M - Lock
PC-000204 - Toilet Seat
(6) PC-000570 - Screen
(9) PC-000100 - Rivet
(9) PC-000106 - Washer
PJ03-0007N - Roof
(20) PC-000100 - Rivet
(20) PC-000106 - Washer
PC-000531 - Vent Stack
PC-000117 - Rivet
PC-000495 - Urinal
(2) PC-000100 - Rivet
(2) PC-000106 - Washer
http://www.polyjohn.com/urinal
http://www.polyjohn.com/pc-000531/
http://www.polyjohn.com/pj03-0007n/
http://www.polyjohn.com/pc-000570/
http://www.polyjohn.com/pc-000204/
https://www.polyjohn.com/2-roll-toilet-paper-dispenser
http://www.polyjohn.com/pj03-0002/
http://www.polyjohn.com/pjn3-0001/
https://www.polyjohn.com/pc-000105
http://www.polyjohn.com/pjn3-0008/
https://www.polyjohn.com/pc-000103
https://www.polyjohn.com/pc-000106
http://www.polyjohn.com/pc-000174/
http://www.polyjohn.com/pc-000123/
http://www.polyjohn.com/pc-000140/
http://www.polyjohn.com/pc-000192/
https://www.polyjohn.com/pjn3-plastic-floor-covering
http://www.polyjohn.com/pc-000192/
http://www.polyjohn.com/pc-000205m/
http://www.polyjohn.com/pc-000760/
https://www.polyjohn.com/pc-000106
https://www.polyjohn.com/pc-000100
https://www.polyjohn.com/pc-000106
https://www.polyjohn.com/pc-000100
https://www.polyjohn.com/pc-000106
https://www.polyjohn.com/pc-000100
https://www.polyjohn.com/pc-000117
https://www.polyjohn.com/pjn3-front-assembly
http://www.polyjohn.com/pj03-0011/
https://www.polyjohn.com/pc-000100
https://www.polyjohn.com/pc-000106

Page 12 of 20
September 2022
PJN3 SERIES
PARTS DIAGRAM
PJN3-0003 FRONT ASSEMBLY
** Items are not included with PJN3-0003 Front Assembly.
Parts bag PJN3-0201 is available for replacement purposes.
** TM01-0003 - Mirror
(4) PC-000367 - Nylon Fastener
(4) PC-000170 - 3“ Hinges
(12) PC-000104 - Rivet (Hinge to Door Jamb)
(12) PC-000102 - Rivet (Hinge to Door)
PJN3-0004 - Front Wall Panel
PJN3-0005 - Door
(Includes Door w/Hinges Only)
PJN3-0006 - Door Jamb
(8) PC-000104 - Rivet
PC-000798 - Serial I.D. Plate
** PJN3-0038
Slide Latch w/Decal
** PC-000181 - Cable Clip
(2) PC-000106 - Washer
(2) PC-000109 - Rivet
** PJN3-0043 - Door Pull
**PC-000200 - Door Check Cable
(2) PC-000102 - Rivet (Clip to Door)
(1) PC-000104 - Rivet (Cable to Door Jamb)
(1) PC-000168 - 5/16” x 7/8” Washer (Cable to Door Jamb)
(1) PC-000106 - Washer (Cable to Door Jamb)
** PC-100800
Door Spring Closure
** PC-000806 - Door Closure Clip
(2) PC-000105 - Rivet
** PC-000223 - Handle
(2) PC-000105 - Rivet
http://www.polyjohn.com/pjn3-0004/
http://www.polyjohn.com/pjn3-0006/
http://www.polyjohn.com/pc-000200/
http://www.polyjohn.com/tm01-0003/
https://www.polyjohn.com/pc-000223
https://www.polyjohn.com/pc-000105
https://www.polyjohn.com/door-spring
https://www.polyjohn.com/pjn3-slide-latch-w-decal
http://www.polyjohn.com/pjn3-0043/
https://www.polyjohn.com/pjn3-door
http://www.polyjohn.com/pc-000806/
https://www.polyjohn.com/door-spring-clip
http://www.polyjohn.com/pc-000168/
https://www.polyjohn.com/pc-000106
https://www.polyjohn.com/pc-000104
https://www.polyjohn.com/pc-000102
http://www.polyjohn.com/pc-000104/
http://www.polyjohn.com/pc-000798/
https://www.polyjohn.com/pc-000367
http://www.polyjohn.com/pc-000170/
https://www.polyjohn.com/pc-000106
https://www.polyjohn.com/pc-000109-rivet
https://www.polyjohn.com/pc-000105

Page 13 of 20
September 2022
PJN3 SERIES
PARTS DIAGRAM
OPTIONAL PSN1-1000 SINK
PC-000581G - Sink Tap
(2) PC-000104 - Rivet
(2) PC-000106 - Washer 3/16”
PC-000308
Sink Strainer
(2) PC-000107 - Rivet
(2) PC-000106 - Washer 3/16”
PC-000224 - Spring Lock
(2) PC-000110 - Rivet
(2) PC-000111 - Washer
PC-000339 - Elbow 3/8”
PC-000322 - Elbow 3/4” Fpt
PC-000225 - Catch Lock
(2) PC-000110 - Rivet
(2) PC-000111 - Washer
PC-000351
#10 Hose Clamp
**NOT SHOWN
CH075-041 - Drain Hose 3/4” x 41” Long
PC-000351 - #10 Hose Clamp
PC-000782 - Decal Not for Drinking or Cooking
PC-000783 - Decal Transport
PC-000790 - Decal Foot Pump
CT38-049 - Tube 3/8” x 49” Long
PC-000305 - Plastic Filter
CT38-003
Tube 3/8” x 3” Long
PC-000600 - Baby Foot Pump
(4) PC-000102 - Rivet
(4) PC-000106 - 3/16” - Washer
PSN1-0050 - Mounting Plate
(2) PC-000147 - Screw
PC-000339 - Elbow 3/8”
PC-000310 - Rubber Washer
1” x 2” x .031
PC-000418 - 1” Uniseal
PC-100421B - Drain Plug Body
PC-000241 - O-Ring
PC-100421P - Drain Plug
http://www.polyjohn.com/pc-000104/
http://www.polyjohn.com/pc-000308/
http://www.polyjohn.com/pc-000351/
http://www.polyjohn.com/pc-000224/
http://www.polyjohn.com/pc-000225/
http://www.polyjohn.com/ct38-003/
http://www.polyjohn.com/pc-000600/
http://www.polyjohn.com/psn1-0050/
https://www.polyjohn.com/drain-plug
https://www.polyjohn.com/o-ring
https://www.polyjohn.com/drain-plug-body
http://www.polyjohn.com/pc-000339/
http://www.polyjohn.com/pc-000305/
http://www.polyjohn.com/pc-000418/
http://www.polyjohn.com/ct38-049/
http://www.polyjohn.com/pc-000322/
http://www.polyjohn.com/pc-000310/
http://www.polyjohn.com/pc-000339/
http://www.polyjohn.com/pc-000782/
http://www.polyjohn.com/pc-000783/
http://www.polyjohn.com/pc-000790/
http://www.polyjohn.com/ch075-041/
http://www.polyjohn.com/pc-000351/
https://www.polyjohn.com/replacement-part/pc-000581g
http://www.polyjohn.com/pc-000106/
http://www.polyjohn.com/pc-000107/
http://www.polyjohn.com/pc-000106/
http://www.polyjohn.com/pc-000110/
http://www.polyjohn.com/pc-000111/
http://www.polyjohn.com/pc-000110/
http://www.polyjohn.com/pc-000111/
http://www.polyjohn.com/pc-000102/
http://www.polyjohn.com/pc-000106/
http://www.polyjohn.com/pc-000147/

Page 14 of 20
September 2022
PJN3 SERIES
OPTIONAL ACCESSORIES,
SUPPLIES AND CHEMICALS
Use a mild soap to clean all surfaces and component parts.
Minor scratches and abrasions can be lightly sanded or scrubbed with a mild abrasive cleaner (such as “Soft Scrub”) that contains calcium
carbonate, hypochlorate bleach and detergents. Be sure to follow the cleaning product directions since these ingredients may cause hazardous
gases when mixed with other chemicals. Rinse the cleaned area and buff with a conventional wax.
Some light scratches may also be hidden by using an industrial hot air gun.
If sink is installed add a “Fresh Sink Tablet” (chlorinated tablet) each time the sink is filled with water to keep the water fresh.
For a source of cleaning, deodorizing and paper products contact:
PRO’S CHOICE
2500 GASPAR AVE.
WHITING, IN 46394-2175
800-292-1305
www.polyjohn.com/products/supplies/pros-choice.html
We highly recommend membership in the Portable Sanitation Association International (PSAI); the worldwide authority on portable sanitation
services. The PSAI, “Portable Sanitation Industry Certification Program” manual contains a wealth of information on standards and service
procedures. For more information contact the PSAI:
PORTABLE SANITATION ASSOCIATION INTERNATIONAL (PSAI)
7800 METRO PARKWAY, SUITE 104
BLOOMINGTON, MINNESOTA 55425 USA
800-822-3020 / 612-854-8300 FAX 612-854-7560
www.psai.org
CLEANING AND MAINTENANCE
For a complete list of all our accessories, visit www.polyjohn.com/products/additional-products.html
For a complete list of all our chemicals, visit www.polyjohn.com/supplies/pros-choice.html
Liquid Soap Dispenser
PSD1-1000
Interior Shelf
SU3-0002PJ - PJ Model
SU3-0001F - Fleet Model
Deodorizing Packages

Page 15 of 20
September 2022
PJN3 SERIES
Follow these instructions for setting up your portable restroom:
• Step 1 – Charge the tank – this refers to filling the waste tank with approximately 5 gallons (19 liters) of fresh water. The tank must be
charged with fresh water first. Charging the tank will allow deodorizers (once added) to be activated.
• Step 2 – Add deodorizers to waste tank – This is a critical step. These deodorizers help to break down the waste and relieve the smell.
Deodorizers added to the waste tank will dissolve in the water charge. These deodorizers are most always dyed blue. In the portable toilet
industry the deodorizers are often referred as just that – blue. Deodorizers come in a variety of forms: pucks, packets, and liquid. They also
come in a variety of scents. To find out more information on deodorizers PolyJohn offers, visit https://www.polyjohn.com/supplies/pros-
choice.html or call 800-292-1305 to speak to a representative.
- Note: Amount of deodorizer used depends on what form you purchase and its use.
• Step 3 – To get rid of the waste in your tank you must call your local portable restroom operator to vacuum out the waste, or if tank is
equipped with dump valve, by bringing it to a local RV dump site or waste treatment plant.
This concludes standard restroom set up. Your restroom is ready for use. For restrooms with options such as sinks & flushable tanks follow the below
instructions accordingly:
• Restroom with Sink – The grey water from the sinks is designed to empty into the waste tank. Water capacity of sinks varies. Visit the
PolyJohn website at https://www.polyjohn.com/products/portable-sinks/ to find your sink. Under the specifications tab on each product
page it will tell you the sink capacity. You can also download the user guide if you click on the yellow “Product Documents” button.
- To open the PJN3 and Fleet sink either insert a small tool in the hole in the front of the sink where the sink bowl & tank meet, or press
firmly in this area. This will release the metal latch to lift the lid. The sink can be filled from that opening.
- For the Single User Wash Station there is a port hole to fill with fresh water.
- To completely empty your sink there is a drain port at the bottom.
- For pictures, videos, and manuals for each sink visit https://www.polyjohn.com/products/portable-sinks/ and find your sink.
• Fresh Flushing Tank Option – Fresh flushing tank options always require a sink. The flushing capability of the bowl draws fresh water from
the sink to flush. Follow the instructions above to find the water capacity of your sink.
• Soap Dispenser – PolyJohn’s own designed liquid soap dispenser can be filled with any non-foaming liquid soap. Just twist the lid and fill
with your liquid soap.
• Foam Dispenser – PolyJohn offers a foaming hand sanitizer dispenser. Specially designed hand sanitizer refill packets are required for this
dispenser. You can find them by visiting https://www.polyjohn.com/supplies/pros-choice.html.
• Paper Towel Dispenser – PolyJohn’s paper towel dispenser can be filled with either folding towels, or rolls. The recommended towels are
Tork Universal Hand Towel Roll (Item# RK350A) or Georgia-Pacific Envision®Singlefold Towels (item # GP-23504).
• Toilet Paper Dispenser – PolyJohn offers a 2 roll dispenser, or a 3 roll dispenser. The dispenser rod is designed for small core toilet paper
rolls, but can work with standard rolls if desired.
For more information including pictures, videos, and documents for each product please visit www.polyjohn.com. You can also call 800-292-
1305 and talk to one of our customer service representatives.
INSTRUCTIONS FOR USE

Page 16 of 20
September 2022
PJN3 SERIES
REGULATIONS
Prop 65
PolyJohn Corporation would like to inform any customers or end users that some products may contain chemicals listed in California’s Safe
Drinking Water & Toxic Enforcement Act of 1986. Commonly referred to as Proposition 65, this Act establishes a list of chemicals known by the
State of California to present a risk of cancer, birth defects, or other reproductive harm.
Chemical exposure typically occurs through inhalation, ingestion, or adsorption. PolyJohn products are not intended to be used in these methods.
PolyJohn Corporation cannot foresee all uses of their products (both intended and unintended uses) and as a result has opted to provide a
general warning of known chemical presence.
The Proposition 65 chemical list can be found at http://www.P65Warnings.ca.gov
The following warnings are labels placed on affected products. If these labels are not present then they do not apply to that product.
WARNING: This product can expose you to chemicals including 4-Vinylcyclohexene which is known to the State of California to cause
cancer and birth defects or other reproductive harm. For more information go to www.P65Warnings.ca.gov.
4-Vinylcyclohexene label above to be used any product made with Bayblend T85
WARNING: This product can expose you to chemicals including titanium dioxide, which is known to the State of California to cause
cancer. For more information go to www.P65Warnings.ca.gov.
Conflict Minerals Compliance Statement
Section1502 of the Dodd-Frank Wall Street Reform and Consumer Protection Act, and the Securities and Exchange Commission Rules adopted in
connection therewith, require certain corporations to report the use of “Conflict Minerals” in the manufacture of their products. Generally, Conflict
Minerals collectively refers to cassiterite, columbite-tantalite, gold, wolframite, or their derivatives, including tantalum, tin and tungsten, which
originate from the Democratic Republic of the Congo or specified adjoining countries (referred to herein as “Covered Countries”).
While we, as a privately held corporation, are not subject to the Conflict Minerals rules and reporting requirements, we understand that our
customers may be, and we are committed to helping our customers comply with their reporting requirements. In order to determine if our
manufactured products contain Conflict Minerals, we have asked our relevant suppliers, as of September 1, 2020, to ascertain their use of any
Conflict Minerals in the materials they supply to us. Their responses demonstrate that our relevant suppliers (i) do not use Conflict Minerals in the
materials they supply to us, (ii) have no reason to believe the Conflict Minerals they use may have originated in the Covered Countries, and/
or (iii) reasonably believe that the Conflict Minerals they use are from recycled or scrap sources. Consequently, we can in turn represent that, to
the best of our knowledge, our manufactured products either do not contain Conflict Minerals, or to the extent they may, such products are “DRC
conflict free” as defined by paragraph (e)(4) of Section 1502.
We will continue to work with our key suppliers to ensure that we are able to identify the use of Conflict Minerals in our supply chain, and the
representations made in this compliance statement remain accurate. To that end, we reserve the right to amend this statement at any time based
on subsequent developments or information.
Should you have any questions or concerns regarding this statement, please do not hesitate to contact us.

Page 17 of 20
September 2022
PJN3 SERIES
REGULATIONS
REACH Compliance
We certify that all components of the PolyJohn PSW3-1000 conform to REACH standards.
Specifically, we cite Article 7 of the Standard which indicates as follows:
Article 7(1) requires Producers and Importers of products to register with the ECHA chemical substances that are intentionally released from the
products during use.
-No chemical substances are intentionally released from the product during use.
Article 7(2) requires Producers and Importers of products to notify the ECHA of the content of Substances of Very High Concern (SVHCs) if the
concentration of SVHC is above 0.1% weight by weight (w/w) and the total amount put on the EU market by the subject company is more than 1
ton a year.
-No SVHC’s exist in concentrations above 0.1% weight to weight (w/w) in the product.
We will maintain adequate documentation of this certification for inspection upon request.
Reduction of Toxics in Packaging
We certify that all packaging and packaging components comply with the requirements of the toxics in packaging law(s). Specifically: U.S. Toxics
in Packaging Clearinghouse Standard and/or The European Parliament and Council Directive 94/62/EC of 20 December 1994 on packaging
and packaging waste last amended by Directive 2018/852.
1) We certify that the regulated chemicals – lead, mercury, cadmium, and hexavalent chromium were not intentionally added to any package or
packaging component during the manufacturing process.
2) We further certify that the sum of the incidental concentration levels of lead, mercury, cadmium and hexavalent chromium present in any
package or package component does not exceed acceptable levels of parts per million by weight.
3) We further certify that no materials used to replace the regulated chemicals are present in a quantity or manner that creates a hazard as great
as or greater than the hazard created by the regulated chemicals.
4) We will maintain adequate documentation of this certification for inspection upon request.

Page 18 of 20
September 2022
PJN3 SERIES
Toilets and Restrooms
Q: Can I use a toilet unit on my own, or do I need a professional?
A: It is illegal to dispose of human waste in an improper way. You can purchase a portable toilet for your own personal use, but you will need to
hire a professional portable toilet operator to empty and dispose of the waste when needed.
Q: Can any toilet unit have a sink added to the inside?
A: Not every unit can house an interior sink. The Comfort XL and We’ll Care units do not have interior sinks. The PJN3, PJP3 and Fleet do have
interior sinks. All Fresh Flush units require a sink to operate, but static and recirculating flush units can add a sink.
Q: How do I initially set up a portable toilet for use?
A: For each new use of an emptied tank, it needs to be charged with 5 gallons of water and a chemical often referred to as “blue” in the
industry. It contains dyes and enzymes designed to break down waste.
Q: Can I replace parts on my toilet?
A: Absolutely. We offer all our parts as replacements. Just call into PolyJohn or contact your local rep to place an order.
Q: My toilet has a dump valve, can I use that to empty the waste tank?
A: You can use the dump valve to empty the tank, but it needs to be done at an RV dump station that has the proper equipment and treatment on
site. You can also hire a local portable toilet operator to empty the waste tank.
Q: In my recirculating unit where does the water come that flushes the toilet bowl?
A: A recirculating unit takes the water that is inside the tank and uses it to flush the toilet bowl. Yes, it is the used water inside the tank. Do not be
worried about this. There are two separate filters that filter out any solid substance before it comes to the bowl. And this water has been mixed
with the powerful chemicals that break down waste inside the tank. This saves fresh water usage while still getting the benefits of flushing.
Q: How does the fresh water flush toilets work?
A: Unlike the recirculating toilets, the fresh water models require a sink. The bowl flushing mechanism draws fresh water from the sink to flush. The
sink also uses the fresh water for hand washing and the gray water drains into the toilet tank.
Q: My screen broke, how do I replace it?
A: The screens can be removed and replaced by drilling out the rivets, sliding the screen out, sliding the new one in and re-riveting the screens in
place.
Q: You don’t have the old style urinal anymore, so will a new style work? If so, what do I need to do to modify my
unit so the new urinal will fit?
A: The new PolyJohn Urinal has been completely redesigned. The new design has been proven to be the best shape and form to keep splash-
back to a minimum. The side walls are much higher and there is no lip on the inside. This will help keep the urinal clean. The entire urinal has
smooth surfaces as well to aid in cleaning. The new urinal can also hold 5 pounds of salt for colder climates. To help your customers who
might need something to shoot for. To install the new urinal on old tanks, you will need 4 - PC-000102 Rivets, 4 - PC-000106 Washers, and 1
PC-000557 Cap.
FREQUENTLY ASKED QUESTIONS

Page 19 of 20
September 2022
PJN3 SERIES
WARRANTY
Restrooms and Toilets
POLYJOHN PORTABLE RESTROOMS LIMITED 3 YEAR PRODUCT WARRANTY
PolyJohn Enterprises Corp. warrants the major plastic parts of its portable restrooms (plastic front, wall panels, roof, and tank) against any
breakage or other problems that prevent the PolyJohn portable toilet from functioning in accordance with usual practices used in the portable toilet
industry and in their intended manner. This warranty covers any damages in material or workmanship for a total period of 3 years (36 months).
This warranty extends only to the original purchaser of the PolyJohn portable restroom. Proof of purchase, serial numbers, and photos will be
required.
Sinks, Tanks, Trailers and SaniStands
PolyJohn Enterprises warrants our sinks, tanks, trailers and sanistands from the date of purchase. Any misuse or abuse of our products or failure to
properly follow recommended procedures shall void this warranty. The warranty is a 1 year limited warranty and a 90 day limited warranty for
components thereof.
What is Not Covered By Warranty
This warranty does not cover damage or failure contributed to or caused by: Not following PolyJohn assembly procedures, unauthorized
modification, acts of God, mishandling, misuse, use of incompatible solvents or other damaging chemicals, vandalism or accident. In no event
shall PolyJohn be liable for labor costs or for incidental or consequential damages.
For full details on PolyJohn’s warranty policy, and to view instructions for submitting a claim please visit https://www.polyjohn.com/warranty/.
Warranty Disclaimer
PolyJohn’s terms of sale are FOB (Free on Board Shipping Point). Meaning buyer takes on responsibility once it leaves PolyJohn’s shipping dock.
The carrier is wholly responsible for any damage incurred during transit. Important notice: All concealed/non-notated damages must be reported
within 5 business days of delivery (1st day is the day of delivery) as per the National Motor Freight Classification (NMFC) – Rule 300100 - for a
damaged claim to be filed. Reporting after this time will void a claim.
In order to prevent warranty disputes follow these steps immediately when receiving your products:
1. Inspect the shipment immediately and insist that visible damages be indicated on your copy of the freight bill. If they are not noted on the
freight bill it is very likely a claim will be denied.
2. Open the shipment if necessary, and inspect for any concealed damages.
3. If there are any damages that you cannot operate with you may refuse shipment. After you do this contact us immediately
Filing Process for Warranty
PolyJohn reserves the right to request inspection of products for verification of defect, which may include returning some or all of the parts with
shipping paid for by the purchaser. Once the items have been returned, inspected, and PolyJohn is found at fault shipping costs will be reimbursed.
You may contact PolyJohn to arrange for return shipping if desired.
To file your warranty claim follow these steps:
1. Go to polyjohn.com/warranty/
2. Fill out necessary contact information
3. Fill in invoice number, date of purchase, product, and product serial numbers.
4. Upload an images of affected products
5. Submit and someone will be in contact with you as soon as possible.

Page 20 of 20
September 2022
POLYJOHN USA
+1 800-292-1305
Whiting, Indiana
www.polyjohn.com
POLYJOHN INTERNATIONAL
UNITED KINGDOM
+44 (0) 1937-583333
Yorkshire, England
www.polyjohn.co.uk
POLYJOHN INTERNATIONAL
CZECH REPUBLIC
+420 608 876 983
Karlovy Vary, Czech Republic
www.polyjohn.eu
POLYJOHN CANADA
+1 800-465-9590
Oro Medonte, Ontario
www.polyjohn.ca
www.fr.polyjohn.ca
POLYJOHN LATIN AMERICA
+01 800-953-1307
Chihuahua, Mexico
www.polyjohn.mx
POLYJOHN NEW ZEALAND
+64 (0)22 387 7142
Auckland, New Zealand
www.polyjohn.co.nz
POLYJOHN SOUTH AMERICA
+57 318 696 7744
Bogotá, Colombia
www.polyjohn.com
POLYJOHN AUSTRALIA
+61 7 3277 5727
Brisbane, Australia
www.totalsanitationsolutions.com.au
POLYJOHN SOUTHERN AFRICA
+27 (011) 615-3804
Johannesburg, South Africa
www.polyjohn.co.za
“PolyJohn is a family owned, state of the art, plastics manufacturing company dedicated
to providing its employees with a work environment committed to excellence, and its
customers with innovative products, services and technology that meet or exceed their
requirements.”
THANK YOU FOR PURCHASING POLYJOHN PRODUCTS!
OUR MISSION STATEMENT
Table of contents
Other PolyJohn Toilet manuals

PolyJohn
PolyJohn PH04 COMFORT XLT Series Instruction sheet

PolyJohn
PolyJohn Comfort XLT FLUSH Series Instruction sheet

PolyJohn
PolyJohn Comfort XLT Series Instruction sheet

PolyJohn
PolyJohn PolyLift PL01-1000 User manual

PolyJohn
PolyJohn Comfort Inn PH03 User manual

PolyJohn
PolyJohn MINI-FLUSH MF02-1000 Instruction sheet

PolyJohn
PolyJohn FLEET Series Instruction sheet

PolyJohn
PolyJohn Comfort XLT PH04 Parts list manual

PolyJohn
PolyJohn Comfort XLT PH04 User manual

PolyJohn
PolyJohn PJP4 Series Instruction sheet