manuals.online logo
Brands
  1. Home
  2. •
  3. Brands
  4. •
  5. Power Craft
  6. •
  7. Drill
  8. •
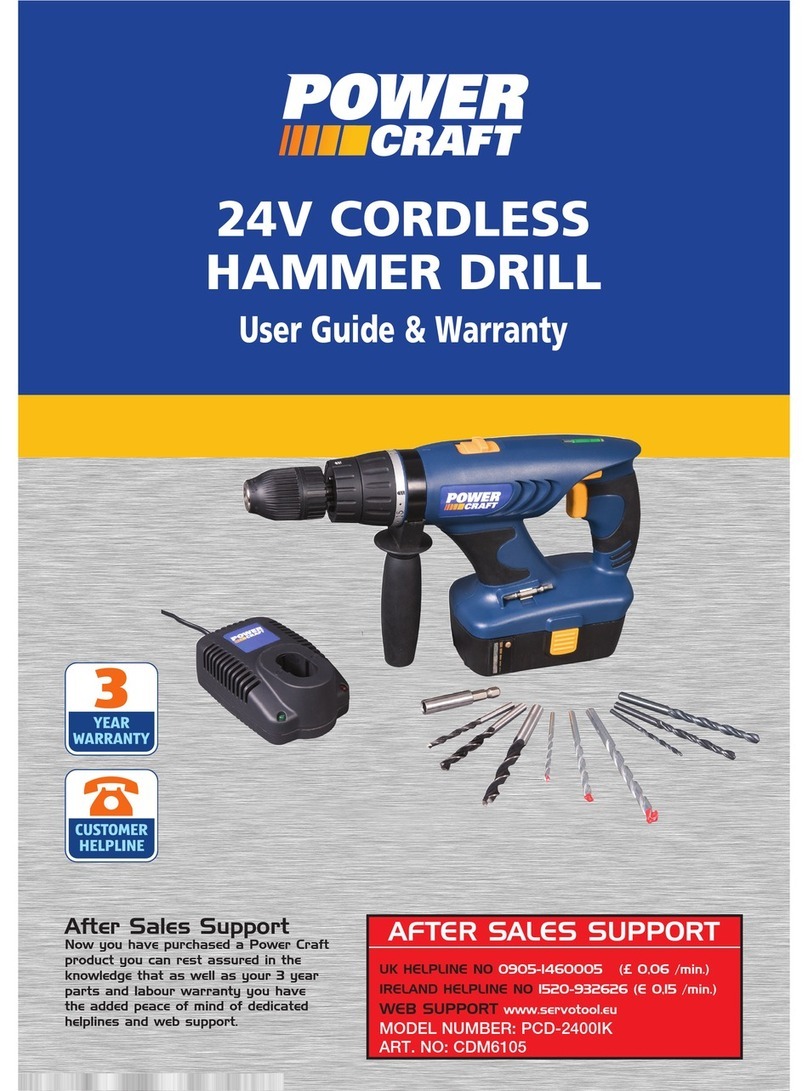
  9. Power Craft PDD-1800 User manual

Power Craft PDD-1800 User manual

www.servotool.com GB/IRE-0609-19
GB Subject to change
GB USERS MANUAL
Art. No. CDM6058
PDD-1800
12/2006
219Powercraft Powercraft
Exploded view
Fig.A
Fig. B
Fig. C
18 Powercraft 3
Spare parts list
Position no. Description No.
4 Battery CDA6012
- Charger CDA6013
Fig.D
Fig.E
12
5
Fig.F
Powercraft
13 14
Powercraft 17
UK
NL
F
E
P
I
S
SF
N
DK
Powercraft
4
D
NL
F
E
P
I
S
SF
N
DK
Fig.G
Fig. H
Fig. I
Powercraft
16
UK
D
NL
F
E
P
I
S
SF
N
DK
Powercraft 5
CORDLESS DRILL
The numerals in the following text refer to the figures on pages 2 – 4.
For your own safety and the safety of others we recommend that you read this
manual thoroughly before using the drill for the first time. Store this manual and the
other documentation together with the machine. Provide this manual with the
device if you give it to another user.
Contents Page
1. Machine information 05
2. Safety instructions 06
3. Installing the accessories 10
4. Operation 11
5. Service and maintenance 14
6. Disposal 14
Appropriate use
This cordless drill is intended for screwing and unscrewing of screws
and for drilling wood, metal, ceramic and plastic.Any other use is explicitly prohibited.
1. MACHINE INFORMATION
Technical specifications
Packaging content
1 x Cordless drill
2 x Batteries
1 x Battery charger
2 x Double-ended bits
1 x Operating manual
1 x Warranty card
6 x Drill bits
Voltage 18 V —
- -
Charger voltage 230 V
Charger frequency 50 Hz
Battery rating 1.3Ah
Charging time 1 - 2 Hrs.
Number of speed ranges 2
Max. torque (low speed) 20 Nm
Unloaded speed 0-400/0-1150/min
Chuck capacity 0.8 - 10 mm
Weight (incl. battery) 1.85 kg
Lpa (sound pressure) 69 dB(A)
Lwa (sound power) 80 dB(A)
GB
D
NL
F
E
P
I
S
SF
N
DK
Powercraft 15
When the product reaches the end of its life, it must never be disposed of in the
normal household waste. According to the EU guideline 2002/96/EC relating to
electrical and electronic devices, it must be appropriately disposed of. Damaged
and/or discarded electrical or electronic devices must be disposed of at the
appropriate recycling centre.
CE DECLARATION OF CONFORMITY (GB)
We declare under our sole responsibility that this product is in conformity
with the following standards or standardized documents:
EN60745-1, EN60745-2-1, EN60745-2-2, EN55014-2, EN60335-1,
EN60335-2-29, EN61000-3-2, EN61000-3-3.
in accordance with the regulations:
98/37/EC, 73/23/EC, 89/336/EC, 2002/95/EC, 2002/96/EC
from 01-09-2006
ZWOLLE NL
J.A. Bakker - van Ingen J. Lodewijk
CEO Ferm BV Quality Manager Ferm Global
It is our policy to continuously improve our products and we therefore reserve the right to change
the product specification without prior notice.
Ferm BV • Lingenstraat 6 • 8028 PM Zwolle • The Netherlands
GB
D
NL
F
E
P
I
S
SF
N
DK
Powercraft
Check the machine, individual parts and accessories for completeness and transport damage.
Product information
Fig.A
1. On/off switch
2. Gear selection switch
3. Torque adjustment ring
4. Chuck
5. Battery
6. Rotation direction switch
7. Screwdriver bit
8. Battery energy display
2. SAFETY INSTRUCTIONS
The following pictograms are used in this manual:
Read instructions carefully.
In accordance with essential applicable safety standards of European directives.
Class II machine – Double insulation – You don’t need an earthed plug.
Denotes risk of personal injury, loss of life or damage to the tool in case of non-
observance of the instructions in this manual.
Indicates electrical shock hazard.
Variable speed control.
Device can rotate in both directions.
Do not throw the battery into a fire.
Do not throw the battery into water.
6
GB
D
NL
F
E
P
I
S
SF
N
DK
Powercraft
lubricant (Fig. I).
• When screwing into wood, pre-drilling a hole to a depth appropriate to the length of the
screw is recommended. Pre-drilling guides the screw into position and avoids splitting or
deforming the wood.
If you have not used the cordless drill for an extended period of time, then you must
first fully charge the battery. The battery must be stored in a charged state.
5. SERVICE & MAINTENANCE
Always remove the power plug from the power socket before cleaning and
maintaining the device. Never use water or aggressive liquids for cleaning the
device. Use a brush for cleaning the device.
The device is constructed for long-term use with minimal maintenance. Long-term satisfactory
operation depends on proper care of the device and regular cleaning.
Cleaning
Regularly clean the case of the machine with a soft cloth, preferably after every use. Keep the
ventilation slots free of dust and dirt. Remove persistent soiling with a soft cloth, dampened with
soapy water. Never use solvents such as petrol, alcohol, ammonia etc. as these solvents
damage the plastic parts.
Lubrication
The machine requires no additional lubrication.
Faults
If a fault develops through e.g. a part wearing out, then please contact the service address on
the warranty card.An extensive list of parts that can be ordered is provided at the end of this
manual.
Warranty
Please read the warranty conditions on the separately included warranty card.
6. DISPOSAL
To avoid transport damage, the machine is delivered in sturdy packaging. The
packing is largely composed of recyclable materials. Please recycle the
packaging.
Old batteries and accumulators may not be disposed of in the household waste.
Every consumer is legally obliged to dispose of these items at the appropriate
disposal centre.
14
GB
D
NL
F
E
P
I
S
SF
N
DK
Powercraft 7
Fuse F: 2A, 250V
Indoor use only
Always recycle batteries
Faulty and/or discarded electrical or electronic apparatus have to be collected at the
appropriate recycling locations.
General safety instuctions
Warning! Read all instructions. Failure to follow all instructions listed below may result in electric
shock, fire and/or serious injury. The term “power tool” in all of the warnings listed below refers to
your mains operated (corded) power tool or battery operated (cordless) power tool. Save these
instuctions!
1) Work area
a. Keep work area clean and well lit. Cluttered and dark areas invite accidents.
b. Do not operate power tools in explosive atmospheres, such as in the presence of
flammable liquids, gasses or dust. Power tools create sparks which may ignite the dust
or fumes.
c. Keep children and bystanders away while operating a power tool. Distractions can
cause you to lose control.
2) Electrical safety
a. Power tool plugs must match the outlet. Never modify the plug in any way. Do not use
any adapter plugs with earthed (grounded) power tools. Unmodified plugs and
matching outlets will reduce risk of electric shock.
b. Avoid body contact with earthed or grounded surfaces such as pipes, radiators,
ranges and refrigerators. There is an increased risk of electric shock if your body is
earthed or grounded.
c. Do not expose power tools to rain or wet conditions. Water entering a power tool will
increase the risk of electric shock.
d. Do not abuse the cord. Never use the cord for carrying, pulling or unplugging the
power tool. Keep cord away from heat, oil, sharp edges or moving parts. Damaged or
entangled cords increase the risk of electric shock.
e. When operating a power tool outdoors, use an extension cord suitable for outdoor
use. Use of a cord suitable for outdoor use reduces the risk of electric shock.Always
use the tool in conjunction with a residual circuit breaker device.
3) Personal safety
a. Stay alert, watch what you are doing and use common sense when operating a
GB
D
NL
F
E
P
I
S
SF
N
DK
Powercraft 13
Charging the battery
Fig. F
The KDDL-1800 charger is only suited for charging KDDB-1800 batteries.
• Insert the battery (5) into the charger (12) as shown in the drawing. Take care to observer
the + and – polarity markings.
• Plug the charger power plug into the power socket. The red quick-charge lamp (14)
illuminates.
• Charging is completed once the green maintenance charge lamp (10) on the other side of
the charger illuminates. The battery is now ready for use.
• The energy display (8) on the battery case provides information on the charge level of the
battery. Press the push button (11).
The coloured display has the following meanings:
• All coloured bars illuminate (red-yellow-green): the battery is fully charged
• The red and yellow coloured bars illuminate: the battery is partially charged
• The red coloured bar illuminates: the battery is discharged and must be recharged.
Always use the charger in a dry environment and only at ambient temperatures
between 5 ºC and 40 ºC.
The battery for your drill is delivered in an uncharged state. It must be charged for approx. 1 – 2
hours to reach full power before first use.
The final capacity of the battery is reached after 4 – 5 charge/discharge cycles.
Discharging the battery
Discharging batteries is just as important as charging them, perhaps even more
important.
• Once the battery is charged, the cordless drill must be used until you notice that the power
of the drill fades and the maximum speed is no longer reached.
• The battery is almost discharged. Only now should the battery be recharged.
• If you recharge the battery when it still has (e.g.) one third remaining power, then the so-
called “memory effect” can occur. When charging, only the discharged part of the battery is
activated and crystallisation can occur in the third that is still charged. This makes this part
of the battery capacity unusable.
• You should also never completely discharge the battery. You should recharge the battery
as soon as you notice that the power or maximum speed of the drill begins to fade. If you
continue using the drill until the battery is completely discharged, the so-called “polarity
reversal effect” can occur. This reverses the polarity of the battery terminals, i.e. “+”
becomes “-“ and “-“ becomes “+”. Once this effect occurs, the polarity remains swapped on
charging. The battery is irreparably damaged and must be replaced.
Instructions for optimum results
• Always hold the device and the screwdriver bit in a direct line with the screw and always use
the correct type of screwdriver bit in the correct size.
• If screws are difficult to screw in, then use a small amount of soap on the screw as a
GB
D
NL
F
E
P
I
S
SF
N
DK
Powercraft
power tool. Do not use a power tool while you are tired or under the influence of
drugs, alcohol or medication. Amoment of inattention while operating power tools may
result in serious personal injury.
b. Use safety equipment. Always wear eye protection. Safety equipment such as dust
mask, non-skid safety shoes, hard hat, or hearing protection used for appropriate
conditions will reduce personal injuries.
c. Avoid accidental starting. Ensure the switch is in the off position before plugging in.
Carrying power tools with your finger on the switch or plugging in power tools that have the
switch on invites accidents.
d. Remove any adjusting key or wrench before turning the power tool on. Awrench or a
key left attached to a rotating part of the power tool may result in personal injury.
e. Do not overreach. Keep proper footing and balance at all times. This enables better
control of the power tool in unexpected situations.
f. Dress properly. Do not wear loose clothing or jewellery. Keep your hair, clothing and
gloves away from moving parts. Loose clothes, jewellery or long hair can be caught in
moving parts.
g. If devices are provided for the connection of dust extraction and collection facilities,
ensure these are connected and properly used. Use of these devices can reduce dust
related hazards.
h. Use clamps or a vice to hold work. It’s safer than using your hand and it frees both hands
to operate tool.
4) Power tool use and care
a. Do not force the power tool. Use the correct power tool for your application. The
correct power tool will do the job better and safer at the rate for which it was designed.
b. Do not use the power tool if the switch does not turn it on and off.Any power tool that
cannot be controlled with the switch is dangerous and must be repaired.
c. Disconnect the plug from the power source before making any adjustments,
changing accessories, or storing power tools. Such safety measures reduce the risk of
starting the power tool accidentally.
d. Store idle power tools out of the reach of children and do not allow persons
unfamiliar with the power tool or these instructions to operate the power tool. Power
tools are dangerous in the hands of untrained users.
e.
Maintain power tools. Check for misalignment or binding of moving parts, breakage of
parts and any other condition that may affect the power tools operation. If damaged,
have the power tool repaired before use. Many accidents are caused by poorly maintained
power tools.
f. Keep cutting tools sharp and clean. Properly maintained cutting tools with sharp cutting
edges are less likely to bind and are easier to control.
g. Use the power tool, accessories and tool bits etc., in accordance with these
instructions and in the manner intended for the particular type of power tool, taking
into account the working conditions and the work to be performed. Use of the power
tool for operations other then those intended could result in hazardous situations.
5) Battery use and care
a. Ensure the switch is in the off position before inserting battery pack. Inserting the
battery pack into power tools that have the switch on invites accidents.
b. Recharge only with the charger specified by the manufacturer.Acharger that is
8
GB
D
NL
F
E
P
I
S
SF
N
DK
Powercraft 9
suitable for one type of battery pack may create a risk of fire when used with another battery
pack.
c. Use power tools only with specifically designated battery packs. Use of any other
battery packs may create a risk of injury and fire.
d. When battery pack is not in use, keep it away from other metal objects like paper
clips, coins, keys, nails, screws, or other small metal objects that can make a
connection from one terminal to another. Shorting the battery terminals together may
cause burns or a fire.
e. Under abusive conditions, liquid may be ejected from the battery; avoid contact. If
contact accidentally occurs, flush with water. If liquid contacts eyes, flush with
water and seek medical help. Liquid ejected from the battery may cause irritations or
burns.
6) Service
a. Please use a qualified expert who uses original replacement parts to repair your
power tool. This will ensure proper functioning of the power tool.
Important safety notes on charger and batterypack
If you should come into contact with acid from the battery pack, immediately wash
the acid off with water. If acid comes into contact with your eyes, immediately rinse
your eyes with water and seek additional medical help!
1. Read and observe the charger and battery pack safety instructions before use.
2. Note! Only use the charger and battery pack provided by the manufacturer, otherwise a
danger of accident exists.
3. Protect the charger, battery pack and electric tool from moisture, such as rain or snow.
4. Check the power cable for signs of damage before using the charger.
5. If you notice signs of damage to the power cable then you must not use the charger. Have
the damaged cable immediately replaced.
6. The power cable must be removed from the power socket when the charger is not being
used. Do not pull the power plug by the power cable.
7. If the charger should fall, or be subjected to heavy mechanical stresses, have it checked for
damage by a recognized specialist workshop before use. Damaged parts must be
repaired.
8. Handle the battery pack carefully, do not drop it and protect it from sudden mechanical
shocks.
9. Never attempt to repair the charger or the battery pack yourself. Repairs must always be
performed by a recognised specialist workshop otherwise the danger of accident exists.
10. Always remove the power plug from the power socket before cleaning or maintaining the
charger or battery pack.
11. Never charge the battery when the ambient temperature lies below 5 °C or above 40 °C
12. The ventilation holes of the charger must remain uncovered.
13. The battery pack must not be short-circuited.
A heavy current flows under short-circuit conditions. This can result in overheating,
fire or ruptures in the battery pack. This can damage the battery pack and/or present
the danger of an accident to the user
GB
Powercraft
Setting the torque
Fig. E
The machine has 16 different torque settings, which can be used for setting the power for
screwing and unscrewing.
• Set the torque adjustment ring (3) to the desired position.
The numbers 1 to 16 on the setting ring indicate the available torque settings. The chosen
torque is limited by the slip-clutch built into the device.
• Choose the lowest possible setting that allows the screw to turn. Choose a higher setting
when the slip clutch engages.
Screwing and unscrewing
• For screwing screws, press the rotation direction switch (6) on the left side of the machine.
• For unscrewing screws, press the rotation direction switch (6) on the right side of the
machine.
Danger of injury! Do not place your other hand under the screwing point when
holding the work piece.
Drilling
• Rotate the torque adjustment ring (3) to the drilling position .
When drilling, ensure that the rotation direction switch on the right of the machine is
pressed in.
Switching the device on and off
Fig.A
• Depress the on/off switch (1). It regulates the speed of the appliance by transmitting power
to the switch.
• Release the on/off switch (1) to halt the drill chuck immediately which will no longer run on.
• Move the direction reversing switch (6) to the centre in order to lock the appliance in its
disabled state.
Wait until the motor has fully stopped before placing the machine aside. Do not lay the machine
on a dusty surface. Dust particles can penetrate inside the mechanism.
Rotatable battery
Fig. G + H
The cordless drill is equipped with a 360º rotating hinge at the bottom of the handle. The battery
can be rotated into different positions. This allows the cordless drill to be used in places that are
difficult to reach. The weight of the battery can also be repositioned so that the cordless drill is
easier to use (e.g. less strain on the wrist).
12
GB
D
NL
F
E
P
I
S
SF
N
DK

Powercraft 11
Flathead Allen Philips Torx
Insertion and removal of the battery
Fig. C
Ensure that the exterior of the battery block or tool is clean and dry before
connecting the charger.
• Ensure that the rotation direction switch (6, figA) is in the middle position, to avoid the
machine being accidentally switched on.
• Insert the battery (5) into the base of the machine, as shown in the drawing. Press the
battery firmly into place until it clicks into position.
• To remove the battery, press the two locking buttons (10) and pull the battery out of the base
of the machine.
4. OPERATION
Always observe the safety instructions and keep to the relevant regulations.
Hold the machine firmly and press the drill evenly into the work piece. Do not overload the
machine. Use only bits that do not show signs of wear. Worn bits have a negative effect on the
functional efficiency of the machine.
Setting the speed
Fig. D
Two speed ranges can be selected using the gear selection switch (2):
1. Gear: Low speed, high power
2. Gear: High speed, lower power
Never change this switch while the motor is running!
D
NL
F
E
P
I
S
SF
N
DK
Powercraft
Therefore:
• Never connect a cable to the battery terminal(s).
• Ensure that no metal items (nails, paperclips, coins etc.) are in the battery
compartment.
• Never subject the battery pack to water or rain.
•
Use only the battery pack provided with this cordless drill, to avoid mistakes and/or risks.
14. Adamaged battery pack, or one that can no longer be charged, must be specially disposed
of. Do not throw this in the household rubbish.
15. Never throw the battery pack into a fire or into water.Adanger of explosion exists!
Electrical safety
When using electric tools, always observe the local regulations relating to fire risk, electric
shock and injury. In addition to the following instructions, also read the safety regulations in the
relevant special section.
Always check that the voltage of the battery pack matches the voltage specified on
the power label of the charger.Also check that your mains voltage matches the input
voltage of the charger.
The battery charger is earth-protected and does not require an earth contact.
Replacing cables or plugs
If the power cable of this device is damaged then, to minimise danger, the manufacturer, their
customer service department or another suitably qualified person must replace it.
• Remove the battery pack. When the electric tool is not being used, before maintenance and
when changing tools such as drills, bits etc.
3. INSTALLING THEACCESSORIES
Always remove the battery before installing any accessories.
Fitting and removing drill cutters
Fig. B
In addition to drills, the machine can also accept screwdriver bits (7) with a hexagonal shaft.
• Loosen the chuck (4) by rotating the knurl (9) in an anticlockwise direction.
• Insert the bit shaft into the chuck.
• Rotate the chuck in the opposite direction so that the bit is securely clamped.
• Rotate the chuck open again when you want to change the bit.
Only use screwdriver bits that are undamaged and that match the screw heads (2 double-ended
screwdriver bits are provided)
10
GB
NL
F
E
P
I
S
SF
N
DK
GB

Other Power Craft Drill manuals

Power Craft PDM 600 User manual

Power Craft

Power Craft PDM 600 User manual

Power Craft PHD-810 Operating instructions

Power Craft

Power Craft PHD-810 Operating instructions

Power Craft 44000 User manual

Power Craft

Power Craft 44000 User manual

Power Craft PCD-2400I User manual

Power Craft

Power Craft PCD-2400I User manual

Power Craft 14.4 Volt CORDLESS HAMMER DRILL Instruction Manual

Power Craft

Power Craft 14.4 Volt CORDLESS HAMMER DRILL Instruction Manual

Power Craft PCC-1800 User manual

Power Craft

Power Craft PCC-1800 User manual

Power Craft 49000 User manual

Power Craft

Power Craft 49000 User manual

Power Craft 66697 User manual

Power Craft

Power Craft 66697 User manual

Power Craft PCD-2400IN User manual

Power Craft

Power Craft PCD-2400IN User manual

Power Craft EHD 500 E User manual

Power Craft

Power Craft EHD 500 E User manual

Power Craft 4500 User manual

Power Craft

Power Craft 4500 User manual

Power Craft 66244 User manual

Power Craft

Power Craft 66244 User manual

Power Craft PCC-1800K2 User manual

Power Craft

Power Craft PCC-1800K2 User manual

Power Craft PCD-2400I User manual

Power Craft

Power Craft PCD-2400I User manual

Power Craft PCd-2400IK Technical manual

Power Craft

Power Craft PCd-2400IK Technical manual

Power Craft CDM6180 Technical manual

Power Craft

Power Craft CDM6180 Technical manual

Power Craft 55063 User manual

Power Craft

Power Craft 55063 User manual

Power Craft 1050W Installation guide

Power Craft

Power Craft 1050W Installation guide

Power Craft PCD-2400I User manual

Power Craft

Power Craft PCD-2400I User manual

Popular Drill manuals by other brands

Festool DR 18/4 E Original operating manual

Festool

Festool DR 18/4 E Original operating manual

BorMann BCD2010 manual

BorMann

BorMann BCD2010 manual

Atlas Copco LBB16 EP024 instructions

Atlas Copco

Atlas Copco LBB16 EP024 instructions

Hitachi DV 20VB Instruction and safety manual

Hitachi

Hitachi DV 20VB Instruction and safety manual

DeWalt DW235G manual

DeWalt

DeWalt DW235G manual

Foy RM312C User manual and warranty

Foy

Foy RM312C User manual and warranty

Makita 6402 instruction manual

Makita

Makita 6402 instruction manual

Atra Ace WOJ-3200 instruction manual

Atra Ace

Atra Ace WOJ-3200 instruction manual

Festool CXS instruction manual

Festool

Festool CXS instruction manual

Draper CAD14VK instructions

Draper

Draper CAD14VK instructions

Parkside PBH 800 A1 Translation of the original instructions

Parkside

Parkside PBH 800 A1 Translation of the original instructions

Husqvarna DM 200 Workshop manual

Husqvarna

Husqvarna DM 200 Workshop manual

Bosch 13624 Operating/safety instructions

Bosch

Bosch 13624 Operating/safety instructions

Chicago Electric 91007 operating instructions

Chicago Electric

Chicago Electric 91007 operating instructions

ENKHO 160294.01 Original instructions

ENKHO

ENKHO 160294.01 Original instructions

HIKOKI DS 12DD Handling instructions

HIKOKI

HIKOKI DS 12DD Handling instructions

BDS MAB 485 Operating	 instruction

BDS

BDS MAB 485 Operating instruction

EINHELL TE-RH 950 5F Original operating instructions

EINHELL

EINHELL TE-RH 950 5F Original operating instructions

manuals.online logo
manuals.online logoBrands
  • About & Mission
  • Contact us
  • Privacy Policy
  • Terms and Conditions

Copyright 2025 Manuals.Online. All Rights Reserved.