Powerfix Profi KH 2927-1 User manual

KOMPERNASS GMBH
BURGSTRASSE 21 · D-44867 BOCHUM
www.kompernass.com
ID-Nr.: KH2927-1-07/11-V1
IAN: 69084
Ultrasonic Distance Meter
3
Ultrasonic Distance Meter
Operating instructions
Ultraäänietäisyysmittari
Käyttöohje
Ultralydsafstandsmåler
Betjeningsvejledning
Ultraljudsavståndsmätare
Bruksanvisning
KH 2927-1
Ultraschall-Entfernungsmesser
Bedienungsanleitung

q
w
0
9
8
3
4
7
5
2
1
KKHH22992277-11
6

- 1 -
IINNDDEEXXPPAAGGEE
Intended Usage 2
Safety instructions 2
Technical data 3
Items supplied 4
Unpacking 4
Device description 4
Inserting the battery 4
Measuring distances 5
Adding distances together 7
Measuring areas 7
Adding areas together 8
Measuring volumes 8
Adding volumes together 9
Displaying the last measurements 9
Temperature Display 9
Battery display 10
Automatic switch-off 10
Cleaning and storage 10
Disposal 10
Service 11
Importer 11
Read these operating instructions carefully before using the
appliance for the first time and preserve this booklet for later
reference. Also, pass these operating instructions on to whoever
might acquire the appliance at a future date.
IB_69084_KH2927_1_LB3.qxd 30.08.2013 10:04 Uhr Seite 1

UULLTTRRAASSOONNIICCDDIISSTTAANNCCEEMMEETTEERR
KKHH22992277--11
Intended Usage
This appliance is intended for the measuring of distances
and for the calculation of areas and volumes. The
appliance
is intended for domestic use only. Do not use it for commer-
cial purposes.
Safety instructions
Risk of personal injury!
• Do not use the appliance at locations where there is a
risk of fire or explosion, e.g. in the vicinity of inflammable
liquids or gases.
• This appliance is not intended for use by individuals
(including children) with restricted physical, physiological
or intellectual abilities or deficiences in experience
and/or knowledge unless they are supervised by a
person responsible for their safety or receive from this
person instruction in how the appliance is to be used.
• Children should be supervised to ensure that they do
not play with the appliance.
Risk from the laser beam!
This appliance contains a Class 2 laser.
NEVER direct the laser beam at people or animals.
NEVER look directly into the laser beam.
The laser beam can cause serious eye damage.
- 2 -
IB_69084_KH2927_1_LB3.qxd 30.08.2013 10:04 Uhr Seite 2

• Do NOT direct the laser beam at strongly reflective
material. Reflected laser beams are also dangerous.
• Any adjustment intended to increase the intensity of the
laser beam is forbidden. There is also a risk of personal
injury!
• No liabilty will be accepted for damage resulting from
manipulation to the laser equipment as well as from
disregarding these safety instructions.
Warning against damage to the appliance!
• NEVER subject the appliance to rain.
Do not use the appliance in wet or moist environments.
Interaction with batteries
Risk of explosion!
Do not throw batteries into a fire.
Do not recharge non-rechargeable batteries.
• Never open batteries, never solder or weld batteries.
Never short-circuit batteries. The risk of explosions and
injuries exists!
• If you do not intend to use the appliance for an extended
period remove the battery, otherwise it could leak
corrosive acids.
• If the batteries have leaked, put on a pair of protective
gloves to avoid the risk of injury through chemical burns.
Clean the battery compartment and the battery contacts
with a dry cloth.
• Always replace the battery with a battery of the same
type.
• Keep batteries away from children. Children can put
batteries into their mouths and swallow them.
If a battery is swallowed immediately seek medical
assistance.
Technical data
Electricity supply: 9V Block battery, 6F22/6LR61
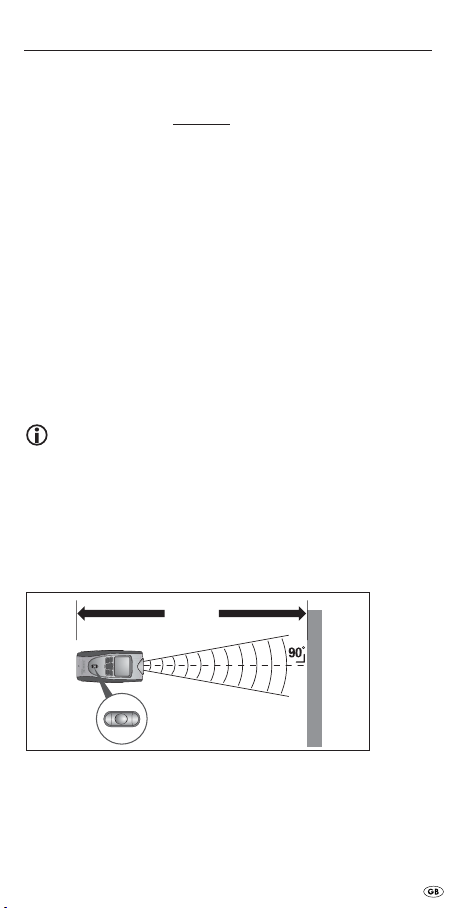
Measurement range: 0.6 - 16 m
Measurement accuracy: +/- 1%
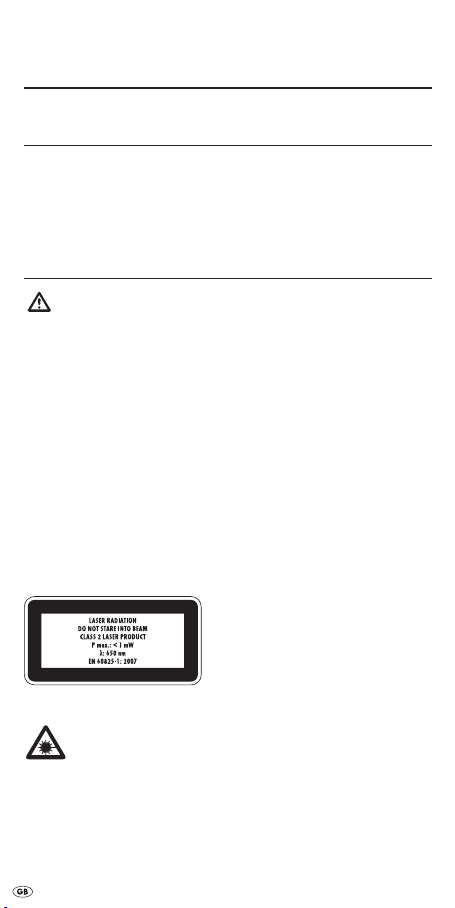
Laser class: 2
Wavelength ( ): 650 nm
Output level (P max.): <1mW
- 3 -
IB_69084_KH2927_1_LB3.qxd 30.08.2013 10:04 Uhr Seite 3

Items supplied
• Ultrasonic Distance Meter
• 9V battery
• Operating Instructions
Unpacking
Remove the Ultrasonic Distance Meter from the packaging.
Remove all transport restraints and packaging materials.
Remove the protective foil from the display w.
Device description
1Laser emission opening
2Ultrasonic sender/receiver
3Temperature sensor
4FT/M button
5RECALL button
6Measurement point
7Battery compartment
8Spirit level
9MODE button
0ON/OFF button
qREAD button
wDisplay
Inserting the battery
1. Open the battery compartment 7at the rear of the
Ultrasonic Distance Meter.
2. Place the 9V block battery onto the contacts.
Pay heed to the correct polarity.
3. Lay the 9V block battery into the battery compartment 7.
Warning:
Ensure that the wires are not trapped in any way. This could
irreparably damage the appliance.
4. Close the battery compartment 7. The battery
compartment lid must audibly engage.
- 4 -
IB_69084_KH2927_1_LB3.qxd 30.08.2013 10:04 Uhr Seite 4

Measuring distances
1. Switch the appliance on by pressing the button
ON/OFF 0.
2. If necessary, press the MODE 9button several times
until the indicator (distance measurement)
appears in the display.
3. To switch between metric (Meter M) and Anglo-American
(Feet‘/Inch’’) measurement units, press the button
FT/M 4.
4. Hold the appliance upright towards the wall to which
you wish to measure the distance. The ultrasound sender/
receiver 2must be at a right-angle to the wall. For this,
use the spirit level 8:
The bubble in the glass 8must stand between the
marking lines (see Fig.1).
5. Press the button READ qbriefly. A laser point is projected
and an acoustic signal sounds. Hold the appliance in
this position until the measured distance appears in the
display w.
Note:
Measurements start at the measurement point
6
! Should the
measurement lie outside the measurement range, "Error" or
an illogical number appear in the display. The measurement
range lies between 0,6 m (ca.2´) and 16 m (ca.53´).
Take note of the following illustrations:
Fig. 1
MIN. 0,6 m
Max. 16 m
ON/OFF FT/M
MODE RECALL
READ
L
- 5 -
IB_69084_KH2927_1_LB3.qxd 30.08.2013 10:04 Uhr Seite 5

Fig. 2
The further you are from the wall, the wider is the area (a) that
the Distance Meter must measure by ultrasound (Fig. 2). There-
fore, take care to ensure that the Distance Meter is always
directed at a right angle towards a level surface (Fig. 1 and 3)
.
Ensure that there are no objects positioned within the measure-
ment area.
False!
Fig. 3
Notice
Inaccurate measurements can also occur because of a weak
battery. If the battery is too weak, the battery symbol appears
in the display.
ON/OFF FT/M
MODE RECALL
READ
ON/OFF FT/M
MODE RECALL
READ
ON/OFF FT/M
MODE RECALL
READ
ON/OFF FT/M
MODE RECALL
READ
a =ca. 1,5 m a =ca. 3,6 m
a =ca. 2,4 m a =ca. 4,5 m
- 6 -
IB_69084_KH2927_1_LB3.qxd 30.08.2013 10:04 Uhr Seite 6

Adding distances together
1. Measure an area as described in the chapter
"Measuring distances".
2. If necessary, press the MODE 9button several times
until the indicator (distance measurement)
appears in the display w.
3. Press the READ qbutton to carry out a distance
measurement.
4. Press the RECALL 5button. A "+" appears in the display
and the measured distance is transferred to the lower line.
5. Measure the next distance. The newly measured
distance is indicated in the upper line, the sum of the di-
stances is indicated in the lower line.
6. Repeat steps 2. to 4. to add further measurement values.
7. If you want to exit the addition mode press the
MODE 9button. All values will be deleted.
Measuring areas
1. Switch the device on by pressing the ON/OFF 0button.
2. If necessary, press the MODE 9button several times
until the indicator (area measurement) appears
in the display w. The bar for the first part of the
measurement blinks.
3. Press the READ qbutton to measure the length.
The bar for the second part of the measurement blinks.
4. Press the READ qbutton to measure the width.
The width is shown in the upper line, the area in square
meters (m2), as the sum of both measurements, is shown in
the lower line.
L
W
L
- 7 -
IB_69084_KH2927_1_LB3.qxd 30.08.2013 10:04 Uhr Seite 7

Adding areas together
1. Measure an area as described in the section
"Measuring areas".
2. Press and hold down the MODE 9button.
"M+" appears in the display w. The area measured is
now saved.
3. Press the MODE 9button. The device is now ready
for the second measurement.
4. Measure the next area.
5. Press the RECALL 5button. A "+" appears in the display.
6. Press and hold down the RECALL 5button. In the lower
line is shown the result of the first measurement.
7. Press the RECALL 5button. Both measurements will be
added and the result is shown in the lower line.
8. Repeat steps 2. to 7. to add further measurement values.
9. If you want to exit the addition mode press the
MODE 9button. All values will be deleted.
Measuring volumes
1. Switch the device on by pressing the ON/OFF 0button.
2. If necessary, press the MODE 9button several times
until the indicator (volume measurement) appears
in the display w. The bar for the first part of the
measurement blinks.
3. Press the READ qbutton to measure the length.
The bar for the second part of the measurement blinks.
4. Press the READ qbutton to measure the width.
The bar for the third part of the measurement blinks.
5. Press the READ qbutton to measure the height.
The measured height appears in the upper line.
The height is shown in the upper line, the volume in
cubic meters (m3), as the sum of all three measurements,
is shown in the lower line.
L
W
H
- 8 -
IB_69084_KH2927_1_LB3.qxd 30.08.2013 10:04 Uhr Seite 8

Adding volumes together
1. Measure a volume as described in the section
"Measuring volumes".
2. Press and hold down the MODE 9button.
"M+" appears in the display w. The volume measured
is now saved.
3 Press the MODE 9button. The device is now ready
for the second measurement.
4. Measure the next volume.
5. Press the RECALL 5button. A "+" appears in the display.
6 Press and hold down the RECALL 5button. In the lower
line is shown the result of the first measurement.
7. Press the button RECALL 5. The two measurements
will be added together and the result indicated on the
lower line.
8. Repeat the steps 2 to 7 to add together further
measurements.
9. Should you wish to depart the addition mode, press the
button MODE 9. All values will be erased.
Displaying the last measurements
After the measurement of a total distance, an area or a
volume, press the button READ qrepeatedly to indicate
once again the individual values of the measurements.
The beam of the respective measured value blinks and the
measurement result is indicated in the upper line of the
display w.
Temperature Display
Press and hold down the FT/M 4button. In the display w
the temperature indicator appears in the lower line.
To change between the SI unit system (degrees celcius)
and the Angloamerican system (degrees Fahrenheit) press
the FT/M 4button. If you want to exit the temperature
indicator press the MODE 9button.
- 9 -
IB_69084_KH2927_1_LB3.qxd 30.08.2013 10:04 Uhr Seite 9

Battery display
A battery symbol appears in the display wwhen the battery
is weak resp. almost discharged. Replace the battery as
soon as possible (see section "Inserting the battery").
If you do not, the measurements will be false.
Automatic switch-off
If a button is not activated for approx. 60 seconds,
the appliance switches itself off automatically.
Cleaning and storage
• Store the appliance at a dry and frost-free location.
• If you do not intend to use the appliance for an extended
period, remove the battery from the battery compartment.
• Clean the appliance with a soft, dry cloth.
• Do not use chemical or abrasive cleaning agents.
These could damage the housing.
Disposal
Do not dispose of the appliance in your normal
domestic waste. This product is subject to the
provisions of European Directive 2002/96/EC.
Dispose of the appliance through an approved disposal
centre or at your community waste facility.
Observe the currently applicable regulations. In case of
doubt, please contact your waste disposal centre.
Disposal of batteries/accumulators
Used batteries/rechargeable batteries may not be disposed
of in household waste. Every consumer is legally obliged
to dispose of batteries at a collection site of his community/
city district or at a retail store.
The purpose of this obligation is to ensure that batteries
are disposed of in a non-polluting manner. Only dispose
of batteries when they are fully discharged.
Dispose of the packaging materials in an
environmentally responsible manner.
- 10 -
IB_69084_KH2927_1_LB3.qxd 30.08.2013 10:04 Uhr Seite 10

Service
Service Great Britain
Tel.: 0871 5000 720 (£ 0.10/Min.)
E-Mail: [email protected]
Service Ireland
Tel.: 1890 930 034
(0,08 EUR/Min., (peak))
(0,06 EUR/Min., (off peak))
E-Mail: [email protected]
Importer
KOMPERNASS GMBH
BURGSTRASSE 21
44867 BOCHUM, GERMANY
www.kompernass.com
IAN 69084
IAN 69084
- 11 -
IB_69084_KH2927_1_LB3.qxd 30.08.2013 10:04 Uhr Seite 11

- 12 -
IB_69084_KH2927_1_LB3.qxd 30.08.2013 10:04 Uhr Seite 12

- 13 -
SSIISSÄÄLLLLYYSSLLUUEETTTTEELLOOSSIIVVUU
Määräystenmukainen käyttö 14
Turvaohjeet 14
Tekniset tiedot 15
Toimituslaajuus 16
Purkaminen pakkauksesta 16
Laitteen kuvaus 16
Pariston asettaminen 16
Etäisyyksien mittaaminen 17
Etäisyyksien laskeminen yhteen 19
Pinta-alojen mittaaminen 19
Pinta-alojen laskeminen yhteen 20
Tilavuuksien mittaaminen 20
Tilavuuksien laskeminen yhteen 21
Viimeisten mittausten näyttö 21
Lämpötilanäyttö 21
Paristonäyttö 22
Automaattinen sammutus 22
Säilytys ja puhdistaminen 22
Hävittäminen 22
Huolto 23
Maahantuoja 23
Lue käyttöohje ennen ensimmäistä käyttökertaa huolellisesti läpi
ja pidä sitä lähettyvillä myös myöhemmissä käytöissä. Jos myyt
laitteen, anna ohje myös seuraavalle omistajalle.
IB_69084_KH2927_1_LB3.qxd 30.08.2013 10:04 Uhr Seite 13

UULLTTRRAAÄÄÄÄNNIIEETTÄÄIISSYYYYSSMMIITTTTAARRII
KKHH22992277--11
Määräystenmukainen käyttö
Etäisyysmittari on suunniteltu etäisyyksien mittaamiseen sekä
alojen ja tilavuuksien laskemiseen. Tämä laite on tarkoitettu
ainoastaan yksityistarkoituksiin. Älä käytä sitä ammattitar-
koituksessa.
Turvaohjeet
Loukkaantumisvaara!
• Älä käytä laitetta paikoissa, joissa on olemassa tulipalon
tai räjähdyksen vaara, esim. palavien nesteiden tai
kaasujen läheisyydessä.
• Tätä laitetta ei ole tarkoitettu sellaisten henkilöiden
(mukaan lukien lapset) käyttöön, joiden rajoitetut, fyysiset,
aistilliset tai henkiset kyvyt tai kokemuksen ja/tai tiedon
puute estävät käytön, lukuun ottamatta tilanteita, joissa
heitä valvoo turvallisuudesta vastaava henkilö tai joissa
he ovat saaneet tältä ohjeita laitteen käytöstä.
• Lapsia on valvottava ja on varmistettava, että he eivät
leiki laitteella.
Lasersäteen aiheuttama vaara!
Laite sisältää luokan 2 laserin.
Älä koskaan suuntaa laseria ihmisiä tai eläimiä
kohti. Älä koskaan katso suoraan laseriin.
Laser saattaa vahingoittaa silmiä.
- 14 -
IB_69084_KH2927_1_LB3.qxd 30.08.2013 10:04 Uhr Seite 14

• Älä suuntaa lasersädettä voimakkaasti heijastaviin
materiaaleihin. Heijastavan valon aiheuttama vaara.
• Kaikki toimet lasersäteen vahvistamiseksi on kielletty.
On olemassa loukkaantumisvaara!
• Emme vastaa laserlaitteiston muuttamisesta tai turvaohjeiden
noudattamatta jättämisestä aiheutuvista vahingoista.
Laitevaurioiden vaara!
• Älä altista laitetta sateelle.
Älä käytä laitetta kosteassa tai märässä ympäristössä.
Paristojen käsittely
Räjähdysvaara!
Älä heitä paristoja tuleen. Älä lataa paristoja uudelleen.
• Älä koskaan avaa paristoja, älä koskaan juota tai hitsaa
paristoja. Älä koskaan oikosulje paristoja. On olemassa
räjähdyksen ja loukkaantumisen vaara!
• Jos et käytä laitetta pidempään, poista paristo, koska
muutoin paristohappo voi vuotaa.
• Jos paristo on vuotanut, käytä suojakäsineitä välttääksesi
syöpymisvaaran. Puhdista paristokotelo ja paristoliitännät
kuivalla liinalla.
• Korvaa aina paristot saman tyypin paristoilla.
• Paristoja ei saa jättää lasten käsiin. Lapset saattavat
pistää paristot suuhunsa ja niellä ne.
Jos paristo on joutunut nieluun, hakeudu välittömästi
lääkärin hoitoon.
Tekniset tiedot
Jännitelähde: 9V:n paristo, 6F22/6LR61
Mittausalue: 0,6 - 16 m
Mittaustarkkuus: +/- 1 %
Laserluokka: 2
Aallonpituus ( ): 650 nm
Lähtöteho (P max.): <1 mW
- 15 -
IB_69084_KH2927_1_LB3.qxd 30.08.2013 10:04 Uhr Seite 15

Toimituslaajuus
• Ultraäänietäisyysmittari
• 9V:n paristo
• Käyttöohje
Purkaminen pakkauksesta
Poista etäisyysmittari pakkauksesta. Poista kaikki kuljetusvar-
mistimet ja pakkausmateriaalit. Poista näytön wsuojakalvo.
Laitteen kuvaus
1Laserin ulostuloaukko
2Ultraäänilähetin/-vastaanotin
3Lämpötila-anturi
4FT/M-painike
5RECALL-painike
6Mittauspiste
7Paristokotelo
8Vesivaaka
9MODE-painike
0ON/OFF-painike
qREAD-painike
wNäyttö
Pariston asettaminen
1. Avaa etäisyysmittarin taustapuolella oleva
paristokotelo 7.
2. Työnnä 9V:n neppariparisto liittimiin.
Varmista oikea napaisuus.
3. Aseta 9V:n paristo paristokoteloon 7.
Huomio:
Varmista, etteivät johdot jää puristuksiin. Se vaurioittaa
laitteen korjauskelvottomaksi.
4. Sulje paristokotelo 7. Paristokotelon kannen täytyy
lukittua kuuluvasti paikalleen.
- 16 -
IB_69084_KH2927_1_LB3.qxd 30.08.2013 10:04 Uhr Seite 16

Etäisyyksien mittaaminen
1. Kytke laite päälle painamalla painiketta ON/OFF 0.
2. Paina tarvittaessa MODE-painiketta 9useaan kertaan,
kunnes näyttöön ilmestyy näyttö
(etäisyysmittaus).
3. Vaihda mittayksikköä metrijärjestelmän (Metriä m) ja
angloamerikkalaisen (jalat'/tuumat'') välillä painamalla
FT/M-painiketta 4.
4. Pidä laitetta vaakasuorassa sen seinän edessä, johon
haluat mitata etäisyyden. Ultraäänilähettimen/-vastaan-
ottimen 2tulee osoittaa seinään suorassa kulmassa.
Käytä tähän vesivaakaa 8:
Vesivaa'an 8kuplan tulee sijaita merkintäviivojen
välissä (katso kuva 1).
5. Paina lyhyesti READ-painiketta q. Laite heijastaa laser-
pisteen ja kuuluu äänimerkki. Pidä laitetta paikoillaan
niin kauan, kunnes mitattu etäisyys näkyy näytössä w.
Huomaa:
Mittaus alkaa mittauspisteestä
6
! Jos mittaus sijaitsee mittaus-
alueen ulkopuolella, näytössä näkyy "Error" tai epälooginen
luku. Mittausalue on välillä 0,6 m (n. 2´) ja 16 m (n. 53´).
Huomaa seuraavat kuvat:
Kuva 1
MIN. 0,6 m
Max. 16 m
ON/OFF FT/M
MODE RECALL
READ
L
- 17 -
IB_69084_KH2927_1_LB3.qxd 30.08.2013 10:04 Uhr Seite 17

Kuva 2
Mitä kauempana seinästä seisot, sitä laajemman alan (a)
etäisyysmittari mittaa ultraäänen avulla (kuva 2). Varmista siksi,
että etäisyysmittari on suunnattu tasaiseen pintaan aina suorassa
kulmassa (kuva 1 ja 3). Varmista, ettei mittausalueella sijaitse
mitään esineitä.
Väärin!
Kuva 3
Ohje
Liian heikot paristot aiheuttavat epätarkkoja mittaustuloksia.
Jos paristo on liian heikko, näyttöön ilmestyy paristosymboli.
ON/OFF FT/M
MODE RECALL
READ
ON/OFF FT/M
MODE RECALL
READ
ON/OFF FT/M
MODERECALL
READ
ON/OFF FT/M
MODE RECALL
READ
a =ca. 1,5 m a =ca. 3,6 m
a =ca. 2,4 m a =ca. 4,5 m
- 18 -
IB_69084_KH2927_1_LB3.qxd 30.08.2013 10:04 Uhr Seite 18
Table of contents
Languages:
Other Powerfix Analytical Instrument manuals