PowerPac PP3405 User manual

Model: PP3405
170596-12
JUICE
EXTRACTOR
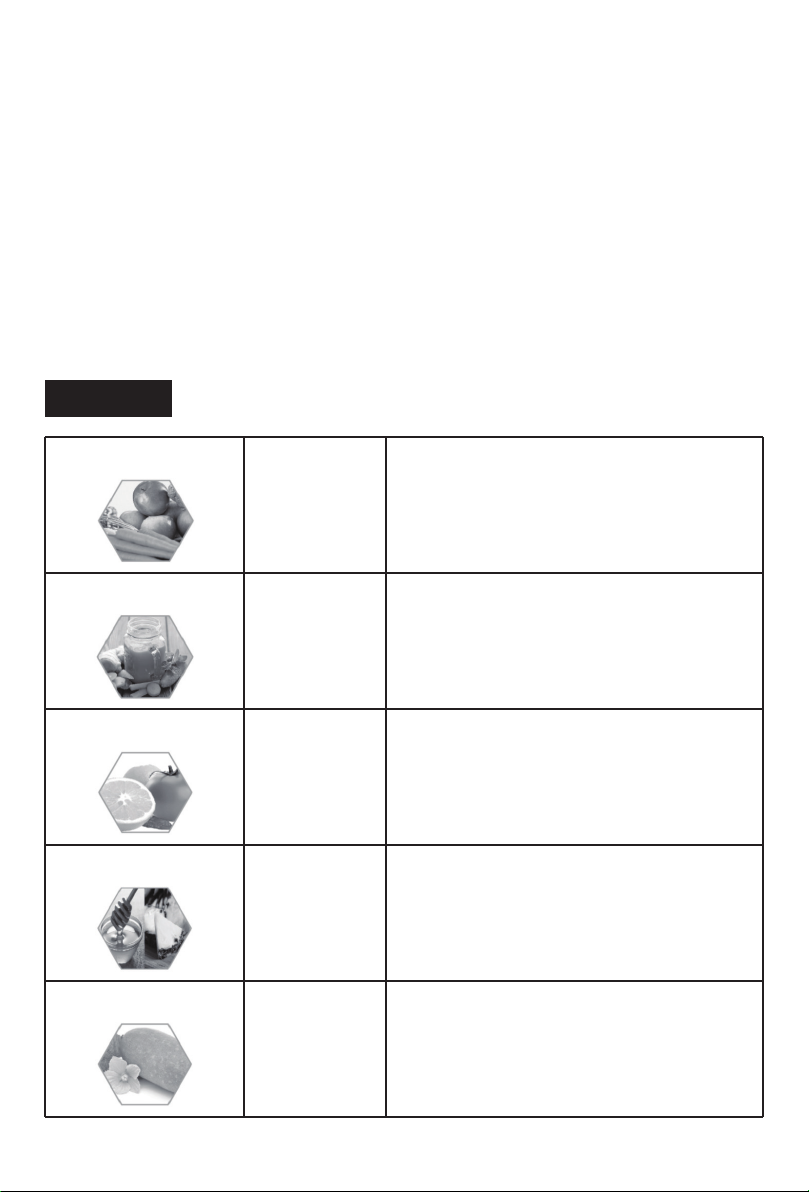
RECIPES
The Powerpac Juice Extractor extracts juice quickly and efficiently. With a dedicated design fitted with a large
Loading Tube, use of high quality materials such as food-grade Stainless Steel Filter mesh and blade and
outstanding functions like a 2-speed gear and a skid-resistant base which holds steady during operations,
you will be making delicious and nutritious fruit juices for yourself and your loved ones for years to come.
Notes
DO NOT extract soft fruits (banana, peach), fruits with hard nuts, ice.
DO NOT juice vegetables such as carrot, beetroot and broccoli with other vegetables as they contain a lot of starch.
Remove seeds from citrus fruits before juicing as they will make juice taste bitter.
Thick-skinned fruits such (orange, grapefruit, pineapple) should be peeled before juicing; thin-skinned fruits
and vegetable DO NOT need to be peeled.
Suitable fruits and vegetables include: apple, carrots, celery, cucumber, ginger, grapefruit, orange, pineapple,
spinach, squash, sugar beet, tomato, and watermelon.
A little lemon will help reduce the bitter taste of vegetables, while a little honey will sweeten the taste.
You can add cinnamon or mint to spice up the taste of the juice.
It is advisable to drink fruit juice immediately (or store it in the refrigerator) after extraction, as oxygen in air
oxidises the juice quickly and nutrients present in the juice will be lost.
The pulp can be saved and used as a plant fertiliser.
Apple & Carrot Juice Apples
Carrots
Lemon
Honey
1.
2.
3.
Cut apples & carrots into small pieces.
Put it into the juicer.
Put the juice into a cup, add a few drops
of honey & a few drops of lemon, and stir.
Chill it in a refrigerator. Serve with a slice
of fresh lemon.
1.
2.
3.
Cut 2 carrots & 1 fresh ginger into small
pieces. Put it into the juicer.
Put the juice into a cup, add yoghurt,
and stir.
Chill it in a refrigerator. Serve with
fragrant mint leaves.
1.
2.
3.
Peel orange and cut into small pieces.
Slice tomato. Put them into the juicer.
Put the juice into a cup, add sugar,
and stir.
Add ice cubes.
1.
2.
3.
Cut pineapple into small pieces.
Put it into the juicer.
Put the juice into a cup, add 2
tablespoons of honey, and stir.
Add ice cubes.
1.
2.
3.
Peel squash and cut into small pieces.
Put it into the juicer.
Put the juice into a cup, add 2
tablespoons of sugar, 2 tablespoons
condensed milk, and stir.
Add ice cubes.
2 carrots
1 fresh ginger
½ cup of
unsweetened
yoghurt
1 orange
1 tomato
Sugar
Ice cubes
1 pineapple
2 tablespoons
honey
Ice cubes
¼ squash
2 tablespoons
sugar
2 tablespoons
condensed milk
Carrot & Ginger Juice
Orange & Tomato Juice
Pineapple Juice
Squash Juice
1

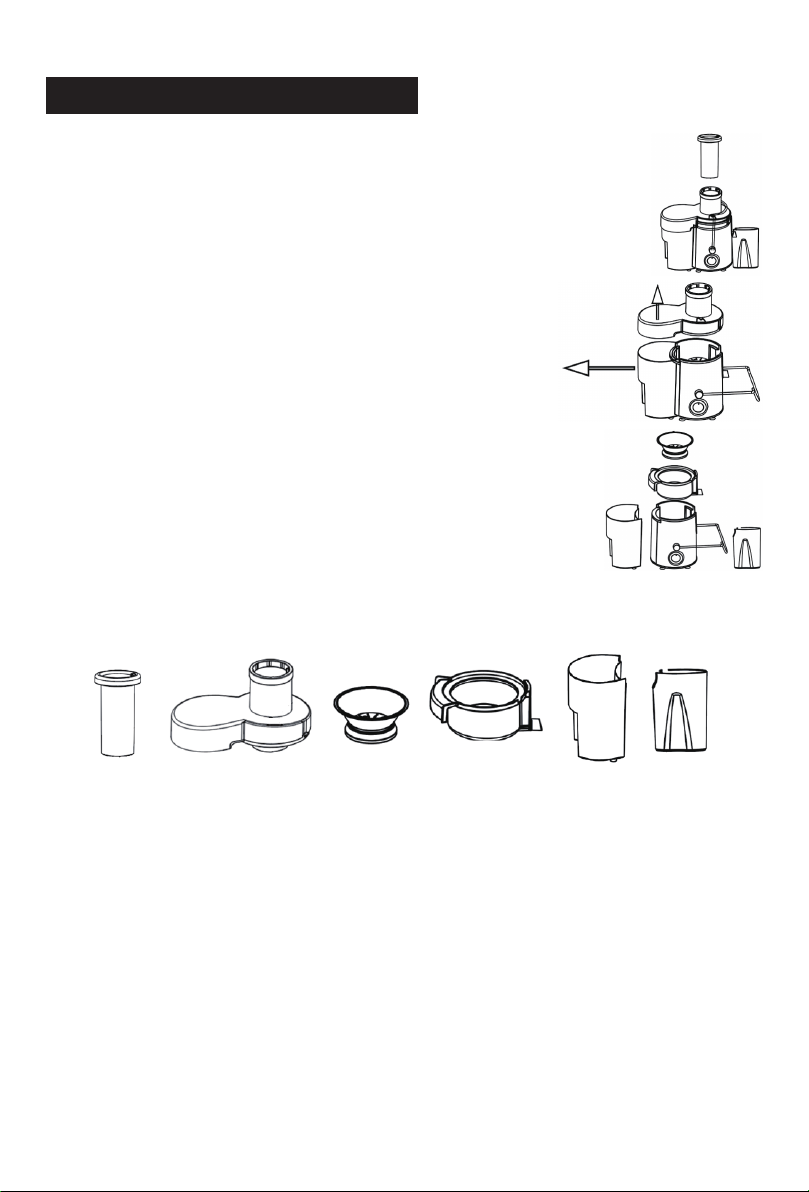
PARTS & DESCRIPTION
LIST OF COMPONENTS
1.
2.
3.
4.
5.
6.
7.
8.
9.
Pusher
Lid
Filter
Holder
Handle
Base
Speed selector
Collector
Cup
9. Cup
1. Pusher
2. Lid
3. Filter
4. Holder
5. Handle
6. Base
7. Speed selector8. Collector
2

ATTENTION :
Read this booklet carefully as it contains important instructions for a safe installation,
use and maintenance.
Important instructions to be kept for future reference.
The following basic precautions should always be followed when using electrical
appliances:
1.
2.
3.
4.
5.
6.
7.
8.
9.
10.
11.
Read all instructions before using the appliance.
This appliance must be used only for the purpose it was expressly designed; any
use NOT complying with the instructions contained in the manual is considered
inappropriate and dangerous. DO NOT use this appliance as a grinder or a masher.
It DOES NOT puree foods, grind meat, whip dairy or process vegetables. The
manufacturer is NOT responsible for possible damages caused by the inappropriate
and/or unreasonable use.
This appliance is NOT suitable to be used in an explosive environment (in the
presence of flammable substances such as gas, vapour, mist or dust, in atmospheric
conditions when, after ignition, the combustion is spread in the air). Items
containing these substances should never be placed in the appliance, and never be
used to clean the appliance in order to avert the risk of fire or explosion.
The packing materials (plastic bags, expanded polystyrene, etc.) must be kept out
of the reach of children or disabled persons since they represent potential sources
of danger.
The installation/assembly of the appliance will be made in accordance with the
indications of the manufacturer. A wrong procedure may cause damages to persons,
animals or objects, for which the manufacturer cannot be considered responsible.
Place and use the appliance on a horizontal and stable surface.
Before use, check the integrity of the appliance and power cable. In case you are not
sure, contact a qualified person. If the power cable is damaged, it must be replaced
by the manufacturer or its service agent or a qualified technician in order to avoid a
shock hazard.
Before powering the appliance make sure the rating (voltage and frequency)
corresponding to the grid and the socket is suitable for the plug of the appliance,
and that the wall socket is properly grounded.
DO NOT power the appliance using multiple sockets. If possible, avoid the use of
adapters and/or extension cables; if their use is absolutely necessary, use only
materials in compliance with the current safety regulations and according to the
electrical parameters of the adapters.
The appliance must NOT be switched on using external timers and/or other remote
control appliances which are not specified in this manual.
Any accessories NOT recommended by the manufacturer may cause injuries to
persons.
WARNINGS
3

12.
13.
14.
15.
16.
17.
During use and storage, the appliance must be kept at a safe distance from heat
sources (open flame, ovens, heaters, stoves, etc.) or any flammable and/or
potentially explosive substances.
If you are using the appliance for the first time, you should:
a.
b.
c.
Make sure to remove any label or protective sheet which may prevent its proper
functioning.
DO NOT:
•
•
•
•
•
•
•
•
•
•
Before plugging make sure the power switch of the appliance is in the‘0’position
(turned off). Plug and unplug the power cable with dry hands and hold it firmly.
Always unplug the power cable to avoid overheating and avoid stretching it (DO
NOT pull it, tug it or use it to drag the appliance to which is connected). Before
unplugging the appliance, switch it off, using the proper command on the control
panel.
During operation, DO NOT touch the appliance with wet body parts, and it is
recommended to have between you and the standing surface, an isolating element
(for example, wearing shoes with rubber soles).
DO NOT soak the Base, which contains the main engine of the appliance, in water
or other liquids, wash it under the tap, or let any liquid flow into the internal casing
of the appliance to prevent electric shock. In case of accidental fall in water, DO NOT
try to take it out, but first of all unplug immediately the power cable from the socket.
Place the appliance at a proper distance from the objects or surrounding walls
making sure that its functioning will not cause accidental damages.
Clean the exterior & interior of the appliance with water & detergent with a
non-abrasive sponge.
DO NOT use metal scouring pads.
Assemble the components to the Base according to the instructions listed in the
section (“How to Use”) below.
Before adding ingredients, make sure the Filter is in place and is running smoothly.
overload the Filter by adding too much ingredients;
cover the appliance during functioning;
place foods or liquids which are hotter than 60°C, or use boiling water for cleaning;
insert objects or body parts inside the protection cover of the appliance;
touch the blades of the Filter or the motor with your fingers or any utensil during
the operation of the appliance, so as to avoid personal injury or damage to the
appliance;
touch the blades, for they are VERY SHARP! Hold the smooth rim of the Filter while
installing, removing or cleaning;
use the appliance to process very hard ingredients or fruits containing hard seeds
(remove the seeds first), ice cubes or other frozen foods, fruits or vegetables with
thick skins (peel the skins off first), soft ingredients, such as coffee beans,
soybeans, rice;
detach the Lid while the appliance is in operation;
let the appliance rest for 2 minutes between processing cycles. After 3 processing
cycles, allow an interval of 15-20 minutes to let the appliance cool down before
the next use;
leave the appliance unsupervised during operation.
4

18.
19.
20.
21.
22.
23.
24.
25.
26.
27.
28.
Avoid placing the power cable on abrasive or sharp surfaces or in positions where it
can be damaged easily.
Always remember to unplug the power cable of the appliance if it is NOT used for a
long period, before storing, cleaning or performing any maintenance operation.
Remember that the blades may still be moving after the power cable is unplugged!
Avoid carrying out operations which are NOT specified in this manual (such as
disassembling and/or altering).
In case of malfunction or anomaly during the functioning, switch off the appliance
immediately, turn off the power and check the cause of the anomaly, if possible,
with the support of a qualified person.
To operate, the Filter should contain sufficient quantity of food – cut fruits and
vegetables should be NO larger than 2 inch (5 cm) in length and thickness – and
must NOT contain dry food, food with insufficient amount of water, hard substances
or liquids with a temperature greater than 60°C.
In the event the mixing of the food items produce bubbles, stop the operation
immediately and wait until the production of bubbles ceases before resuming
blending.
Wash the Pusher, Lid, Filter, Holder, Handle, Base, Collector, and Cup under running
water immediately after usage to avoid build-up of bacteria with water & detergent
with a non-abrasive sponge. (Warning: Blades are sharp!).
This appliance is intended to be used in households and similar applications,
such as:
• Staff kitchen areas in shops, offices and other working environments;
• Dormitories;
• By clients in hotels, motels and other residential environments;
• Bed and breakfast type environment.
This DO NOT use or store the appliance outdoors. Store and use the appliance only
indoors, or in any case, protected from weathering such as rain, direct radiation of
the sun and dust.
This appliance can be used by children aged from 8 years and above and persons
with reduced physical, sensory or mental capabilities or lack of experience and
knowledge if they have been given supervision or instruction concerning use of the
appliance in a safe way and understand the hazards involved. Children shall NOT
play with the appliance. Cleaning and user maintenance shall NOT be made by
children unless they are older than 8 and supervised. Keep the appliance and its
cord out of reach of children less than 8 years.
Save these instructions.
5

HOW TO USE
1.
2.
3.
4.
5.
6.
7.
8.
9.
10.
11.
12.
13.
14.
Clean the exterior & interior of the appliance with water & detergent with a
nonabrasive sponge. DO NOT use metal scouring pads.
Put the (4) Holder on the (6) Base.
Put the (3) Filter into the (4) Holder and secure it into the right position of the
motor wheel.
Put the (2) Lid on top of the (3) Filter and secure it to the (4) Holder.
Swing the (5) Handle onto the (2) Lid, and press down the (5) Handle till a“click”
is heard.
Place the (8) Collector under the (4) Holder.
Place the (9) Cup under the Juice outlet.
Wash the fruit/s and/or vegetables, then peel and cut into pieces. Remove kernels,
hard seeds, thick skin or hard shells, if present.
Plug (and unplug) the power cable with dry hands and hold it firmly.
Turn the (7) Speed dial from ‘0’ to ‘1’ or ‘2’.
1: Low-speed gear for processing soft fruits and vegetables such as watermelon,
tomato, cucumber and strawberry.
2: High-speed gear for processing harder fruits and vegetables.
Safety measure: This appliance will only work if all components are installed
properly. Should the appliance not work, turn the Speed dial back to ‘0’ and unplug
the power cable. Dissemble the appliance and go through steps 2 – 7 again.
Drop the pieces of fruit/s and/or vegetables into the Feed Tube of the (2) Lid, and
use the (1) Pusher to push them into the (3) Filter.
DO NOT use the appliance for more than 3 minutes without interruption. Let the
appliance rest for 2 minutes between processing cycles. After 3 processing
cycles, allow an interval of 15-20 minutes to let the appliance cool down before
the next use, so as to prolong its service life. DO NOT allow the appliance to idle
while in operation.
Safety measure: This appliance is designed with Overheat Protection function
which automatically stops the appliance from operating when the motor is hot.
Turn the Speed dial back to ‘0’ and unplug the power cable. Let the appliance
cool down before the resumption of juicing.
(only if a blockage occurs: DO NOT continue pushing if the filter is blocked.
Turn the Speed dial back to ‘0’ and unplug the power cable. To clear the blockage:
a. Remove the (1) Pusher.
b. Remove the (9) Cup under the Juice outlet.
c. Remove the (8) Collector under the (4) Holder.
d. Swing the (5) Handle off the (2) Lid.
e. Lift the (2) Lid off the (4) Holder.
f. Clear the blockage from the (3) Filter.
Perform steps 4 – 7 again.)
Upon the completion of the juicing, turn the Speed dial back to‘0’and unplug the
power cable. Enjoy your drink.
6
HOW TO CLEAN AND MAINTAIN
1.
2.
3.
4.
Remove the (1) Pusher.
Remove the (9) Cup under the Juice outlet.
Remove the (8) Collector under the (4) Holder.
Swing the (5) Handle off the (2) Lid.
Lift the (2) Lid off the (4) Holder
Lift the (3) Filter off the motor wheel and
remove it from the (4) Holder.
Lift the (4) Holder off the (6) Base.
Turn the Speed dial back to ‘0’ and unplug the power cable.
Dissemble the appliance with the following steps:
a.
b.
c.
d.
e.
f.
g.
Use a wet cloth to wipe the (6) Base dry. DO NOT immerse
this in water or other liquids, and avoid spraying water, in
order to avoid damage or leakage.
Wash the (1) Pusher, (2) Lid, (3) Filter, (4) Holder, (5) Handle,
(6) Base, (8) Collector, (9) Cup under running water
immediately after usage to avoid build-up of bacteria &
detergent with a non-abrasive sponge. DO NOT use metal
scouring pads, abrasive cleaners or corrosive liquids such as
gasoline or acetone to clean this appliance. DO NOT clean any of the components
in a dishwasher. After washing, air-dry the components. Blades are sharp!
5.
6.
Put the (4) Holder on the (6) Base.
Put the (3) Filter into the (4) Holder and secure it into the right position of the
motor wheel.
Put the (2) Lid on top of the (3) Filter and secure it to the (4) Holder.
Swing the (5) Handle onto the (2) Lid, and press down the (5) Handle till a
“click” is heard.
Place the (8) Collector under the (4) Holder.
Place the (9) Cup under the Juice outlet.
Insert the (1) Pusher into the Feed Tube.
To store the appliance, reassemble the components as follows:
a.
b.
c.
d.
e.
f.
g.
Ensure that the appliance is clean, dry, and placed in dry and well ventilated storage.
Avoid direct sunlight.
(1) Pusher (2) Lid (3) Filter (4) Holder (8) Collector (9) Cup
7
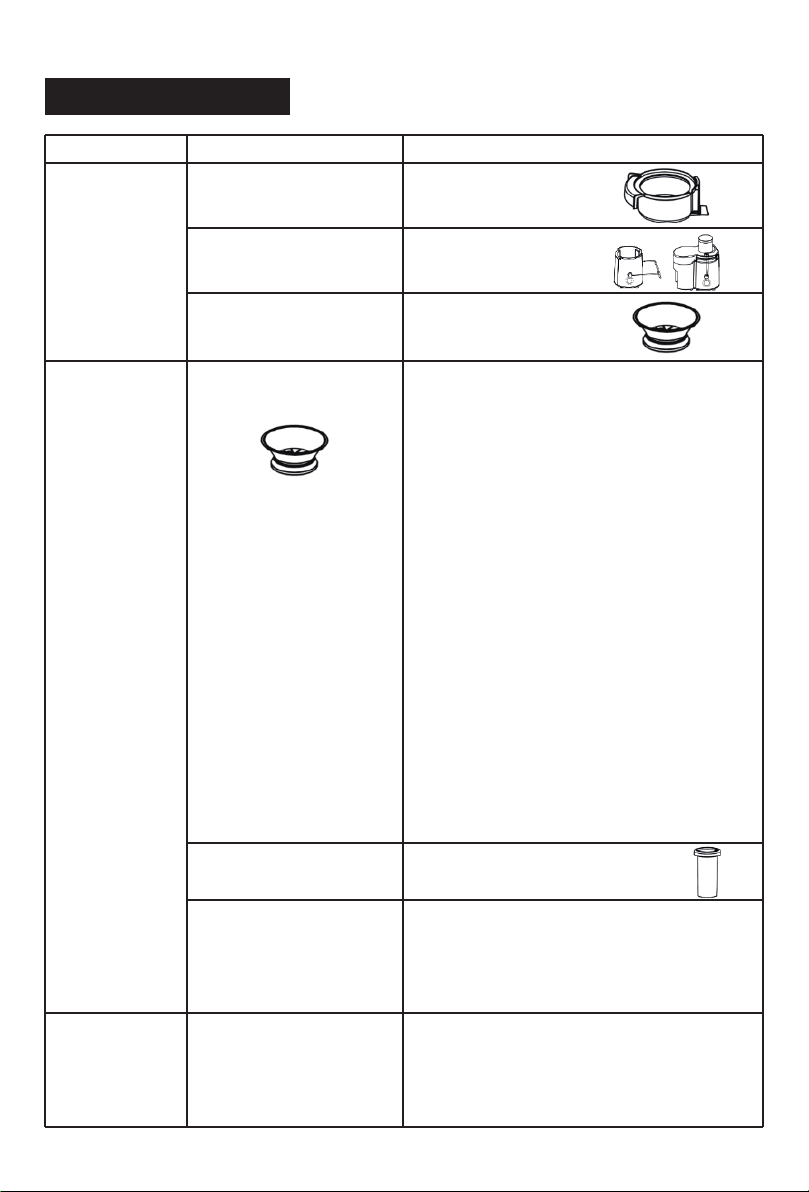
PROBLEM SOLVING
Fault symptom
The appliance
does not work
after
connecting the
power cable to
the electric
mains and
switching the
appliance on
The (4) Holder is not
correctly installed
The (5) Handle is not
correctly installed
The (3) Filter is not
correctly installed
The (3) Filter is stuck
with ingredients
The appliance
stops working
while in use
The (1) Pusher is forced
in too violently
Overheat Protection
function automatically
stops the appliance from
operating when the
motor is hot
Insert the (1) Pusher gently
Safety measure: Turn the Speed dial back
to ‘0’ and unplug the power cable.
Let the appliance cool down before the
resumption of juicing
It is a normal
phenomenon when a
new motor is initially
used
The smell will disappear with useThe motor
gives off an
unpleasant
smell while in
operation
Install the (4)
Holder correctly
Install the (5)
Handle correctly
Install the (3)
Filter correctly
Cause analysis Troubleshooting
DO NOT continue pushing if the filter is
blocked. Turn the Speed dial back to ‘0’
and unplug the power cable. To remove
the ingredients:
a. Remove the (1) Pusher
b. Remove the (9) Cup under the Juice
outlet
c. Remove the (8) Collector under the
(4) Holder
d. Swing the (5) Handle off the (2) Lid
e. Lift the (2) Lid off the (4) Holder
f. Clear the blockage from the (3) Filter
g. Put the (2) Lid on top of the (3) Filter
and secure it to the (4) Holder
h. Swing the (5) Handle onto the (2)
Lid, and press down the (5) Handle
till a “click” is heard
i. Place the (8) Collector under the (4)
Holder
j. Place the (9) Cup under the Juice
outlet
To prevent further blockage, cut the
ingredients into smaller pieces or put
less ingredients
8

This appliance, along with all other electronic appliances, should, when it is no longer capable of
functioning, be disposed with the least possible environmental damage according to the local
regulations in your area. In most cases you can discard the appliance at your local recycling centre.
DISPOSAL: Do not dispose this appliance as unsorted municipal waste.
Collection of such waste separately for special treatment is necessary.
Risk of child or animal entrapment
Before you discard this appliance, please remove all doors and leave the shelves inside so that
children or animals may not easily get trapped inside.
ENVIRONMENTAL TIP
Warranty Conditions
1.
2.
3.
4.
5.
6.
7.
8.
9.
10.
This warranty provides against defective materials and manufacturing faults throughout for
two years from the date of purchase of the appliance. The warranty on the Compressor is 10
years subject to the same conditions as above.
This warranty also does not cover normal wear and tear, replacement of consumable
materials and accessories, and the cost of maintenance of the appliance.
This warranty does not cover the repair or replacement of part/s damaged by misuse,
accidents, negligence, alterations, or modifications in any way, or repairs done by any repair
organisation without the prior consent of PowerPac Electrical Pte Ltd.
Repair and service are to be performed at: 5 Changi South Lane #03-01 Singapore 486045.
A transport fee will be charged for personal doorstep service.
The original purchaser of the appliance must furnish proof of purchase to our Service Centre
with the email or number as registered during submission of warranty when this appliance is
sent for repair/service. Failure to do so may delay the receipt of said repair/service by the
customer.
Under no circumstances whatsoever shall the serial number be erased, defaced or altered by
the customer and/or his representatives, or the dealer and/or his agents. Failure to ensure
this shall invalidate the warranty.
This warranty is deemed to be void if the defect is cause by the attack of household pests,
fire, lightning, natural disasters, pollution, abnormal voltage or the usage of generators.
This warranty is valid in Singapore only.
This warranty will be honoured subject to the customer’s registration of the warranty
inclusive of original invoice or valid purchase receipt. Failure to present these documents will
result in denial of service. However, if the customer still requests that the defective appliance
be repaired, PowerPac Electrical Pte Ltd may, at its discretion, repair the appliance but impose
a labour charge, as well as the costs of the replacement parts, to be borne solely by the
customer.
Please refer to the attached picture for the location of one of our appliance’s serial number,
as an example.
Please complete the on-line registration warranty form available
on our website. There is no further requirement to send us any
hard copy as part of our efforts to save the environment.
In accordance with the terms and conditions of this limited
warranty as stated above, PowerPac Electrical Pte Ltd, at its
expense shall provide free services for the appliance within the
warranty period from its date of purchase from our Authorised
dealers.
WARRANTY
E-Register scan
9

PP3405
MODEL
220-240V ~ 50Hz
VOLTAGE
400W
POWER
SPECIFICATION
Table of contents
Other PowerPac Kitchen Appliance manuals

PowerPac
PowerPac PPMC708 User manual

PowerPac
PowerPac PPRC38 User manual

PowerPac
PowerPac PPEC813 User manual

PowerPac
PowerPac My Choise MC165 User manual

PowerPac
PowerPac PPMC385 User manual

PowerPac
PowerPac PPMC688 User manual

PowerPac
PowerPac PPIN617 User manual

PowerPac
PowerPac PPMC677 User manual

PowerPac
PowerPac PPS706 User manual

PowerPac
PowerPac PPEC815 User manual


