Powersmart PS2020 User manual

INSTRUCTION MANUAL
2030 PSI ELECTRIC PRESSURE WASHER
Model # PS2020
Have product questions or need technical support? Please feel free to contact us!
Website: www.Amerisuninc.com
www.powersmartusa.com
Toll free: 1-800-791-9458 M-F 9-5 EST
Email: support@amerisuninc.com

2

3
CONTENTS
Technical data …...……………………………………………………… 3
Introduction …...………………………………………………………... 4
Safety information …...………………………………………………… 4
General safety rules…….………………………………………….…… 5
Special safety rules for high pressure washer…………………………… 6
Symbols …...………………………………………………………......... 7
Knowing your high pressure washer.……………….….……………….. 8
Assembly instruction…………………………………………….………. 9
Operating instruction…………………………………………………....... 10
Maintenance……………………………………………………...………. 13
Trouble shooting…………………………………………………………. 14
Exploded view…………………………………………………………… 15
Parts list…………………………………………………………………... 16
Warranty statement………………………………………………………. 18
TECHNICAL DATA
2030 PSI Electric pressure washer Model # PS2020
Voltage: AC120 V,60Hz
Power: 1600W
Max. pressure: 2030 PSI
Flow rate: 1.42 GPM
Max. Tap water: 58Psi
Working pressure: 1088Psi
Water temperature: 32~104℉
Working temperature: 41~122℉
Package dimensions (L x W x H): 13.8 x 12.2 x 19.1 inches
Weight: 19.8 lb.

4
INTRODUCTION
Thank You for Purchasing a PowerSmart®Product. This manual provides information regarding the safe
operation and maintenance of this product. Every effort has been made to ensure the accuracy of the
information in this manual. PowerSmart®reserves the right to change this product and specifications at
any time without prior notice.
Please keep this manual available to all users during the entire life of the high pressure washer.
This manual contains special messages to bring attention to potential safety concerns, high
pressure
washer damage as well as helpful operating and servicing information. Please read
all the information carefully to avoid injury and machine damage.
QUESTIONS? PROBLEMS?
Please contact our Customer Service Dept. with any questions and/or comments, either by Email:
support@amerisuninc.com, or Toll Free at (800)791-9458. We are available Mon-Fri 9am-5pm EST to
help solve any issues that you might encounter.
SAFETY INFORMATION
Before operating this high pressure washer, read and observe all warnings, cautions, and instructions on
the high pressure washer and in this Owner’s Manual.
NOTE: The following safety information is not meant to cover all possible conditions and situations that
may occur. Read the entire Owner’s Manual for safety and operating instructions. Failure to follow
instructions and safety information could result in serious injury or death.
This safety alert symbol is used to identify safety information about hazards that can result in personal
injury.
A signal word (DANGER, WARNING, or CAUTION) is used with the alert symbol to
indicate the likelihood and the potential severity of injury. In addition, a hazard symbol may
be used to represent the type of hazard.
DANGER Indicates a hazard, which, if not avoided, will result in death or serious injury.
WARNING Indicates a hazard, which, if not avoided, could result in death or serious injury.
CAUTION Indicates a hazard, which, if not avoided, might result in minor or moderate injury.
CAUTION Without the alert symbol, indicates a situation that could result in damage.

5
GENERAL SAFETY RULES
Safety is a combination of common sense, staying alert, and knowing how your high pressure washer
works.
SAVE THESE SAFETY INSTRUCTIONS.
WARNING: Do not operate this unit until you read this instruction manual for safety,
operation and maintenance instructions. Failure to follow all instructions listed below may
result in electric shock, fire, and/or serious personal injury.
WORK AREA SAFETY
This appliance is not intended for use by children or by unassisted, unsupervised persons whose
physical, sensory or mental capabilities prevent them from using it safely. Children should be
supervised to ensure that they do not play with the appliance.
Keep bystanders away . All visitors and pets should be kept a safe distance away from the work area.
Never use the machine in potentially explosive areas under any circumstances.
The operator must use the appliance correctly. When working with the appliance, he must consider
the local conditions and pay due care and attention to other persons, in particular children who are
nearby.
This high pressure washer is designed for domestic use only:
1.To clean cars, motorbikes, caravans, bicycles.
2.To clean patios, fences, garden walls, pathways, driveways and house facades, particularly useful
for cleaning blocked driveway.
3.To remove of algae and moss from roofs, brickwork and guttering.
4.To clean garden tools and machinery, furniture and barbecues.
5.To clean hygienic of animal pens and their surrounding area.
ELECTRICAL SATETY
Grounding instructions
IN THE EVENT OF A MALFUNCTION OR BREAKDOWN, grounding provides the path of least
resistance for electric current and reduces the risk of electric shock. This tool is equipped with an electric
cord that has an equipment grounding conductor and a grounding plug. The plug MUST be plugged into
a matching outlet that is properly installed and grounded in accordance with ALL local codes and
ordinances.
DO NOT MODIFY THE PLUG PROVIDED. If it will not fit the outlet, have the proper outlet installed
by a licensed electrician.
IMPROPER CONNECTION of the equipment grounding conductor can result in electric shock. The
conductor with the green insulation (with or without yellow stripes) is the equipment grounding
conductor. If repair or replacement of the electric cord or plug is necessary, DO NOT connect the
equipment grounding conductor to a live terminal.
CHECK with licensed electrician or service personnel if you do not completely understand the grounding
instructions, or if you are not sure if the tool is properly grounded.

6
USE ONLY THREE-WIRE EXTENSION CORDS that have 3-pronged plugs and outlets that accept the
tool's plug as shown in Fig. A. Repair or replace a damaged or worn cord immediately.
CAUTION: In all cases, make certain the outlet in question is properly grounded. If you are not sure if it
is, have a licensed electrician check the outlet.
WARNING: Do not expose to rain or use in damp locations.
Guidelines for using extension cords
Make sure your extension cord is in good condition. When using an extension cord, be sure to use one
heavy enough to carry the current your product will draw. An undersized cord will cause a drop in line
voltage resulting in loss of power and overheating. The table below shows the correct size to be used
according to cord length and nameplate ampere rating. If in doubt, use the next heavier gauge. The
smaller the gauge number, the heavier the cord.
Minimum Gauge for Extension Cords (AWG)
(When using 120 V only)
Make sure your extension cord is properly wired and in good condition. Always replace a damaged
extension cord or have it repaired by a qualified person before using it.
Protect your extension cords from sharp objects, excessive heat and damp or wet areas.
Use a separate electrical circuit for your tools. This circuit must not be less than a #12 wire and should be
protected with a 15 A time-delayed fuse. Before connecting the motor to the power line, make sure the
switch is in the OFF position and the electric current is rated the same as the current stamped on the motor
nameplate. Running at a lower voltage will damage the motor.
WARNING: This tool must be grounded while in use to protect the operator from electric
shock.
Ampere Rating
Total Length of Cord in feet
More Than Not More
Than
25 50 100 150
0
6
18
16
16
14
6
10
18
16
14
12
10
12
16
16
14
12
12 16 14 12 Not Recommended

7
PERSONAL SAFETY
The high pressure washer may not be directed at persons, animals, live electrical equipment or at the
appliance itself.
Keep bystanders away . All visitors and pets should be kept a safe distance away from the work area.
Do not wear loose clothing or jewelry. They can get caught in moving parts. Protective rubber gloves
and non-slip footwear are recommended when working outdoors.
Watch what you are doing. Use common sense. Do not operate the pressure washer when you are
tired, or under the influence of alcohol or drugs.
Do not overreach. Keep proper footing and balance at all times.
Avoid unintentional starting. Do not carry a plugged-in machine with your finger on the trigger.
Make sure the switch is off before plugging in the machine.
Do not abuse the cord . Never carry the machine by the cord or yank the cord to disconnect it from
the receptacle. Keep the cord away from heat, oil, and sharp edges.
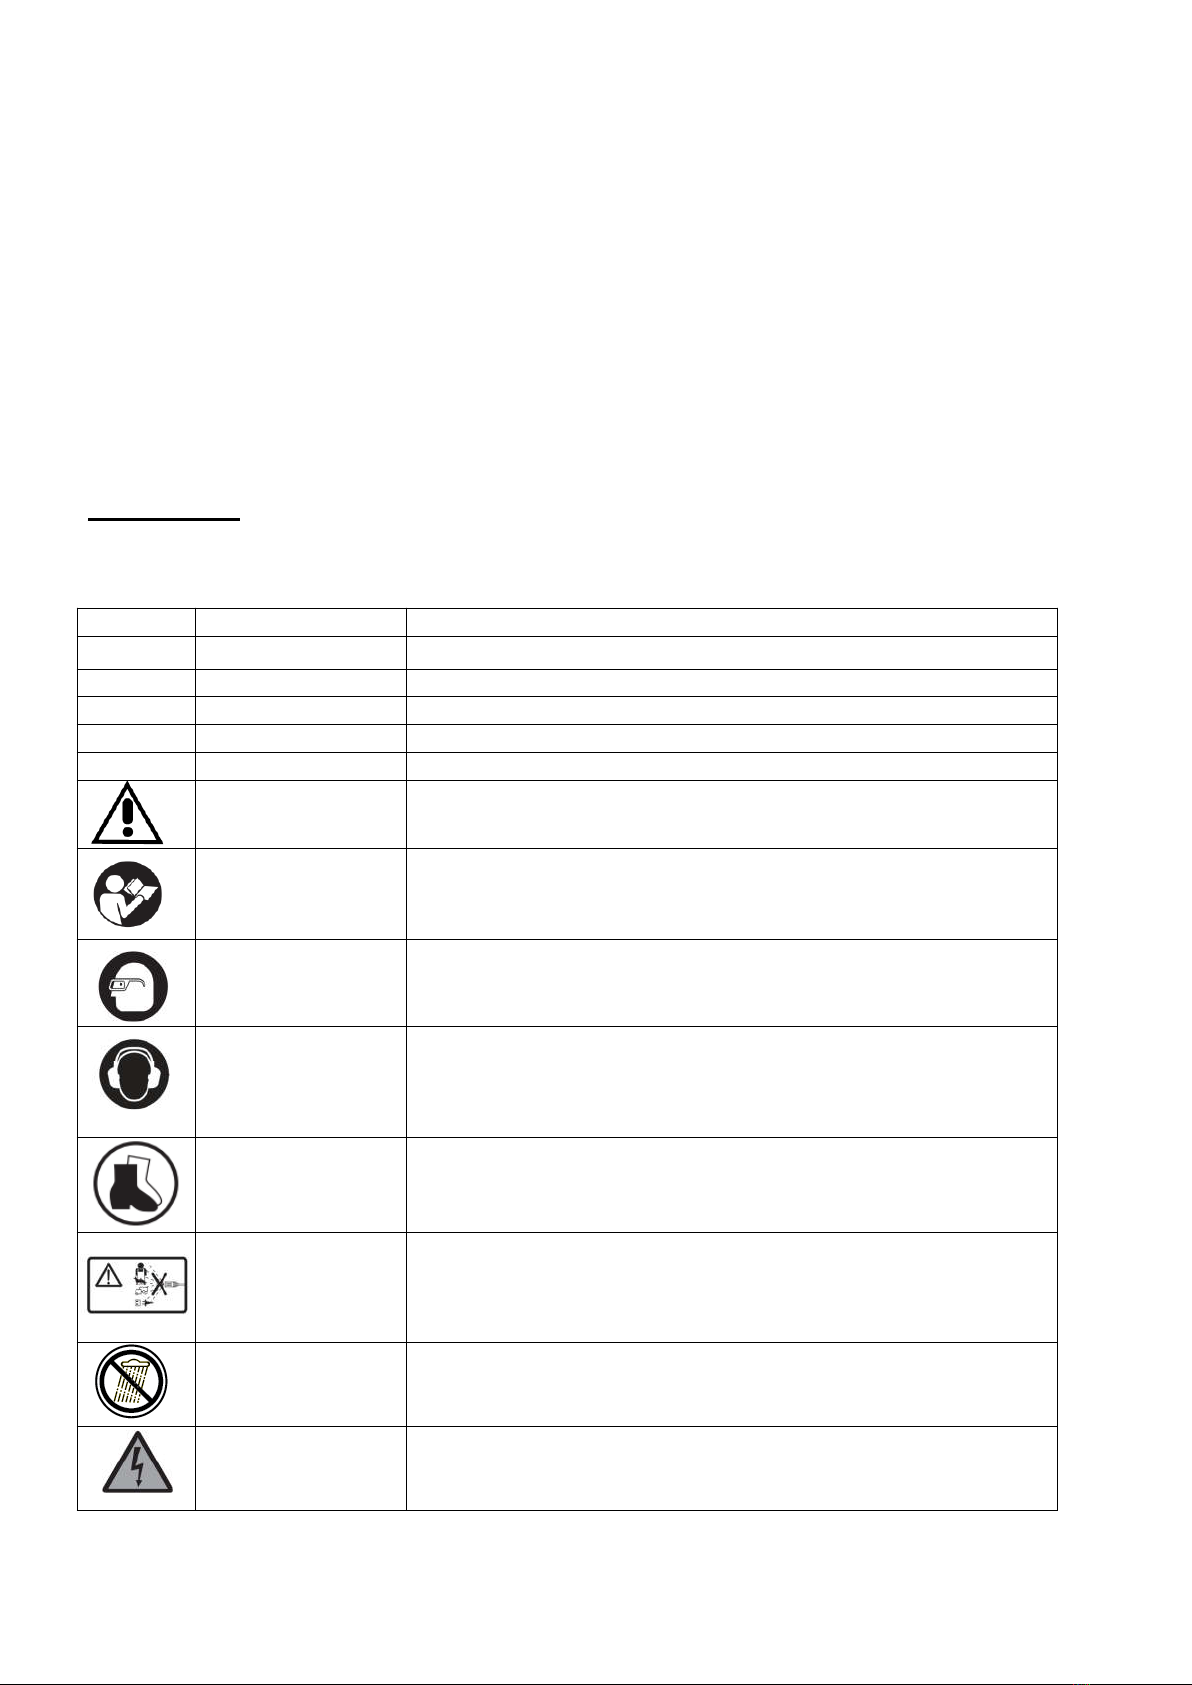
Use safety glasses . Also use safety footwear, snug-fitting clothing, protective gloves, hearing and
head protection.
SERVICE
Tool service must be performed only by qualified repair personnel. Service or maintenance
performed by unqualified personnel could result in a risk of injury.
When servicing a tool, use only identical replacement parts. Follow instructions in the Maintenance
section of this manual. Use of unauthorized parts or failure to follow Maintenance Instructions may
create a risk of electric shock or injury.
SPECIFIC SAFETY RULES FOR HIGH PRESSURE WASHER
Do not point the gun at anyone or at any part of the body.
Before servicing, cleaning, or removing any parts, shut off the power and relieve pressure.
Check the water temperature .This pressure washer is not meant to pump hot water. NEVER connect
it to a hot water supply as it will significantly reduce the life of the pump.
Store indoors. NEVER store the pressure washer outdoors or where it could freeze. The pump could
be seriously damaged.
Risk of explosion. Do not spray flammable liquids. Never draw in fluids containing solvents or
undiluted acids. This includes petrol, paint thinner and heating oil. The spray mist thus generated is
highly inflammable, explosive and poisonous. Do not use acetone, undiluted acids or solvents as
they are damaging to the materials from which is the appliance is made.
High pressure hoses, fixtures and couplings are important for the safety of the appliance. Only use
high pressure hoses, fixtures and couplings recommended by the manufacturer.
Create stability for the appliance prior to all work on or with the appliance to prevent accidents or
damage. The stability of the appliance is warranted when it is placed on to an even surface.
Never leave the appliance unattended when it is in operation.
The appliance must not be used if the power cord or important parts of the appliance, e.g. high
pressure hoses, trigger gun or safety devices are damaged. Please arrange for it to be replaced
immediately by an authorised repair agent or a skilled electrician.
The high pressure washer must not be directed at other persons or directed by the user at him/herself
to clean clothing or footwear.
If the appliance is used in hazardous areas (e.g. filling stations) all of the safety provisions and
operating instructions detailed in this manual must be observed.
Never use the appliance to clean objects containing hazardous substances.

8
Vehicle tyres or tyre valves are susceptible to damage from the high pressure washer and may burst.
The first indication of this is a discoloration of the tyre. Damaged vehicle tyres/tyre valves are highly
dangerous. Ensure that a distance of at least 30 cm is observed when cleaning with the washer.
Risk of explosion. Do not spray flammable liquids. Never draw in fluids containing solvents or
undiluted acids. This includes petrol, paint thinner and heating oil. The spray mist thus generated is
highly inflammable, explosive and poisonous. Do not use acetone, undiluted acids or solvents as
they are damaging to the materials from which is the appliance is made.
Always fully unroll electrical cables.
Do not cover or modify the spray wand or the spray nozzle in any way.
Do not use the machine if the persons nearby do not wear safety protection device.
Wearing protective clothing and safety goggles to protect against splash back containing water or
dirt.
SYMBOLS
Some of the following symbols may be used on this product. Please study them and learn their meaning.
Proper interpretation of these symbols will allow you to operate the product better and safer.
SYMBOL
NAME
DESIGNATION/EXPLANATION
V Volts Voltage
A
Amperes
Current
Hz
Hertz
Frequency (cycles per second)
W
Watts
Power
MIN
Minutes
Time
Safety Alert Precautions that involve your safety.
Read the user’s
manual
To reduce the risk of injury, user must read and understand user’s
manual before using this product.
Eye protection Wear eye protection when operating this equipment.
Hearing protection Use proper hearing protection when operating this equipment.
Wear non-slip
footwear
Wear non-slip footwear that will protect your feet and improve your
footing on slippery surfaces.
Keep bystanders
away
To reduce the risk of injury, user must keep all bystanders at least
49 ft (15 m) away.
Wet conditions alert Do not expose to rain or use in damp locations.
Electric shock alert Beware of electric shock hazard.

9
KNOWING YOUR HIGH PRESSURE WASHER
Unpacking
Unpack the power tool and all its parts, and compare
against the list below. Do not discard the carton or any
packaging materials. Please call 1-800-791-9458 or
E-mail us at support@amerisuninc.com if any parts are
damaged or missing.
Including: High pressure washer/ Trigger gun / High pressure hose/ Water supply connector / Spray lance
/ Five Quick-Connect nozzles / Triangular brush / Needle / User manual
1
Water supply connector
2
High pressure hose
3
Water outlet
4
Water inlet
5
ON/OFF switch
6
Transport handle
7
Detergent tank
8
Power cord
9
Wheels
10
Trigger gun
11
Spray lance
12
Safety lock
13
Hose lock
14
Trigger handle holder
15
Trigger handle locker
16
Retractable rod
17
Detergent suction pipe
18
Filter
19
Detergent tank lock
20
Spray lance holder
Fig.1

10
ASSEMBLY INSTRUCTION
WARNING:
Do not use this product if any parts on the packing list are already assembled to your product
when you unpack it. Parts on this list are not assembled to the product by the manufacturer
and require customer installation. Use of a product that may have been improperly assembled
could result in serious personal injury.
WARNING:
If any parts are damaged or missing do not operate this product until the parts are replaced.
Use of this product with damaged or missing parts could result in serious personal injury.
WARNING:
Do not attempt to modify this product or create accessories not recommended for use with
this product. Any such alteration or modification is misuse and could result in a hazardous
condition leading to possible serious personal injury.
WARNING:
Do not connect to power supply until assembly is complete. Failure to comply could result in
accidental starting and possible serious personal injury.
1. Install coupling for water connection (Fig.2). Screw the coupling to the water connection on the
appliance.
2. Install high pressure hose (Fig.3 and Fig.4)
Insert the high pressure hose tightly in to coupling on the appliance, it will lock in audibly.
Note: make sure the connection nipple is aligned correctly. Check the secure connection by pulling
on the high pressure hose.
3. Install the storage of trigger gun (Fig.5). Insert the storage of trigger gun and push down all the way.
4. Install spray lance (Fig.6). Push the spray lance into the trigger gun and fasten it by turning it through
90 degree.

11
OPERATING INSTRUCTION
WARNING: Prior to cleaning, make sure that the high pressure washer is placed safely on
level ground. Wear protective goggles and protective clothing during the cleaning process.
Notes: Release the lever of the trigger gun, the device will switch off again. High pressure
washer remains in the system.
USING THE PRESSURE WASHER
WARNING: Impurities in the water can damage the high pressure pump and accessories.
All high pressure washer (except hot water system) use the cold water. The suitable water
temperature is 0℃to 40℃.
Position the washer as CLOSE as possible to the water supply.
The washer must be used on a secure and stable surface in a standing, upright position (Fig.7).
Make sure the unit is switched off before plugging the unit into the power outlet.
Check that the electrical supply voltage and frequency (Volt/Hz) correspond to those specified on the
rating plate. If the power supply is correct, you may now plug the pressure washer into the power
outlet.
NOTE: The GFCI may need to be reset when first plugged into the electric outlet. Press the "Reset"
button until the power light indicator on the GFCI illuminates when plugged in (Fig.8).

12
Turn the water supply tap on completely.
Make sure the safety lock is down and in its original position
(Fig.9) , then press the trigger for a few seconds until water flow
is steady. This will allow air to escape and discharge any
residual
pressure in the hose.
Turn the ON/OFF switch to the ON position to start the pressure
washer(Fig.10) .
When re-starting the motor, always keep the trigger pressed.
NOTE: The motor only runs when the trigger is operated and shuts off when the trigger is released.
USING NOZZLES
Before beginning any cleaning task, determine the best nozzle for the job. Each of the nozzles has
a different spray pattern.
This electric pressure washer is equipped with five (5) Quick-Connect nozzles that easily snap onto the
Quick-Connect collar of the spray wand. The nozzle patterns are 40˚ (for gentle cleaning), 25˚ (for
all-purpose cleaning), 15˚ (for tough jobs), 0˚ (for spot cleaning or hard-to-reach areas) and the
Soap nozzle (for detergent application).
CAUTION: NEVER change nozzles without locking the safety lock on the trigger handle.
WARNING:High-pressure jets can be dangerous if subject to misuse. The jet must not be
directed at persons, pets, live electrical equipment, or the appliance itself.
To connect a nozzle to the spray wand
Turn off the pressure washer and shut off the water supply.
Pull the trigger to release water pressure.
Engage the safety lock on the trigger handle .
Snap the desired nozzle onto the Quick-Connect collar until
it
clicks into place (Fig.11).

13
To disconnect a nozzle from the spray wand
Turn off the pressure washer and shut off the water supply. Pull the trigger to release water pressure.
Engage the safety lock on the trigger handle .
Remove the nozzle by placing your hand over the nozzle while pulling back on the Quick-Connect
collar.
WARNING:Do not make changes to the nozzle while the trigger is engaged. Doing so could
result in damage to the pressure washer or injury to the user.
WORKING WITH DETERGENT
WARNING: Use only detergents specifically designed for use with pressure washers.
DO NOT USE household detergents, acids, alkaline solutions, bleaches, solvents, flammable material,
or industrial grade solutions. These could damage the pressure washer. Many detergents may require
mixing prior to use. Prepare the cleaning solution as instructed on the solution bottle.
WARNING: When being used with detergent, make sure to use the black soap
quick-nozzle.
Gently pull the detergent tank out of its storage position. Remove the
detergent tank cap with suction tube (Fig.12).
Fill the tank or mix as recommended by detergent instructions, and
secure the cap with suction tube back into place. Replace it back on
the unit.
Install the soap nozzle (black) on the spray wand.
Turn on the pressure washer. Pull the trigger to operate the unit.
When finished using the pressure washer, you must first drain and
rinse the detergent tank. Run the pressure washer until all of the soap
is drained from the detergent tank.
FINISH OPERATION
1. Turn off the water source.
2. Press the lever on the trigger gun to release any remaining pressure and water in the system.
3. Turn the switch to the OFF position and unplug the power cord from the outlet.
4. Disconnect the high-pressure hose connection on the trigger gun handle.
5. Store the water hose and high pressure hose.

14
MAINTENANCE
WARNING: In order to avoid personal injury and the risk of fire and electric shock, turn
off the appliance and remove the mains plug prior to any care and maintenance work.
WARNING: When servicing, use only identical replacement parts. Use of any other parts
could create a hazard or cause product damage.
CLEANING
Prior to longer periods of storage, pull out the filter in the detergent bottle and clean under running
water.
Pull out the filter in the water connection and clean under running water (Fig.13). Use the needle to
clean the residue (Fig.14).
TRANSPORT INSTRUCTION
Mind the weight of appliance during moving. Put the appliance a level
ground. Pull out the telescopic rod to move the appliance (Fig.15).
STORAGE
Place the appliance on a level ground.
Disconnect trigger gun and high pressure hose.
Disconnect high pressure hose with outlet.
Put the trigger gun into the trigger gun holder.
Wind back power cord and high pressure.
In winter, please do not put the machine outside without draining the water to avoid the damage to
the machine. Just put it in a room with frost prevention.

15
SCHEMATIC DRAWING
TROUBLE SHOOTING
WARNING: Read instruction manual first! Remove plug from power source before making
adjustments or assembling accessories.
Problem Possible Cause Possible Solution
Appliance is not running
1.Machine not plugged in
2.Defective socket
3.Defective extension cable
4.Incorrect mains voltage
5.Switch off
6.Fuse has blown
1.Plug in machine
2.Try another socket
3.Try another extension cable
4.Check voltage correctly
5.Turn on switch
6.Replace fuse
Pump stop working Lack of water lead to high
temperature Check water flow quantity
Fluctuating pressure
1.Spray lance blocked
2.Pump is sucking air
3.Impurities in pump
1.Clean lance with needle
2.Check that hoses and connections
are airtight
3.Contact the dealer
Appliance does not reach
operation pressure
1.Spray lance blocked or
worn
2.Short supply of water
3.Hose kinked
4.Filter blocked
5.Hose blocked
1.Clean or change spray lance
2.Check inlet flow rate
3.Straighten out hose
4.Clean filter
5.Clean hose
Trigger gun can be used Trigger gun is locked Unlock trigger gun safety
Machine often starts and
stops by itself
1.Safety valve worn out
2.Pump,high pressure hose,
trigger gun is leaking
Call 800-791-9458
Fig.16

16
EXPLODED VIEW

17
PARTS LIST
Item Stock# Description Qty. Item Stock# Description Qty.
1 PS2020-001 ST4X16 SELF
TAPPING SCREW
11 32 PS2020-032 CHECK VALVE
SPRING
6
2 PS2020-002 MOTOR COVER
CAP
1 33 PS2020-033 CHECH VALVE BASE 6
3 PS2020-003 MOTOR COVER 1 34 PS2020-034 Φ11.5XΦ1.8 O RING 7
4 PS2020-004 MOTOR HC8849JM 1 35 PS2020-035 CHECK VALVE PLUG 7
5 PS2020-005 629Z BEARING 1 36 PS2020-036 Φ8.5XΦ1.8 O RING 1
6 PS2020-006 50 TEETH GEAR 1 37 PS2020-037 RELIEF VALVE HEAD 1
7 PS2020-007 DRIVING SHAFT 1 38 PS2020-038 Φ12XΦ2 O RING 1
8 PS2020-008 Φ62XΦ2.5 O RING 2 39 PS2020-039 RELIEF VALVE ROD 1
9 PS2020-009 GEAR BOX 1 40 PS2020-040 RELIEF VALVE FLAT
WASHER
1
10 PS2020-010 RUBBER GASKET 1 41 PS2020-041 RELIEF VALVE
SPRING
1
11 PS2020-011 Φ6 SPRING
WASHER
8 42 PS2020-042 RELIEF VALVE CORE 1
12 PS2020-012 M6X30 HEX BOLT 4 43 PS2020-043 FLAT WASHER 1
13 PS2020-013 DRIVING SHAFT
OIL SEAL
1 44 PS2020-044 Φ5.6XΦ1.8 O RING 1
14 PS2020-014
6203Z BEARING
1 45 PS2020-045 Φ18XΦ2.5 O RING 1
15 PS2020-015 CAM 1 46 PS2020-046 RELIEF VALVE PLUG 1
16 PS2020-016 51106B BEARING 1 47 PS2020-047 Φ4XΦ2 O RING 1
17 PS2020-017 M8 FLAT WASHER 1 48 PS2020-048 M6X10 CROSS HEAD
BOLT
1
18 PS2020-018 Φ8 SPRING
WASHER
1 49 PS2020-049 605 INLET TUBE 1
19 PS2020-019 M8X20 LEFT
TOOTH SCREW
1 50 PS2020-050 INLET TUBE PLUG 1
20 PS2020-020 PLUNGER CLAMP 3 51 PS2020-051 U PIN 1
21 PS2020-021 PLUNGER SPRING 3 52 PS2020-052 FILTER 1
22 PS2020-022 PLUNGER 3 53 PS2020-053 HOSE CONNECTOR 1
23 PS2020-023 BOTTOM PUMP
BODY
1 54 PS2020-054 CHECK VALVE
SPRING
1
24 PS2020-024 PLUNGER OIL
SEAL
3 55 PS2020-055 CHECK VALVE CORE 1
25 PS2020-025 GUIDED RING 3 56 PS2020-056 Φ4.5XΦ2 ORING 1
26 PS2020-026 PLUNGER WATER
SEAL
3 57 PS2020-057 OUTLET 1
27 PS2020-027 UP PUMP BODY 1 58 PS2020-058 Φ15XΦ2.5 O RING 1
28 PS2020-028 M6X40 HEX BOLT 4 59 PS2020-059 SUCKED TUBE
SPRING
1
29 PS2020-029 Φ8.5XΦ2 O RING 8 60 PS2020-060 S/S BALL BEARING 1
30 PS2020-030 CHECK VALVE
BODY
6 61 PS2020-061 Φ7.5XΦ1.8 O RING 1
31 PS2020-031 CHECK VALVE
CORE 6 62 PS2020-062 Φ3.5XΦ1.5 O RING 1

18
63 PS2020-063 LIQUID-ABSORBENT
JOINT
1 94 PS2020-094 WHEEL CAP 2
64 PS2020-064 Φ6XΦ2 O RING 2 95 PS2020-095
M5X12 HEX BOLT
1
65 PS2020-065 LIQUID-ABSORBENT
CORE TUBE
1 96 PS2020-096 BT5X16 SELF-TAPPING
SCREW
8
66 PS2020-066 Φ2.5XΦ1 O RING 1 97 PS2020-097 BOTTLE 1
67 PS2020-067 BACKFLOW HOLE
PLUG
1 98 PS2020-098 BOTTLE LID 1
68 PS2020-068 SWITCH WIRE 1 99 PS2020-099 PVC SOFT TUBE 1
69 PS2020-069 RUBBER SEAL 1 100 PS2020-100 FILTER PLUG 1
70 PS2020-070 SWITCH BOX 1 101 PS2020-101 GUN HOLDER 1
71 PS2020-071 CLINCH BOLT 1 102 PS2020-102 PULL ROD PLUG(BIG) 2
72 PS2020-072 LEVER 1 103 PS2020-103 PULL ROD BRAKE(BIG) 2
73 PS2020-073 PRESSURE SWITCH
WATERPROOF CAP
1 104 PS2020-104 ALUMINIUM TUBE(BIG
SIZE)
2
74 PS2020-074 M6X10 CROSS
SCREW
2 105 PS2020-105 PULL ROD
BRAKE(SMALL)
2
75 PS2020-075 MICRO SWITCH
(NORMAL CLOSE)
1 106 PS2020-106 PULL ROD CLAMPING
PIECE(BIG)
2
76 PS2020-076 PRESSURE SWITCH
LID
1 107 PS2020-107 ALUMINIUM
TUBE(MEDIUM SIZE)
2
77 PS2020-077
ST3X12
SELF-TAPPING
SCREW
16 108 PS2020-108 PULL ROD CLAMPING
PIECE(SMALL) 2
78 PS2020-078 KNOB SWITCH
COVER
1 109 PS2020-109 ALUMINIUM
TUBE(SMALL SIZE)
2
79 PS2020-079 MICRO-SWITCH(NO
RMAL OPEN)
2 110 PS2020-110 PULL ROD PLUG(SMALL) 2
80 PS2020-080 CAPACITOR 1 111 PS2020-111 PULL ROD HANDLE 1
81 PS2020-081 SEPARATOR 1 112 PS2020-112 ST4X12 SELF-TAPPING
SCREW
2
82 PS2020-082 SWITCH SHRAPNEL 2 113 PS2020-113 PULL ROD HANDLE STRIP 1
83 PS2020-083 SWITCH AXLE 1 114 PS2020-114 FRONT POSITIONING
FRAME OF PUMP
1
84 PS2020-084 KNOB SWITCH BOX 1 115 PS2020-115 FRONT COVER 1
85 PS2020-085 KNOB STOPPER 1 116 PS2020-116 LOGO PLATE 1
86 PS2020-086 KNOB 1 117 PS2020-117 KNOB OUTSIDE INSERT
PART
1
87 PS2020-087 RUBBER GASKET
DOUBLE HOSE
1 118 PS2020-118 DECORATED PLATE 1
88 PS2020-088 INTER CONNECTING
WIRE
1 119 PS2020-119 DECORATED PART 1
89 PS2020-089 POWER CORD 1 120 PS2020-120 HIGH PRESSURE HOSE 1
90 PS2020-090 WIRE PLATE 1 121 PS2020-121 WATER GUN 1
91 PS2020-091 WIRE PRESS BASE 1 122 PS2020-122 LANCE 1
92 PS2020-092 BACK COVER 1 123 PS2020-123 NEEDLE 1
93 PS2020-093 WHEEL 2

19
TWO (2) YEARS LIMITED WARRANTY
PowerSmart®is committed to building tools that are dependable for years. Our warranties are consistent with our
commitment and dedication to quality.
TWO (2) YEARS LIMITED WARRANTY OF POWERSMART PRODUCTS FOR HOME USE.
PowerSmart (“Seller") warrants to the original purchaser only, that all PowerSmart consumer power tools will be
free from defects in material or workmanship for a period of two (2) years from date of purchase. Ninety (90) days
for all PowerSmart Products, if the tool is used for professional or commercial use.
SELLER’S SOLE OBLIGATION AND YOUR EXCLUSIVE REMEDY under this Two (2) Years Limited
Warranty and, to the extent permitted by law, any warranty or condition implied by law, shall be the repair or
replacement of parts, without charge, which are defective in material or workmanship and which have not been
misused, carelessly handled, or misrepaired by persons other than Seller or Authorized Service Center. To make a
claim under this Limited Warranty, you must return the entire power tool product; transportation prepaid, to
PowerSmart Include a legible copy of the original receipt, which lists the date of purchase (month and year) and the
name of the company purchased from.
THIS LIMITED WARRANTY DOES NOT APPLY TO ANY ACCESSORY ITEMS INCLUDED WITH THE
TOOL SUCH AS CIRCULAR SAW BLADES OTHER RELATED ITEMS OR TO ANY REPLACEMENT
PARTS LISTED UNDER MAINTENANCE.
ANY IMPLIED WARRANTIES SHALL BE LIMITED IN DURATION TO TWO (2) YEARS FROM DATE OF
PURCHASE. SOME STATES IN THE U.S. AND SOME CANADIAN PROVINCES DO NOT ALLOW
LIMITATIONS ON HOW LONG AN IMPLIED WARRANTY LASTS, SO THE ABOVE LIMITATION MAY
NOT APPLY TO YOU.
IN NO EVENT SHALL SELLER BE LIABLE FOR ANY INCIDENTAL OR CONSEQUENTIAL DAMAGES
(INCLUDING BUT NOT LIMITED TO LIABILITY FOR LOSS OF PROFITS) ARISING FROM THE SALE
OR USE OF THIS PRODUCT. SOME STATES IN THE U.S. AND SOME CANADIAN PROVINCES DO NOT
ALLOW THE EXCLUSION OR LIMITATION OF INCIDENTAL OR CONSEQUENTIAL DAMAGES, SO
THE ABOVE LIMITATION OR EXCLUSION MAY NOT APPLY TO YOU.
THIS LIMITED WARRANTY GIVES YOU SPECIFIC LEGAL RIGHTS, AND YOU MAY ALSO HAVE
OTHER RIGHTS WHICH VARY FROM STATE TO STATE IN THE U.S., PROVINCE TO PROVINCE IN
CANADA AND FROM COUNTRY TO COUNTRY.
For questions / comments, technical assistance or repair parts –
Please call toll free at: 1-800-791-9458 (M-F 9am – 5pm EST)
Email: [email protected]
SAVE YOUR RECEIPTS. THIS WARRANTY IS VOID WITHOUT THEM.
Table of contents
Other Powersmart Pressure Washer manuals