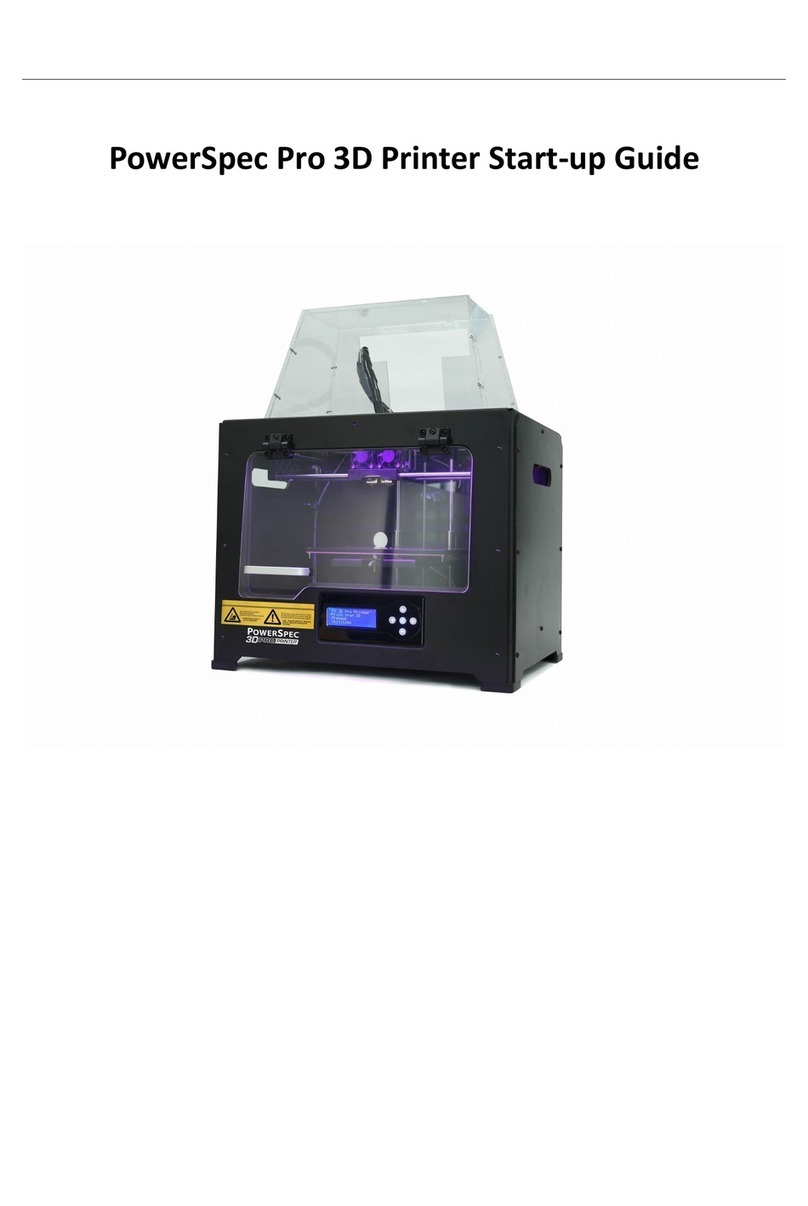
PowerSpec Ultra User guide

2
PRECAUTIONS:
Please ensure this page is read carefully prior to setting up or operating the 3D
printer.
The 3D printer is very sensitive to static electricity, so please ensure sure you connect to a properly
grounded surge protected power outlet.
Before repairing or making any alterations to the 3D printer, it is essential that the machine is turned off and
the power cord is unplugged.
The 3D printer operates at very high temperature so please allow: the nozzle, the extruded plastic, and the
heating plate to cool before handling them.
Some plastic filaments may give off a slight odor when heated and because of this; the machine should
always be operated in a well-ventilated area.
Do not wear gloves when operating or repairing the 3D printer, as entanglement may occur and result in
injury.
Do not leave the machine unattended while in operation.

3
1What's Included in the Box?
Along with your 3D printer, the box also contains the following:
In the two long boxes on top:
•Power cord x 1pc
•USB type A to type B cable x 1pc
•Sensor Line x 1pc
•Filament guide tube x 2 pcs
•Filament spool holder x 2 pcs
In the 3D printer Acrylic Accessory box:
●Acrylic sheet x 6pcs
●Handle x 1pcs
●Accessory bag x 1pc
An accessory box on the top of the 3D printer:
•Dual extruder heads x 1pc
•4G SD card x 1 pc
•Bolt, hex wrench, and screws kit x 1 bag.

4
2 Un-packing
The 3D printer was carefully packaged at the manufacturing facility. Please follow the unpacking steps as noted
below.
!
First, put the box on a clean, flat surface. Remove the top long box and inside you will find: 1 power cord, 1 USB
type A to type B cable, 1 sensor line , 2 filament holders, and 2 filament guide tubes.
You will find another box containing the relevant assembly tools under the long box. You should assemble the
Acrylic cover yourself using these tools, but please view the assembly video contained in the SD card.
CAUTION
Handle the package and its contents with extreme care and do not use any unnecessary force.
Do not remove the thin yellow film from the heating plate. It is heat resistant tape that improves the
adhesion of the extruded plastic to the plate.
Do not remove the wrapping around the nozzle. It consists of a ceramic fiber fabric and heat resistant
tape that helps to keep the nozzle at a consistent temperature.

5
Please remove both of the foam supports holding the printer in place and make certain that you can grasp the
frame firmly, and then lift the printer out of the carton.
Now you can see the top of the printer along with more boxes inside. The large box with the black wire is the
accessory box.This contains the dual extruder heads, SD card, and other important components. Don't
remove the accessory box or its contents yet. Note: Do not lift the box by the black cable! Doing so could cause
damage to the component.
Please remove the protective wrap and you can now open the accessory box and remove the accessory sleeve. You
will find the dual extruder heads in the protective packaging along with the black cable, carefully remove it and
place it on your work surface. Remove the cardboard packing material and take the accessory box from the
printer, set it aside for later.
The build platform should now be visible. It is an aluminum plate covered in a thin polyamide film. This is the
surface that your objects will be printed on. Note: Remember to not remove this film.
The next step is to raise the build platform; there are two ways to do this:
1. Turn the screw which is behind the rotating platform.
2. Grasp the printing platform with one hand on each side raising it slowly while keeping it level.
Stop once the platform is just a little below the bronze nozzle.
Now you can see two empty boxes, you can easily take them out after removing the remaining packaging.

6
3Initial Hardware Installation
You will need the two shortest silver screws from the kit found in the accessory box, and the appropriate hex
wrench.
First, lower the build platform by using one of the methods described in the previous section. Holding the extruder
by both sides, take it out of the accessory sleeve and position it on the extruder seat with the fan facing forward.
Align the screw holes and fasten with the two short silver screws.
Next is the installation of the spool holders install one on each side.
The installation of the spool holders is very simple – just insert it into the circular opening and tighten the nut
behind if. Then install the filament guide tube onto the empty spot on the extruder. Place one end of the guide
tube into the hole. The hardware installation is now almost complete.
Next, with the power switch in the OFF position, confirm that the power cord is plugged into the power outlet
next to the power switch.

7
Finally install the filament on the spool holders
Congratulations! You have completed the initial hardware installation! You are now ready to start printing. Please
proceed to the next step: Software Installation.

8
4 Software Installation
1.1 Preparation
A. Insert the included SD card with 3D printer software into your computer. We have already prepared the
latest driver installation package in the SD card. Copy the RAR program to your PC.
1.2 Installation & Startup
A. Uncompress the copied RAR file, and complete the installation according to the provided instructions.
B. Connect your 3D printer to your computer using the included USB cable, ensure that the printer is
connected to your computer successfully. Start the software by selecting the shortcut on your computer’s desktop
or in the Start Menu.
Note: This software supports Windows XP/Win 7/Win8 32-bit and 64 bit, and Mac operating system.
2. Software Operating Instructions
Load one or multiple files.
View Powerprint home screen from one of six viewing angles.
Move model around on the xy-plane; shift+click to move along z axis

9
Turn and rotate your model
Scale the size of your model
Select right or left extruder you want to print with
Print it directly with your 3D printer or export to your SD card.
You can use Powerprint software to control 3D printer and perform printing tasks.
2.1 Load File
You can load a model file or Gcode file into the software by following any of the following six methods:
A. Click the “Load” button at the top of the software interface and then select the file to be loaded.
B. Select the file to be loaded, and then drag the file to the software interface.
C. Click the “File -> Load File” menu. Then select the file to be loaded.
D. Click the “File -> Examples” menu. Then select the file to be loaded.
E. Click the “File -> Recent Files” menu. Then select the file to be loaded.
F. Select the file to be loaded then drag the file to the software icon.
You can load .stl, .obj, or .fpp model files which are editable using this software. Please refer to Chapter 2.2~2.5
and you can find instructions regarding modifications, such as operations of mouse, changes of view from
different angles, and how to edit and save the file. After modification, please refer to Chapter 2.6 if you want to
slice the model file, generate Gcode, file, or Print it.
Important Note: Gcode files cannot be edited, but you can directly start the printing after loading it into the
software. Please refer to the Chapter 2.6.1 and 2.6.2.2 which tells you how to connect to 3D printer and how to
print the Gcode file.
2.2 Mouse Operations
2.2.1 Left click
A. Select a model by moving the cursor to it and then left click.
B. Select multiple models by holding the Ctrl key and then left click each model you want.
C. Models look brighter when selected.
D. Models can be edited when selected.
E. Left click any blank space to undo the selection of model.
2.2.2 Left click and hold the left button
When changing viewing angles or editing models, different effects will appear by left-clicking and holding
the left button. Please refer to Chapter 2.3.1~2.3.2 & 2.4.
2.2.3 Right click and hold the right button
Same affects as with any operation when right clicking and holding the right button. Please refer to the
Chapter 2.3.1 & 2.3.2.
2.2.4 Scrolling using the mouse wheel
Same affects as with any operations when scrolling using the mouse wheel. Please refer to the Chapter 2.3.3.

10
2.3 Change Views
Change your view of the model by moving, rotating, scaling the view, and so on.
2.3.1 Move
You can move the view of printing frame in the software interface using the following three methods:
A. Press and hold the left button of the mouse and then drag the cursor.
B. Press and hold the middle button of mouse and then drag the cursor.
C. Hold the Shift key while pressing the right button of the mouse and then drag the cursor.
2.3.2 Rotate
You can rotate the view of printing frame in the software interface using the following two methods:
A. Hold the right button of the mouse and then drag the cursor.
B. Hold the Shift key while pressing the left button of the mouse and then drag the cursor.
2.3.3 Scale
You can scale the view of printing frame in the software interface by scrolling the mouse wheel in any
condition.
2.3.4 Set
You can set the view of printing frame in the software interface to observe the model from six angels by the
following two methods (Top/Bottom/Front/Back/Left/Right View):
A. Click the View menu, and then select the view to use to observe the model.
B. Click the Look button on the left of the software interface, and then select the view you require.
2.3.5 Reset
A. Click the View menu and then select Home view to reset the view.
B. Click the Look button on the left of the software interface, and then click Reset button to reset it.
2.3.6 Show Model Outline
Click the View -> Show Model Outline, it will highlight the outer surfaces of your model file with gray and
white color.
2.3.7 Show Steep Overhang
Click the View -> Show Steep Overhang menu. When the intersection angle between the model surface and
horizontal line is within the overhang threshold value, where the surface has a steep overhang and it is
highlighted red in the software. Overhang threshold value can be set as needed. The default value is 45
degree.
2.4 Edit Models
You can edit the models by moving, rotating, scaling the model and so on.
2.4.1 Move
When the model is selected, you can change the model location on the build platform using the following
two methods:
A. Click the Move button on the left of the software interface. Holding the left button of the mouse and then
drag the cursor to adjust the location of the model in the XY direction. Hold the shift key and while pressing
the left button of the mouse, drag the cursor to adjust the location of the model in the Z direction. You can
see the distance and direction of the movement which refers to the relative distance between present and
former locations.
B. Click the Move button on the left of the software interface and then enter the distance value you want to
move on the X/Y/Z axes positioning. Click Reset button to reset distance values.

11
Note: Generally, we suggest you to click the Center and On Platform buttons after adjusting location of
the model to make sure the model within the printing scope and sticking to HBP. Only click On Platform
button if you want to print the model in a specified position.
2.4.2 Rotate
When the model is selected, you can change the orientation on the build platform using the following two
methods:
A. Click the Rotate button on the left of the software interface and you will see three mutually perpendicular
rings: red, green and blue. Click one of the rings and you can rotate it on the present axis, you will see the
rotation angle and direction in the center of circle. Using this method you can rotate your model on its X/Y/Z
axis.
B. Click the Rotate button on the left of the software interface, and then enter the rotating angel values in the
X/Y/Z axes positioning. Click the Reset button to reset the rotating angel values.
2.4.3 Scale
When the model is selected, you can change the size of the model on the build platform by using the
following two methods:
A. Click the Scale button on the left of the software interface, then press the left mouse button and move the
mouse to adjust the size of the model. You will see the corresponding values of the different axes near the
borders.
B. Click the Scale button on the left of the software interface, and then enter the scale values of the X/Y/Z
axes positioning. Click the Maximum button to get the largest size possible size for building. Click the
Reset button to reset the size of model.
Note: Select the Uniform Scaling option and it will scale the model in equal proportions when changing
values in any positioning of the model. Not selecting this option will only change the value of the
corresponding positioning.
2.4.4 Set
When the model has been selected, click the Extruder button on the left of the software interface and then
select the extruder you want to print with. The model will display purple if you choose the left extruder or
gray if the right extruder.
If a model can be printed with dual extruders, or support is needed to complete the printing, you can use the
dual extruders to print with different color filaments, or even different kinds of filament. However, dual
extrusion printing is not available when the model can only be printed with one extruder. You need to know
whether the model diagram has single or dual colors when selecting the model. A dual-color model is
combined with two single color models.
Note: When setting the extruder, mouse operations are the same as those for changing views. Please refer to
the Chapter 2.3.1~2.3.2.
2.4.5 Other Functions
2.4.5.1 Undo
To Undo the most recent edit you made to your model file use the following two methods:
A. Click Edit-> Undo menu.
B. Use the shortcut Ctrl+Z.
Note: Selecting this option multiple times will continue to undo edits in reverse order in which they
were performed.
2.4.5.2 Redo
To Redo the most recent edit you have undone to your model file use the following two methods:
A. Click Edit-> Redo menu.
B. Use the shortcut Ctrl+Y.
Note: Selecting this option multiple times will continue to redo edits in reverse order in which
they were removed.

12
2.4.5.3 Select ALL
Using the following two methods, you can select all models in the scene.
A. Click Edit->Select ALL menu.
B. Use the shortcut Ctrl+A.
Note: When models are too small to be seen, or out of viewing scope, please click Center and On
Platform buttons after selecting all models to bring them to the printing scope.
2.4.5.4 Duplicate
After a model is selected, you can duplicate it by using the following two methods:
A. Click the Edit-> Duplicate menu.
B. Use the shortcut Ctrl+D.
2.4.5.5 Delete
After a model is selected, you can delete it by using the following two methods:
A. Click the Edit-> Delete menu.
B. Use the shortcut Del.
2.5 Edit Supports
After a model file is loaded, click Edit->Supports in the top menu and you can edit the support structures of your
model. Click Back on the top-right corner to exit when finishing any edits.
2.5.1Auto Supports
Select this option to have your model built with support structures. Powerprint software will automatically
generate supports for any overhanging sections of your model, and it will generate new support structures to
replace original ones included in your model file.

13
2.5.2 Clear Supports
Select this option to empty all the supports of your model. Click Edit->Undo in the menu or Ctrl+Z to undo
this operation.
2.5.3Add
Select this option to add supports. After selecting this option, move your mouse to where you want to add
the support, and then left-click the mouse to select the start point of support structure. Press and hold the left
mouse button down, drag the cursor, and then you can preview the support structure you will add (If the
support surface does not need to support, or the angle of support column is too large, the previewed support
structure will be highlighted.) Release the left button of mouse to add this support, the support structure will
be generated according to the start and the end position. But if the support column intersects with the model
or the previewed support structure is highlighted, the support structure will not be generated.
2.5.4 Delete
Select this option to delete supports. After selecting this option, move the mouse to the supports you want to
delete, then left-click the mouse to delete it.
2.6 New Project
Click File -> New Project to create a new project. If your current project hasn’t been saved with changes, it will
pop up a dialog to prompt you to save them. Click Yes button to save those changes, click No button to discard
them, Click Cancel button to close this dialog and it will not create a new project.
2.7 Saving File
You can save changes of your model files by using the following two methods:
A. Click File -> Save Project to save your file use only .fpp format. All models (including supports) are in
the .fpp format file, are independent, and can be edited again when reloading the file. Additionally, an
extruder configuration and model locations remain same when saving the file.
B. Click File -> Save As to save your file with .stl, .obj, or .fpp format. All the models (including supports)
in a .stl or .obj format file are not independent, but combined to a new model. All model locations remain the
same as saving the file, while an extruder’s configuration becomes different when reloading the file.
2.8 Printing Process
2.8.1 Choose Machine Type
Click Print-> Machine Type to choose the machine type you have selected before connecting to the printer,
or the Powerprint will automatically recognize the machine type after connecting, in this case you cannot
manually switch to other machine type(s). Different machine types have different machine frames which
will affect the sliced file(s).
2.8.2 Connect Machine
Please refer to Chapter 2.9.1.1 for configurations of connecting to 3D printer.

14
2.8.3 Print
2.8.3.1 Generate Gcode File
In order to print, you need to slice the model file to generate a gcode file by using the following
steps:
1. Click Print -> Print menu or Print button on top of the software interface, a pop-up dialog box will
open for slicing.
2. Set slicing parameters and click the Ok button, and a pop-up dialog box will open for saving the Gcode
file.
3. In the Save as dialog box, select the path for saving the Gcode file, and then click Save button. You can
see the progress bar at the bottom of software interface start that shows the completion progress of slicing
and uploading Gcode file now. Click the Abort button on the right side of the process bar to cancel the
slicing.

15
2.8.3.2 Explanation of Slicing settings

16
A. Preview: Select this option to preview the Gcode file when slicing is finished.
B. Print When Slice Done: Select this option to directly print the model.
C. Slice Engine: Three slice engines are provided: Slic3r, Skeinforge and ffslicer. Different slice
engines have different configurations. It is recommend to select Slic3r, as it has better
performance.
D. Material Right: Choose filament type you want to use with right extruder.
E. Material Left: Choose filament type you want to use with left extruder.
F. Supports: Choose Left or Right Extruder to print supports when overhang is existing, or
disable when not needed.
G. Raft: Choose Left or Right Extruder to print rafts which can helps the model to adhere better to the
build plate, or Disable when not needed. (Note: Slic3r has no this function, while Skeinforge has
this function with the default extruder used to print the raft. You can choose left or right extruder to
print the raft when using ffslicer.)
H. Skirt: Select this option to help extruder extrude filament more smoothly. (Note: ffslicer does not have
this function.)
I. Wall: Select this option to scrape extruded filament from a non-printing extruder during dual
extrusion print. (Note: Skeinforge does not have this function. This function can’t be used with Skirt
at the same time.)
J. Use Editable Supports: Select this option to disable the built-in supports function in the slice
engine and use the support structures generated by Powerprint software. ffslicer has no
built-in support functions, so this function is always enabled.
K. Resolution: When printing using the right extruder with ABS, or dissolvable filament, you can select
High option with better print but lower speed, or Standard option, or Low option with normal
print but high speed. Each option has its own configured parameter. While printing with the right
extruder with PLAfilament, you have the fourth option, which is Hyper with hyperfine print.
Click More Option button to set the parameters as you want. Different resolutions have different
default parameters. Click Restore Defaults to restore it.
H
G

17
A. Layers
a. Layer Height is the height of each layer. The lower the value of layer height is, the finer the
surface of the model will be .
b. First Layer Height exists when users choose Slic3r as the slice engine, and it affects
the adhesion degree between model and platform. The max value is 0.4mm. Normally we
recommend you to use the default value.
c. Number of Shells is the quantity of shells of each layer. The max value is 10.
B. Infill
a. Fill Density means fill rate.
b. Fill Pattern is the pattern of filling shape which effects printing duration.
C. Speed
a. Print Speed is the moving speed of the extruder. Generally, the lower the speed is, the better the
final print will be. For ABS printing, 60 is recommended; for PLA printing, 80 is
recommended.
b. Support Print Speed is needed to set when choosing Slic3r as the slice engine which
can control the moving speed of the extruder when printing the supports.
c. Travel Speed is to control the moving speed of the extruder under non-printing status
during work. For ABS printing, 80 is recommended; for PLAprinting, 100 is recommended.
Note: Modify parameters settings to get better prints as different models need different
parameters.
D. Temp. Set the temperature for left or right extruder and platform. Set 220 to the extruder
temp for ABS and PLA printing. Set 110 to the platform temp for ABS printing while 50 for
PLA printing.Adjust the temperature according to the condition in order to get a good print.
E. Other Functions
a. Turn Fan On to turn on the back fans to cool the chamber if printing PLA.
b. Overhang Threshold helps to measure whether a support structure is needed or not. If the
intersection angle between model surface and horizontal line is within the overhang
threshold value, then this surface will need a support.
2.8.2.3 Print Gcode File
After finishing slicing, it will load into the generated Gcode file automatically if you select the Preview
option when slicing, or you can manually load into it and then go to the Preview interface. In the
preview interface, there is a vertical scroll bar which shows each layer of the model and you can find
the Estimated Material Right and Estimated Print Time it will take located in the top right corner. Then
you can click the Print button in the same location, the machine will start to print. Click the Back button to
exit from the Preview mode.
2.8.2.4 Pause or Terminate Printing
Once printing starts, click the machine icon in the bottom right corner of the software interface
and it will show the process status in a frame. Click the Pause button to pause printing and then click
the Continue button to resume. Click the Stop button to cancel the printing task but you will need to restart
the print task if you want to print it again.
Note: Please DO NOT click the Pause button unless necessary because it will affect the overall printing
result.

18
2.9 Printer Operations
2.9.1 Connect / Disconnect
You can connect the 3D printer to Powerprint software via a USB cable or WIFI (if equipped). The machine
icon in the bottom right corner of the software interface displays a broken chain pattern means disconnected,
while displaying an unbroken one means connected.
2.9.1.1 Connecting
A. USB cable connection
a. Find the USB ports on the right-side of machine and on your computer and connect them.
b. Open Powerprint software and turn on the printer.
c. Click the Print -> Connect Machine menu, then select USB in the Connection Mode options
and then select the machine you want to connect to in the Select Machine option. If you
cannot find your machine, click the Rescan button to scan your machine and then select it.
Finally click the Connect button to connect to the printer. If you still cannot find your machine
after rescanning you haven’t installed the driver software. You will need to install the driver
manually, please refer to the Chapter 2.8.3.1. Normally, the driver will be installed
automatically along with the software install.
B. WIFI connection
a. Via a wireless network
1. Switch on the printer, and verify the WIFI is available by clicking Tools ->Set
up->WIFI->WIFI ON.
2. Open the wireless network connection in your computer, and choose PS_3D_Ultra_Printer
Wireless network. It is the default network of the printer, and no password is needed if you
haven’t changed it in the settings.
3. Open your browser and enter the IP address 10.10.100.254 in the Address Bar. Then
enter admin as the account and password . (The above IP address
/Account /Password are default if setting haven’t been changed)
4. Click WIFI Set and you can check and set the WIFI Operating Mode, as shown in the
picture below:

19
AP Mode Setup: In the setup section of AP Parameters, you should change the SSID, password, IP and subnet
mask. To setup WIFI mode as AP mode, click Save and reboot and AP mode should be set successfully.
STA Mode Setup: In the setup section of STAParameters, you can change the SSID, Internet Password, and
DHCP Mode. To setup WIFI mode as STA mode, click Save and reboot and STA mode should be successfully.
(Note: If, under the STA Mode, there are incorrect parameter settings or an area beyond the valid range,
the WIFI will fail to connect, correct by switching to theAP Mode by using Reset on WIFI interface.)
1. Reboot the printer WIFI to re-establish a connection, then connect the printer to the Internet in AP mode on
the computer, make sure the Printer and the computer access the same WIFI, then open the PowerPrint and
click on Menu—Print—Connect successfully. Choose WIFI as the link mode, input the IP address of the user’
Internet (The IP address shown on the screen of the 3D printer) to the IP port below, and then click Connect.
2. The printer has connected with PowerPrint. The status bar in the lower right corner should show the
temperatures of the nozzle and printing platform.
3. A printing selection dialog will be displayed after clicking Printing icon. You should ensure that you
choose “ABS/PLA” in the material options. You can click the More icon then select Options to implement
advanced options. Check on Printing after Layering and click OK.
4. G-code files could be saved in any location. After saving, the model starts to be cut into slices and will be
uploaded to the Printer. Then the printer will turn on pre-heat mode and start to print when the preheat
finishes.
2.9.1.2 Disconnect from the printer
Click Print -> Disconnect menu on top of the software interface, the computer will disconnect from
the 3D printer.
2.9.2 Control Panel
After connection between software and 3D printer is established, click Tools->Control Panel menu to open
the control window. The following operations are available in the control panel to control the printer.

20
A. Jog Controls
a. Jog Mode:
You can set the distance the extruder or the platform moves by a single jog click time.
b. Direction Buttons:
These six blue-arrow buttons are set to control the movements in the X/Y/Z directions. Click the direction
buttons of the x-axes and y-axes to control the horizontal movements of the extruder. Click the direction
buttons of the z-axes to control the vertical movements of the platform. Click the X- button to make the
extruder move to the left; click the X+ button to make the extruder move to the right. Click the Y- button
to make the extruder move forward; click the Y+ button to make the extruder move backward. Click the
Z- button to make the platform move upward; click the Z+ button to make the platform move downward.
The distance of movement will be shown in the X/Y/Z value bar.
c. Stop Button:
Click this button to terminate the current movement.
d. Coordinate frame:
Displays the coordinated positions of the extruder and platform.
e. Make the current position zero, button:
Click this button to set the current position of the extruder and platform as the origin of coordinates.
f. Center X/Y/Z buttons:
Click these buttons to return the extruder or platform to the origin of coordinates automatically.
g. X/Y/Z Speed sliding bar:
Set the moving speed of the extruder and platform by sliding the speed sliding bar.
B. Limit Switch
In order to protect the 3D printer, there are three limit switches on the X/Y/Z axes used to control the
movement limit positions. The following are the two statuses:
a. Open Status:
If the extruder or platform has not reached the limit position of the X/Y/Z direction, the switch will not be
triggered and its status is Open.
b. Triggered Status:
If the position of the extruder or platform has reached the maximum point of the X/Y/Z direction, the
limit switch will be triggered and its status will be displayed as Triggered.
C. Fan Controls
Click the Open button to turn on the cooling the fan and the Close button to turn it off.
Other PowerSpec 3D Printer manuals