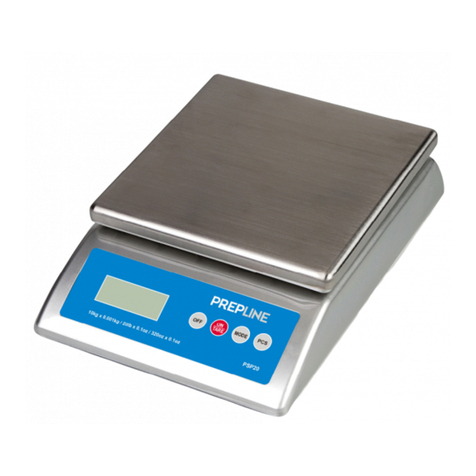
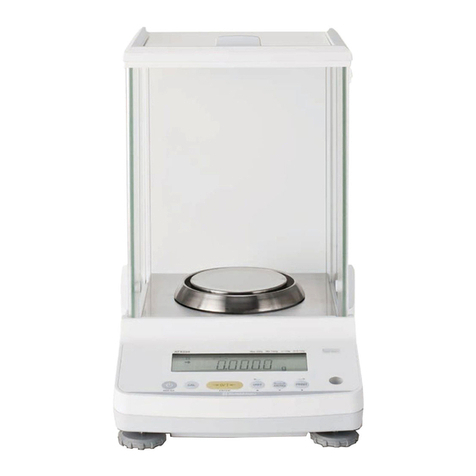
PREPLINE PSP40 User manual

PSP40
PSP40PSP40
PSP40
User/Technical Manual
Contents subject to change without notice
Version 1.0
04/2021

CONTENTS
1.
1.1.
1.
INTRODUCTION
INTRODUCTIONINTRODUCTION
INTRODUCTION .................................................................................................................... 1
General and afety Information
General and afety InformationGeneral and afety Information
General and afety Information .................................................................................................................................. 1
pec
pecpec
pecifications
ificationsifications
ifications .......................................................................................................................................................... 1
2.
2.2.
2.
Unpacking and etup
Unpacking and etupUnpacking and etup
Unpacking and etup ............................................................................................................ 2
Contents
ContentsContents
Contents ................................................................................................................................................................. 2
3.
3.3.
3.
OVERVIEW OF CONTROL AN
OVERVIEW OF CONTROL ANOVERVIEW OF CONTROL AN
OVERVIEW OF CONTROL AND FUNCTION
D FUNCTIOND FUNCTION
D FUNCTION .................................................................................. 2
3.1 Front Display
3.1 Front Display3.1 Front Display
3.1 Front Display ...................................................................................................................................................... 2
3.2 Indicator Display Character Definitions
3.2 Indicator Display Character Definitions3.2 Indicator Display Character Definitions
3.2 Indicator Display Character Definitions ................................................................................................................... 3
3.3 Key Functions
3.3 Key Functions3.3 Key Functions
3.3 Key Functions .................................................................................................................................................... 4
4.
4.4.
4.
OPERATION
OPERATIONOPERATION
OPERATION ...................................................................................................................... 5
4.1 Power on / Power off scale
4.1 Power on / Power off scale4.1 Power on / Power off scale
4.1 Power on / Power off scale .................................................................................................................................. 5
4.2 Zeroing the display
4.2 Zeroing the display4.2 Zeroing the display
4.2 Zeroing the display ............................................................................................................................................. 5
4.3 Normal
4.3 Normal4.3 Normal
4.3 Normal
Weighing Mode
Weighing ModeWeighing Mode
Weighing Mode ........................................................................................................................................ 5
4.4 Taring
4.4 Taring4.4 Taring
4.4 Taring ............................................................................................................................................................... 5
4.5 witching measuring unit
4.5 witching measuring unit4.5 witching measuring unit
4.5 witching measuring unit ..................................................................................................................................... 5
5.
5.5.
5.
Calibration
CalibrationCalibration
Calibration ......................................................................................................................... 6
6.
6.6.
6.
AUTO
AUTOAUTO
AUTO-
--
-OFF setting
OFF setting OFF setting
OFF setting and BACKLIGHT setting function
and BACKLIGHT setting functionand BACKLIGHT setting function
and BACKLIGHT setting function......................................................................... 6
7.
7.7.
7.
Display symbol meaning
Display symbol meaningDisplay symbol meaning
Display symbol meaning ......................................................................................................... 6
8.
8.8.
8.
Troubleshooting
TroubleshootingTroubleshooting
Troubleshooting .................................................................................................................. 7
8.1 Troubleshooting
8.1 Troubleshooting8.1 Troubleshooting
8.1 Troubleshooting ................................................................................................................................................. 7

PSP40 .
1 .
1.
1.1.
1. INTRODUCTION
INTRODUCTIONINTRODUCTION
INTRODUCTION
General and afety
General and afety General and afety
General and afety Information
InformationInformation
Information
For use in dry environments only.
This product uses 4xAA batteries. Dispose of according to local laws and regulations.
Read and understand all operating instructions before using this product. Keep this manual for future
reference.
Allow sufficient warm up time. Turn the scale on and allow up to 10 minutes for internal components to stabilize
before weighing.
Record the weight shortly after placing a load on the platter. Leaving loads in place for extended periods may vary the
load cell’s output signature and may result in a less accurate reading.
Avoid extended exposure to extreme heat or cold. Optimum operation is at normal room temperature. ee operating
temperature range in the specifications table. Allow the scale to acclimate to room temperature before using.
When storing the scale for extended periods, the battery must be charged every 90 days to avoid premature
performance degradation. Over time, the operating time per charge will degrade. If the operating time is no longer
acceptable even after recharging, the battery must be replaced.
Electronic scales are precision instruments. Do not operate near cell phones, radios, computers or other electronic
devices that emit radio frequencies that may cause unstable readings.
pecifications
pecificationspecifications
pecifications
Model
ModelModel
Model
P P06
P P06P P06
P P06
P P12
P P12P P12
P P12
P P30
P P30P P30
P P30
P P40
P P40P P40
P P40
Max. Capacity
Max. CapacityMax. Capacity
Max. Capacity
3
kg (
6
lb)
6
kg (
12
lb)
15
kg (
3
0
lb)
20
kg (
4
0
lb)
Readability
ReadabilityReadability
Readability
0.5 g (0.001 lb) 1 g (0.002 lb) 2 g (0.005 lb) 10 g (0.02 lb)
Display Resolution
Display ResolutionDisplay Resolution
Display Resolution
1
:60
00
1:
60
00
1:
75
00
1:2000
Min. Recommended Weight
Min. Recommended WeightMin. Recommended Weight
Min. Recommended Weight
10
g
(0.1 lb)
2
0 g
(0.1 lb)
4
0 g
(0.1 lb)
200 g (0.4 lb)
Construction
ConstructionConstruction
Construction
tainless steel pan, plastic housing
Weighing Units
Weighing UnitsWeighing Units
Weighing Units
kg / lb
/ g / oz / lb:oz
Calibration unit
Calibration unitCalibration unit
Calibration unit
kg / lb
Modes
ModesModes
Modes
Weighing
Weight Display
Weight DisplayWeight Display
Weight Display
1-Window backlit LCD display, 17.5mm (0.68”) high, 5 1/2 digits, 7-segment
Zero Range
Zero RangeZero Range
Zero Range
Power-on zero range: calibration zero point±20%F ;
ZERO key range: power
-
on zero±
5
%F
Tare Range
Tare RangeTare Range
Tare Range
U
p to
10
0
%F
tabilization Time
tabilization Timetabilization Time
tabilization Time
<
3
seconds
Operating Temperature
Operating TemperatureOperating Temperature
Operating Temperature
5
° to
35
°C
(41
°
F
to
9
5°F
)
Humidity Range
Humidity RangeHumidity Range
Humidity Range
<90%
relative humidity, non
-
condensing
Power upply
Power upplyPower upply
Power upply
4*AA
batter
ies
or AC power adapter (
9
Vdc/
6
00mA with central positive)
afe Overload Capacity
afe Overload Capacityafe Overload Capacity
afe Overload Capacity
150% of capacity
Platter Dimensions (L x W)
Platter Dimensions (L x W)Platter Dimensions (L x W)
Platter Dimensions (L x W)
215
x 2
45
mm
; 9.65" x 8.46"
cale Dimensions(L x W x H)
cale Dimensions(L x W x H)cale Dimensions(L x W x H)
cale Dimensions(L x W x H)
255
x
308 x
11
0
mm
; 10.04" x 12.13" x 4.33"

PSP40 .
2 .
2.
2.2.
2. Unpacking and etup
Unpacking and etupUnpacking and etup
Unpacking and etup
Remove the scale from the box and place it on a firm, level surface. Avoid locations with rapid temperature changes,
excessive dust, moisture, air currents, vibrations, electromagnetic fields, heat or direct sunlight.
Adjust the leveling feet until the bubble is centered in the circle of the level indicator
(located on the front panel).
NOTE
NOTENOTE
NOTE: Ensure that the scale is level each time its location is changed.
Connect the supplied AC adapter to the power input receptacle underneath the scale. Plug the AC adapter into a
properly grounded power outlet.
If the scale will be stored or transported in the future, save the packaging material to ensure the best possible
protection for the scale.
Contents
ContentsContents
Contents
cale
9Vdc/600mA adapter
Manual
4 x AA batteries
3.
3.3.
3. OVERVIEW OF CONTROL AND FUNCTION
OVERVIEW OF CONTROL AND FUNCTIONOVERVIEW OF CONTROL AND FUNCTION
OVERVIEW OF CONTROL AND FUNCTION
3.1
3.1 3.1
3.1 Front
FrontFront
Front
Display
DisplayDisplay
Display

PSP40 .
3 .
3.2
3.2 3.2
3.2 Indicator Display
Indicator Display Indicator Display
Indicator Display Character Definitions
Character DefinitionsCharacter Definitions
Character Definitions

PSP40 .
4 .
3.3
3.3 3.3
3.3 Key Functions
Key FunctionsKey Functions
Key Functions
Button
Functions
FunctionsFunctions
Functions
hort Press: (when off)
(when on)
Long Press: (when on)
Power on the scale
ets display to zero
Power off the scale
hort Press:
Long Press:
Tare a weight
witch between unit of measure

PSP40 .
5 .
4.
4.4.
4. OPERATION
OPERATIONOPERATION
OPERATION
4.1
4.1 4.1
4.1 Power on / Power off scale
Power on / Power off scalePower on / Power off scale
Power on / Power off scale
Place the scale on a flat, stable surface. Level the scale using the leveling bubble at the lower left side of the display.
With the weighing platter empty, press the ON/OFF
ON/OFFON/OFF
ON/OFF/ZERO
/ZERO/ZERO
/ZERO key to power on the scale. The self-check will run, show the
version number “
”, display full capacity e.g. “F20.000kg” , at last, the scale will display a zero reading.
(Note: the proper (power-on zero-point) range is: (calibration zero-point) +20% F ).
To power off the scale, press and hold ON/OFF
ON/OFFON/OFF
ON/OFF/ZERO
/ZERO/ZERO
/ZERO key.
4.2
4.2 4.2
4.2 Z
ZZ
Zero
eroero
eroing the display
ing the displaying the display
ing the display
You can press the ON/OFF
ON/OFFON/OFF
ON/OFF/ZERO
/ZERO/ZERO
/ZERO key at any time to set the zero point from which all other weighing is measured. When
the zero point is obtained, the display will show the indicator for zero.
ZERO
ZEROZERO
ZERO key range is (power-on zero-point) +5% F . ZERO function is only activated when the scale is in steady weighing
mode and this also clear the recorded tare weight, the ZERO indicator will be lighted on, NET indicator will be off. ZERO
function will be not activated when the current weight is not in the range of (power-on zero-point) +5% F , and it will
display “
” or “
”, then back to previous weight reading.
4.
4.4.
4.3
33
3
Normal Weighing Mode
Normal Weighing ModeNormal Weighing Mode
Normal Weighing Mode
When scale is powered on and back to 0, place the weighing objects on the platform. The display will show the weight and
the units of weight currently in use.
4.
4.4.
4.4
44
4
Taring
TaringTaring
Taring
Zero the scale by pressing the ON/OFF
ON/OFFON/OFF
ON/OFF/ZERO
/ZERO/ZERO
/ZERO
key if necessary when reading is stable. The zero indicator will be on.
Place a container on the platform, a value for its weight will be displayed.
Press the TARE
TARETARE
TARE/UNIT
/UNIT/UNIT
/UNIT
key to tare the scale. The weight that was displayed is stored as the tare value and that value is
subtracted from the display, leaving zero on the display. The "NET" indicator will be on. As product is added only the
weight of the product will be shown. The scale could be tared a second time if another type of product was to be added
to the first one. Again only the weight that is added after taring will be displayed.
When the container is removed a negative value will be shown. If the scale was tared just before removing the container
this value is the gross weight of the container plus all product that was removed. The zero indicator will also be on
because the platform is back to the same condition it was when the ON/OFF
ON/OFFON/OFF
ON/OFF/ZERO
/ZERO/ZERO
/ZERO
key was last pressed.
Note: TARE range for this scale is up to 100%F .
4.5
4.54.5
4.5
witching measuring unit
witching measuring unitwitching measuring unit
witching measuring unit
In normal weighing mode, press and hold Tare/U
Tare/UTare/U
Tare/Unit
nitnit
nit key to switching the measuring units between lb, kg, g, oz, lb:oz.

PSP40 .
6 .
5.
5.5.
5. Calibration
Calibration Calibration
Calibration
1. Prepare standard weights, and make the scale with no load.
2. When the scale is off, press and hold down TARE
TARETARE
TARE/UNIT
/UNIT/UNIT
/UNIT button, and then press ON/OFF
ON/OFFON/OFF
ON/OFF/ZERO
/ZERO/ZERO
/ZERO button at the same
time till
appears. Release the two buttons.
3. Be sure no weight on the scale, and press ON/OFF
ON/OFFON/OFF
ON/OFF/ZERO
/ZERO/ZERO
/ZERO button, 0 in CAL-0 will be flashed;
4. When
is displayed, press and hold TARE
TARETARE
TARE/UNIT
/UNIT/UNIT
/UNIT button to choose the unit (kg or lb) of standard weight in
calibration; load full capacity weight on the platter. Then press ON/OFF
ON/OFFON/OFF
ON/OFF/ZERO
/ZERO/ZERO
/ZERO button, F in
will be flashed;
5. When
appears again, remove the weight from the platter, and then press ON/OFF
ON/OFFON/OFF
ON/OFF/ZERO
/ZERO/ZERO
/ZERO button. “0” in
"
” will be flashed.
6. When calibration has been completed properly, the scale will reset to normal working mode. If
is display,
that means there is an error in calibration, and need being re-calibrated
7. In step3 to step5, press and hold ON/OFF
ON/OFFON/OFF
ON/OFF/ZERO
/ZERO/ZERO
/ZERO to exit during the calibration mode.
6.
6.6.
6. AUTO
AUTOAUTO
AUTO-
--
-OFF
OFFOFF
OFF
setting and BACKLIGHT setting
setting and BACKLIGHT settingsetting and BACKLIGHT setting
setting and BACKLIGHT setting
function
functionfunction
function
When the scale is on, press and hold TARE
TARETARE
TARE/UNIT
/UNIT/UNIT
/UNIT and ON/OFF
ON/OFFON/OFF
ON/OFF/ZERO
/ZERO/ZERO
/ZERO buttons till ETUP is displayed, then the “
xx”
is displayed (xx=0,1…9: means when the scale has no weight changing and no key pressed for 1…9 minutes, the
scale will auto power off to save battery power, when x=0, means no auto-power off function); Now, press TARE
TARETARE
TARE/UNIT
/UNIT/UNIT
/UNIT
button to choose the auto-off time and press ON/OFF
ON/OFFON/OFF
ON/OFF/ZERO
/ZERO/ZERO
/ZERO button to confirm and save the setting.
The scale will display “BLT.X” (x=0, 1, 2. 0 means backlight always off, 1 means backlight always on, 2 means backlight
will be on when any button is pressed or reading changes). ow, press TARE
TARETARE
TARE/UNIT
/UNIT/UNIT
/UNIT button to choose the backlight mode
and press ON/OFF
ON/OFFON/OFF
ON/OFF/ZERO
/ZERO/ZERO
/ZERO button to confirm and save the setting.
7.
7.7.
7. Display symbol meaning
Display symbol meaningDisplay symbol meaning
Display symbol meaning
0
------
:
Power-on zero-point is over (calibration zero-point) +20%F ) when scale is turned on, or the reading
weight is over (power-on zero-point) +5%F when pressing ZERO button;
0
_ _ _
_ _ _ _ _ _
_ _ _ _
__
_
_ _
_ __ _
_ _
: Power-on zero-point is below (calibration zero-point) -20%F ) when scale is turned on, or the reading
weight is + (power-on zero-point) -5%F when pressing ZERO button;
-------
: The current weight is over 100% F +9d;
: Zero point at calibration;
: Full capacity at calibration;
: Calibration error;
: EEPROM accessing error or data in EEPROM is error or not in their normal range;
: The voltage of internal working is below 5.7V(+0.1V)

PSP40 .
7 .
8.
8.8.
8.
Troubleshooting
TroubleshootingTroubleshooting
Troubleshooting
8
88
8.1
.1 .1
.1 Troubleshooting
TroubleshootingTroubleshooting
Troubleshooting
YMPTOM
YMPTOMYMPTOM
YMPTOM
PROBABLE CAU E
PROBABLE CAU EPROBABLE CAU E
PROBABLE CAU E
REMEDY
REMEDYREMEDY
REMEDY
Will not power on
Power cord not plugged in or properly
connected. Power outlet not supplying electricity.
Battery is low. Other failure.
Check power cord connections. Make sure
power cord is plugged into the power outlet.
Check power source. Replace batteries. Or
service required.
Unable to zero the
display or will not
zero when turned on
Load on scale exceeds allowable limits.
Load on scale is not stable.
Load cell damage.
Remove load on scale.
Wait for load to become stable.
ervice required.
Lo.bAt is shown Battery is low Replace new batteries
Table of contents
Other PREPLINE Scale manuals
