Presentation Switchers PS190 Manual

Programmers Guide
PS190
September, 2015 • PN: DOC-000025-00c
Presentation
Switchers
digital presentation systems

Page 2 Presentation Switchers, Inc.
Trademark Informaon
Presentaon Switchers®, the “PS Box” logo or icon, and the names and marks associated with Presentaon
Switchers’ products are trademarks and/or service marks of Presentaon Switchers, Inc., and are registered
and/or common-law marks in the United States and various other countries.
All other trademarks are the property of their respecve owners.
Patent Informaon
The accompanying product is protected by one or more U.S. and foreign patents and/or pending patent
applicaons held by Presentaon Switchers, Inc.
Customer Feedback
We are constantly working to improve the quality of our documentaon, and we would appreciate your
feedback. Please send email to sales@PSwitchers.com.
© 2015 Presentaon Switchers, Inc. All rights reserved.
Presentaon Switchers, Inc.
2324 Cheney-Spokane Road
Cheney, WA 99004 USA
No part of this document may be reproduced or transmied in any form or by any means, electronic or
mechanical, for any purpose, without the express wrien permission of Presentaon Switchers, Inc.
Under the law, reproducing includes translang into another language or format. As between the pares,
Presentaon Switchers, Inc., retains tle to and ownership of all proprietary rights with respect to the so-
ware contained within its products. The soware is protected by United States copyright laws and interna-
onal treaty provision. Therefore, you must treat the soware like any other copyrighted material (e.g., a
book or sound recording).
Every eort has been made to ensure that the informaon in this manual is accurate. Presentaon Switch-
ers, Inc., is not responsible for prinng or clerical errors.
Informaon in this document is subject to change without noce.

Page 3PS190 Programmers Guide
Contents
Contents��������������������������������������������������������������������������������������������3
Introduction���������������������������������������������������������������������������������������4
Getting to Know the PS190����������������������������������������������������������������������������� 4
Auto-Sense, Auto-Switching��������������������������������������������������������������������������� 4
Automatic Display On/O ������������������������������������������������������������������������������� 5
RS-232 Connection���������������������������������������������������������������������������6
Communications Interface������������������������������������������������������������������������������ 6
RS-232 Control Codes����������������������������������������������������������������������7
Help / Available Commands ���������������������������������������������������������������������������� 7
Select Input / Source ��������������������������������������������������������������������������������������� 8
This command selects a source or input device to display� ����������������������� 8
Get Current Input / Source������������������������������������������������������������������������������ 8
Set Master Volume Level��������������������������������������������������������������������������������� 8
Get Master Volume Level �������������������������������������������������������������������������������� 9
Increase Volume ���������������������������������������������������������������������������������������������� 9
Decrease Volume ������������������������������������������������������������������������������������������� 10
Mute, Stereo Output �������������������������������������������������������������������������������������� 10
Set Resolution������������������������������������������������������������������������������������������������ 11
Get Current Resolution Setting �������������������������������������������������������������������� 11
Set Stereo Line Input Audio Level���������������������������������������������������������������� 12
Get Stereo Line Input Audio Level ��������������������������������������������������������������� 12
Turn Auto-Switch On/O ������������������������������������������������������������������������������� 13
Get Auto-Switch Feature Status ������������������������������������������������������������������� 13
Trim Audio on Specic HDMI Input �������������������������������������������������������������� 14
Get Trim Levels for All Inputs ����������������������������������������������������������������������� 14
Turn Automatic Display Control (CEC) On/O�������������������������������������������� 15
Turn Display On/O ��������������������������������������������������������������������������������������� 15
Turn Freerun Feature On/O������������������������������������������������������������������������� 16
Get Device Model Number ���������������������������������������������������������������������������� 16
Page 4 Presentation Switchers, Inc.
Getting to Know the PS190
The graphic below points out key a ributes of the PS190.
Front View
Back View
Auto-Sense, Auto-Switching
Auto-sense, automa c switching (ASW) is a very powerful feature of the PS190 and will be
explained further to best understand how it can be u lized. ASW is enabled by default and can
be disabled using the RS-232 interface.
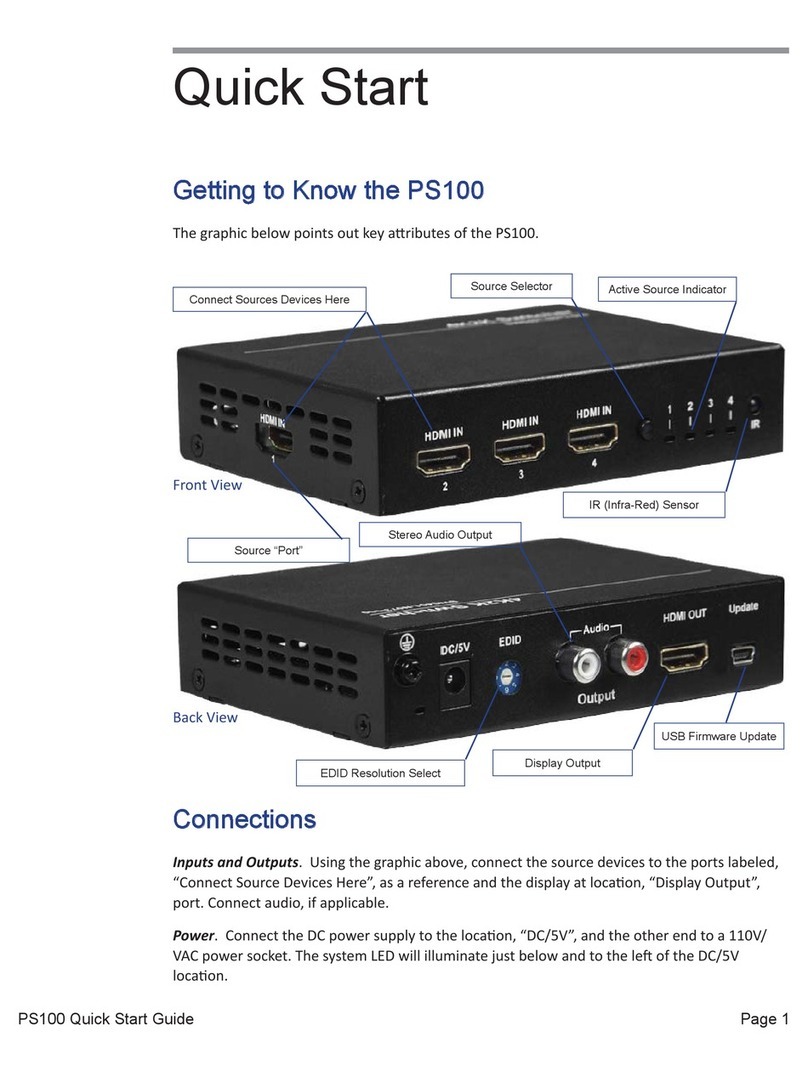
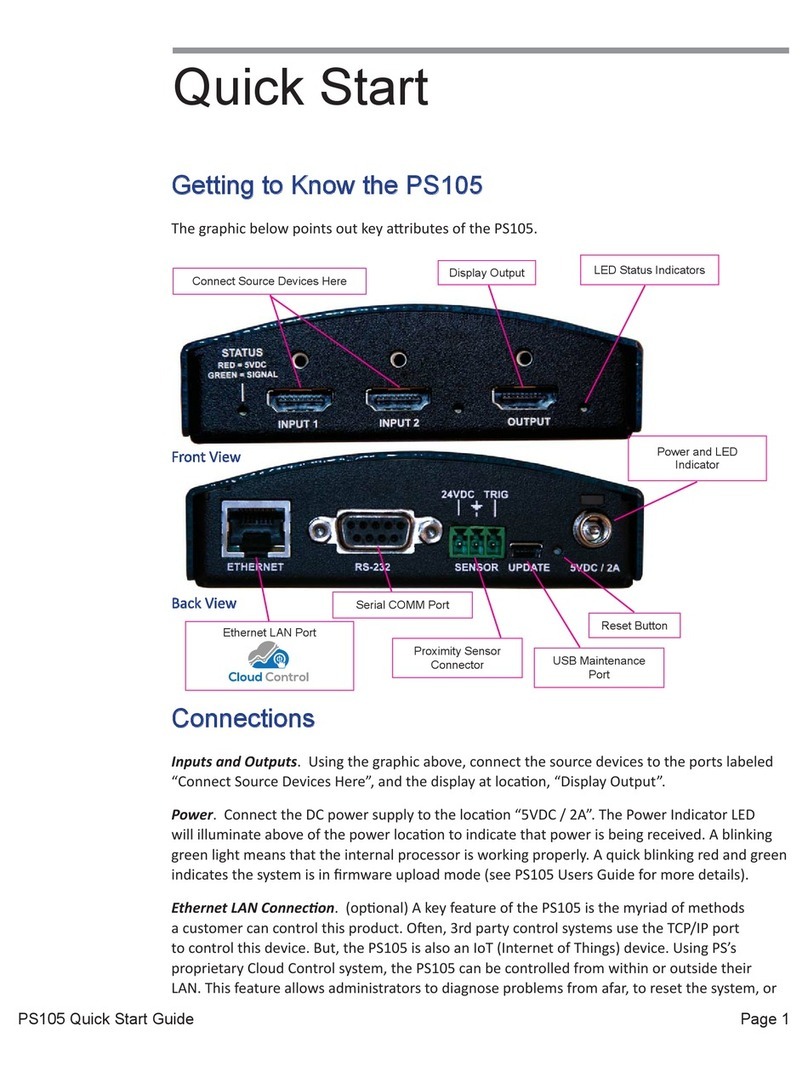
The PS190 is very sensi ve. When a user connects a device to one of the 5 HDMI input ports,
the PS190 responds immediately by rou ng the video from the newly connected device to the
display. If the color space is di erent than the display, color is automa cally converted internally
to ensure the highest quality image is displayed at the highest resolu on prac cable.
If another person connects a computer or mobile device to an HDMI input port, that device will
immediately appear on the display. The rule is: The last to connect will always appear on the
display.
Should an ac vely displayed device be disconnected, the PS190 will search from input 1 through
Introduction
Connect Sources Devices Here
USB Firmware Update
Power and Power
Indicator
Stereo Input Port
Stereo Output
Communication Port
Display Output

Page 5PS190 Programmers Guide
input 5 for the rst acve signal. Once found, the image from that device will appear on the
display. From a design standpoint, consider having the home room computer on input 1 and any
ancillary or guest connecons on inputs 2 through 5.
Automatic Display On/O
Automac display on/o (CEC) is another powerful feature of the PS190. CEC is enabled by
default but can be disabled using the RS-232 interface.
CEC must be enabled on the display itself for this feature to work with the PS190.
Trade names for CEC are Anynet+ (Samsung), Aquos Link (Sharp), BRAVIA Link and BRAVIA
Sync (Sony), HDMI-CEC (Hitachi), E-link (AOC), Kuro Link (Pioneer), INlink (Insignia), CE-Link
and Regza Link (Toshiba), RIHD (Remote Interacve over HDMI) (Onkyo), RuncoLink (Runco
Internaonal), SimpLink (LG), T-Link (ITT), HDAVI Control, EZ-Sync, VIERA Link (Panasonic),
EasyLink (Philips), and NetCommand for HDMI (Mitsubishi).
If a user connects to the PS190, the PS190 will automacally turn the display on. When the last
person disconnects, the PS190 will wait 30 seconds of inacvity then turn o the display. In
many cases, this feature eliminates the need for television remotes, extends display life, saves
power, and simplies classrooms, conference rooms, and huddle spaces, making them more
user friendly.

Page 6 Presentation Switchers, Inc.
RS-232 Connection
Communications Interface
The PS190 uses a serial interface (RS-232) to change aributes and behavior of the PS190.
Parameters are as follows: 115200 baud, 8 bit, no parity, and 1 stop bit. The baud rate is xed
and unchangeable. Pins 2 (Rx), 3 (Tx), and 5 (GND) are used.
Attribute Value
Type (on PS190) DB-9, Female
Baud Rate 115,200 (xed)
Data Size 8 bit
Parity None
Stop Bits 1
235
235
COMPUTER SWITCHER
STRAIGHT THROUGH
SERIAL CABLE

Page 7PS190 Programmers Guide
RS-232 Control Codes
Help / Available Commands
Type “HELP” to list all available commands for this version of PS190.
Command Format
HELP
Examples in ASCII Response
HELP Complete list of available commands. See Command Line Example
below.
Examples in HEX Response
48 45 4C 50 0D Complete list of available commands. See Command Line Example
below.
Command Line Example
PS190 by Presentation Switchers
Firmware Revision 1.0
$ HELP
PS190 Published Commands
-------- -----------------------------------------------
HELP - This page.
ID - Displays Device Identication
FRUN # - Freerun Mode (0 = Disable, 1 = Enable)
ASW - Displays Auto-Switch Feature Status.
ASW # - Selects Auto-Switch (0=O, 1=On).
SW - Displays currently selected input being displayed.
SW # - Selects input ‘#’ (1-5) to be displayed.
RES - Displays EDID output resolution.
RES # - Selects output resolution from table (1-7), 1=1080p
MUTE # - Mutes Audio Output (0=Unmute, 1=Mute)
VOL - Displays Volume Level
VOL # - Set Volume Level (1-100)
+ - Increase Volume by 1 Step (1-100)
- - Decreases Volume by 1 Step (1-100)
LIN - Displays Line Input Volume Level (1-100)
LIN # - Changes Line In Level (1-100)
TRIM - Displays all TRIM Settings
TRIM # # - Sets Selected Input (#) to TRIM Setting (#)
DBG # - Sets Devices to Debug Mode
TV # - Uses CEC to control Display (0=O, 1=On)
CEC # - Turns CEC On/O (0=O, 1=On)

Page 8 Presentation Switchers, Inc.
Select Input / Source
This command selects a source or input device to display.
Command Format
SW # Replace # with the input to display (1-5). End command with
carriage return.
Examples in ASCII Response
SW 2 None.
Examples in HEX Response
53 57 20 32 0D None.
Command Line Example
PS190 by Presentation Switchers
Firmware Revision 1.0
$ SW 2
SW 2
Get Current Input / Source
This command displays the currently selected input being routed to the output device.
Command Format
SW Type return (carriage return) after typing SW.
Examples in ASCII Response
SW SW 4
Examples in HEX Response
53 57 0D 53 57 20 34 0D
Command Line Example
PS190 by Presentation Switchers
Firmware Revision 1.0
$ SW
SW 4
Set Master Volume Level
This command sets the current master volume level of the PS190.
Command Format
VOL # Replace # with the volume level (1-100). End command with
carriage return.
Examples in ASCII Response

Page 9PS190 Programmers Guide
Command Format
VOL 85 VOL 85
Examples in HEX Response
56 4F 4C 20 38 35 0D 56 4F 4C 20 38 35
Command Line Example
PS190 by Presentation Switchers
Firmware Revision 1.0
$ VOL 85
VOL 85
Get Master Volume Level
This command obtains the current master volume level of the PS190.
Command Format
VOL Type return (carriage return) after typing VOL.
Examples in ASCII Response
VOL VOL 85
Examples in HEX Response
56 4F 4C 0D 56 4F 4C 20 38 35
Command Line Example
PS190 by Presentation Switchers
Firmware Revision 1.0
$ VOL
VOL 85
Increase Volume
The “+” command increases the volume by 1 step (1-100).
Command Format
+Type plus ‘+’. No carriage return is required.
Examples in ASCII Response
+ None
Examples in HEX Response
2B None

Page 10 Presentation Switchers, Inc.
Command Format
Command Line Example
PS190 by Presentation Switchers
Firmware Revision 1.0
$ +
Decrease Volume
The minus or dash “-” command decreases the volume by 1 step (1-100).
Command Format
-Type minus or dash ‘-’. No carriage return is required.
Examples in ASCII Response
- None.
Examples in HEX Response
2D None.
Command Line Example
PS190 by Presentation Switchers
Firmware Revision 1.0
$ -
Mute, Stereo Output
This command will turn o the audio to the stereo output port. This command does not inter-
fere with the HDMI audio output.
Command Format
MUTE # Replace ‘#’ with 0 to unmute or 1 to mute audio. End command by
typing a carriage return.
Examples in ASCII Response
MUTE 0 MUTE 0
Examples in HEX Response
4D 55 54 45 20 30 0D 4D 55 54 45 20 30 0D
Command Line Example

Page 11PS190 Programmers Guide
Command Format
PS190 by Presentation Switchers
Firmware Revision 1.0
$ MUTE 0
MUTE 0
Set Resolution
This command sets the current master volume level of the PS190.
Command Format
RES # Replace # with the resolution (0-7). End command with carriage
return.
Resolutions:
0. Passthru. Use EDID from display without any modication.
1. 1080p (1920 x 1080 @ 60Hz)
2. 720p (1280 x 720 @ 60Hz)
3. 1920 x 1200 @ 60Hz
4. 1600 x 1200 @ 60Hz
5. 1280 x 1024 @ 60Hz
6. 1280 x 768 @ 60Hz
7. 1024 x 768 @ 60Hz
Once command is accepted the system will force a hot plug detect
on all inputs. All sources should react by resending its video at the
dened resolution.
Examples in ASCII Response
RES 1 RES 1
Examples in HEX Response
52 45 53 20 31 0D 52 45 53 20 31 0D
Command Line Example
PS190 by Presentation Switchers
Firmware Revision 1.0
$ RES 1
RES 1
Get Current Resolution Setting
This command obtains the current resoluon table value.

Page 12 Presentation Switchers, Inc.
Command Format
RES Type return (carriage return) after typing RES.
Examples in ASCII Response
RES RES 1
Examples in HEX Response
52 45 53 0D 52 45 53 20 31 0D
Command Line Example
PS190 by Presentation Switchers
Firmware Revision 1.0
$ RES
RES 1
Set Stereo Line Input Audio Level
This command sets the current master volume level of the PS190.
Command Format
LIN # Replace # with the line input level (1-100). End command with
carriage return.
Examples in ASCII Response
LIN 75 LIN 75
Examples in HEX Response
4C 49 4D 20 37 35 0D 4C 49 4D 20 37 35 0D
Command Line Example
PS190 by Presentation Switchers
Firmware Revision 1.0
$ LIN 75
LIN 75
Get Stereo Line Input Audio Level
This command obtains the current stereo line input level of the PS190.
Command Format
LIN Type return (carriage return) after typing LIN.
Examples in ASCII Response

Page 13PS190 Programmers Guide
Command Format
LIN LIN 65
Examples in HEX Response
4C 49 4D 0D 4C 49 4D 20 36 35 0D
Command Line Example
PS190 by Presentation Switchers
Firmware Revision 1.0
$ LIN
LIN 65
Turn Auto-Switch On/O
This command controls the status of the auto-sensing auto-switch capability of the Ps190.
When turning this feature o, switching can only occur using the RS232 serial interface.
Command Format
ASW # Replace # with either 0 or 1. 0 = Disable, 1 = Auto-Switch enabled.
End command with carriage return.
Examples in ASCII Response
ASW 0 ASW 0
Examples in HEX Response
41 53 57 20 30 0D 41 53 57 20 30 0D
Command Line Example
PS190 by Presentation Switchers
Firmware Revision 1.0
$ ASW 0
ASW 0
Get Auto-Switch Feature Status
This command indicates whether the auto-sense auto-switching feature is current enabled for
disabled.
Command Format
ASW Type return (carriage return) after typing ASW.
Examples in ASCII Response
ASW ASW 1

Page 14 Presentation Switchers, Inc.
Command Format
Examples in HEX Response
41 53 57 0D 41 53 57 20 31 0D
Command Line Example
PS190 by Presentation Switchers
Firmware Revision 1.0
$ ASW
ASW 1
Trim Audio on Specic HDMI Input
Somemes audio levels from a source can be louder than the other devices. This feature aenu-
ates, or trims, the audio level of the loud device so that it roughly equals the loudness of the
other devices.
Command Format
TRIM # # Replace the rst # with the input (1-5) and the second with the trim
level (1-100).
Examples in ASCII Response
TRIM 2 85 TRIM 2 85
Examples in HEX Response
54 52 49 4D 20 32 20 38
35 0D
54 52 49 4D 20 32 20 38 35 0D
Command Line Example
PS190 by Presentation Switchers
Firmware Revision 1.0
$ TRIM 2 85
TRIM 2 85
Get Trim Levels for All Inputs
This roune retrieves the audio trim levels (sengs) for all of the HDMI inputs.
Command Format
TRIM Type return (carriage return) after typing TRIM.
Examples in ASCII Response
TRIM See Command Line Example below.

Page 15PS190 Programmers Guide
Command Format
Examples in HEX Response
54 52 49 4D 0D See Command Line Example below.
Command Line Example
PS190 by Presentation Switchers
Firmware Revision 1.0
$ TRIM
TRIM 1 100
TRIM 2 85
TRIM 3 100
TRIM 4 100
TRIM 5 100
Turn Automatic Display Control (CEC) On/O
This funcon turns the automated Display Control feature on and o.
Command Format
CEC # Replace the “*” with a 0 - disable display power control or 1 - enable
the display power on/o control feature.
Examples in ASCII Response
CEC 0 CEC 0
Examples in HEX Response
43 45 43 20 30 0D 43 45 43 20 30 0D
Command Line Example
PS190 by Presentation Switchers
Firmware Revision 1.0
$ CEC 0
CEC 0
Turn Display On/O
This funcon turns the Display’s Power on and o.
Command Format
TV # Replace the “*” with a 0 - turn o display or 1 to turn on the display.
Examples in ASCII Response
TV 0 TV 0

Page 16 Presentation Switchers, Inc.
Command Format
Examples in HEX Response
54 56 20 30 0D 54 56 20 30 0D
Command Line Example
PS190 by Presentation Switchers
Firmware Revision 1.0
$ TV 0
TV 0
Turn Freerun Feature On/O
Freerun involves displaying a Blue Screen at 480i when the currently selected input does
not have a valid signal present. This happens when auto-switch is disabled and the PS190 is
switched to a input with no signal present. When this feature is turned o, the display will show
a signal not present or disconnect. By default, FRUN is enabled.
Command Format
FRUN # Replace the “*” with a 0 - turn o freerun or 1 to turn on freerun.
Examples in ASCII Response
FRUN 1 FRUN 1
Examples in HEX Response
46 52 55 4E 20 31 0D 46 52 55 4E 20 31 0D
Command Line Example
PS190 by Presentation Switchers
Firmware Revision 1.0
$ FRUN 1
FRUN 1
Get Device Model Number
Use this roune to get the model number of this device. In this case, the model number should
always read PS190. This roune is oen used to see if the switcher is connected and listening.
Command Format
ID Type ID then a carriage return.
Examples in ASCII Response
ID PS190

Page 17PS190 Programmers Guide
Command Format
Examples in HEX Response
49 44 0D 50 53 31 39 30 0D
Command Line Example
PS190 by Presentation Switchers
Firmware Revision 1.0
$ ID
PS190

© 2015 Presentaon Switchers, Inc. All rights reserved.
Presentaon Switchers, Inc.
2324 Cheney-Spokane Road
Cheney, WA 99004 USA
Sales@PSwitchers.com
Other manuals for PS190
2
Table of contents
Other Presentation Switchers Switch manuals

Presentation Switchers
Presentation Switchers PS190 User manual

Presentation Switchers
Presentation Switchers PS112 User manual

Presentation Switchers
Presentation Switchers PS112 Manual

Presentation Switchers
Presentation Switchers PS510 User manual

Presentation Switchers
Presentation Switchers PS190 User manual

Presentation Switchers
Presentation Switchers PS110 User manual

Presentation Switchers
Presentation Switchers PS120 User manual

Presentation Switchers
Presentation Switchers PS105 Operating and maintenance instructions

Presentation Switchers
Presentation Switchers PS100 User manual

Presentation Switchers
Presentation Switchers PS120 User manual