manuals.online logo
Brands
  1. Home
  2. •
  3. Brands
  4. •
  5. Prilux
  6. •
  7. Outdoor Light
  8. •
  9. Prilux Hexagon PLAY User manual

Prilux Hexagon PLAY User manual

1/8
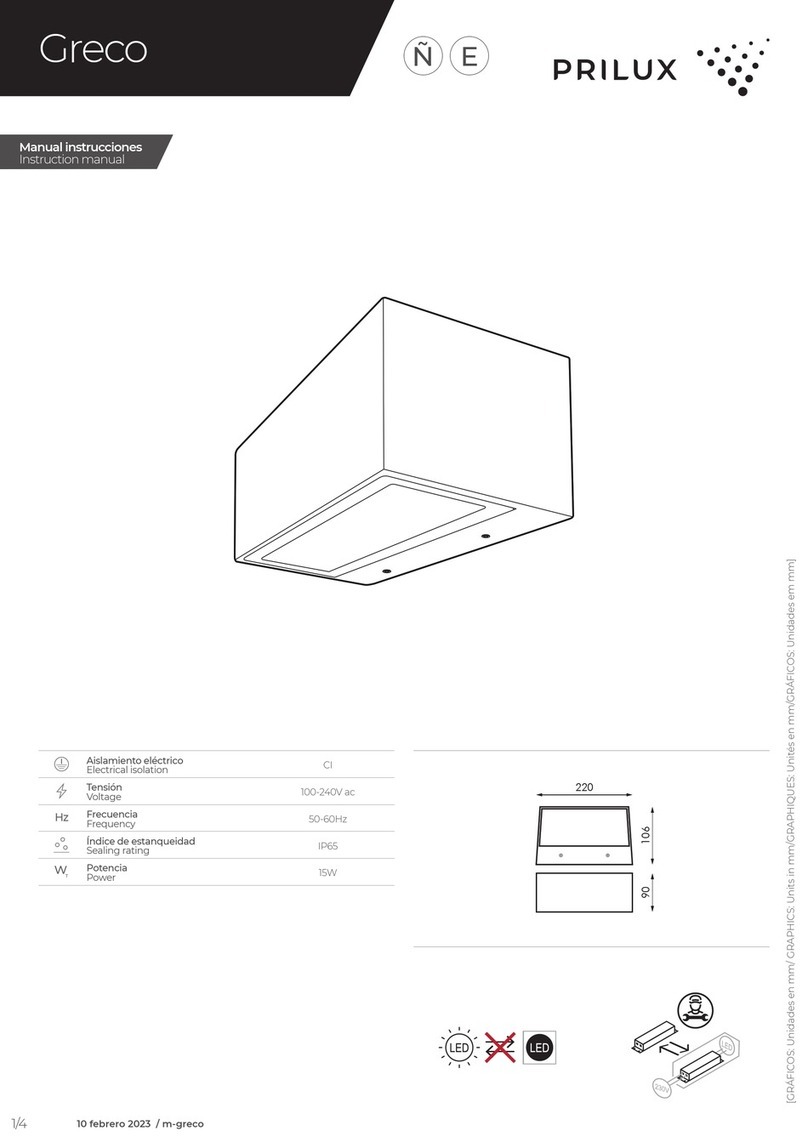
[GRÁFICOS: Unidades en mm/ GRAPHICS: Units in mm/GRAPHIQUES: Unités en mm/GRÁFICOS: Unidades em mm][GRÁFICOS: Unidades en mm/ GRAPHICS: Units in mm/GRAPHIQUES: Unités en mm/GRÁFICOS: Unidades em mm]
Hexagon
PLAY 48 LEDS 200W
452
321
174
471 366
463
1 MÓDULO/ 1 MODULE 2 MÓDULOS/ 2 MODULES
471 366
683
463
974 366
3 MÓDULOS/ 3 MODULES 4 MÓDULOS/ 4 MODULES
Especicaciones/ Specications
Aislamiento eléctrico/
Electrical isolation CI
Índice de estanqueidad/
Sealing rating IP66
Protección contra impactos/
Impact resistance
IK10
Nº LED/
LED Number 48 LED 96 LED 144 LED 192 LED
Peso/
Weight
9Kg 18Kg 25Kg 33Kg
Altura Máx. de instalación/
Sealing rating
- - - -
Resistencia al viento/
Wind resistance 0,082 m20,169 m20,261 m20,352 m2
Manual instrucciones
Instruction manual
febrero 2020
2/8
PRECAUCIONES:
• Mantenga el producto fuera del alcance de los niños.
• No sumerja este producto en agua ni lo manipule con las manos mojadas.
• No golpee el producto.
• No instale el producto donde haya fuentes de calor o concentraciones
de humedad.
• No manipule el producto mientras se encuentre en funcionamiento y
déjelo enfriar antes de tocarlo con las manos.
• Mantenga una distancia mínima de 1m con la supercie u objeto a
iluminar.
• El producto no debe ser cubierto por material aislante térmico en ningún
caso.
• Si el producto se encuentra dañado sustitúyalo inmediatamente por uno
nuevo.
• Desconecte la corriente antes de instalar el producto.
• Este producto contiene componentes sensibles a la electricidad estática y
una descarga sobre ella podría destruir o dañar sus componentes.
• Antes de proceder a cualquier manipulación o mantenimiento hay que
asegurarse de que el aparato esté completamente desconectado del
suministro eléctrico.
• La reposición o mantenimiento de cualquier componente deberá hacerse
con idénticos elementos recomendados y suministrados por el propio
fabricante. De no ser así, cualquier incidencia en una instalación que
no se haya realizado de acuerdo con esta hoja de instrucciones será
responsabilidad del instalador.
• Si el cable exible o cordón de esta luminaria está dañado, debe sustituirse
exclusivamente por el fabricante o su servicio técnico o una persona de
cualicación equivalente con objeto de evitar cualquier riesgo.
• La fuente de luz de esta luminaria debe reemplazarse unicamente por el
fabricante, su servicio técnico o persona cualicada equivalente.
• La luminaria debe colocarse de forma que no se espera una mirada
prolongada a la luminaria a una distancia más cercana a 4,67m.
• Entre la alimentación en Baja Tensión y los conductores de control el
aislamiento es aislamiento reforzado.
• Cualquier modicación en la luminaria anula la garantía
PRECAUTIONS:
• Keep out of reach of children.
• This product is for outdoor use, pay attention to the permissible mounting
positions for this product.
• Do not immerse this product in water or handle it with wet hands.
• Do not hit the product.
• Do not install the product where there are sources of heat.
• Do not handle the product while it is in operation and let it cool before
touching it with your hands.
• Keep a minimum distance of 1m with the surface or object to be illuminated.
• The product must not be covered by thermal insulation material in any
case.
• If the product is damaged, replace it immediately with a new one.
• Disconnect the power before installing the product.
• This product contains components sensitive to static electricity and a
discharge on it could destroy or damage its components.
• Before proceeding with any handling or maintenance, make sure that the
appliance is completely disconnected from the power supply.
• The replacement or maintenance of any component must be done with
the same elements recommended and supplied by the manufacturer. If
this is not the case, any incident in an installation that has not been carried
out in accordance with this instruction sheet will be the responsibility of
the installer.
• If the exible cable or cord of this luminaire is damaged, it must only be
replaced by the manufacturer or its technical service or a person of
equivalent qualication in order to avoid any risk.
• The light source of this luminaire must be replaced only by the manufacturer,
its technical service or equivalent qualied person.
• The luminaire shou ld be placed so that a prolonged look at the luminaire
is not expected at a distance closer to 4.67m.
• Between the low voltage power supply and the control conductors the
insulation is reinforced insulation.
• Any modication to the luminaire voids the warranty
AVISO
ANTES DE COMENZAR LA INSTALACIÓN DE ÉSTE PRODUC-
TO, POR FAVOR, LEA ATENTAMENTE LAS INSTRUCCIONES Y
GUÁRDELAS EN UN SITIO SEGURO.
LA INSTALACIÓN DEBE REALIZARLA PERSONAL CUALIFICA-
DO.
LA INADECUADA MANIPULACIÓN DE LOS COMPONENTES O DE
LA PROPIA LUMINARIA PODRÍA DAÑAR EL CORRECTO FUN-
CIONAMIENTO DE ESTE PRODUCTO, QUEDANDO ANULADA LA
GARANTÍA DEL FABRICANTE.
QUEDA ANULADA LA GARANTÍA DEL FABRICANTE: SI LA INSTA-
LACIÓN NO SE REALIZA SEGÚN LO INDICADO EN EL REBT 2002.
ES DE OBLIGADO CUMPLIMIENTO LA APLICACIÓN DE ITC BT09-4
DEL REBT (INSTALACIÓN DE PROTECTORES DE SOBRETENSIONES
EN LÍNEAS Y LUMINARIAS) PARA INSTALACIONES INDUSTRIALES
Y DE ALUMBRADO PÚBLICO. LA GARANTÍA NO CUBRE DAÑOS
PRODUCIDOS POR SOBRETENSIONES EN LUMINARIAS SIN PRO-
TECTORES DE SOBRETENSIONES.
RESPETAR LAS PRECAUCIONES DE
MANIPULACIÓN DE LOS COMPO-
NENTES SENSIBLES A DESCARGAS
ELECTROSTÁTICAS (LED).
WARNING
BEFORE INSTALLING THIS PRODUCT, PLEASE READ THE INSTRUC-
TIONS CAREFULLY AND STORE THEM IN A SAFE PLACE.
THE INSTALLATION SHOULD BE CARRIED OUT BY TRAINED STAFF.
INCORRECT HANDLING OF THE PARTS OR THE LIGHT FIXTURE
ITSELF MAY IMPAIR THE PROPER PERFORMANCE OF THIS PRO-
DUCT. IN THIS CASE, THE MANUFACTURER GUARANTEE SHALL BE
DEEMED VOID.
THE MANUFACTURER GUARANTEE SHALL BE DEEMED VOID: IF THE
INSTALLATION IS NOT PERFORMED IN ACCORDANCE WITH THE
SPANISH LOW VOLTAGE ELECTROTECHNICAL REGULATION 2002
(REBT 2002).
THE APPLICATION OF IBC BT09-4 OF REBT (INSTALLATION OF LINE
AND LIGHT FIXTURE SURGE PROTECTORS) IS ESSENTIAL FOR IN-
DUSTRIAL AND PUBLIC LIGHTING INSTALLATIONS. THE GUARAN-
TEE DOES NOT COVER AGAINST DAMAGES CAUSED BY SURGES
IN LIGHT FIXTURES WITHOUT SURGE PROTECTORS INSTALLED.
ATTENTION!!!
RESPECT THE PRECAUTIONS FOR HAND-
LING COMPONENTS SENSITIVE TO ELEC-
TROSTATIC DISCHARGES (LEDS).
3/8
[GRÁFICOS: Unidades en mm/ GRAPHICS: Units in mm/GRAPHIQUES: Unités en mm/GRÁFICOS: Unidades em mm]
100
974
297
700
Ø20,5
500
250
309
Ø21
4 MÓDULOS/
4 MODULES
2-3 MÓDULOS/
2-3 MODULES
1 MÓDULO/
1 MODULE
250
105
50
432
Ø21
Ø12,5
Ø16,5
321
100
471
Ø
21
250
297 309
Componentes/Components
4/8
* Fijar mínimo con 2 tornillos M12/
Fix minimum with 2 screws M12
* Fijar mínimo con 4 tornillos M20/
Fix minimum with 4 screws M20
* Fijar mínimo con 3 tornillos M20/
Fix minimum with 3 screws M20
HEXAGON
*
NO INCLUIDO/
NOT INCLUDED
*
NO INCLUIDO/
NOT INCLUDED
*
NO INCLUIDO/
NOT INCLUDED
1 MÓDULO/
1 MODULE 2-3 MÓDULOS/
2-3 MODULES
4 MÓDULOS/
4 MODULES Utilizar materiales reisitentes a la
corrosión.
Para la jación del proyector se
recomienda utilizar los taladros
exteriores para minimizar las
posibles vibraciones por causas
del viento.
Para alturas elevadas o condi-
ciones muy desfavorables, utili-
zar un segundo sistema de ja-
ción como cable de seguridad.
Eliminar elementos físicos sobre
los módulos de LED que pue-
dan perjudicar a la disipación.
Realizar un mantenimiento de
limpieza periodicamente de-
pendiendo de lo agresivo que
sea el entorno de su instalación.
Para aplicaciones en entornos
de ambiente corrosivo extre-
mo, realizar un mantenimiento
preventivo sustituyendo los ma-
teriales que estuvieran parcial-
mente oxidados.
Use corrosion resistant mate-
rials.
For xing the projector it is re-
commended to use the exter-
nal holes to minimize possible
vibrations due to wind.
For high heights or very unfavo-
rable conditions, use a second
xing system as a safety cable.
Eliminate physical elements on
the LED modules that may im-
pair dissipation.
Carry out periodic cleaning
maintenance depending on
how aggressive the environ-
ment of your installation is.
For applications in extreme co-
rrosive environments, perform
preventive maintenance by
replacing partially oxidized ma-
terials.
Montaje/Mounting
5/8
* Para girar, aojar suciente para no dañar la pintura/
To turn, loosen enough to avoid damaging the paint
*
*
Giro/Turn
1 MÓDULO/
1 MODULE
2-3-4 MÓDULOS/
2-3-4 MODULES
M5 => 5Nm.
M10 => 46Nm.
* Para girar, aojar suciente para no dañar la pintura/
To turn, loosen enough to avoid damaging the paint
180º
CONEXIÓN ALIMENTACIÓN/ POWER CONNECTION
Ver esquema de instalación/
See installation diagram
135
135º
º
6/8
CONEXIÓN ELÉCTRICA/ ELECTRICAL CONNECTION
CLICK!!!
2,5 ± 0,2Nm.
ESQUEMA DE INSTALACIÓN/ INSTALLATION DIAGRAM
DALI
N N
1 L
2 DA
3 DA
1-10V
N N
1 L
2 1-10V-
3 1-10V+
Asegurar la buena conexión.
Ensure good connection.
Respetar par de apriete para asegurar la estanqueidad/
Observe tightening torque to ensure tightness.
7/8
MANTENIMIENTO/MAINTENANCE
CAMBIAR PROTECTOR SOBRETENSIONES/ CHANGE THE OVERVOLTAGE PROTECTOR
8/8
GRUPO PRILUX ILUMINACIÓN S.L.U.
SEDE CENTRAL
DELEGACIÓN NORESTE
DELEGACIÓN LATAM
C/ Río Jarama nº 149
45007, Toledo (España)
Tel.: 925 23 38 12
Fax: 925 23 38 80
Carretera BV - 2249 Km 8
08791, Sant Llorenç d’Hortons,
Barcelona (Spain)
Tel.: 93 719 23 29
Fax: 93 719 25 90
CNPJ: 16.863.522/0001-57
Rua das Castanheiras,
Nº 200 galpão 82,
Jardim São Pedro
CEP 13187-065
Hortolândia (SP)
Domicilio, Marcos Sastre 1769
5009, Bº Cerro de las Rosas,
Cordoba, (Argentina)
www.grupoprilux.com
d=1m

Other Prilux Outdoor Light manuals

Prilux Merk User manual

Prilux

Prilux Merk User manual

Prilux flexiLIGHT LED 953375 User manual

Prilux

Prilux flexiLIGHT LED 953375 User manual

Prilux Versa LED User manual

Prilux

Prilux Versa LED User manual

Prilux INSTANT 002684 User manual

Prilux

Prilux INSTANT 002684 User manual

Prilux Pincho Jardin I User manual

Prilux

Prilux Pincho Jardin I User manual

Prilux Hexagon ARENA-PLAY User manual

Prilux

Prilux Hexagon ARENA-PLAY User manual

Prilux Catt User manual

Prilux

Prilux Catt User manual

Prilux Arisa TOP4 User manual

Prilux

Prilux Arisa TOP4 User manual

Prilux Gaudium User manual

Prilux

Prilux Gaudium User manual

Prilux Zereus User manual

Prilux

Prilux Zereus User manual

Prilux Ebro LED User manual

Prilux

Prilux Ebro LED User manual

Prilux Anzio LED User manual

Prilux

Prilux Anzio LED User manual

Prilux Greco User manual

Prilux

Prilux Greco User manual

Prilux ACTIVA ENERGY AVANT 4 RGB User manual

Prilux

Prilux ACTIVA ENERGY AVANT 4 RGB User manual

Prilux ecTUBE T8 GLASS N User manual

Prilux

Prilux ecTUBE T8 GLASS N User manual

Prilux Egea XL ROAD User manual

Prilux

Prilux Egea XL ROAD User manual

Prilux Niza User manual

Prilux

Prilux Niza User manual

Prilux Avatar User manual

Prilux

Prilux Avatar User manual

Prilux Arisa ROAD User manual

Prilux

Prilux Arisa ROAD User manual

Prilux flexiLIGHT 146432 User manual

Prilux

Prilux flexiLIGHT 146432 User manual

Prilux flexiLIGHTLED decorativo User manual

Prilux

Prilux flexiLIGHTLED decorativo User manual

Prilux decorativo flexiLIGHT LED DUAL 191821 User manual

Prilux

Prilux decorativo flexiLIGHT LED DUAL 191821 User manual

Prilux Ircana LED User manual

Prilux

Prilux Ircana LED User manual

Prilux Versa L User manual

Prilux

Prilux Versa L User manual

Popular Outdoor Light manuals by other brands

Kichler Lighting HELEN 37536 instructions

Kichler Lighting

Kichler Lighting HELEN 37536 instructions

Thorn OXANE L installation instructions

Thorn

Thorn OXANE L installation instructions

esotec Solar Globe Light multicolor 20 operating instructions

esotec

esotec Solar Globe Light multicolor 20 operating instructions

mitzi HL200201 ELLIS Assembly and mounting instructions

mitzi

mitzi HL200201 ELLIS Assembly and mounting instructions

HEPER TILA S AFX 3 Module Installation & maintenance instructions

HEPER

HEPER TILA S AFX 3 Module Installation & maintenance instructions

Designplan TRON 180 installation instructions

Designplan

Designplan TRON 180 installation instructions

Sealey LED37 instructions

Sealey

Sealey LED37 instructions

nordlux VEJERS Mounting instruction

nordlux

nordlux VEJERS Mounting instruction

SImx ELITE LED LHTC637 installation instructions

SImx

SImx ELITE LED LHTC637 installation instructions

GEV CAROLINE 10833 manual

GEV

GEV CAROLINE 10833 manual

WE-EF PFL540 LED Installation and maintenance instructions

WE-EF

WE-EF PFL540 LED Installation and maintenance instructions

HEPER DOGO Side LW6048.585-US Installation & maintenance instructions

HEPER

HEPER DOGO Side LW6048.585-US Installation & maintenance instructions

BEGA 84 253 Installation and technical information

BEGA

BEGA 84 253 Installation and technical information

HEPER LW8034.003-US Installation & maintenance instructions

HEPER

HEPER LW8034.003-US Installation & maintenance instructions

HEPER MINIMO Installation & maintenance instructions

HEPER

HEPER MINIMO Installation & maintenance instructions

LIGMAN BAMBOO 3 installation manual

LIGMAN

LIGMAN BAMBOO 3 installation manual

Maretti TUBE CUBE WALL 14.4998.04 quick start guide

Maretti

Maretti TUBE CUBE WALL 14.4998.04 quick start guide

Maxim Lighting Carriage House VX 40428WGOB installation instructions

Maxim Lighting

Maxim Lighting Carriage House VX 40428WGOB installation instructions

manuals.online logo
manuals.online logoBrands
  • About & Mission
  • Contact us
  • Privacy Policy
  • Terms and Conditions

Copyright 2025 Manuals.Online. All Rights Reserved.