© Pro-Ject Audio Systems · VC-S3 · Revision 2022.11.02
Do not use cleaning fluids from other suppliers. Use only so little fluid that it is not regularly getting on
the surface of the machine. If this happens remove the excess fluid with a tissue.
Cleaning efficiency can be significantly improved by applying appropriate force on the cleaning brush.
Even more cleaning improvement can be achieved by using warmed-up Wash It 2 cleaning fluid. Wash
It 2 can be warmed in a microwave oven up to 40 degrees Celsius, please check temperature to avoid
record damage. Wash It 2 is non-flammable and non-toxic. Please note that you are doing all this at
your own risk.
The motor can turn in both directions or can be stopped during the application of the fluid, depending on
your personal preference. To change direction, choose the "I" position for clockwise rotation or to the “II”
position for counter-clockwise rotation.
It is recommended that you use the brush to spread the Wash it 2 cleaning fluid on the record in both
directions before vacuuming. For better dissolving of impurities, wait a few seconds (longer in the case of
heavily soiled records) before starting the vacuuming process.
Once the fluid covers the entirety of the record, turn the motor switch to the “I” position (if not already at that
position) and place the vacuum arm above the record pointing at the spindle until it reaches its lock position.
Turn the Vacuum motor to the “I” position at the same time as you set the arm down onto the record. After
the cleaning fluid has been thoroughly vacuumed, switch off the vacuum, followed by the motor (we
recommend one rotation on the “I” setting and afterwards another rotation on the “II” setting). Return the
vacuum arm into its rest position and wait a few seconds for the record to dry thoroughly. Remove the clamp,
turn the record over and repeat steps for the opposite side of the record.
Keep in mind, the felt strips on the vacuum arm collect liquid and get wet as you clean many records
in a row. Dry the strips with a clean piece of microfibre cloth or let them dry by air, if you intend to do
longer cleaning sessions! Cleaning tips: use minimum necessary amount of Wash it 2; maximum of 2
rotations of vacuuming the liquid per record.
The VC-S3 is equipped with automatic overheating protection, which switches the motor off in case of
excessive usage. After a cool-down period, the VC-S3 will return to its fully operational status.
After use tip: We highly recommend to remove the vacuum arm from its position on the flange and
switch the vacuum motor on for 15-30s in order to blow away all the remaining liquid from the motor
and the whole system. This will help to keep all internal parts of the unit dry and significantly lower the
possibility to be affected with rust. For the same reason it is also not recommended to pack the VC-S3
back into its plastic bag from original packaging.
Prior to maintenance, always disconnect the record cleaning machine from the power outlet!
Your record cleaning machine requires little to no regular maintenance.
A water level gauge is located on the left side of the unit, below the air outlet hole. The internal tank has a
substantial capacity and subsequently takes a very long time to reach full capacity. Common home use of
the unit DOES NOT require to empty the tank. The tank is there to catch the drained cleaning liquid, and the
large surface on the inside and oversized capacity allows the drained liquid to evaporate faster than in a
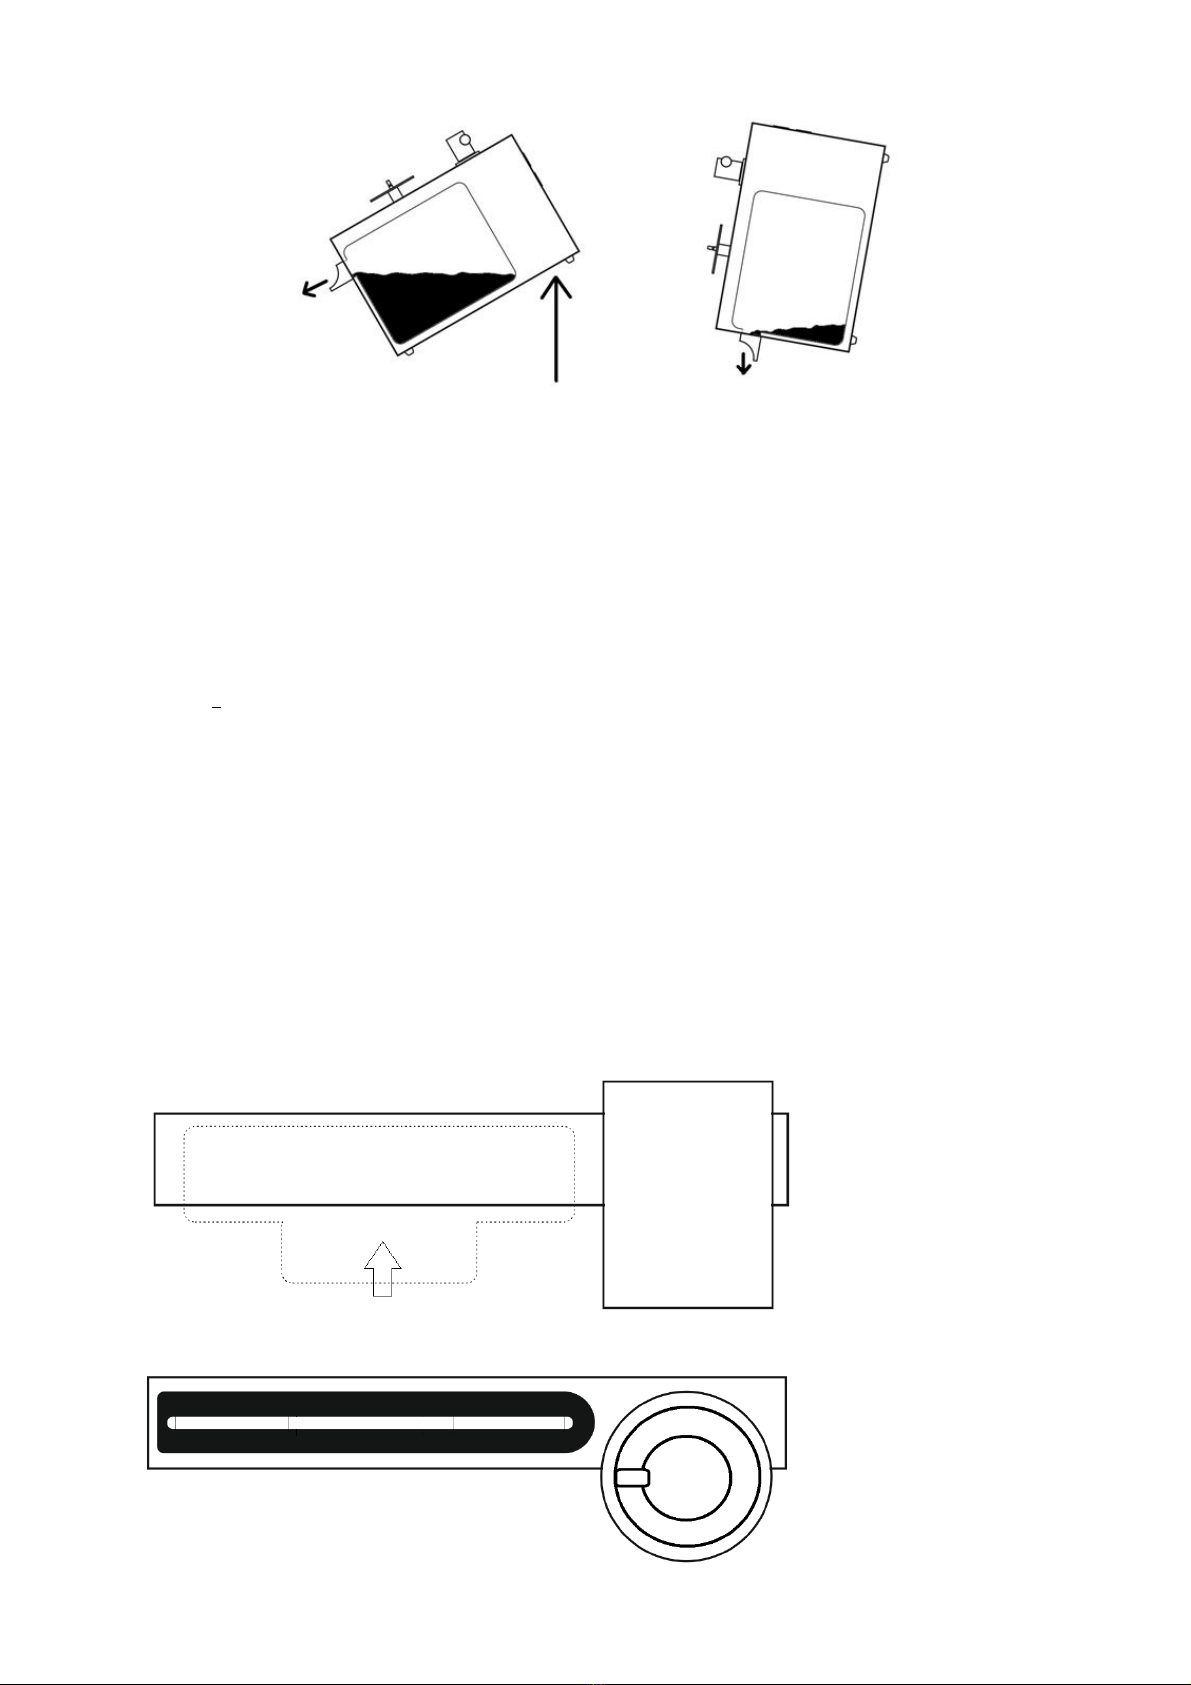
much smaller tank. In rare cases when the water level reaches the point marked " ←MAX", the tank should
be emptied:
1. Remove ventilation outlet grille (4)
2. Place the drain insert spout into the hole (drain insert is included in the accessories) and make sure it
sits there tightly, so no fluid can reach the inside of the device.
3. Lift the opposite side of the VC-S3 ALU up to drain the unit reservoir to a big container.
4. Remove the spout and attach the ventilation outlet grille back to its place.