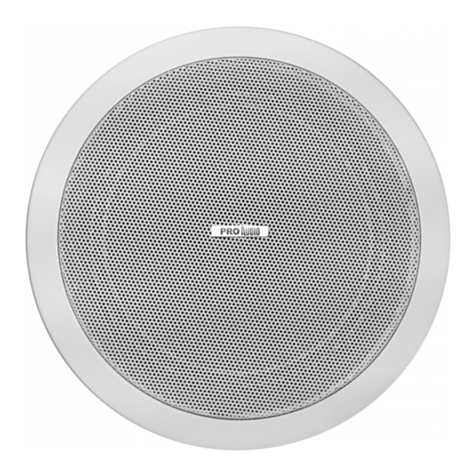
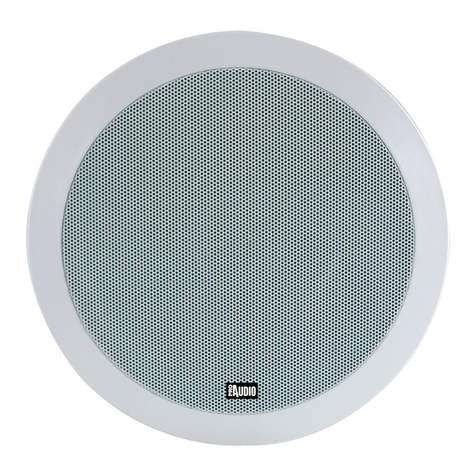
ProAudio D66T User manual

Manuale Utente
ATTENZIONE! Prima di effettuare qualsiasi operazione con l’unità, leggere con attenzione questo manuale e conservarlo accuratamente per
riferimenti futuri. Contiene informazioni importanti riguardo l’installazione, l’uso e la manutenzione dell’unità.
Al fine di migliorare la qualità dei prodotti, la Music&Lights S.r.l. si riserva la facoltà di modificare, in qualunque momento e senza preavviso, le specifiche
menzionate nel presente manuale di istruzioni. Tutte le revisioni e gli aggiornamenti sono disponibili nella sezione 'Manuali' sul sito www.musiclights.it
Per qualsiasi necessità si prega di contattare il nostro ufficio tecnico: tel. +39 0771 72190 fax +39 0771 721955 - [email protected]
Rev001 - 08/12 ©2012 Music & Lights S.r.l. - Italy - www.musiclights.it
Diffusore PA » D66T
I
Avvertenze generali
• I prodotti a cui questo manuale si riferisce sono conformi alle Direttive della Co-
munità Europea e pertanto recano la sigla .•Ildispositivofunzionaconperi-
colosa tensione di rete 100V~. Non intervenire mai al suo interno al di fuori delle
operazionidescrittenelpresentemanuale; esisteilpericolodiunascaricaelet-
trica.•Èobbligatorioeettuareilcollegamentoadunimpiantodialimentazio-
ne dotato di un’ efficiente messa a terra (apparecchio di Classe I secondo norma
EN60598-1).Siraccomanda,inoltre,diproteggerelelineedialimentazionedelle
unità dai contatti indiretti e/o cortocircuiti verso massa tramite l’uso di interrut-
toridierenzialiopportunamentedimensionati.•Leoperazionidicollegamento
allaretedidistribuzionedell’energiaelettricadevonoessereeettuatedaunin-
stallatoreelettricoqualicato.Vericarechefrequenzaetensionedellaretecor-
rispondonoallafrequenzaedallatensionepercuil’unitàèpredisposto,indicate
sullatarghettadeidatielettrici.•Evitarediutilizzarel’unità:-inluoghisoggetti
adeccessivaumidità;-inluoghisoggettiavibrazioni,oapossibiliurti;-inluoghi
atemperaturasuperioreai45°Coinferioria2°C.•Evitarechenell’unitàpenetrino
liquidiinammabili,acquaooggettimetallici.•Nonsmontareenonapportare
modicheall’unità.•Tuttigliinterventidevonoesseresempreesoloeettuatida
personaletecnicoqualicato.Rivolgersialpiùvicinocentrodiassistenzatecnica
autorizzato.•Sesidesideraeliminareildispositivodenitivamente,consegnarlo
perlosmaltimentoadun’istituzionelocaleperilriciclaggio.
Attenzione e precauzione per l’installazione
• Mantenerematerialiinammabiliadunadistanzadisicurezzadall’unità.
• Questoprodottoèsoloperusointerno.
Descrizione e specifiche tecniche
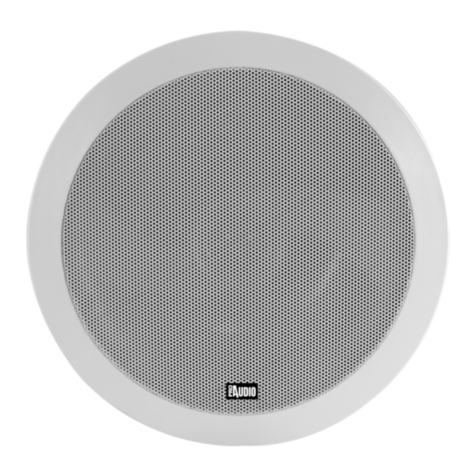
Questialtoparlantisonostatirealizzatiperlasonorizzazioneabassapotenza.Sono
adattiperlavoceeperlamusicadisottofondo.IlDS66Tèprevistoperl’impiegoin
impianti PA con uscita audio 70/100 V.
DS66Tè un diusoreacusticoda incasso,ideale perlariproduzione di annuncie
sottofondi musicali.
• Altoparlanteadaltaecienzaagammaestesa
• Trasformatoreintegratoconconnessionimultipleperlineeatensionecostante
70/100V
• CorpoinABSegrigliametallicaprotettivacolorebianco
• Sistema di fissaggio rapido tramite ganci a molla integrati che evita l’uso di viti,
tasselli o altri elementi di fissaggio
Installazione
1. Praticare un’apertura con un diametro di 180 mm.
2. Eseguire i collegamenti con l’impianto audio attraverso l’ingresso del
trasformatore: collegare il conduttore nero e uno degli altri conduttori
colorati, a seconda della potenza desiderata per l’altoparlante, con l’uscita
dell’amplificatore PA.
3. Sesicolleganopiùaltoparlantifareattenzionechelapolaritàsiaugualepertutti
(conduttore nero = negativo).
4. Spingere le molle di sostegno in alto fino all’arresto e tenerle ferme.
Attenzione a non farsi male – tener ben ferme le molle tese!
5. Inserire le molle nell’apertura di montaggio e spingere l’altoparlante
delicatamente in alto finché si trova a livello del soffitto.
Pulizia e manutenzione
• Durantegliinterventi,assicurarsichel’areasottoilluogodiinstallazionesialibera
da personale non qualificato
• Spegnerel’unità,scollegareilcavodialimentazioneedaspettarenchél’unità
nonsiarareddata
• Tuttelevitiutilizzateperl’installazionedell’unitàelesuepartidovrebberoessere
assicuratesaldamenteenondovrebberoesserecorrose
• Alloggiamenti,elementidissaggioediinstallazione(sotto)dovrebberoessere
totalmenteesentidaqualsiasideformazione
• L’internodeldispositivodeveesserepulitoogniannoutilizzandounaspirapolvere
o un getto d’aria
Attenzione: consigliamo che la pulizia interna sia eseguita da personale
qualificato!
Colore conduttore Potenza
Nero contatto cumune
Verde 1.5 W
Bianco 3.0 W
Rosso 6.0 W
DS66T
MAX 40 mm
MIN 10 mm
Ø180 mm
60 mm
Ø 200 mm
TECHNICAL DATA DS66T
Speaker 6”full range
Type Ceiling speaker
Installation system Flush - mounted
Nominal/maximum power 6.0 W
Constant voltage (100/70V) 6.0 W / 3.0W /1.5 W
Frequency response 100 ~ 13.000 Hz
Sensitivity 91 dB (1W/1m)
Maximum sound pressure 98/100 dB
Dimensions Ø 200x60 mm
Flush - mounting hole Ø 180 mm
Weight 0.72 Kg
User Manual
WARNING! Before carrying out any operations with the unit, carefully read this instruction manual and keep it with cure for future
reference. It contains important information about the installation, usage and maintenance of the unit.
In order to improve the quality of products, Music&Lights S.r.l. reserves the right to modify the characteristics stated in this instruction manual
at any time and without prior notice. All revisions and updates are available in the ‘manuals’ section on site www.musiclights.it
For further information, please contact our Service Center: tel. +39 0771 72190 fax +39 0771 721955 - [email protected]
Rev001 - 08/12 ©2012 Music & Lights S.r.l. - Italy - www.musiclights.it
PA speaker » D66T
EN
Installation
1. Saw out a mounting hole with a diameter of 180 mm.
2. Make the connections to the audio system, connect the speaker via the
transformerinput:connecttheblackcoreandoneoftheothercoloredcores,
whichcorrespondstothedesiredratedpowerbythespeaker,totheoutputof
the PA amplifier.
3. Withtheconnectionofseveralspeakersobservethatallspeakersarepolarizedin
thesameway(blackcore=negativepole).
4. Bend the mounting springs upward up to the stop and keep them in this
position.
Attention, hazard of injury – firmly hold the springs bended!
5. Insert the springs into the mounting cutout and let the speaker slide carefully
into the cutout for a flush fitting.
Cleaning the unit and maintenance
• Makesuretheareabelowtheinstallationplaceisfreefromunwantedpersons
during setup
• Switchotheunit,unplugthemaincableandwaituntiltheunithascooeddown
• Allscrewsusedforinstallingthedeviceandanyofitspartsshouldbetightlyfas-
tenedandshouldnotbecorroded
• Housings,xationsandinstallationspots(ceiling)shouldbetotallyfreefromany
deformation
• Theinteriorofthedeviceshouldbecleanedannuallyusingavacuumcleaneror
air-jet
Warning: we strongly recommend internal cleaning to be carried out by
qualified personnel!
General Instructions
• TheproductsreferredtointhismanualconformtotheEuropeanCommunityDi-
rectives and are therefore marked with .•Theunitissuppliedwithhazardous
network voltage (100V~). Leave servicing to skilled personnel only. Never make
anymodicationontheunitnotdescribedinthisinstructionmanual,otherwise
youwillrisk anelectric shock. • Connection must bemade to apowersupply
system fitted with efficient earthing (Class I appliance according to standard EN
60598-1). It is, moreover, recommended to protect the supply lines of the unit
fromindirectcontactand/orshortingtoearthbyusingappropriatelysizedresid-
ualcurrentdevices.•Theconnectiontothemainnetworkofelectricdistribution
mustbecarriedoutbyaqualiedelectricalinstaller.Checkthatthemainfrequen-
cy and voltage correspond to those for which the unit is designed as given on the
electricaldatalabel.•Neverusethextureunderthefollowingconditions:-in
placessubjecttoexcessivehumidity;-inplacessubjecttovibrationsorbumps;-
inplaceswithatemperatureofover45°Corlessthan2°C.•Makecertainthatno
inammableliquids,waterormetalobjectsenterthexture.•Donotdismantle
ormodifythexture.•Allworkmustalwaysbecarriedoutbyqualiedtechnical
personnel. Contact the nearest sales point for an inspection or contact the manu-
facturerdirectly.•Iftheunitistobeputoutofoperationdenitively,takeittoa
local recycling plant for a disposal which is not harmful to the environment.
Warnings and installation precautions
• Neverlookdirectlythebeamwhenit’slit.Forinsideuseonly.
• Not designed for outside use.
Description and technical specifications
TheseceilingmountspeakersaredesignedforPAapplicationsofsmallpower.They
aresuitableforspeechandbackgroundmusic.TheDS66Tisespeciallydesignedfor
the use in PA systems operating with 70/100 V technique.
DS66Tisabuilt-inceilingloudspeaker,idealforannouncementsandbackground
music reproduction.
• High efficiency extended range speaker
• Built-in line transformer with multiple output connections for 70/100V constant
voltage lines
• WhiteABSbodyandmetalprotectiongrid
• Quickandeasyinstallationbyspringclips,withnoneedofscrewsorotherxing
elements
TECHNICAL DATA DS66T
Speaker 6”full range
Type Ceiling speaker
Installation system Flush - mounted
Nominal/maximum power 6.0 W
Constant voltage (100/70V) 6.0 W / 3.0 W /1.5W
Frequency response 100 ~ 13.000 Hz
Sensitivity 91 dB (1W/1m)
Maximum sound pressure 98/100 dB
Dimensions Ø 200x60 mm
Flush - mounting hole Ø 180 mm
Weight 0.72 Kg
DS66T
MAX 40 mm
MIN 10 mm
Ø180 mm
60 mm
Ø 200 mm
Core color Rated power
Black common connection
Green 1.5 W
White 3.0 W
Red 6.0 W
Table of contents
Languages:
Other ProAudio Speakers System manuals

ProAudio
ProAudio DS62T User manual

ProAudio
ProAudio DP65T User manual

ProAudio
ProAudio CS840TO User manual

ProAudio
ProAudio PA DS45T User manual

ProAudio
ProAudio M series User manual

ProAudio
ProAudio HD82T User manual

ProAudio
ProAudio HD100T User manual

ProAudio
ProAudio GR62T User manual

ProAudio
ProAudio CS606TO User manual

ProAudio
ProAudio AT60 User manual