Prokura Innovations Gauthali User manual

GAUTHALI
USER MANUAL v1.0
2020.9
© 2020 Prokura Innovations. All Rights Reserved.

Using this manual
Legend
To make: Warning, important, hints and tips, reference signs
Read before the first Flight
1. User Manual
2. Quick start guide
3. Disclaimer and safety guidelines
Videos
https://www.youtube.com/watch?v=5lbfTUy_7UA&t=121s
Downloading the app
The app is made available at purchase / only downloadable by the user with the account in the
website/ freely available in the prokura website
© 2020 Prokura Innovations. All Rights Reserved.

Contents
Using this manual 2
Legend 2
Read before the first Flight 2
Videos 2
Downloading the app 2
Product Profile 5
Introduction 5
Feature Highlights 5
Preparing the Aircraft 5
Aircraft Diagram 6
Aircraft 8
Aircraft Status Indicator 8
Return to Launch 9
Propellers 9
Battery Management System (BMS) 10
Flight 12
Flight Environment Requirements 12
Flight Limit and Geo Zones 12
Pre-Flight Checklist 12
Auto Takeoff/landing 13
Flight Modes 13
DroneFly App 16
Mobile App 16
Web App 20
Appendix 24
Specifications 24
Calibrating the Compass 26
© 2020 Prokura Innovations. All Rights Reserved.

Product Profile
This section introduces Gauthali and lists the
components of the aircraft and remote
controller.
© 2020 Prokura Innovations. All Rights Reserved.

Product Profile
Introduction
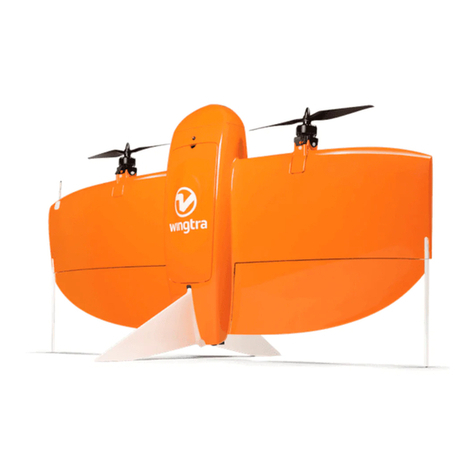
Gauthali is a hybrid VTOL drone made in Nepal. It can Hover and Fly and Return to
Launch automatically. Gauthali has a maximum flight speed of 30m/s and a maximum flight time
of 45 minutes. With a payload-carrying capacity of 1.2 kg and a payload volume of 4050 cm3, it
can transport most of the emergency medical supplies.
Feature Highlights
Gauthali boasts a simple convertible design and has a lightweight of 11 kilograms,
making it easy to transport. Using an advanced flight controller, Gauthali is able to provide a
safe and reliable flight experience. The aircraft is able to automatically return to its Home Point
when the communication signal is lost or the battery is low, as well as being able to land on the
current position in such scenarios.
Our redundant communication technology is built-in into Gauthali and supports both 2.4
GHz and 900Mhz frequencies and a transmission range of 1 km on 2.4Ghz frequency and
anywhere in 900Mhz frequency as long as the area supports 3G/4G mobile communication.
Preparing the Aircraft
Follow the steps below to assemble Gauthali.
Step 1: Join the two wings to the wing in the fuselage
Step 2: Put the Quadcopter Propellers
Step 3: Put the Pusher motor propeller
Step 4: Join the tail
Step 5: Connect the power and signal wires
Step 6: Connect the batteries
© 2020 Prokura Innovations. All Rights Reserved.

Aircraft Diagram
Preparing the Remote Controller
1. Disclaimer: The drone is intended for fully automatic operation in the preplanned
waypoint based missions. Any manual use via remote is not recommended. Any faults
and risks associated to manual flying are liabilities of the user themselves
2. Switch on the remote
3. Check for the stable green light for the indication of the connection to the drone (the
drone must be powered on before the remote)
4. Then, you are ready for RC flight of the drone.
Remote controller diagram
Further information on the remote packaged with this drone can be found at
https://www.rc.futaba.co.jp/english/dl_manual/4ywd_e.pdf.
© 2020 Prokura Innovations. All Rights Reserved.

Aircraft
Gauthali contains a Flight controller,
Payload Compartment,
Remote Control system, and Dual
Flight Battery System.
© 2020 Prokura Innovations. All Rights Reserved.

Aircraft
The overall aircraft of Gauthali consists of a flight controller, smart communication
system, propulsion system and a battery management system.
Aircraft Status Indicator
The aircraft status indicator is an rgb led accompanied with the flight controller. It relays
the status of the flight controller system. The different status as indicated by the pattern of led
are:
LED Pattern
Description
Flashing red and blue
Initializing gyroscopes. Hold the vehicle still
and level while it initializes the sensors.
Flashing blue:
Disarmed, no GPS lock found. Autopilot,
loiter and return-to-launch modes require
GPS lock.
Solid blue:
Armed with no GPS lock
Flashing green
Disarmed (ready to arm), GPS lock acquired.
Quick double tone when disarming from the
armed state.
Fast Flashing green
Same as above but GPS is using SBAS (so
should have better position estimate).
Solid green - with single long tone at time of
arming:
Armed, GPS lock acquired. Ready to fly!
Double flashing yellow:Single Flashing yellow
Failing pre-arm checks (system refuses to
arm).
Single Flashing yellow
Radio failsafe activated
Flashing yellow - with quick beeping tone
Battery failsafe activated
Flashing yellow and blue - with
high-high-high-low tone sequence:
GPS glitch or GPS failsafe activated
Flashing red and yellow - with rising tone:
EKF or Inertial Nav failure
© 2020 Prokura Innovations. All Rights Reserved.

Flashing purple and yellow
Barometer glitch
Solid Red
Error
Solid Red with SOS tone sequence:
SD Card missing (or other SD error like bad
format etc.)
Flashing Red, Blue and Green:
Copter ESC Calibration mode entered.
Return to Launch
The Return to Launch (RTL) feature makes it possible for the vehicle to return to its
preset home location without automatically based on GPS data. The vehicle can be switched to
RTL mode by either switching the mode stick on the RC or tapping the RTL button in the
mobile/web app.
Procedure
1. The GPS coordinates of home is recorded during initialization of the vehicle after startup
2. RTL is triggered
3. The aircraft continues in the fixed wing mode until it is close to the return point at which
time it switches to a VTOL RTL. Using the fixed wing RTL the vehicle arrives at a
reasonable altitude, about 15 meters at which point it switches to VTOL mode and
descends to the ground.
4. After reaching the Home location, the vehicle lands and the motors stop.
Propellers
There are two types of propellers, one for the multicopter system and other for the push
motor for fixed wing systems. Considering multicopter propellers they are fuRTLer of two types
for rotation in different directions. While it is easy to detach the propellers some considerations
must be taken into account while mounting them.
Attaching the Propeller
Attach the propellers to the motors with similar markings. Markings are differentiated
based on their direction and copter type, and can be found on the sides of the motors and below
the propeller. Propellers spinning in the same direction are interchangeable for multicopters.
Make sure the pusher propeller and multicopter propellers are correctly attached.
© 2020 Prokura Innovations. All Rights Reserved.

Detaching the Propeller
Remove the propellers with care as the blades are sharp and might cause injury. Just
rotate the propellers to detach them and do not use screw drivers to unmount them as the
screws are there to hold the mount and not the propeller. Make sure the vehicle is in off state or
in no position to fly. If a propeller is broken, replace it with the same model or if not possible
might need to change the entire propellers. Make sure all propellers are in good condition and
screwed properly before each flightMaintain distance from the propellers before flight or when
the propellers are spinning.
Battery Management System (BMS)
We have a highly intelligent dual battery power system - a Li-ion based primary source
and Li-po based secondary source. The charging and discharging of the battery source is
designated by the BMS. If one of the power systems fails the system is not completely
dysfunctional but will enter into the failsafe mode and land in the nearest safe location avoiding
imminent crash scenario. The BMS is a robust system that has several protection facility:
1. Overcharge protection
2. Over Discharge protection
3. Parallel cell balancing
The battery charge state can be viewed on the battery unit itself as well as the data is also
displayed in the DMS app.
© 2020 Prokura Innovations. All Rights Reserved.

Flight
This section describes flight modes, safe flight
practices and flight restrictions.
© 2020 Prokura Innovations. All Rights Reserved.

Flight
Flight Environment Requirements
1. Do not use the aircraft in severe weather conditions including wind speeds exceeding 8
m/s, snow, rain, and fog.
2. Fly in open areas. Tall structures and large metal structures may affect the accuracy of
the onboard compass and GPS system.
3. Avoid obstacles, crowds, high voltage power lines, trees, and bodies of water.
4. Minimize interference by avoiding areas with high levels of electromagnetism such as
locations near power lines, base stations, electrical substations, and broadcasting
towers.
5. Aircraft and battery performance are subject to environmental factors such as air density
and temperature. Be careful when flying 9842 ft (3000 m) or more above sea level, since
battery and aircraft performance may be reduced.
Flight Limit and Geo Zones
Unmanned aerial vehicle (UAV) operators should abide by the regulations from
self-regulatory organizations such as the International Civil Aviation Organization, the Federal
Aviation Administration, and local aviation authorities. For safety reasons, flight limits are
enabled by default to help users operate this aircraft safely and legally. Users can set flight
limits on height and distance. Altitude limits, distance limits, and GEO zones function
concurrently to manage flight safety when GPS is available. Only altitude can be limited when
GPS is unavailable.
Pre-Flight Checklist
1. Make sure the remote controller, mobile device, and Flight Battery are fully charged.
2. Make sure the Flight Battery and the propellers are mounted securely.
3. Make sure the aircraft wings are properly mounted.
4. Make sure the GPS and compass are functioning normally.
5. Make sure nothing is obstructing the motors and that they are functioning normally.
6. Make sure the ground control software is successfully connected to the aircraft.
© 2020 Prokura Innovations. All Rights Reserved.

Auto Takeoff/landing
Auto Takeoff
1. Open the Ground control software
2. Complete all the steps in the Pre Flight Checklist
3. Upload the desired mission
4. Click Start
Auto Landing
1. If the conditions are safe to land, click the Land button
2. The motors stop after landing.
Flight Modes
Modes
1. Quad mode
In this mode the drone behaves as a typical quadcopter, where it uses its X-config
motors. This mode is typically used in landing and takeoff modes but may also be
enabled as an assistance mode when the drone is incapable of maintaining its cruise
speed (due to wind or gust). The mode is also enabled in failsafe situations when a
failure of operation occurs in the plane mode.
2. Plane mode
In this mode the drone operates like a typical plane and is propelled by the pusher motor
at the backside of the drone. During this mode the drone uses the servos and control
surfaces on the wing and the tail parts to control its motion. This mode is highly energy
efficient and is used in most of the mission parts.
Stabilize (QLoiter) Mode
This is the only manual mode in the aircraft, where the aircraft uses gps information and
sensor optimization for assisted flying. The drone automatically maintains the current location,
heading and altitude. The pilot may fly the drone in stabilized mode with the control sticks but
when the sticks are released, the vehicle will slow to a stop and hold position.
© 2020 Prokura Innovations. All Rights Reserved.

Mission Mode
In this mode, the drone will follow a mission (a set of GPS waypoints and other
commands) that are preloaded via the DMS app. When in mission mode, the pilot is not allowed
to control the plane via the remote controller but can send flight commands via the app. This
mode is complex, constituting several sets of actions: takeoff, transition from quad to plane
mode, waypoint to waypoint navigation and hover, transition back to quad mode and land mode.
Return To Launch (RTL) Mode
RTL mode (QuadPlane Return To Launch mode) navigates the drone in fixed wing mode
from its current position to hover in quad mode above the home position and then lands.
Land Mode
The drone lands in the quad mode in the location provided. The drone descends at the
rate of 0.5m/s. The drone must be in hover or loiter mode before you can enable this mode. For
all else, it is suggested to use RTL mode.
© 2020 Prokura Innovations. All Rights Reserved.

DroneFly App
This section introduces the main
functions of the DroneFly app.
© 2020 Prokura Innovations. All Rights Reserved.

DroneFly App
There are two portions of the DroneFly App. An android based mobile app which comes
with the drone and a web app (dms.prokurainnovations.com)
Mobile App
Login Screen
Login using the provided credentials (username, password) and for the provided drone.
© 2020 Prokura Innovations. All Rights Reserved.

Home Screen
Status Panel
The status Panel shows the status of the drone. The “show” and “hide” button from the
commands button panel can be used to view or hide the drone status accordingly. The data
displayed are:
Param
Description
Lat
Latitude corresponding to the current position of drone
Long
Longitude corresponding to the current position of drone
AltR
Attitude of drone relative to the home altitude
Alt
Absolute altitude of drone
Sat
Number of satellites connected for GPS
HDOP
Horizontal dilution of Precision
Fix
The type of GPS fix, 3D, 2D
© 2020 Prokura Innovations. All Rights Reserved.

Head
The heading/compass reading
GS
Ground Speed
AS
Air Speed
Mode
The current mode of Drone, Auto, Land, RTL
Arm
Arm condition of dron, True/False
Lat
Latitude corresponding to the current position of drone
Commands Button Panel
It consists of a series of buttons to interact either with the drone or app.
Button
Description
SHOW/HIDE
Shows or Hides the Status Panel
DOWNLOAD
Downloads current drone mission and displays it on the
screen
CLEAR1:
Clears the current mission from the screen
DROPDOWN (Locations)
List of available missions for drone
SEND
Send the mission with the corresponding drop down
value to be uploaded to drone
NUMBER INPUT
Radius to display a grid of circles for distance
approximation
CLEAR
Clears the grid of circles from the screen
SERVO
Toggles servo position of drone
SIMULATE
Performs simulation of recent drone flight
RESET
Resets logs
© 2020 Prokura Innovations. All Rights Reserved.

Prearm CheckList
The pre arm check list presents a list of checks necessary to be performed by the user
before each flight. It is mandatory to attain each criteria before any flight. It Lists:
Check
Description
GPS Lock
A proper GPS lock for Auto flights
Battery
Proper Battery Condition with sufficient charge
Mag
The compass is behaving well
Flight Plan
Ensure a valid flight plant is uploaded to the drone
Horizon
Ensure the drone is flat on the ground
Fly Button
The fly button is used to initiate the flight. Initially it is colored in red and the flight cannot
be initiated. Once all the pre arm conditions are satisfied, it turns green and flight operation is
permitted.
© 2020 Prokura Innovations. All Rights Reserved.

On Pressing the fly button three sub buttons pop out: TAKEOFF, LAND and RTL
Button
Description
TAKEOFF
Initiates the mission
LAND
Lands at current drone position
RTL
Returns to Home Position
Web App
Login Page
Login to the web app with valid credentials
© 2020 Prokura Innovations. All Rights Reserved.
Table of contents
