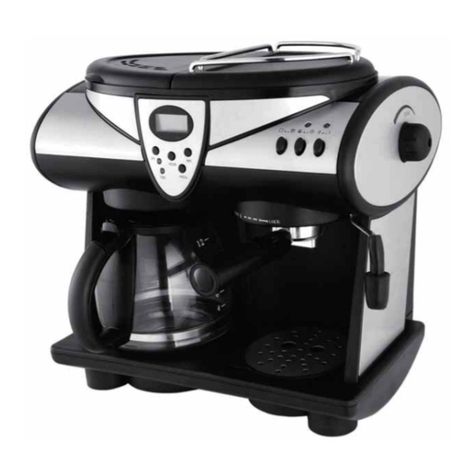
Proline CBE16 User manual

COMBI ESPRESSO COFFEE MACHINE
COMBINE ESPRESSO CAFETIERE
CAFETERA EXPRESSO
ESPRESSO KOFFIEMACHINE
Downloaded from www.vandenborre.be

1
Table of Contents
WARNINGS ................................................................................................................. 2-3
IMPORTANT SAFETY INSTRUCTIONS ..............................................................................4
DESCRIPTION.............................................................................................................. 4-5
BEFORE USING THE APPLIANCE FOR THE FIRST TIME ...................................................6
MAKING DRIP COFFEE................................................................................................ 6-7
Pr gramming the Aut matic Start
............................................................................ 7
MAKING ESPRESSO..................................................................................................... 7-8
MAKING CAPPUCCINO ...................................................................................................9
MAKING HOT WATER OR BEVERAGES...................................................................... 9-10
CLEANING AND DESCALING ................................................................................... 10-11
SPECIFICATIONS............................................................................................................11
Downloaded from www.vandenborre.be

2
GB
WARNINGS
This appliance is intended f r d mestic
h useh ld use nly and sh uld n t be used
f r any ther purp se r in any ther
applicati n, such as f r n n-d mestic use
r in a c mmercial envir nment.
If the supply c rd is damaged, it must be
replaced by the manufacturer, its service
agent r similarly qualified pers ns in rder
t av id a hazard.
The appliance must n t be immersed.
WARNING: The filling aperture must n t
be pened during use.
This appliance can be used by children
aged fr m 8 years and ab ve if they have
been given supervisi n r instructi n
c ncerning use f the appliance in a safe
way and if they understand the hazards
inv lved. Cleaning and user maintenance
shall n t be made by children unless they
are lder than 8 and supervised. Keep the
Downloaded from www.vandenborre.be

3
appliance and its c rd ut f reach f
children aged less than 8 years.
Appliances can be used by pers ns with
reduced physical, sens ry r mental
capabilities r lack f experience and
kn wledge if they have been given
supervisi n r instructi n c ncerning use
f the appliance in a safe way and
understand the hazards inv lved.
Children shall n t play with the
appliance.
The surfaces are liable t get h t during
use.
F r the details n h w t clean surfaces
in c ntact with f d and descaling please
see secti n “Cleaning and descaling” n
pages 10-11
WARNING: Risks f injuries if y u d n't
use this appliance c rrectly.
Downloaded from www.vandenborre.be

4
IMPORTANT SAFETY INSTRUCTIONS
• Switch ff and unplug the appliance fr m the mains s cket when n t in use r bef re cleaning.
• All w the appliance t c l bef re attaching access ries r cleaning.
• The use f access ry attachments n t rec mmended by the manufacturer may result in fire,
electric sh ck r pers nal injury.
• Be careful n t t get scalded by steam.
• Never switch n the appliance with ut water in the water tank.
• D n t rem ve the metal funnel when the appliance is brewing c ffee r when steam and h t
water escape fr m the metal funnel.
• Only use the carafe supplied with this appliance. Never use it n a c king surface.
• D n t use the carafe if it is cracked r the handle is l se.
• D n t perate the appliance with ut water in the tank.
• Scalding may ccur if the tank c ver is pened during the brewing cycles.
• Never leave the empty carafe n the warming plate when the appliance is perating, therwise
the carafe is liable t crack.
• D n t rem ve the metal funnel during the brewing cycles r when steam and h t water escape
fr m metal funnel. Be sure t release the pressure in water tank bef re rem ving metal funnel.
DESCRIPTION
Downloaded from www.vandenborre.be

5
1. Water tank c ver
2. Filter h lder (f r drip c ffee)
3. Nyl n filter (f r drip c ffee)
4. C ntr l panel
5. Warming plate
6. Carafe lid
7. Lid release butt n
8. Carafe handle
9. Carafe f r drip c ffee
10. Measuring sp n with tamper (f r
espress )
11. Cup warming tray
12. Steam c ntr l kn b
13. Fr thing device
14. Fr thing n zzle
15. Rem vable drip tray
16. Metal funnel (f r espress )
17. Mesh filter (f r espress )
18. Lever
19. Metal funnel handle
20. Measuring sp n f r drip c ffee
Cont ol panel
1. On/ ff indicat r light (red) f r drip c ffee
2.
Time indicat r light (yell w)
3. Espress indicat r light (green)
4. On/ ff indicat r light (red) f r espress
5.
Steam indicat r light (green)
6.
On/ ff butt n f r drip c ffee
7. HOUR butt n
8. MIN butt n
9. PROG butt n
10. / Espress /steam butt n
11. PUMP butt n
12.
On/ ff butt n f r espress
Downloaded from www.vandenborre.be

6
BEFORE USING THE APPLIANCE FOR THE FIRST TIME
Carefully unpack the appliance and rem ve all packaging materials.
Wipe the appliance with a slightly damp cl th. Dry th r ughly.
It is rec mmended t wash b th the drip c ffee and espress systems bef re first use.
• D ip coffee system: Fill the water tank with c ld water and f ll w the directi ns f r drip brewing
t make at least tw carafes f c ffee with ut using gr und c ffee.
• Esp esso system: Fill the water tank with c ld water and f ll w the directi ns f r making
espress and cappuccin t make at least f ur cappuccin s with ut using gr und c ffee and
using water instead f milk.
MAKING DRIP COFFEE
Make sure the appliance is plugged in. the display will sh w “12:00”.
1. Open the water tank c ver.
2. Fill the tank with water, referring t the height markings n the stair step water gauge inside the
tank and taking care n t t exceed the MAX 10 level.
• The height markings n the water gauge c rresp nd t the level indicat rs n the carafe,
representing the number f cups f c ffee y u want t prepare.
• Be sure t add a small am unt f extra water t acc unt f r the am unt f water l st in
wetting the gr und c ffee and l st as steam during the brewing cycle.
3. Place the nyl n filter int the filter h lder, making sure it is assembled c rrectly.
Otherwise the tank c ver cann t be cl sed.
4. Place a paper filter (n t supplied) f 4-10 cup size int the nyl n filter.
5. Add the desired gr und c ffee in the paper filter using the supplied measuring sp n.
• Use a level sp n f gr und c ffee (appr ximately 5g) f r every cup f c ffee.
6. Cl se the tank c ver and insert the carafe nt the warming plate.
7. Press twice. The red indicat r light (
)
will
illuminate, indicating that the appliance is brewing c ffee.
8. The c ffee will begin t fl w fr m the filter h lder after a
sh rt time.
• During brewing, y u can rem ve the carafe fr m the
warming plate. The brewing pr cess d es n t st p
during this peri d and nly the fl w f c ffee fr m the
filter h lder st ps. D n t rem ve the carafe f r l nger
than 30 sec nds r the c ffee may verfl w the filter
h lder.
• Alth ugh the c ffee maker has the ab ve feature, it is
n t rec mmended t p ur c ffee bef re the cycle has
c mpleted as d this may affect the flav ur f the
c ffee.
• It is n rmal f r the appliance t emit steam while it is
brewing c ffee.
9. T keep c ffee warm after the brewing pr cess has finished, place the carafe n the warming
plate.
• The appliance is designed t keep the c ffee warm f r appr ximately 30 minutes and then
Downloaded from www.vandenborre.be
7
the appliance will be turned ff aut matically.
10. T turn ff the appliance press . The red indicat r light (
)
will g ut.
P og amming the Automatic Sta t
The appliance can be pr grammed t make drip c ffee aut matically.
F r example, it is 8:10 and y u want t start brewing c ffee at 13:10.
First, make sure the time is set c rrectly.
To set the clock in 24-hou cycle
1. Press PROG nce.
• The text “CLOCK” will be sh wn n the display.
2. While “CLOCK” is sh wn n the display, repeatedly press HOUR and MIN t set the c rrect time.
• T speed up time setting, press and h ld HOUR/MIN t scr ll thr ugh numbers quickly.
3. After setting the time, press PROG t c nfirm.
• The text “TIMER” will be sh wn n the display.
To set the delayed sta t time
4. While “TIMER” is sh wn n the display, repeatedly press
HOUR and MIN t set the desired time.
5. After y u have set the delayed start time, press nce.
• The yell w indicat r light ( ) will illuminate.
• After a while the display will sh w the current time. Y u can check
the set time by pressing PROG twice.
6. When the set time is reached, the appliance will start brewing c ffee.
• The text “TIMER” will disappear fr m the display.
NOTE:
• Y u may cancel the aut matic start functi n by pressing twice.
• If y u want t change the start time after it has been set, set a new time as described f ll wing
steps 1 t 6 ab ve.
MAKING ESPRESSO
Making espress is different than making regular drip c ffee. The appliance w rks under pressure,
bringing the water t a b il and then f rcing it thr ugh the gr und c ffee in a sh rt peri d f time.
Caution: D n t leave the appliance unattended while making espress .
Ensure that the steam c ntr l kn b n the side f the
appliance is set at the Off p siti n by turning it cl ckwise until
y u cann t turn it any further.
Downloaded from www.vandenborre.be

8
1. Make sure the appliance is plugged in and turned ff.
2. Fill the water tank with water.
• T av id verfl w, make sure the water level is n t ver the MAX 10 line.
3. Fill the mesh filter with gr und espress p wder using the supplied measuring sp n and then
put the mesh filter int the metal funnel.
• The filter is marked with “2-cup” n the b tt m, indicating that y u can make tw cups f
espress .
• Distribute the espress p wder evenly and press it tight t gether using the tamper.
• A sp n (appr ximately 7g) f espress p wder will make a cup (cup size c rresp nds t
35ml) f espress .
4. Insert the metal funnel int the b iler utlet fr m the Insert p siti n ( ), then pushing
upwards and turning it anticl ckwise until it is in the L ck p siti n ( ).
5. Press .
• The red indicat r light ( ) will illuminate and
the green espress indicat r light ( ) will flash.
6. Wait until the green espress indicat r light st ps
flashing.
NOTE: During brewing, it is n rmal f r the green indicat r light t cycle n and flash,
indicating that the heating element is heating up t maintain the water temperature is h t
en ugh.
7. Place a cup (n t supplied) n the shelf, making sure that the cup is under the b iler utlet.
• It is rec mmended t heat the cup bef re use. Y u can place the cup n the cup warming
tray while the espress is prepared.
8. Press PUMP. After a while, the espress will start t run ut fr m the metal funnel sp uts.
9. When y u have en ugh espress in the cup, press
t st p the fl w.
• The red indicat r light ( ) and the green indicat r light ( ) will g ut.
10. Rem ve the cup and serve.
Helpful hints:
• An espress is a far richer drink with a m re intense taste than regular brewed drip c ffee. It is
rec mmended that espress sh uld be served immediately after brewing. If the espress is t
str ng, y u can add h t water. Add sugar t taste.
• Which c ffee? Any c ffee labelled “espress ” is suitable f r making espress . Any c ffee with at
least 80% Arabica beans is ideal f r espress preparati n. Check with y ur l cal c ffee st re.
Downloaded from www.vandenborre.be

9
MAKING CAPPUCCINO
Cappuccin is a p pular espress -based c ffee drink. F ll w the steps bel w s that y u may have
en ugh steam pressure t fr th and steam milk pr perly.
1. Prepare espress first f ll wing steps 1 t 8 in the Making Espress secti n ab ve.
2. Press / .
• The green steam indicat r light ( ) will flash while the green espress indicat r light
( ) will g ut.
3. Wait until the green steam indicat r light st ps flashing.
4. Fill a pitcher (n t supplied) with 100ml milk f r cappuccin t be prepared and set aside.
• It is rec mmended t use wh le milk at refrigerat r temperature.
• When y u ch se the size f the pitcher, bear in mind that the milk v lume will increase by 2
times.
5. P siti n the pitcher c ntaining the milk n the drip tray.
6. Insert the fr thing device int the milk by ab ut 2cm.
• Remember that the fr thing n zzle is n t submerged t deep, but just deep en ugh t stay
bel w the surface f the milk and als prevent the milk fr m splattering ar und.
7. Sl wly turn the steam c ntr l kn b anticl ckwise. The steam will c me ut fr m the fr thing
n zzle.
NOTE: Never turn the steam c ntr l kn b quickly, as the steam will accumulate rapidly in a
sh rt time, which may increase the p tential risk f expl si n.
8. M ve the pitcher c ntaining the milk up and d wn under the fr thing device t create the
desired milk fr th.
9. When the milk has sufficient f aming, turn the steam c ntr l kn b t the Off p siti n by turning
it cl ckwise until y u cann t turn it any further.
10. P ur the fr thed milk int the espress and the cappuccin is ready. Add sugar t taste.
11. Press t turn ff the appliance.
• The red indicat r light ( ) and the green indicat r light ( )
will g ut.
12. If m re Cappuccin is required, f ll w the instructi ns ab ve, all w
the appliance t c l f r at least 5 minutes after each
brewing cycle.
IMPORTANT: Always clean f othing device with a wet sponge immediately afte use. Be ca eful
not to touch the steam wand. Remove the f othing nozzle and check that the steam wand is not
blocked. If necessa y use a needle to emove any solid milk.
MAKING HOT WATER OR BEVERAGES
The fr thing device can be used t make h t water r beverages like drinking ch c late r tea.
1. Fill the water tank with the desired am unt f water. The water level
sh uld n t exceed the MAX 10 line.
2. Plug in the appliance and press .
Downloaded from www.vandenborre.be

10
• The red indicat r light ( ) will illuminate and the green espress indicat r light ( )
will flash.
3. Press / .
• The green steam indicat r light ( ) will flash while the green espress indicat r light
( ) will g ut.
4. Wait until the green steam indicat r light t st p flashing.
5. Dip the fr thing n zzle int the water t be heated. Sl wly turn the steam c ntr l kn b
anticl ckwise t start making steam.
6. When the required temperature is reached, turn the steam c ntr l kn b cl ckwise until y u
cann t turn it any further.
7. Press t turn ff the appliance.
• The red indicat r light ( ) and the green indicat r light ( ) will g ut.
Fo tea: Place ne tea bag in the heated water.
Fo hot chocolate: Add specific am unt f c c a p wder int the heated water and immediately
whisk t blend well.
CLEANING AND DESCALING
Turn ff and unplug the appliance fr m the mains s cket. All w the appliance t c l d wn bef re
cleaning.
Clean the utside f the appliance with a slightly damp cl th. Dry th r ughly.
Clean the rem vable parts in warm s apy water then rinse them th r ughly.
Never immerse the appliance in water.
D n t use abrasive r chemical cleaning agents.
T disp se f the used espress gr unds, unfasten the metal
funnel fr m the b iler utlet.
Bl ck the filter using the lever inc rp rated in the handle
and empty the gr unds by turning the metal funnel upside
d wn and tapping.
Descaling
Descaling the drip c ffee system
Regularly descale the drip c ffee system using a specific descaler.
1. Fill the tank with water and descaler t the MAX 10 line. (Refer t the
descaler instructi ns f r the scale f water and descaler.)
2. Place the carafe nt the warming plate.
3. Press . Perc late the equivalent f a cupful and then
Downloaded from www.vandenborre.be
11
press again t switch ff the appliance.
4. Leave the s luti n in the system f r 15 minutes. Repeat
steps 3 and 4 again.
5. Switch n the appliance and c ntinue the brewing pr cess until the tank is c mpletely empty.
6. Rinse ut by perating the appliance using water at least three times (3 full tanks f water).
Descaling the espress system
It is rec mmended t descale the espress system every 2-3 m nths, depending n the hardness
f the water and the frequency f use.
1. Fill the tank with water and descaler t the MAX 10 line. (Refer t the descaler instructi ns f r
the scale f water and descaler.)
2. Put the metal funnel (n c ffee p wder in it) and cup in place.
3. Press . The appliance will start heating.
4. Wait until the green espress indicat r light st ps flashing.
5. Press PUMP and fill tw cups with water.
6. Press / and wait until the green steam indicat r
light st ps flashing.
7. Sl wly turn the steam c ntr l kn b anticl ckwise t make
steam f r 2 minutes, then turn the steam c ntr l kn b
cl ckwise until y u cann t turn it any further.
8. Press
t turn ff the appliance, then leave the appliance with the descaling s luti n in it f r
at least 15 minutes.
9. Restart the appliance and repeat steps 3 t 8 f r at least 3 times.
10. Press and wait until the espress green indicat r light st ps flashing.
11. Press PUMP t brew until n descaler is left.
12. Brew c ffee (with n c ffee p wder) with tap water at the MAX 10 line, repeating the steps f
3 t 8 f r at least 3 time. Keep repeating until the water tank is left empty.
• It is n t necessary t wait f r 15 minutes in step 8 again.
SPECIFICATIONS
Ratings: 220-240V~ 50Hz 1850W
We ap l gise f r any inc nvenience caused by min r inc nsistencies in these instructi ns, which
may ccur as a result f pr duct impr vement and devel pment.
Darty Plc © UK: EC1N 6TE 29 / 07 / 2014
Downloaded from www.vandenborre.be
12
Table des matiè es
ATTENTION .................................................................................................................13-15
MISES EN GARDE IMPORTANTES: ..........................................................................15-16
DESCRIPTION.................................................................................................................. 16
AVANT LA PREMIÈRE TILISATION DE L'APPAREIL ................................................... 17
PRÉPARATION DE CAFÉ FILTRE ................................................................................... 18
Programmation de démarrage automatique ............................................................. 19
PRÉPARATION D'EXPRESSO ................................................................................ 19-20
PRÉPARATION DE CAPP CCINO.................................................................................. 21
CHA FFER DE L'EA O PRÉPARER DES BOISSONS CHA DES ……………… .... 21
NETTOYAGE ET DÉTARTRAGE.................................................................................22-23
SPÉCIFICATIONS............................................................................................................. 23
Downloaded from www.vandenborre.be
13
FR
ATTENTION
Cet appareil est destiné à un usage
d mestique uniquement. T ute utilisati n
autre que celle prévue p ur cet appareil,
u p ur une autre applicati n que celle
prévue, par exemple une applicati n
c mmerciale, est interdite.
Si le câble d'alimentati n est end mmagé,
il d it être remplacé par le fabricant, s n
service après vente u des pers nnes de
qualificati n similaire afin d'éviter un
danger.
L'appareil ne d it pas être immergé.
MISE EN GARDE: L' rifice de remplissage
ne d it pas être uvert en c urs
d'utilisati n.
Cet appareil peut être utilisé par des
enfants âgés d'au m ins 8 ans et des
pers nnes d nt les capacités physiques,
sens rielles u mentales s nt réduites u
s uffrant d'un manque d'expérience et de
Downloaded from www.vandenborre.be
14
c nnaissances, à c nditi n qu'elles s ient
placées s us une surveillance u qu'elles
aient reçu des instructi ns quant à
l'utilisati n de l'appareil en t ute sécurité
et en c mprennent bien les dangers
p tentiels. Les enfants ne d ivent pas
utiliser l'appareil c mme un j uet. Le
nett yage et l'entretien de l'utilisateur ne
d ivent pas être effectués par des enfants,
à m ins qu'ils ne s ient âgés d'au m ins 8
ans et qu'ils s ient s us la surveillance d'un
adulte.
Cet appareil peut être utilisé par des
pers nnes d nt les capacités physiques,
sens rielles u mentales s nt réduites u
d nt l'expérience u les c nnaissances ne
s nt pas suffisantes, à c nditi n qu'ils
bénéficient d'une surveillance u qu'ils
aient reçu des instructi ns quant à
l'utilisati n de l'appareil en t ute sécurité
et en c mprennent bien les dangers
p tentiels.
Downloaded from www.vandenborre.be
15
Les enfants ne d ivent pas utiliser
l'appareil c mme un j uet.
Les surfaces s nt susceptibles de devenir
chaudes au c urs de l'utilisati n.
Les inf rmati ns détaillées sur la manière
de nett yer les surfaces en c ntact avec les
aliments et du détartrage s nt définis en
pages 22-23 dans la secti n “NETTOYAGE
ET DETARTRAGE”.
MISE EN GARDE: Risques de blessures en
cas de mauvaise utilizati n du pr duit.
MISES EN GARDE IMPORTANTES:
• Éteignez et débranchez t uj urs l'appareil après usage et avant de le nett yer.
• Laissez à l'appareil le temps de refr idir avant de le nett yer et avant de m nter des access ires.
• L’utilisati n d’access ires autres que ceux rec mmandés par le fabricant peut être à l’ rigine d’un
incendie, de blessures u de ch cs électriques.
• Faites attenti n à ne pas v us brûler avec la vapeur.
• N'allumez en aucun cas l'appareil avec le réserv ir vide.
• N'enlevez pas l'ent nn ir métallique quand le café est en c urs de préparati n et l rsque
l'ent nn ir pr duit de la vapeur u de l'eau brûlante.
• N'utilisez pas d'autre carafe que celle f urnie avec l'appareil. Ne mettez jamais la carafe sur une
plaque de cuiss n.
• N'utilisez pas la carafe si elle est fissurée u si la p ignée tient mal.
• Ne faites pas f ncti nner l'appareil sans eau dans le réserv ir.
• Il existe un risque de brûlure si le c uvercle du réserv ir est uvert pendant que l'appareil
f ncti nne.
• Ne laissez en aucun cas la carafe vide sur la plaque chauffante pendant que l'appareil f ncti nne:
elle risquerait de se briser.
• N'enlevez pas l'ent nn ir métallique quand le café est en c urs de préparati n et l rsque
Downloaded from www.vandenborre.be
16
l'ent nn ir pr duit de la vapeur u de l'eau brûlante. Relâchez t uj urs la pressi n du réserv ir
avant d'ôter l'ent nn ir.
DESCRIPTION
1. C uvercle du réserv ir d’eau
2. P rte-filtre (p ur café filtre)
3. Filtre en nyl n (p ur café filtre)
4. Panneau de c mmande
5. Plaque chauffante
6. C uvercle de la carafe
7. B ut n d' uverture du c uvercle
8. P ignée de la carafe
9. Carafe p ur café filtre
10. Cuillère à d ser avec tasseur (p ur
express )
11. Plateau chauffe-tasses
12. B ut n de réglage de vapeur
13. Buse
14. Emb ut de la buse
15. Grille d'ég uttage am vible
16. P rte-filtre (p ur express )
17. Filtre (p ur express )
18. Manette
19. P ignée
20. Cuillère à d ser p ur café filtre
Downloaded from www.vandenborre.be
17
Panneau de commande
1. Tém in lumineux marche/arrêt (r uge) p ur café filtre
2.
Tém in lumineux d'heure (jaune)
3. Tém in lumineux d'express (vert)
4. Tém in marche/arrêt (r uge) p ur express
5.
Tém in lumineux de vapeur (vert)
6.
B ut n marche/arrêt (café filtre)
7. HOUR (heures)
8. MIN (minutes)
9. PROG (pr gramme)
10. / T uche express /vapeur
11. PUMP (p mpe)
12.
B ut n marche/arrêt (express )
AVANT LA PREMIÈRE UTILISATION DE L'APPAREIL
Déballez délicatement l'appareil et enlevez t us les matériaux d'emballage.
Fr ttez l’appareil avec un chiff n légèrement imbibé d'eau. Séchez bien.
Il est rec mmandé de laver les deux systèmes (café filtre + express ) avant la première utilisati n
de l'appareil.
• Système pou café filt e: Remplissez le réserv ir avec de l'eau fr ide et suivez les instructi ns
c mme p ur faire du café filtre (d nc sans café en p udre); faites au m ins deux carafes de cette
manière.
• Système pou exp esso: Remplissez le réserv ir avec de l'eau fr ide et suivez les instructi ns
c mme p ur faire de l'express u du cappuccin , d nc sans café et avec de l'eau au lieu du lait;
faites au m ins quatre tasses de cette manière.
Downloaded from www.vandenborre.be
18
PRÉPARATION DE CAFÉ FILTRE
Branchez l'appareil. L'écran affiche "12:00".
1. Ouvrez le c uvercle du réserv ir.
2. Remplissez le réserv ir avec de l'eau, en utilisant c mme p ints de repère les traits de niveau
d'eau; ne remplissez jamais le réserv ir au-delà du niveau MAX de 10.
• Les traits de niveau d'eau c rresp ndent aux mêmes traits indiqués sur la carafe; ils
représentent le n mbre de tasses de café à préparer.
• Une partie de l'eau reste fixée au café en p udre, tandis qu'une autre partie est perdue s us
f rme de vapeur; raj utez une petite quantité d'eau au début p ur c mpenser cette perte.
3. Placez le filtre en nyl n dans le p rte-filtre, en v us assurant qu'il est m nté c rrectement.
Faute de qu i, le c uvercle du réserv ir ne peut pas se fermer.
4. Mettez un filtre en papier (n n f urni) de taille 4-10 tasses dans le filtre en nyl n.
5. Mettez la quantité s uhaitée de café en p udre dans le filtre en papier, à l'aide de la cuillère à
d ser f urnie.
• Mettez une cuillère rase de café en p udre (s it env. 5 g) p ur chaque tasse.
6. Refermez le c uvercle du réserv ir et placez la carafe sur la plaque chauffante.
7. Appuyez deux f is sur . Le tém in r uge (
)
s'allume, indiquant que la préparati n de café est en c urs.
8. Quelques instants plus tard, le café d it c mmencer à
s'éc uler du p rte-filtre.
• V us avez la p ssibilité d'enlever la carafe au c urs de
la préparati n. Cela interr mpt l'éc ulement du café à
partir du p rte-filtre, mais pas la préparati n du café
pr prement dite. Veillez cependant à ne pas enlever la
carafe pendant plus de 30 sec ndes, faute de qu i le
p rte-filtre risquerait de déb rder.
• Bien que v tre machine à café s it équipée de cette
f ncti n, n us ne v us rec mmand ns pas de verser
du café avant qu'il ne s it entièrement passé car s n
g ût risquerait d'en être affecté.
• Il est n rmal que l'appareil pr duise de la vapeur
quand la préparati n de café est en c urs.
9.Afin de garder le café au chaud une f is la préparati n terminée, laissez la carafe sur la plaque
chauffante.
• L'appareil est c nçu p ur garder le café au chaud envir n 30 minutes, après qu i il s'éteint
aut matiquement.
10.P ur éteindre l'appareil, appuyez sur . Le tém in r uge s'éteint (
)
.
Downloaded from www.vandenborre.be

19
P og ammation de déma age automatique
L'appareil peut être pr grammé p ur préparer du café filtre aut matiquement.
Imagin ns qu'il est 8:10 et que v us s uhaitez lancer la préparati n du café à 13:10.
C mmencez par régler l'h rl ge c rrectement.
Réglage de l'ho loge en fo mat 24 h
1. Appuyez sur PROG.
• L’écran indique "CLOCK" (h rl ge).
2. Pendant que l'écran indique "CLOCK", réglez l'h rl ge en appuyant sur les t uches HOUR et MIN
le n mbre de f is nécessaire.
• P ur accélérer la vitesse du réglage, v us p uvez garder le d igt sur les t uches HOUR/MIN:
les chiffres défiler nt plus vite.
3. Une f is l'h rl ge réglée, c nfirmez en appuyant sur PROG
.
• L’écran indique maintenant "TIMER" (h rl ge).
Réglage de déma age diffé é
4. Pendant que l'écran indique "TIMER", réglez l'heure de
départ s uhaitée en appuyant sur les t uches HOUR et MIN
le n mbre de f is nécessaire.
5. Une f is l'heure de départ différé réglée, appuyez une f is sur .
• Le tém in jaune ( ) s'allume.
• Au b ut d'un instant, l'écran affiche l'heure en c urs. Appuyez deux
f is sur PROG p ur vérifier l'heure de départ réglée.
6. Une f is arrivée l'heure en questi n, l'appareil lance aut matiquement la préparati n de café.
• Le m t TIMER disparaît de l'écran.
REMARQUE :
• P ur annuler la f ncti n de démarrage aut matique, appuyez deux f is sur .
• P ur changer une heure de départ déjà définie, réglez la n uvelle heure en suivant les étapes 1 à
6 ci-dessus.
PRÉPARATION D'EXPRESSO
Un express ne se prépare pas de la même manière que du café classique. L'appareil f ncti nne
s us pressi n: il p rte l'eau à ébulliti n puis la p usse à travers le café filtre dans un intervalle de
temps très bref.
Attention: Ne laissez jamais l’appareil sans surveillance pendant qu'un express est en c urs de
préparati n.
Downloaded from www.vandenborre.be
Table of contents
Languages:
Other Proline Coffee Maker manuals

Proline
Proline RETROC User manual

Proline
Proline CBE18 User manual

Proline
Proline TCF12 User manual

Proline
Proline EXP1050 User manual

Proline
Proline CM75SS User manual

Proline
Proline EXP1500 User manual

Proline
Proline STCM15P User manual

Proline
Proline CM75 User manual

Proline
Proline PCM11N User manual

Proline
Proline KCM8 User manual