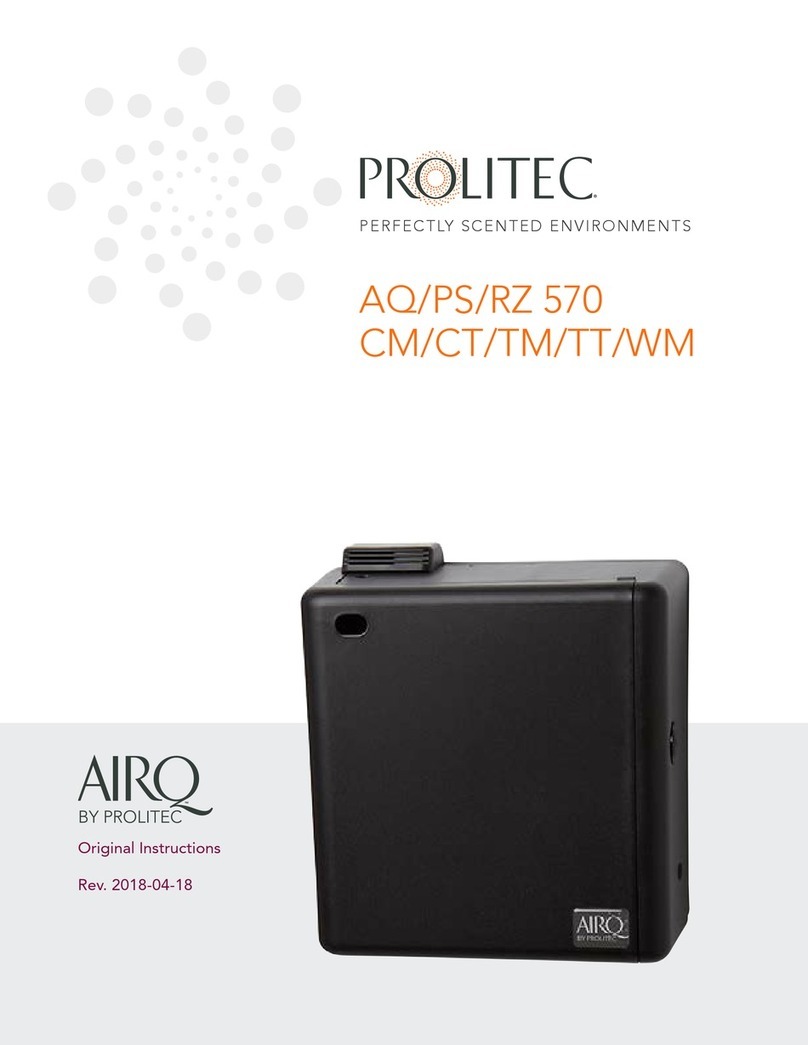
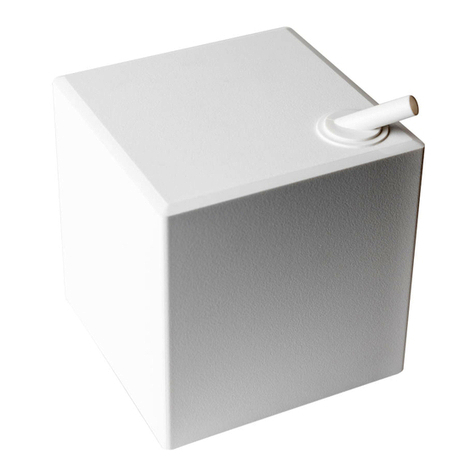
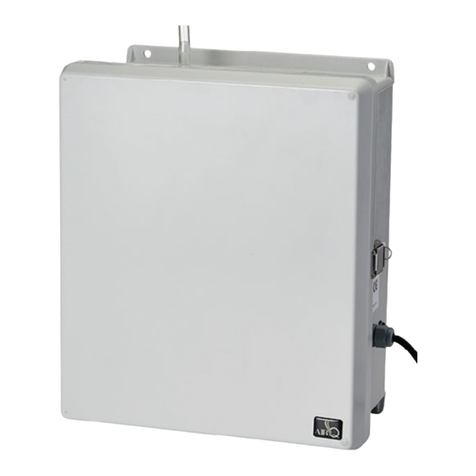
Prolitec AirQ 380 User manual

AirQ 380/580
PERFECTLY SCENTED ENVIRONMENTS
Original Instructions
Rev. 2018-04-10

AirQ 380/580 2
Contents
Chapter 1: IMPORTANT SAFETY
INSTRUCTIONS
Appliance Precautions
Fragrance Cartridge Precautions
FCC Statement – Class B Digital Device
Chapter 2: About AirQ 380/580
Chapter 3: Unpacking
Chapter 4: MOVING AND STORAGE
INSTRUCTIONS
Chapter 5: INSTALLATION
General
Location
Service Area
Colors
Estimating Cartridge Life
AQ580 Room-Size Table
AQ380 Room-Size Table
Appliance Location
Wall Mounting
The Electrical Source
Mounting Kit, Parts & Tools
Positioning the Mounting Bracket
Installing the Top Anchors
Marking the Bottom Anchor Holes
Drilling the Bottom Anchor Holes
Hanging the Mounting Bracket
Positioning the Appliance
Fitting the Appliance in Place
Mounting the Appliance in Place
Chapter 6: SCENXUS INSTALLATION
Connecting the System
Controlling the Appliance Remotely
Chapter 7: OPERATING INSTRUCTIONS
Features and Controls
Setting Up the Cartridge
Programming the Appliance
Using the Online USB Programming Tool
Setting Scent Intensity
Scent Control
Chapter 8: Plume Dispersion Fan
Chapter 9: Special Concerns for Track-
Light Mounted Appliances
Chapter 10: USER MAINTENANCE
Cartridge Change
Cartridge Change Maintenance Checklist
Items
Changing an Appliance
General Care
Chapter 11: Applications
Ambient Scenting
Product Marketing
Odor Control
Aromatherapy and Performance Scenting
Chapter 12: Frequently Asked Questions
Chapter 13: Specifications

AirQ 380/580 3IMPORTANT SAFETY INSTRUCTIONS
IMPORTANT SAFETY INSTRUCTIONS
The most up-to-date version of this manual is available for download at airqmanuals.com
IMPORTANT SAFETY INSTRUCTIONS – SAVE THESE INSTRUCTIONS
Appliance Precautions
1. WARNING – When using electric products, basic precautions should always be followed,
including the following:
• Read all the instructions before using the product.
• Children should be supervised not to play with the appliance.
• Do not put ngers or hands into the product.
• The appliance must be operated in an upright or vertical position.
• The appliance should not be used with the door in the open position. The door is opened only
to perform a cartridge or program change.
• Never put your nose to the output of the AQ380/580. Within 12 inches of the output, the
fragrance is highly concentrated. The improper inhalation of high concentrations of fragrance
may cause irritation including watery eyes, headache, cough and upper respiratory discomfort.
• This appliance is not intended for use by persons (including children) with reduced physical,
sensory or mental capabilities, or lack of experience and knowledge, unless they have been
given supervision or instruction concerning use of the appliance by a person responsible for their
safety.
2. INSTRUCTIONS PERTAINING TO A RISK OF FIRE, ELECTRIC SHOCK, OR INJURY TO PERSONS
• The appliance is built to be plugged into an 110VAC or 220VAC power outlet. Must be used only
with the approved and included power supply. The UL and CE compliant power supply converts
power to 15VDC to power the appliance. The appliance must only be supplied at Safety Extra
Low Voltage (SELV).
• If the supply cord is damaged, it must be replaced by the manufacturer, its service agent, or
similarly qualied persons in order to avoid a hazard.
• Unplug before cleaning.
• To reduce the risk of electric shock, the appliance should only be plugged into a properly
grounded outlet box. If there is any doubt as to whether an outlet box is properly grounded, a
qualied electrician should be consulted.
• It is recommended that the user remove the appliance from the wall to test and reset the GFCI
outlet on a regular basis.
1

AirQ 380/580 4IMPORTANT SAFETY INSTRUCTIONS
Fragrance Cartridge Precautions
• Use only AirQ by Prolitec fragrance cartridges.
• Read the Consumer Product Safety Information Sheet and the Material Safety Data Sheet
provided with each shipment of Cartridges. Insure that these information sheets are available for
review by employees.
• Use latex gloves to handle a Cartridge to avoid the liquid getting on hands. The AirQ fragrances
are formulated so as to not be harmful in contact with the skin, but the concentrated nature of
the fragrances may make the scent difcult to remove from hands and skin.
• Wash your hands after all contact with Cartridges or fragrance.
• While AirQ Air Treatment Agents do not contain ingredients deemed harmful to the skin, if there
is skin contact, wash with soap and water. If there is contact with the eyes, irrigate the eye with
fresh water for 5 minutes. If there is any eye irritation, consult a physician immediately.
FCC Statement – Class B Digital Device
This device complies with Part 15 of the FCC Rules. Operation is subject to the following two
conditions: (1) this device may not cause harmful interference, and (2) this device must accept any
interference received, including interference that may cause undesired operation.
NOTE: This equipment has been tested and found to comply with the limits for a Class B digital
device, pursuant to part 15 of the FCC Rules. These limits are designed to provide reasonable
protection against harmful interference in a residential installation. This equipment generates, uses,
and can radiate radio frequency energy. If not installed and used in accordance with the instructions,
this equipment may cause harmful interference to radio communications. However, there is no
guarantee that interference will not occur in a particular installation. If this equipment does cause
harmful interference to radio or television reception, which can be determined by turning the
equipment off and on, the user is encouraged to try to correct the interference by one or more of the
following measures:
• Reorient or relocate the receiving antenna.
• Increase the separation between the equipment and receiver.
• Connect the equipment into an outlet on a circuit different from that to which the receiver is
connected.
• Consult the dealer or an experienced radio/TV technician for help.
Modications not expressly approved by the manufacturer could void the user’s authority to operate
the equipment under FCC rules.
1

AirQ 380/580 5About AirQ 380/580
About AirQ 380/580
Welcome to a whole new world of air treatment from Prolitec, the technology leader in air care
with scent. The AQ380 and AQ580 appliances are the most advanced commercial air-treatment
systems on the market today. It is the world’s rst fully adjustable commercial air-treatment system
engineered to serve indoor spaces.
AQ380/580 is a patented, computer-controlled, always-on system capable of main-taining a constant,
uniform and controlled level of scent or odor neutralizer. The basic technology of the AQ380/580 has
been tested and proven in demanding commercial environments such as retail stores, malls, hotel
lobbies and other public spaces where scent is used to enhance the environment, market a product, or
erase an odor.
The AQ380/580 is managed by an on-board computer that is fully adjustable, enabling intensity
settings to match space sizes from 200 to 30,000 cubic feet (10-850 cubic meters) per appliance.
The AQ380, meanwhile, is fully adjustable to match space sizes from 200 to 15,000 cubic feet (10 to
425 cubic meters). Both appliances are programmable, capable of executing 21 distinct start and
stop times, repeatable daily or weekly. Utilizing up to 21 programs and the full range of 50 intensity
settings allows you to optimize the fragrance levels depending on peak and non-peak occupancy in
the space. This new feature can save you money on fragrance AND service visits. Multiple appliances
can work together in the same space.
The classic design blends well into any environment. AQ380 and AQ580 come standard in Textured
True Black or Eggshell White. At sufcient order quantities, AQ380 and AQ580 can be supplied
in a custom color. AQ380 and AQ580 can also be concealed in a xture, cabinet or behind a wall-
mounted shroud to match any interior design.
AQ380 and AQ580 can use 100V to 240V AC power sources and come complete with plugs for local
power receptacles. AQ380 and AQ580 are designed to be mounted on a wall with a ush-mounted
power source behind it or can be congured for attachment to ceiling track-lighting systems, which
act as both a source of power and a method of attachment. With our tabletop kit added, your
appliance can be congured to stand alone on a at surface, and with our cable tie kit, it can be
strapped to a support pillar.
AQ380 and AQ580 are simple to install and program for specic room size, airow conditions,
and desired scent intensity. Minimal maintenance is required beyond the periodic change of the
disposable fragrance cartridge, inspection and annual replacement of two o-rings, and a simple wipe
down or dusting of exterior surfaces. Once installed in the right location, AQ380 and AQ580 will
outperform any other system, providing completely uniform scent distribution.
Prolitec’s AirQ advanced technology creates a scent effect with a smaller quantity of fragrance
ingredients than any other method. The chemicals employed in making AQ380 and AQ580
fragrances are fully compliant with the most restrictive air-quality and inhalation standards. AQ380
and AQ580 generate no harmful VOCs and use no ethanol or propellants. Quite simply, used as
directed, this appliance is the greenest, most eco-friendly way to introduce scent into an interior
space with no negative impact on indoor air quality. This is not an accident. The scientists and
engineers at Prolitec are committed to the highest ecological and human safety standards.
This User Guide is easy to read. It is also important to read. AQ380/580 is a high-performance
appliance that, installed and used correctly, will meet the most demanding requirements.
2

AirQ 380/580 7MOVING AND STORAGE INSTRUCTIONS
MOVING AND STORAGE INSTRUCTIONS
1. Remove the cartridge.
2. Unscrew and remove the long round-head screws in the lower corners.
3. Lift the appliance upward, off the mounting posts.
4. Unplug the appliance.
5. Unscrew the mounting plate.
6. Store at -4°F (-20°C) to 158°F (70°C), 5% to 95% humidity
4

AirQ 380/580 8Installation
Installation
General
Location
AQ380 and AQ580 are designed for permanent installation on wall surfaces over a 110 to 240V outlet
(Fig. 1), mounted to a ceiling track-lighting system (Fig. 2), used as a table- or shelf-top unit (Fig. 3) or
strapped to a column or pillar (Fig. 4).
Service Area
The service area range of AQ580 is from 200 to 30,000 cubic (10 to 850 cubic meters). The service
area range of AQ380 is from 200 to 15,000 cubic feet (10 to 425 cubic meters). Of course this can
vary signicantly depending on airow, number of fresh air changes per hour, temperature, humidity
and desired service interval. AQ380 and AQ580 can be adjusted from 1 to 50 to accommodate these
variations.
Colors
AQ380 and AQ580 come standard in black or white, and can be special ordered in any color.
Fig. 1 Fig. 2 Fig. 3 Fig. 4
5

AirQ 380/580 9Installation
Estimating Cartridge Life
Estimating how long a cartridge will last and the number of days between services is critical to
performing an installation that can be serviced efciently. This includes determining the number of
AQ380 and AQ580s needed for a space. Please refer to AirQ’s ‘S4 (Sizing, Service & Success) Tool,’
available at AirQ Tools. The chart below can be used as a rough guideline for sizing.
AQ580 Room-Size Table
Normal Off-Cycle
(NOC)
Short Off-Cycle
(SOC)
Very Short Off-Cycle
(VSOC)
Output
Level
Range
Room Volume Range Room Volume Range Room Volume Range
CFT CM CFT CM CFT CM
1-5 400 - 1600 11 - 45 1200 - 5000 34 - 142 4300 - 13300 122 - 376
6-10 2000 - 3500 57 - 99 6000 - 9400 170 - 266 15000 - 19400 425 - 549
11-15 3900 - 5500 110 - 156 10200 - 13300 289 - 376 20200 - 22800 572 - 645
16-20 6000 - 7900 170 - 224 14000 - 16700 396 - 473 23300 - 25000 659 - 708
21-25 8500 - 10700 241 - 303 17400 - 19800 492 - 560 25400 - 26600 719 - 753
26-30 11300 - 13700 320 - 388 20300 - 22400 574 - 634 26800 - 27700 758 - 784
31-35 14400 - 17100 408 - 484 22900 - 24700 648 - 699 27800 - 28500 787 - 807
36-40 17900 - 21000 507 - 594 25100 - 26700 710 - 756 28600 - 29100 809 - 824
41-45 21800 - 25200 617 - 713 27100 - 28500 767 - 807 29200 - 29600 826 - 838
46-50 26100 - 30000 739 - 849 28800 - 30000 815 - 849 29700 - 30000 841 - 849
These settings are suggested as a starting point. Start on the lower end of the range and adjust after
one hour. Fragrance type, room size, number of fresh air changes per hour, temperature, humidity
and user preference will determine the nal setting. Best practice is to use AirQ’s ‘S4 Tool’ at AirQ
Tools.
5

AirQ 380/580 10Installation
AQ380 Room-Size Table
Normal Off-Cycle
(NOC)
Short Off-Cycle
(SOC)
Very Short Off-Cycle
(VSOC)
Output
Level
Range
Room Volume Range Room Volume Range Room Volume Range
CFT CM CFT CM CFT CM
1-5 200 - 800 6 - 23 600 - 2500 17 - 71 2100 - 6700 59 - 190
6-10 1000 - 1700 28 - 48 3000 - 4700 85 - 133 7500 - 9700 212 - 275
11-15 1900 - 2800 54 - 79 5100 - 6600 144 - 187 10100 - 11400 286 - 323
16-20 3000 - 4000 85 - 113 7000 - 8400 198 - 238 11700 - 12500 331 - 354
21-25 4200 - 5300 119 - 150 8700 - 9900 246 - 280 12700 - 13300 359 - 376
26-30 5600 - 6900 158 - 195 10200 - 11200 289 - 317 13400 - 13800 379 - 391
31-35 7200 - 8600 204 - 243 11400 - 12400 323 - 351 13900 - 14200 393 - 402
36-40 8900 - 10500 252 - 297 12600 - 13400 357 - 379 14300 - 14600 405 - 413
41-45 10900 - 12600 308 - 357 13500 - 14200 382 - 402 14600 - 14800 413 - 419
46-50 13100 - 15000 371 - 425 14400 - 15000 408 - 425 14800 - 15000 419 - 425
These settings are suggested as a starting point. Start on the lower end of the range and adjust after
one hour. Fragrance type, room size, number of fresh air changes per hour, temperature, humidity
and user preference will determine the nal setting. Best practice is to use AirQ’s ‘S4 Tool’ at AirQ
Tools.
5

AirQ 380/580 11Installation
Appliance Location
1. Placement of your appliance is the KEY TO OPTIMAL PERFORMANCE. It is important to identify
a wall or track-light location where the output of AQ380 or AQ580 can use, rather than ght, the
natural air currents in a room.
2. Air currents in a room are determined by using a SMOKE TEST KIT available from Prolitec or any
source of smoke or vapor, such as a candle or match.
3. To conduct a smoke test, stand at the entrance of the room in front of the door and observe
the direction of the smoke or vapor. If the smoke drifts into the room your appliance should be
installed somewhere near the door.
See Figure 1. If the smoke drifts out of the room, the AQ380 or AQ580 appliance should be placed
on the wall furthest from the door. See Figure 2. If there is no clear direction that the smoke travels or
it travels upward into the air-conditioning return grill, nd a position near the air-conditioning supply
grill. See Figure 3.
NOTE: The location of AQ380 or AQ580 MUST NOT be near an HVAC return grill, exhaust fan or
vent, or an open door or window through which air is leaving the space. Remember, you want to
work with the natural air ow, not against it.
Figure 1
Smoke ows
away from door
Smoke Tube Smoke Tube
Figure 2
Smoke ows
back toward door
Figure 3
Smoke travels
toward grill
Smoke Tube
Wall-Mounting AQ380/AQ580
Step 1 – The Electrical Source
Before the AQ380 or AQ580 appliance can be mounted, a qualied electrician must install an
electrical outlet at the position you have decided to place the appliance. The appliance is then
mounted over the outlet and plugged in.
In some locations local codes or rules require that the main power source be located beside the
appliance. This will require a hardwiring kit. If the appliance is PERMANENTLY CONNECTED in this
way, a readily accessible disconnect device must be used. Consult with your electrician.
5

AirQ 380/580 12Installation
If it makes sense to plug the appliance into an outlet that is near, but not behind the appliance, a
rectangular, plastic wire-concealment conduit should be used (PN 10619).
Step 2 – Mounting Kit, Parts and Tools
The mounting kit provided includes a mounting plate, which holds the appliance to the wall, and 4
screws and wall anchors suitable for plastered drywall — 2 short at-head screws and 2 longer round-
head screws. If you have another surface you will need to get anchors suitable for the wall material
and screws that work with these anchors. The screws need to be the same length as the ones
provided — 2 long round-head screws and 2 short at-head screws. You will need the following tools:
1. A good level to help you make the mounting plate
exactly horizontal.
2. A hammer.
3. A Phillips screwdriver to match the screws provided
or whatever screwdriver matches the screws needed
to attach to the anchors you have chosen.
4. A pointy tool like a small screwdriver to insert through
the holes on the appliance to mark the right spot for
the anchors.
5. A Drill.
Step 3 – Position the Mounting Bracket
Plug in the power adapter to the top outlet. Place mounting bracket over the power adapter,
allowing for equal spacing between the top and both sides of the power adapter. (If hardwired or
plugged elsewhere, position the mounting bracket to the side of the power source). Use the level
to make sure the mounting bracket is horizontal. While holding the bracket level, use a pointy tool,
screw or screwdriver to mark the location of the top two wall anchors. Check again with the level to
ensure the bracket is horizontal.
5

AirQ 380/580 13Installation
Step 4 – Installing the Top Anchors
Set the mounting bracket aside. Use an electric drill to make a 1/8” hole at the exact location you
marked. This will serve as a guide for the anchors. Use a hammer to tap the anchors in far enough
so they stay well in position. Then screw them straight into the drywall. Avoid screwing them in at an
angle.
HINT: If you use an electric drill with a Phillips driver
head, make sure the head ts the anchor perfectly, as
the anchor or screw can strip easily. Set the drill to a
slow rotation.
Step 5 – Marking the Bottom Anchor Holes
Now you can mark the holes for the bottom anchors using the mounting bracket as a template. Hold
the mounting bracket in place and screw the at-head screws half way into the top anchors. This will
prevent the bracket from moving. Now use the pointy tool to mark the location for the two bottom
anchors. Unscrew the top screws and set the bracket aside.
Step 6 – Drilling the Bottom Anchor Holes
Drill a 1/8” hole as the guide for the anchors at the exact spot you have marked. Hammer the
anchors in just enough to set them in place, then screw them in straight.
5

AirQ 380/580 14Installation
Step 7 – Hanging the Mounting Bracket
Hang the mounting bracket by holding the bracket so the top holes match up with the anchors, then
screw the 2 at-head screws through the hole in the bracket into the anchors. Tighten the screws
rmly, but do not crack the bracket.
Step 8 – Positioning the Appliance
Take the power supply and plug the round plug into the hole that is located in the recess on the back
of the appliance.
The power-supply block can accommodate several different plugs for various countries. Install the
correct one and plug it into the wall receptacle.
Some installations do not accommodate mounting of the appliance over a power outlet. In this case,
untie the power cord and extend it to a nearby outlet using a conduit (not included - PN 10619) to
conceal and keep it out of reach. An outlet cover may also be used over the adapter.
NOTE: Remember that the standard installation is to position the appliance right over the power
source, storing the power-supply block and the power cord in the recess in the back of the appliance.
To make this easy, do not untie the power cord and take just enough wire to make the connection.
Plug Location
5

AirQ 380/580 15Installation
Step 9 – Fitting the Appliance in Place
Place the appliance so that the big holes in the top of the back cover t over the rounded locking
posts. In doing this, make sure the appliance is ush with the wall and the posts are in the holes of
the appliance. Slide the appliance downward to lock on the posts. Sometimes this slide requires a
slight tap on the top of the appliance with your hand.
Step 10 – Mounting the Appliance in Place
Now unlock and open the door and insert the long round-head screws into the holes in the lower
corners and into the anchors. Tighten the screws rmly.
5

AirQ 380/580 16ScenXus Installation
ScenXus Installation
Connecting the System
1. Unpack the appliance as normal, but do not plug it in yet.
2. Remove the extra labels from the Scenxus module.
3. Adhere the remaining ScenXus label inside the appliance door, adjacent to the serial number,
and take a photograph.
6

AirQ 380/580 17ScenXus Installation
4. Attach the ScenXus module to the appliance by pressing the connector into place.
5. While remaining in the approximate installation location of the appliance, open “settings”
on your smart phone and locate “Wi-Fi settings.”
6. Under “Wi-Fi settings,” make sure you see the network that will provide ScenXus internet access.
6

AirQ 380/580 18ScenXus Installation
7. Install the appliance normally, with ScenXus still attached next to the DC jack.
8. Power on the appliance and look for the rmware on the display.
9. The network icon will blink .
10. Refresh the list of Wi-Fi networks on the phone until you see a network titled “ScenXus...”
6

AirQ 380/580 19Chapter 5 ScenXus Installation
11. Connect your smart phone to the network named “ScenXus...”
On most iPhones, you will be redirected to a list of other networks. On most Android phones,
you will either need to select “manage router” or open a web browser and enter the IP address
192.168.0.1 to see the list of networks.
12. Connect to the network that will provide ScenXus with internet access.
13. Type in the password for your wireless router.
14. Wait as your smart phone disconnects from ScenXus, ScenXus connects to the router, and the
router connects to the internet. When ScenXus is connected to the cloud, you’ll see the
message: “connection complete.”
15. The network icon should stop ashing and Wi-Fi signal strength should appear .
6

AirQ 380/580 20ScenXus Installation
Controlling the Appliance Remotely
conrm your account. Be sure to check your junk and spam folders.
2. On your iPad or Laptop, go to scenxus.com and sign in using your email address and the
aforementioned token.
3. Depending on your account, you will see a slightly different version of this homepage.
6
This manual suits for next models
1
Table of contents
Other Prolitec Accessories manuals
Prolitec
Prolitec AirQ AQ570 User manual
Prolitec
Prolitec AirQ AQ550 User manual
Prolitec
Prolitec AirQ AQ150 User manual
Prolitec
Prolitec AirQ AQ1200 User manual
Prolitec
Prolitec AQ1570 User manual
Prolitec
Prolitec AirQ AQ1200WHTTT-SS User manual
Prolitec
Prolitec GENIE User manual
Prolitec
Prolitec AirQ 1570 User manual
Prolitec
Prolitec AirQ 270 TT User manual
Prolitec
Prolitec AirQ 1280 User manual

