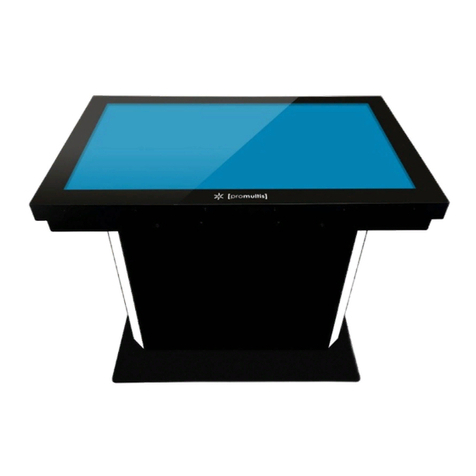
PROMULTIS unotable User manual

For more exciting multitouch products visit
www.promultis.info
or call +44 (0) 239 251 2794
MULTITOUCH SOLUTIONS
unotable
U S E R ’ S M A N U A L
CAUTION
• Changes or modications not expressly approved by the party responsible
for compliance could void the user’s authority to operate the equipment.
• This User’s Manual includes detailed usage instructions for your product.
• Please read this manual thoroughly.
• Figures and illustrations in this User Manual are provided for reference only
and may differ from actual equipment appearance. Equipment design
and specications may be changed without notice.
• Due to the processes required for manufacturing a large format Projected
Capacitive product Promultis will only accept warranty requests for units
that have a blemish, mark or smear on the touch skin that is 5% or larger
than the total interactive area.

For more exciting multitouch products visit
www.promultis.info
or call +44 (0) 239 251 2794
MULTITOUCH SOLUTIONS
touch screen
2
USB Memory Stick with
Promultis User Manual pdf
Warranty Card Remote Control Promultis Manual
HDMI Cable AC Power Supply USB Cable
Getting started
The following items are included in your
product box.

For more exciting multitouch products visit
www.promultis.info
or call +44 (0) 239 251 2794
MULTITOUCH SOLUTIONS
touch screen
3
Start the device
1. Check the plug is switched on at the wall socket.
2. When the power is turned on the screen should power up.
3. After a few seconds, if the screen is still blank, take the TV
remote control, point towards the bottom center of the screen
and press the power button.
4. Please note: The connection sensor varies on different models
and, if necessary, move the controller along the base of
the device while presseing the power button until the screen
turns on.

For more exciting multitouch products visit
www.promultis.info
or call +44 (0) 239 251 2794
MULTITOUCH SOLUTIONS
touch screen
4
Controller for Samsung
CH LIST
MUTE
POWER
SOURCE
ON/OFF
PRE-CH
@TV
INTERNET
MENU
CONTENT
TOOLS
RETURN
MEDIA.P
FAV.CH P.SIZE
CC
A B C D
MTS
EXIT
INFO
YAHOO!
Turns the TVon and off.
Returns to the previous channel.
Cuts off the sound temporarily.
Displays the channel list on thescreen
.
Changes channels.
Turns the remotecontrol light on or
off. When on, the buttons become
illuminated for a moment when pressed.
(Using the remotecontrol with this button
set to off will reduce the battery usage
time.)
Link to various internet services .
Displays information on the TV screen.
Selects the on-screen menu items and
changes the values seen on the menu.
Exits the menu.
MEDIA.P: DisplaysMedia Play
YAHOO!: Runs Yahoo widget!
MTS: Press to choose stereo, mono
or Separate Audio Program (SAP
broadcast)
FAV.CH: Displays Favorite Channel Lists
on the screen
P.SIZE: Selects the picture size
CC: Controls the caption decoder
Displaysand selects the available video
sources
Press todirectly access channels.
Press toselect additional channels
(digital) being broadcasted by the same
station. For example, to select channel
“54-3”, press “54”, then press “-” and
“3”.
Adjusts the volume.
Brings up the OSD.
Displays theContent View, which
includes Channel List, Internet@TV,
Media Play and AllShare.
Quickly select frequently used functions.
Returns to theprevious menu.
These buttons are for theChannel list,
Internet@TV, Media Play menu, etc.
Use these buttons inMedia Play
and Anynet+ (HDMI-CEC) modes
.
( : Controls recording for Samsung
recorders that have the Anynet+
feature)

For more exciting multitouch products visit
www.promultis.info
or call +44 (0) 239 251 2794
MULTITOUCH SOLUTIONS
touch screen
5
Power cable
1. The Power cable MUST be fed out through the
opening in the base plate of the Kiosk.
2. The Uno Table should be tilted backwards and the
power cable fed out of the Table sideways* as shown.
3. Please note that the base has two bars under the
base which means that the cable can not be fed out
via the back or front of the kiosk.
*Please feed out cable sideways to avoid damage to the Kiosk
and cable.
Promultis Table setup proceedure for power cable

For more exciting multitouch products visit
www.promultis.info
or call +44 (0) 239 251 2794
MULTITOUCH SOLUTIONS
touch screen
6
Connect to PC for touch
1. In order for the touch to work on the screen the HMDI and USB
cables MUST be connected to a PC.
2. The touch driver is pre-installed.
3. If the touch requires further calibaration tap on the Displax
Connect icon to open conguration tool (see page 7)
HDMI USB

For more exciting multitouch products visit
www.promultis.info
or call +44 (0) 239 251 2794
MULTITOUCH SOLUTIONS
touch screen
7
Screen Cleaning
Over time and use the screen will
become tarnished with nger prints;
to clean a mist spray class cleaner /
degreaser should be used when the
screen is at a 45 degree angle. Should
any liquid be dropped on the screen
when it is in the horizontal position this
should be mopped up with a liquid
absorbent cloth prior to cleaning.
Operation Guidance
When using the screen the gesture
functions are similar to using your touch
screen phone or tablet but on a much
larger scale.
What has to be born in mind when using
a large scale interactive touch screen is
how the technology works.

For more exciting multitouch products visit
www.promultis.info
or call +44 (0) 239 251 2794
MULTITOUCH SOLUTIONS
touch screen
8
Skin Ultra has all the following features.
If you have Skin Fit or Skin Dualtouch some features may not be available, whenever a
feature is not available, a note is provided.
A. Stand by: the touch is temporally disabled when opening the control panel.
This way, if you want to adjust a setting you will be able to do it without the touch being
active. When you close ‘DISPLAX Connect’ the touch injection will be automatically
re-enabled and the STAND-BY status will change to ON. This stand-by status is only
active when ‘DISPLAX Connect’ is open.
B. Product designation.
C. Firmware version.
D. Product serial number.
E. Label: you can attribute a label to the touch controller.
F. Touch Injection Status: touch injection to the Operating System has 3 modes:
ON: Operating system will receive touch events from the Skin.
Displax Connect: index of features

For more exciting multitouch products visit
www.promultis.info
or call +44 (0) 239 251 2794
MULTITOUCH SOLUTIONS
touch screen
9
OFF: Operating system will not receive touch events from the Skin.
STAND-BY: Operating system will temporarily not receive touch events from the Skin.
This way, if you want to adjust some setting you will be able to do it. When you close
‘DISPLAX Connect’ the touch injection will be automatically re-enabled and the STAND-
BY status will change to ON. This stand-by status is only active when ‘DISPLAX Connect’
is open.
G. Conguration wizard: automatically congures the touch parameters i.e. Gain,
Threshold, Shield level. If the conguration wizard fails the touch parameters must be
congured manually. Conguration Wizard is not available for Skin Dualtouch.
Settings
H. Settings tab: touch conguration settings.
H1. Gain: adjusts the signal strength injected by the Touch Controller on the Touch
Sensor - thicker glasses and bigger Touch Sensors may require a stronger signal (higher
GAIN values). Gain values range between 0 and 7.
H2. Threshold: adjusts the threshold level of what is considered a touch. Values vary
between 0 and 50 starting on rmware version 1.5.0. (0 to 15 on rmware version equal
or previous to 1.4.0).
H3. Shield: electromagnetic shielding reduces noise that may exist between the
Skin product and the LCD. Shielding level ranges between 1 and 6, with 6 being the
strongest shielding level. The shielding level should be maintained as low as possible.
H4. Palm: allows the rejection of areas with dimensions larger than a nger, such as a
hand or an arm. (Feature not available in Skin Dualtouch).
H5. Sensor tools: Allows enabling and disabling horizontal and vertical electrodes and
the selection of areas to be activated or deactivated within the touch sensor active
area.
H5.1. Trash: reactivates the electrodes or electrode portions that we have deactivated.
H5.2. Rectangle selection: Enables drawing rectangular areas to be deactivated.

For more exciting multitouch products visit
www.promultis.info
or call +44 (0) 239 251 2794
MULTITOUCH SOLUTIONS
touch screen
10
H5.3. Rectangular eraser: Allows the selection of areas to be reactivated.
H5.4. Draw selection: With the draw selection you can select parts of the active
area to be disabled.
H5.5. Draw eraser: With the draw eraser you can select parts of the active area
to be enabled.

For more exciting multitouch products visit
www.promultis.info
or call +44 (0) 239 251 2794
MULTITOUCH SOLUTIONS
touch screen
11
I. Calibration: Geometrical calibration process to match the physical touch with the
Operating System digital coordinates.
I1. Screens: select the display where you want to perform
the geometric calibration.
I2. Calibrate: Click the button to start the geometric calibration.
For most scenarios 4 calibration points are more than enough.
I3. + Advanced geometric calibration.
I4. Calibration points: Number of points used to perform the geometric
calibration. Please refer to the advanced calibration chapter.
I5. Drag mode: Calibration of a touch sensor smaller than the LCD.
Please refer to the advanced calibration chapter.
Calibration

For more exciting multitouch products visit
www.promultis.info
or call +44 (0) 239 251 2794
MULTITOUCH SOLUTIONS
touch screen
12
J. Advanced tab: advanced conguration tools.
J1. Optimization: establishes a balance between Touch speed
and Touch precision.
J2. Number of touches: limits the number of touches reported by the Touch
Controller (Skin Ultra: between 1 to 100 touches; Skin Fit: 1 to 40 touches; Skin
Dualtouch: 1 or 2 touches). This feature is available depending on the Touch
Controller version and rmware you are using.
J3. Load settings le: allows loading previously saved conguration les. The user
must wait 10 seconds after changing settings, before changing to other settings,
in order to correctly save them into the controller.
J4. Save current settings to le: Allows saving the current settings to be used in
other congurations. This feature should be used with equivalent setups, i.e. same
LCD, glass thickness and size, sensor size and air gap. Note that there may
be other sources of electromagnetic interferences on each setup, and the
settings may have to be adjusted.
J5. Load rmware: allows to load a rmware le to the Touch Controller.
This feature can be used when there is no internet access onsite, if you have
internet access you do not need to use this feature.
J6. Factory reset: sets the Touch Controller to its default settings.
View options
K. View options:
K1. Touches: enables and disables touch recognition.
K2. Frame: represents electromagnetic interferences over the touch sensor.
K3. Frame color: choose between, a white, black or green frame.
K4. Full screen: expand the view of the touch sensor active area.
Advanced
Other manuals for unotable
1
Table of contents
Other PROMULTIS Touch Panel manuals
Popular Touch Panel manuals by other brands
Extron electronics
Extron electronics SMK 2 installation guide
IEI Technology
IEI Technology IOVU-210AD-RK39 user manual

Crestron
Crestron Isys TPS-4000 Operation guide
Extron electronics
Extron electronics TLP Pro 720M Setup guide

Foresight Sports
Foresight Sports FTP10 Installation and operation guide

Transtech
Transtech PQI 301 Operator's handbook
