5. Fit the new Spring over the Collet inside the Closing Sleeve (see figure 4)
and screw the Collet thread through the Spring Retainer and into the Spindle
(see figure 5).
6. Secure the Collet using the 3/32” hex key through the hole in the brass
Collet and rotate it clockwise to tighten the Collet. The Collet should be firmly
fitted but not overtightened. Only apply light pressure when tightening.
Note: A loose fitted Collet may overheat and damage the PROPEL Torch.
7. Refit the Shroud and the Brush before use.
Note: The Collet should be checked regularly to ensure it has not become
loose. When correctly fitted, there should be a 1/25” gap between the Closing
Sleeve and the Spring Retainer (see figure 3). The Closing Sleeve should move
to touch the Spring Retainer and spring back.
The PROPEL Collet is a consumable item which may last for approximately 20
Brushes. Replacement Collet Assemblies are supplied with a Spring which
should be replaced with the Collet.
1. Remove the Brush as previously described from the PROPEL Torch.
2. Wind the Collet back slightly by turning the Drive Sleeve half a turn
anti-clock wise.
3. Remove the Shroud by unscrewing it anti-clockwise.
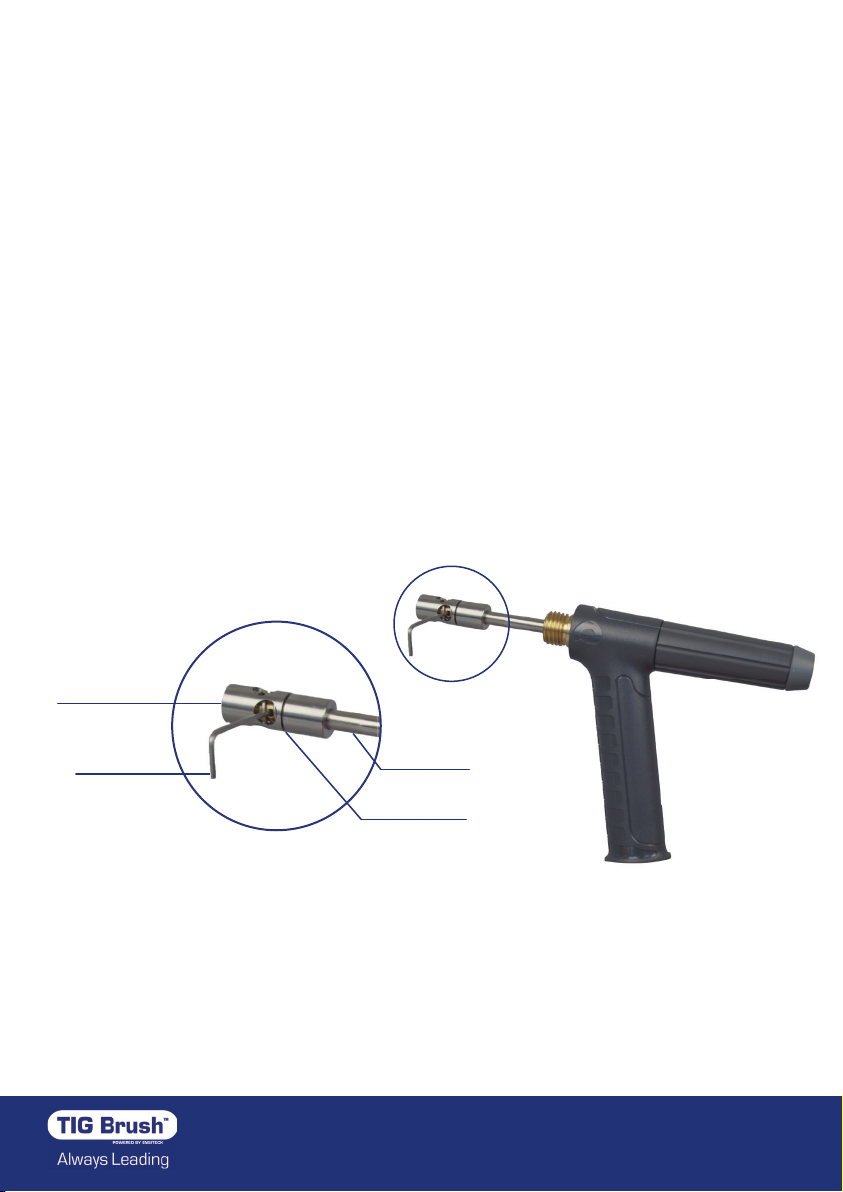
4. Use a tool, such as a 3/32” hex key, through the side hole in the Collet.
Rotate it anti-clockwise to undo the Collet (see figure 3).
Note: You may need to rotate the Closing Sleeve to expose the hole in the
Collet side.
Replacing the Collet Assembly
Hex Key Spindle
Figure 3
1mm Gap
Closing Sleeve
7