SAFETY PRECAUTIONS
HELICOPTER WARNING:
The helicopter blades revolve at high speeds and can harm the user, other people, and animals. Stand away from the helicopter to
reduce the risk of getting into the flight path. Warn others that you will be flying your helicopter so that they are aware of its
position. Before flight, inspect the rotor blades to make certain that the blades are securely fastened to the helicopter.
WARNING!
• Choking/Cutting Hazard. Small Parts/Sharp Rotor Blades.
• Keep hands, hair and loose clothing away from the propeller when the power switch is turned to the ON position.
• Turn off the transmitter and helicopter power switches when not in use.
• The remote control charger is built specifically for the helicopters Li-Poly battery. Do not use it to charge any other battery.
• New alkaline batteries are recommended for maximum performance.
• Parental supervision recommended when flying helicopter.
BATTERY WARNINGS
RECHARGEABLE BATTERY:
This helicopter uses an internal Li-Poly rechargeable battery and is not replaceable. If battery no longer stays charged, dispose of
battery properly according to local disposal requirements.
CONTROLLER BATTERIES:
Remote control requires 6 “AA” batteries (not included). Please read the important battery safety warning below.
• Do not mix alkaline, standard (carbon-zinc) and rechargeable batteries (Nickel Metal Hydride).
• Do not mix old and new batteries.
• Non-rechargeable batteries are not to be recharged.
• Rechargeable batteries are to be removed from the item before being charged (if removable).
• Rechargeable batteries are only to be charged under adult supervision.
• Exhausted batteries should be removed immediately and must be recycled or disposed of properly according to state or local
government ordinances and regulations.
• The supply terminals are not to be short-circuited.
• Only batteries of the same or equivalent type as recommended are to be used.
• Batteries are to be inserted with the correct polarity (see inside booklet for diagram).
• Do not dispose batteries in a fire - batteries may leak or explode.
CARE AND MAINTENANCE
• Always remove the batteries from the wireless infrared remote control when it is not being used for an extended period of time.
• To clean, gently wipe the remote control and helicopter with a clean damp cloth.
• Keep the toy away from direct heat or sunlight.
• Do not submerge the toy into water. This can damage the unit beyond repair.
• Parental guidance recommended when installing or replacing the batteries.
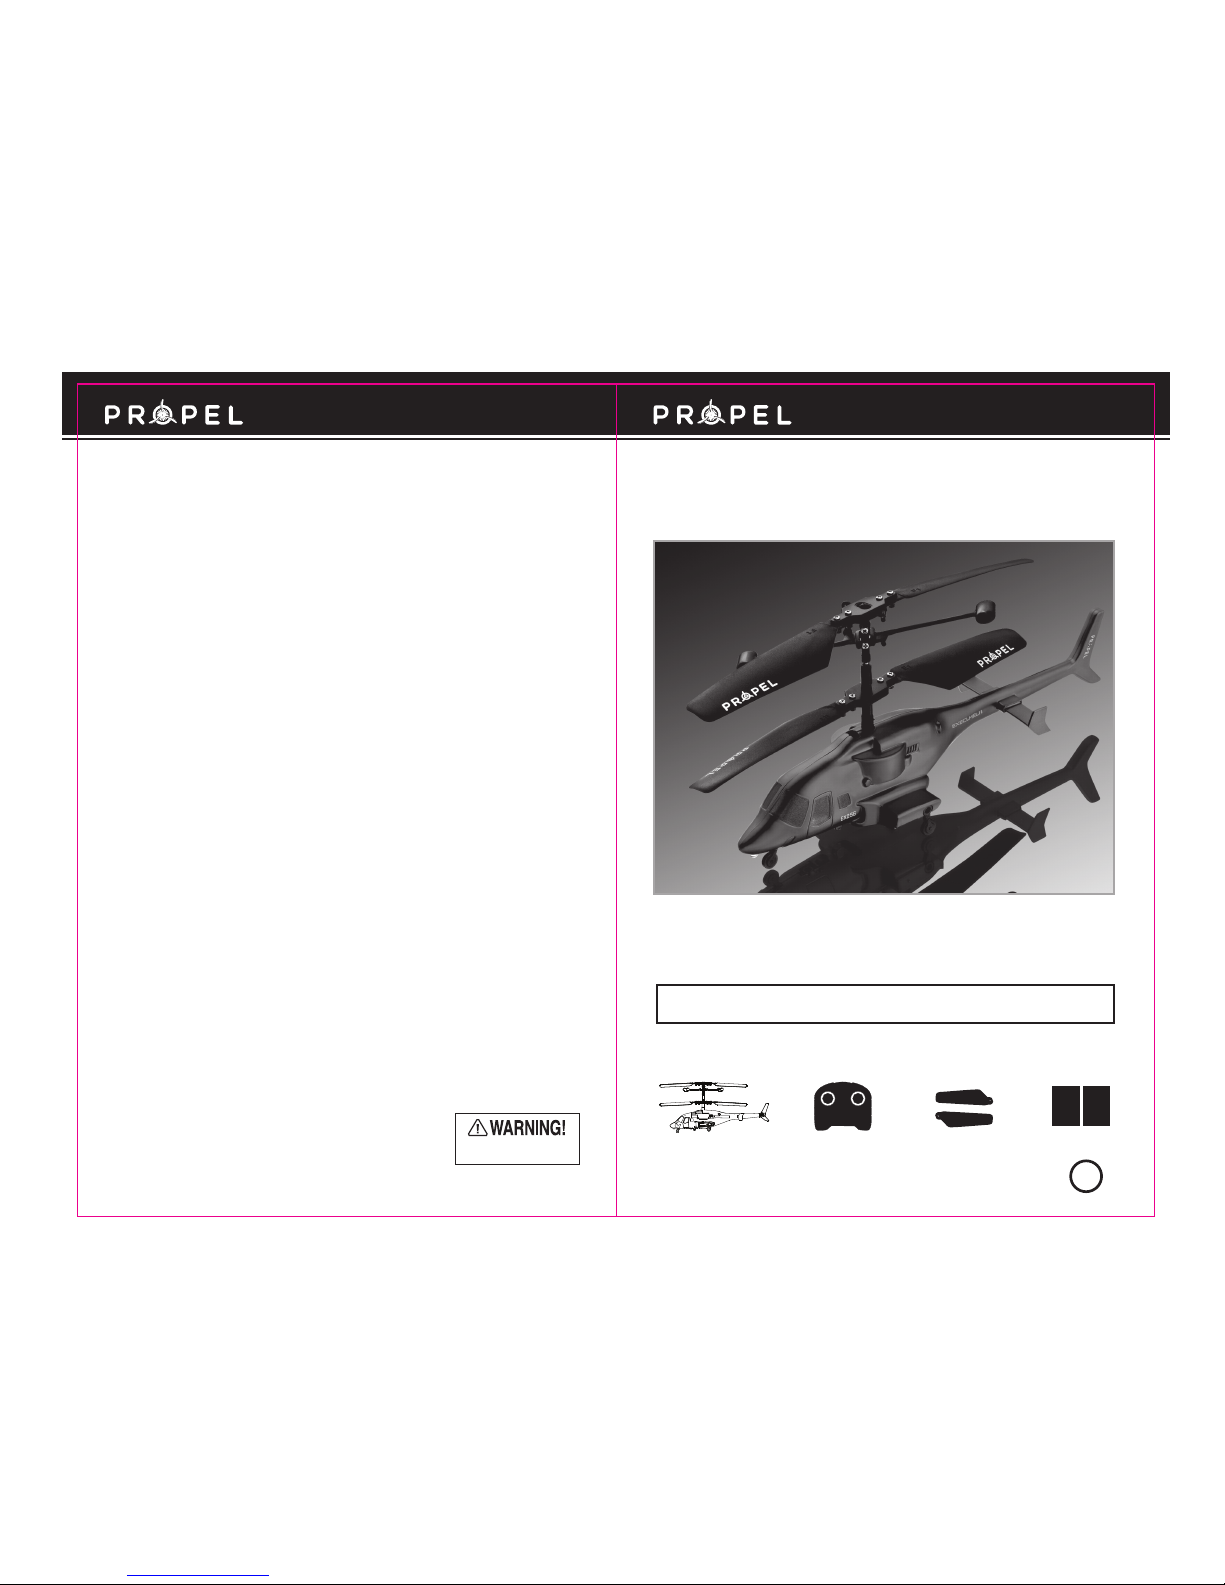
INFRARED MULTI CHANNEL CONTROL SYSTEM
Your Execuheli II™ utilizes an automatic multi-channel selection system that allows up to 3 people to fly side by side in
the same wireless range.
FOR ONE PERSON PLAY:
1. Before starting, make sure that both your controller and helicopter are in the power off position.
2. Select the desired flight channel (a, b or c) from the controller and turn the controller on (see diagram D).
3. Next, turn on the helicopter and set it on a table or hold it in your hand from underneath. Make sure your hands and
body are away from the helicopter blades.
4. Move the left throttle stick all the way up and back down again one time to pair the helicopter to the controller.
NOTE: The helicopter blades will NOT spin.
5. Lift the left throttle stick slowly one more time. Now your blades should spin and you are ready to play!
6. Note: If you turn your helicopter off or the battery runs out, you will need to pair the helicopter and controller again.
FOR TWO OR THREE PERSON PLAY:
1. Before starting, make sure that ALL the helicopters and controllers are in the power off position.
2. Each individual player must select a different flight channel (a, b or c) on his/her own controller. If more than one person is on
the same flight channel, there will be interference.
3. Only one person at a time should pair their helicopter by following steps 3 thru 5 above.
4. When a player’s helicopter is paired and working it should be left on while the next player/s pair their helicopters.
5. Note: If you turn your helicopter off or the battery runs out, you will need to pair the helicopter and controller again.
FLYING TIPS
• It is recommended that you operate the helicopter in a wide indoor space. You should allow at least a 10-foot radius.
• The helicopter is designed for INDOOR USE ONLY. Never pilot the helicopter near buildings, power lines, people,
animals, vehicles, homes, trees or other large objects nearby.
• Make sure you are not wearing any loose or long-hanging clothing.
• Parental guidance or adult supervision is suggested at all times.
• If you are flying the helicopter with others, make sure all spectators are behind you.
• For best performance, it is recommended that you operate the helicopter in zero wind conditions. Close all open doors
or windows, and turn off any nearby fans. Wind can greatly affect the performance of the helicopter.
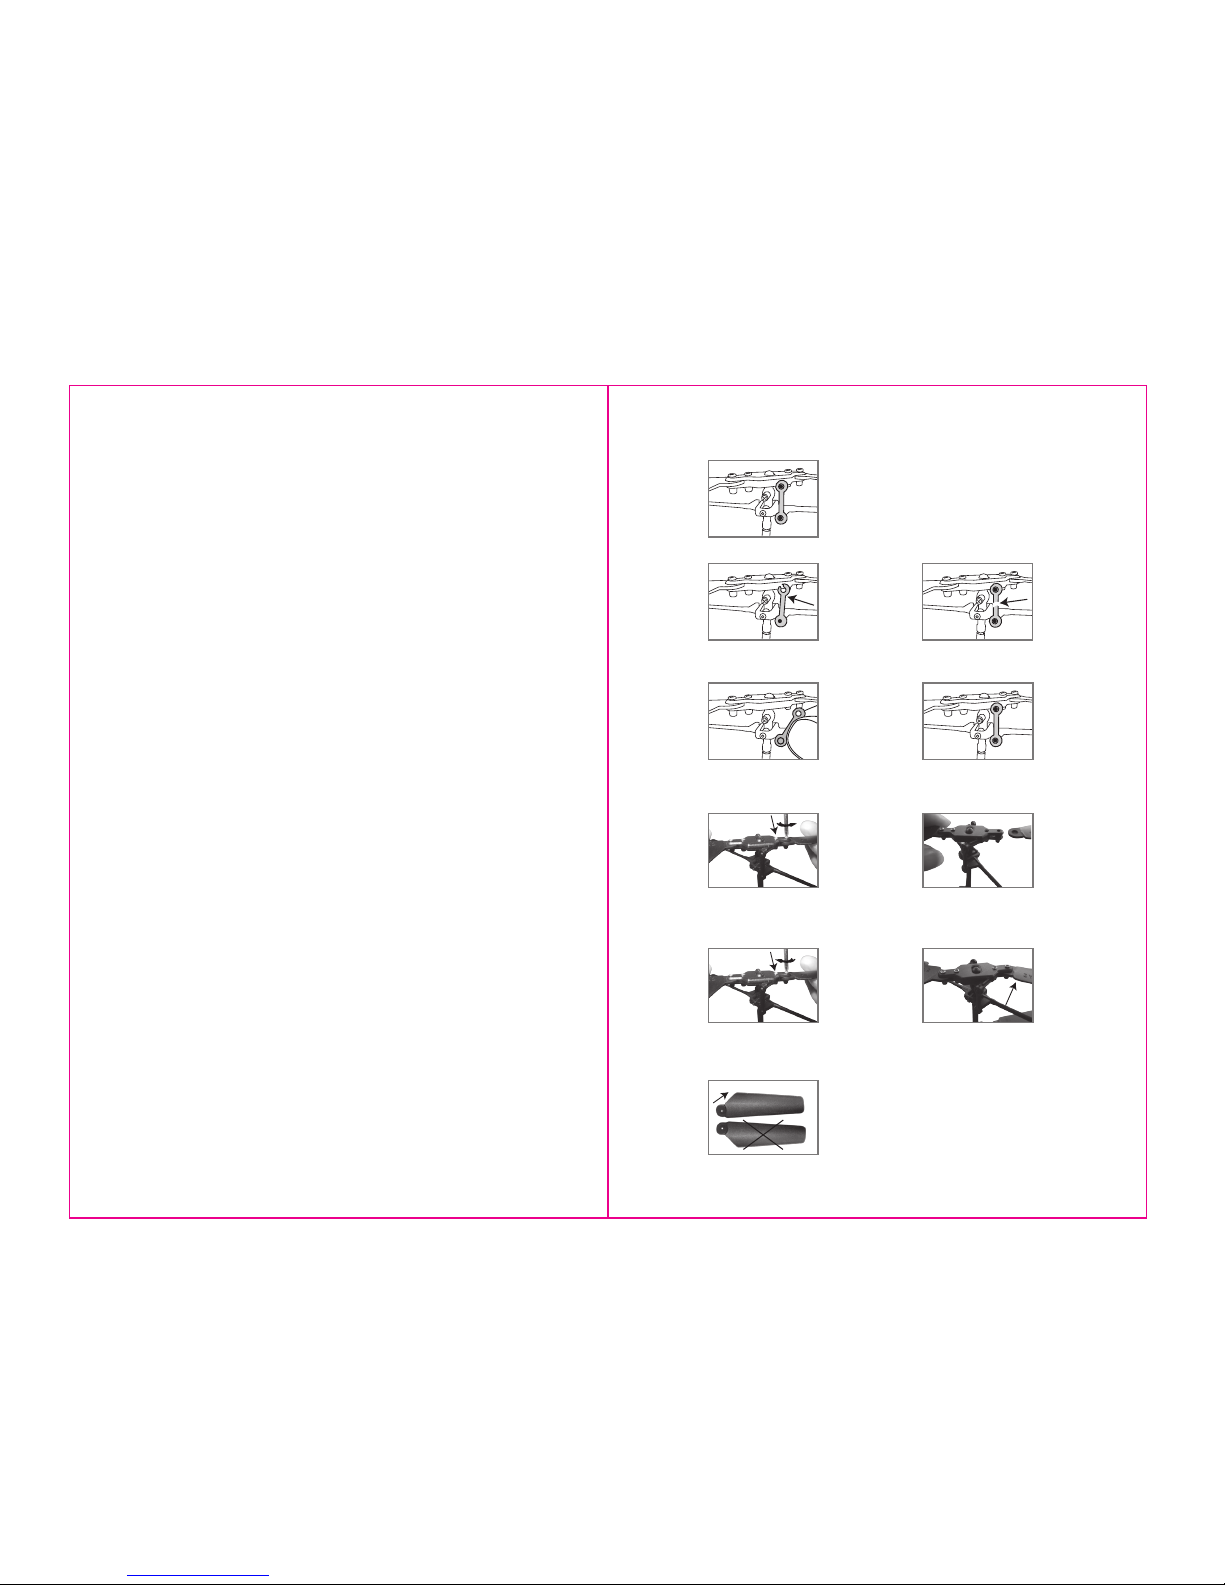
HELICOPTER FLIGHT ADJUSTMENTS
If your helicopter rotates uncontrollably, you may need to utilize the TRIM button. If your helicopter over rotates
CLOCKWISE (to the right), push and release the LEFT Trim button repeatedly until the turning stops and proper flight is
maintained. If your helicopter over rotates COUNTERCLOCKWISE (to the left), push and release the RIGHT Trim button
repeatedly until the turning stops and proper flight is maintained.
If over rotates to the right... Push left trim.
If over rotates to the left... Push right trim.
Trim Controls
L R
L R
TRIM
CHARGE
L R
5 6