Pucada TX581 User manual
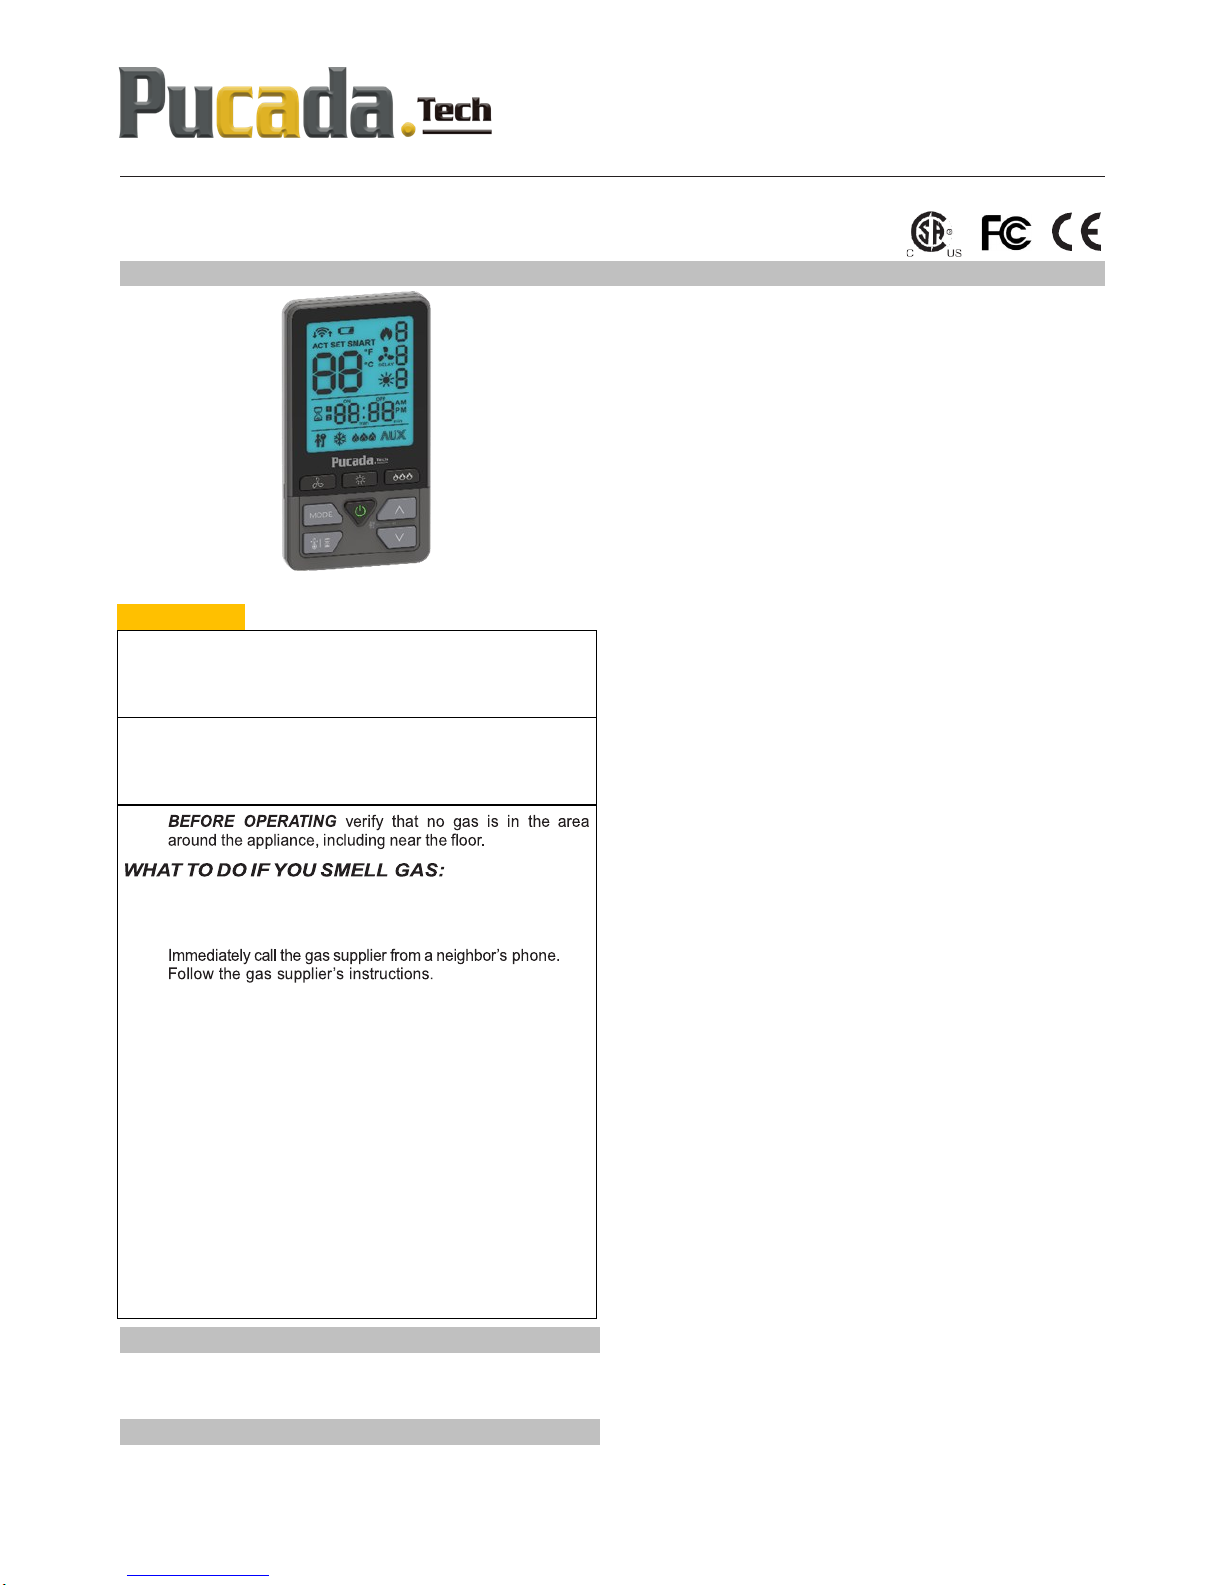
1/7
TX581 Remote Electronic Ignition and Control System
OPERATING INSTRUCTIONS -FOR OEM USE ONLY
Fire or explosion hazard. Attempted disassembly or repair
of controls can cause property damage, severe injury or
death. Do not disassemble the gas valve; it contains no ser-
viceable components.
Read these instructions carefully. Failure to follow them
could result in a fire or explosion causing property dam-
age, personal injury, or loss of life. The product must be installed
and operated according to all local regulations.
A.
●Do not light any appliance.
●Do not touch any electrical switch; do not use any
phone in your building.
●
●If you cannot reach the gas supplier, call the fire de-
partment.
B. Use only your hand to push in or turn the gas control
knobs. Never use tools. If a knob will not push in or turn
by hand, don’t try to repair it, call a qualified service tech-
nician. Force or attempted repair may result in a fire or
explosion.
C. Do not use this control or any gas appliance if any part has
been under water or in contact with water. Immediately call
a qualified service technician to replace the control sys-
tem and any gas control system which has been under
water or in contact with water.
D. These instructions are to be referenced as a user guide,
and do not supersede appliance manufacturer’s lighting
instructions.
APPLICATION
TX581 is a battery-powered electronic remote ignition and
control system for gas appliances with pilot burners and ODS
systems.
GENERAL NOTES
TX581
Radio frequency Remote
434 MHz for Europe, US, Canada;
⚠WARNING
NOTE: This device complies with part 15 of the FCC Rules. Oper-
ation is subject to the following two conditions: (1) This device
may not cause harmful interference, and (2) This device must
accept any interference received, including interference that may
cause undesired operation. Changes or modifications not ex-
pressly approved by the party responsible for compliance could
void the user’s authority to operate the equipment.
This equipment has been tested and found to comply with the
limits for a Class B digital device, pursuant to part 15 of the FCC
Rules. These limits are designed to provide reasonable protection
against harmful interference in a residential installation. This
equipment generates, uses and can radiate radio frequency ener-
gy and, if not installed and used in accordance with the instruc-
tions, may cause harmful interference to radio communications.
However, there is no guarantee that interference will not occur in
a particular installation. If this equipment does cause harmful in-
terference to radio or television reception, which can be deter-
mined by turning the equipment off and on, the user is encour-
aged to try to correct the interference by one or more of the follow-
ing measures:
—Reorient or relocate the receiving antenna.
—Increase the separation between the equipment and receiver.
—Connect the equipment into an outlet on a circuit different from
that to which the receiver is connected.
—Consult the dealer or an experienced radio/TV technician for
help.
Batteries - Remote Handset:
3 x1.5V “AAA” (quality alkaline recommended)
NOTE: These remote handsets, receiver, wall switches, are not in-
terchangeable with previous versions.
For all lighting/ignition instructions please refer to appliance manu-
facturer’s instructions.
TX581—Operating Instructions D01
2/7
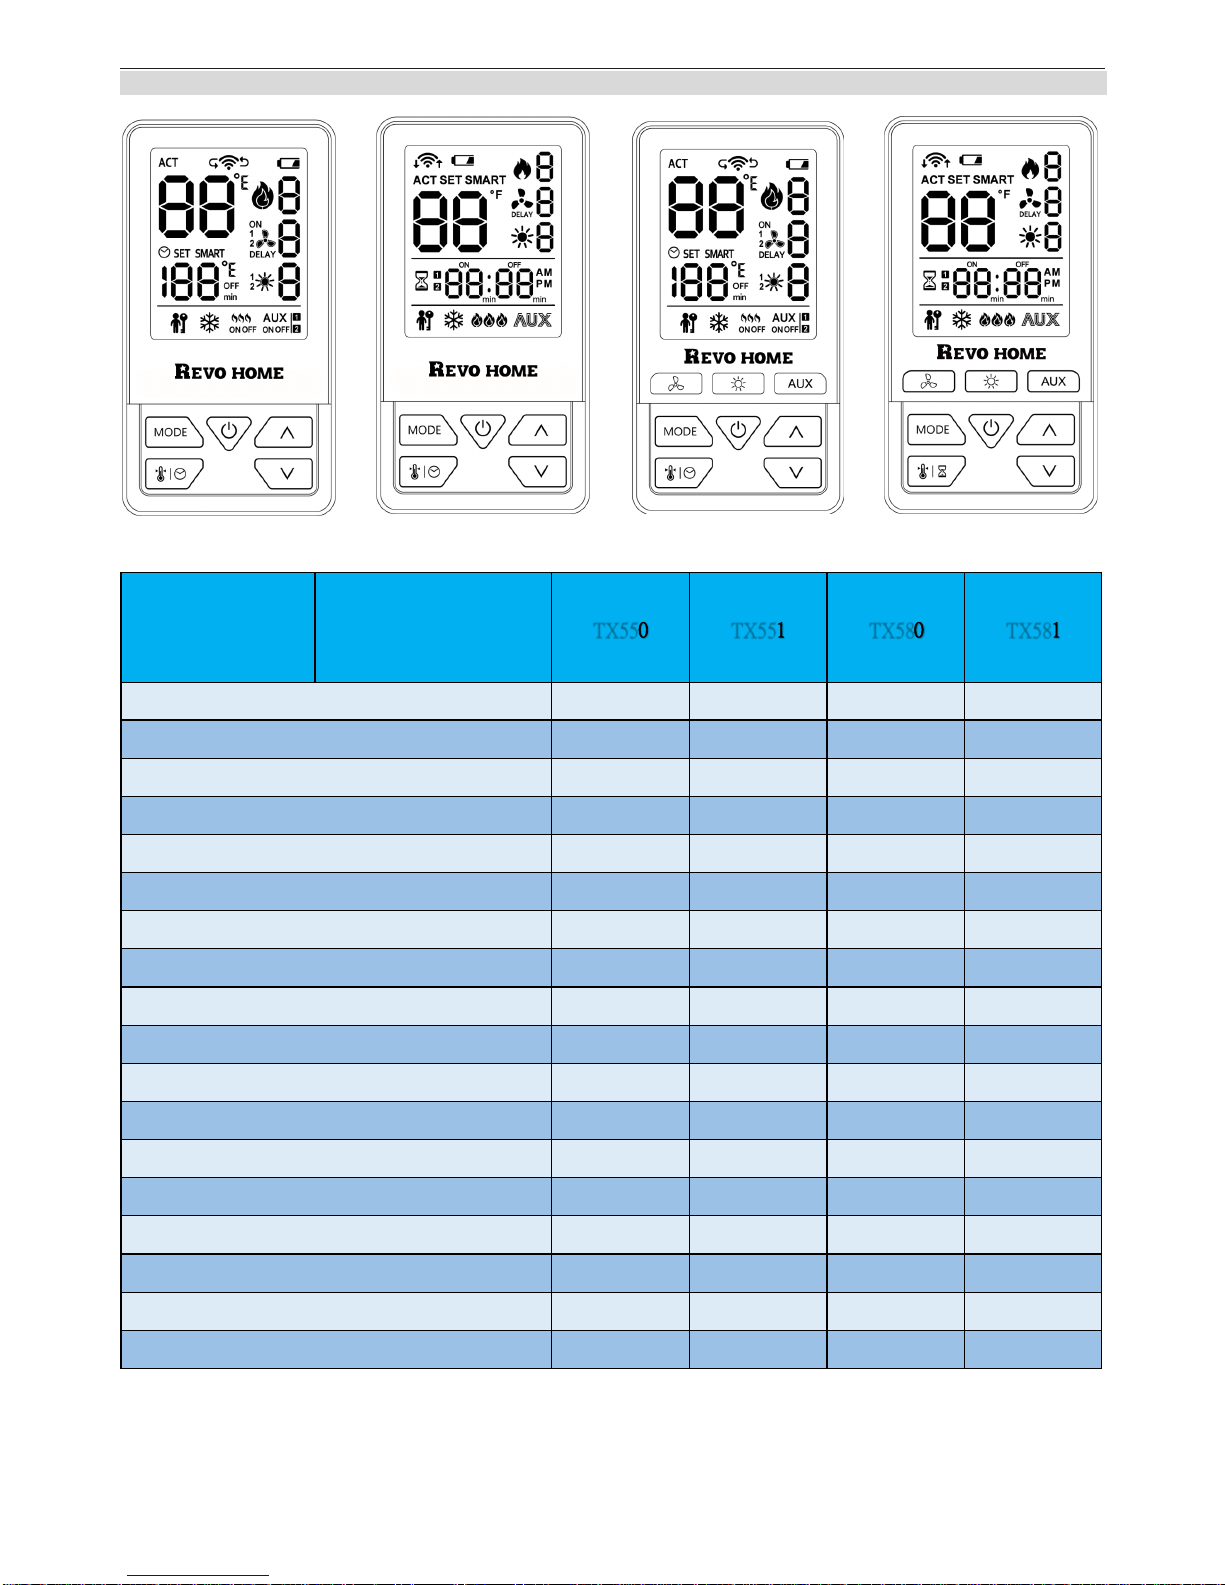
TX581 SERIES REMOTE HANDSET FEATURES
Remote
Controller
434MHz
Unidirectional TX550 TX551 TX580 TX581
ON/ OFF ★★★★
Childproof ★★★★
Revo Home Compatible ★★★★
Flame Height Adjustment ★★★★
Standing Pilot* ★★★★
LCD ★★★★
Low Battery Indicator ★★★★
Second Burner ★★★★
Thermostat ★★★★
Timer ★★★★
Error Code Notification* ★★★★
Fan Speed ★★★★
Light Dimmer ★★★★
AUX ON/ OFF ★★★★
Fan Delay ON/ OFF ★★★★
Clock ★★
Daily Program Thermostat ★★
3 Independent Access Keys ★★
*Disabled for Europe
TX550 TX551 TX580 TX581

TX581—Operating Instructions D01
3/7
SYMBOL
Figure 1: Symbol Display
SETTING TEMPERATURE UNIT
Install batteries into remote handset,
while ℃ or ℉ is flashing, press
or to choose Fahrenheit or Cel-
sius and vice versa.
Idle 10 seconds or press to con-
firm.
Day setting:
Press or to select a num-
ber to corresponding with the day of
the week (eg. 1= Monday,
2=Tuesday, 3=Wednesday, 4=Thu-
rsday, 5=Friday, 6=Saturday,
7=Sunday).
Idle 10 seconds or press to con-
firm.
12/24 Hour setting:
Press or to select 12:HR or
24:HR
Idle 10 seconds or press to con-
firm.
SETTING DAY AND TIME
Press or to adjust
Hour, Idle 10 seconds or press
to confirm.
Press or to adjust mi-
nute, Idle 10 seconds or press
to confirm.

TX581—Operating Instructions D01
4/7
TURN ON THE FIRE
Press and hold button for 3 sec-
ond,
●Main burner and rear burner turn on
once pilot ignition is confirmed.
●Main gas goes Max flame height first,
and will goes last flame height memory.
●Handset automatically goes into Manual
mode after main burner ignition.
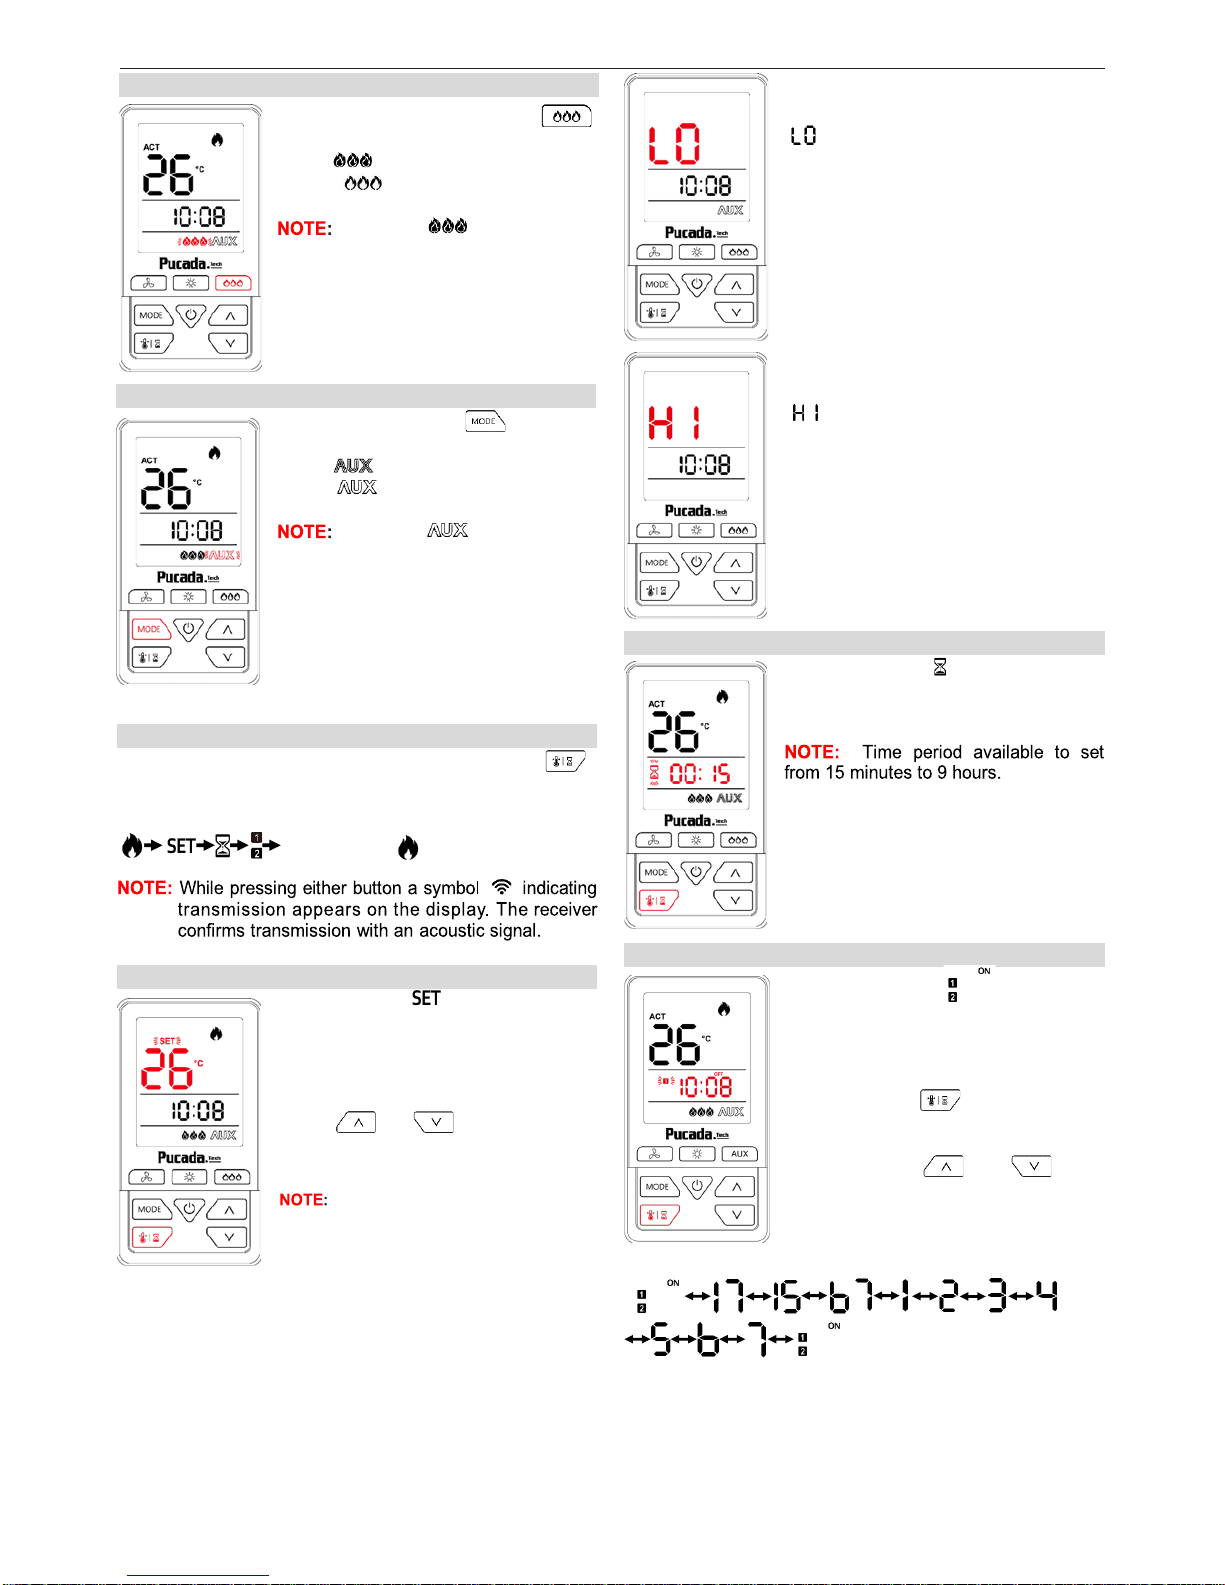
FLAME HEIGHT ADJUSTMENT
To increase flame height press
. Max flame height is 5.
To decrease flame height press
. Min flame height is 1.
TURN OFF THE FIRE
Press button,
NOTE: There is a 3 second delay
before the next ignition is
possible.
After setting the time and temperature
unit, actual temperature display on
standby screen.
CHILDPROOF
ON:
To activate press and but-
tons simultaneously. indicated
and the handset is rendered inopera-
ble include the off function.
Wiring of valve and receiver must be completed be-
fore starting ignition. Failure to do so could damage
the electronics.
⚠WARNING
When pilot ignition is confirmed, main flame valve turn
on to maximum flame height.
MODE OF OPERATION – CIRCULATION FAN
To Fan mode, press button to
flashing.
●To increase fan speed press .
Max fan speed is 3.
●To decrease fan speed press .
Min fan speed is 0.
To seng fan delay ON or fan delay OFF
mode, press and buons
simultaneously.
Press to setting fan delay
ON time from 0 to 12 minutes. Fan
will turn on depend on this delay
time after success ignition. 0
minutes will instant turn on the cir-
culation fan.
Press to setting fan delay
OFF time from 0 to 12 minutes.
Fan will turn off depend on this de-
lay time after turn off the appli-
ance. 0 minutes will instant turn off
the circulation fan.
Default is 12 minutes delay
ON; 12 minutes delay OFF.
MODE OF OPERATION – LIGHT
To Light mode, press button
to flashing.
●To increase light dimmer press .
Max light dimmer is 7.
●To decrease light dimmer press .
Min light dimmer is 0.
Default is .
TX581—Operating Instructions D01
5/7
MODE OF OPERATION – AUX
To AUX mode, press button to
toggle ON or OFF
ON:
OFF:
Default is
MODE OF OPERATION – REAR BURNER
To Rear Burner mode, press
button to toggle ON or OFF.
ON:
OFF:
Default is
CHANGING THE MODE OF THERMOSTAT
During the appliance flame on, briefly pressing the
button changes the mode of thermostat in the following
order:
and back to
MODE OF THERMOSTAT – SET MODE
In Set mode, indicated. Room
temperature is measured from hand-
set and compared to the set tempera-
ture. The flame height modulated be-
tween last setting and off to achieve
the set temperature.
press or to change set
temperature.
The default set temperature is 22℃
(72℉). Set temperature range from
7℃(45℉) to 35℃(95℉).
While ambient temperature equal or
lower than 10℃(50℉) will appear
.
MODE OF OPERATION – TIMER MODE
In Timer mode, indicated. At the
end of countdown time period, the fire
turns off.
MODE OF OPERATION – PROGRAM MODE
While ambient temperature equal or
greater than 37℃(99℉) will appear
.
Handset will transmit a shutdown sig-
nal to appliance.
In program mode, indicated.
Appliance thermostat according to set
temperature and period between ON
time and OFF time.
Press and hold to enter set-
tings.
Briefly pressing or but-
ton to changes the mode of thermo-
stat in the following order:
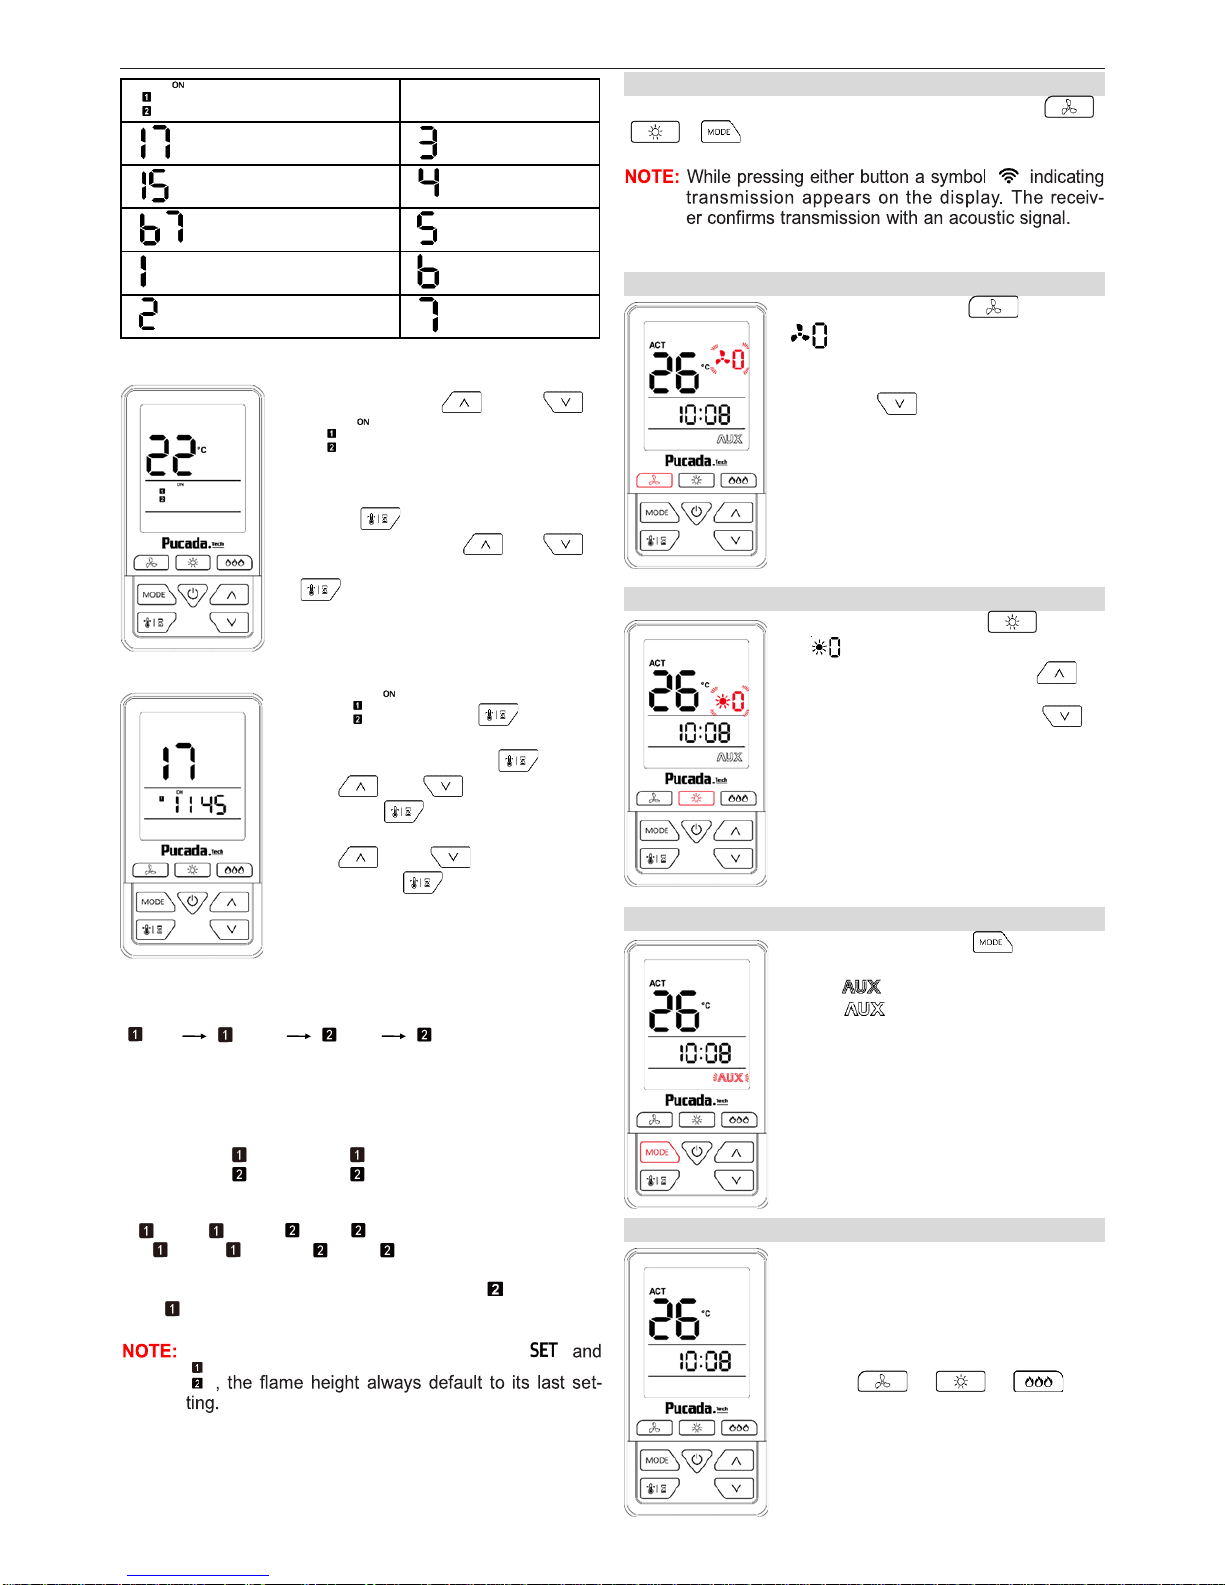
TX581—Operating Instructions D01
6/7
= Set Temp while ON
= Monday to Sunday = Wednesday
= Monday to Friday = Thursday
= Saturday to Sunday = Friday
= Monday = Saturday
= Tuesday = Sunday
Briefly pressing or
to can check ON Temp de-
fault is 22℃(72℉).
Press to enter ON Temp
setting, pressing or
to change the temperature, press
or idle for 10 sec to save
and exit to next setting.
Except , press to enter
ON time and OFF time setting, to
change the time, press ,then
press or to change the
hour, press or idle for 10 sec to
enter minute setting.
Press or to change the
minute, press or idle for 10 sec
save and exit to next setting.
Setting follow the sequence of :
ON OFF ON OFF
While complete all settings, Idle for 10 sec to save and
exit to program mode.
●Default settings:
Program 1 : ON : 23:45 OFF: 23:45
Program 2 : ON : 23:45 OFF: 23:45
●Two ON times can be programmed per day
●The ON/OFF times have to be programmed in the order
ON ≤ OFF< ON ≤OFF
●If ON = OFF or ON = OFF the timer is deactivat-
ed.
To have the fire overnight, it can be set: OFF 23:50
and ON 0:00
Only one set temperature memory for
OFF MODE AVAILABLE FUNCTIONS
While appliance remain off, briefly pressing the ,
, button changes the mode of operation.
OFF MODE – CIRCULATION FAN
To Fan mode, press button to
flashing
In fan delay off countdown process,
can press to switch off the fan.
If fan is off, unable switch on, unless
switch on the appliance.
OFF MODE – LIGHT
To Light mode, press button
to flashing
●To increase light dimmer press .
Max light dimmer is 7.
●To decrease light dimmer press .
Min light dimmer is 0.
OFF MODE – AUX
To AUX mode, press button to
toggle ON or OFF
ON:
OFF:
SLEEP MODE
While handset is idle for 1 minutes, it
will turn into sleep mode.
Clock will remain working, and display
ambient temperature.
Except , , , all
buttons can awake handset from
sleep mode.

TX581—Operating Instructions D01
7/7
MISCELLANEOUS
Low Battery Indication
Handset: Low battery indicator indicated.
Battery replacement
Battery replacement is recommended at the beginning of
each heating season. Do not use metal tools to remove bat-
teries. Using a metal tool could cause a short that may
damage the receiver.
Factory reset
Remove battery, press and hold and install battery,
backlight flash rapidly 3 times represent factory reset com-
plete.
Dexen Industries, Inc
9220 Norwalk Blvd
Santa Fe Springs, CA 90670
Tel: +1 5626998490
Table of contents
Popular Control System manuals by other brands

iO HVAC Controls
iO HVAC Controls ZP6-ESP-PRO installation guide

MASTERZONE
MASTERZONE ZONEFIRST ZONE-ADDER MZA2 Installation and operating instructions

Sturtevant Richmont
Sturtevant Richmont TCVe2 user manual

Extron electronics
Extron electronics TouchLink TLP Pro 520M user guide

HWH
HWH 725 SERIES Operator's manual

AMT
AMT 168-B installation manual


