Puch 1970-1971 Puch User manual

PUCH
1970and
1971
MOPEDMAINTENANCE
MANUAL
Includes
•TechnicalData
•Description
•Maintenanceandservice
•TroubleShooting
Steyr- Daimler-
Puch
PUCH
SERVICE-AUSTRIA 907.1.71.033.1

i
PUCH-Motor-Cycles
mm
DESCRIPTION
AND
MAINTENANCE
STEYR- DAIMLER- PUCHAKTIENGESELLSCHAFT
AUSTRIAAUTRICHE
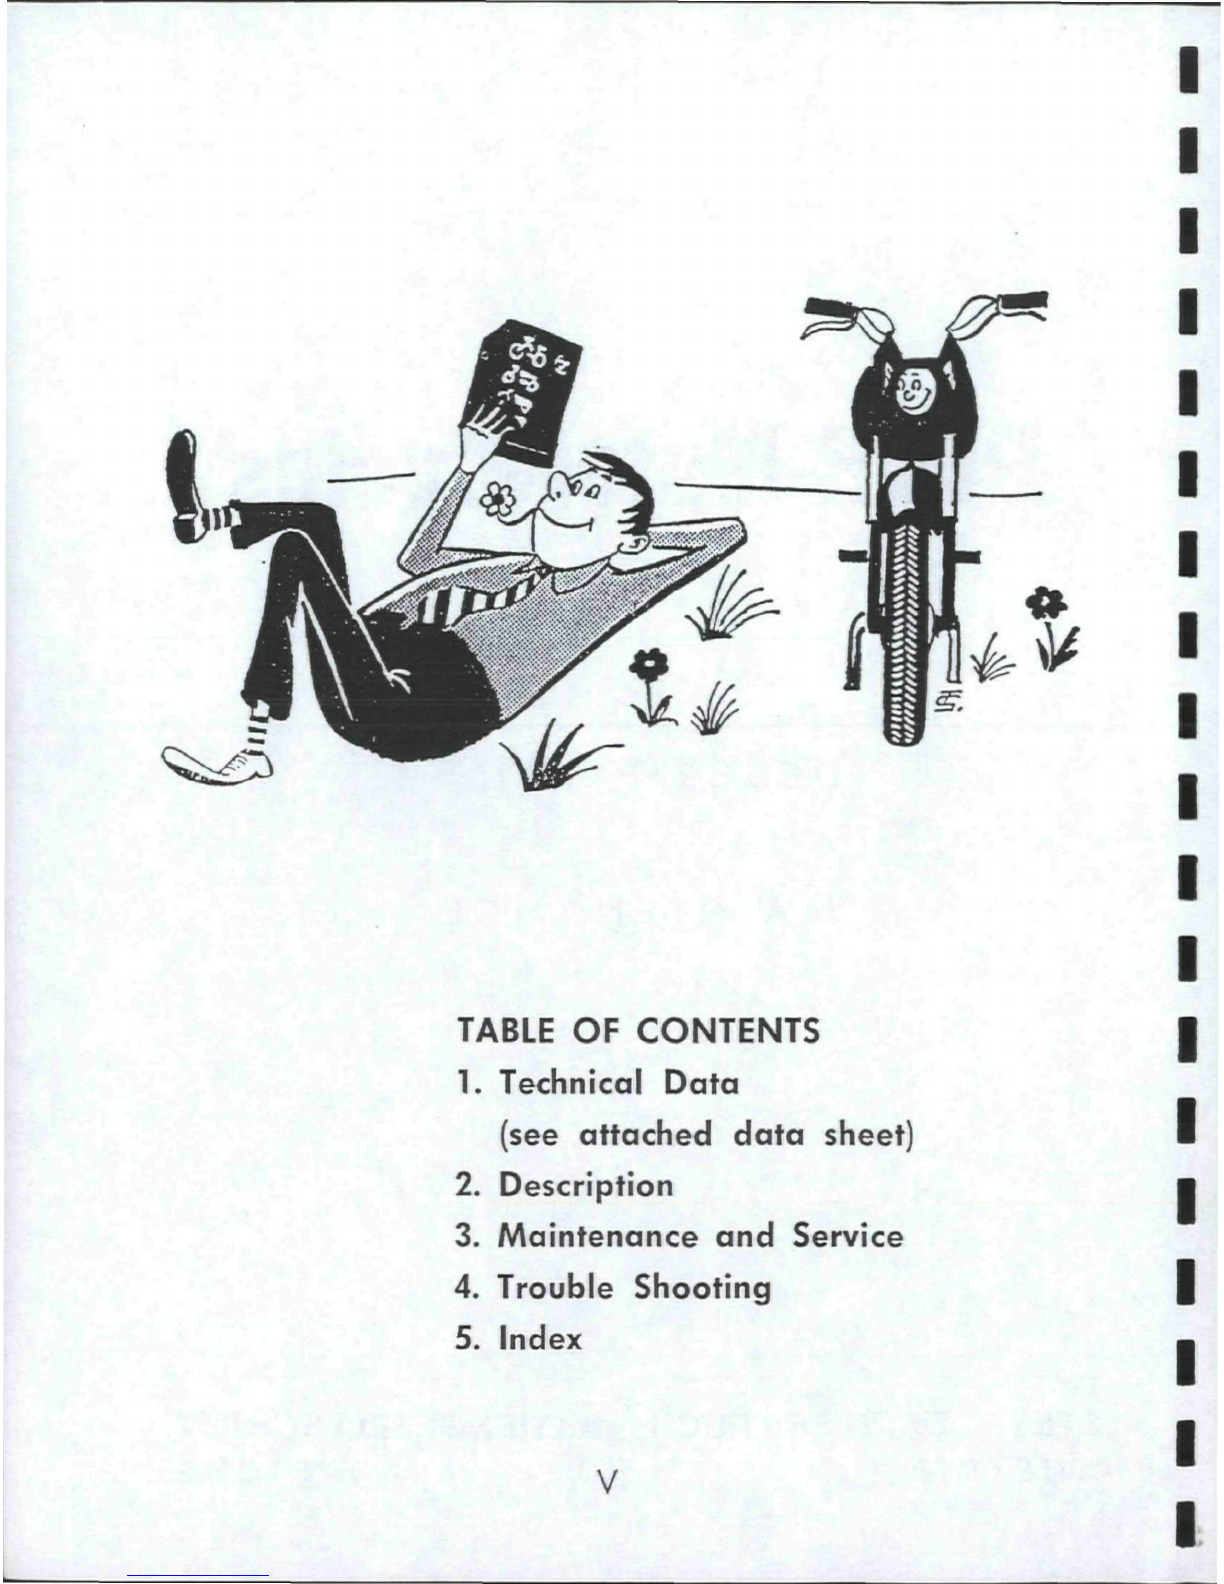
TABLEOFCONTENTS
1.
TechnicalData
(seeattacheddatasheet)
2.
Description
3.MaintenanceandService
4.TroubleShooting
5.Index
V

FIRSTREAD— THENDRIVE!
I
!
Takethismottotoheartandletyourvehiclehavethat
minimumofmaintenanceandcareitneedstogiveyou
fullsatisfactionandsecurity.
Wepresentyouthereforetogetherwithyournew
PUCHMOTOR-CYCLE
theseoperatinginstructions.
Thebookletisintendedasanintroductiontohandling,
tendingandmaintenanceofthevehicle.
Shoulditbeyourfirstmotorvehicle,weadviseyouin
yourowninteresttoreadtheseoperatinginstructions
carefully.Mostdamagesarecausedbyignoranceand
hencecouldeasilybeavoided.Regularmaintenancewill
preventtroublesandrepairswhichmaycostyoumuch
timeandmoney.
Thesectionontroubleshootingwillinformyouabout
manysourcesoffaults.Butdonotundertakefumbling
thingsthatcanonlybeexecutedexpertlybya reliable
workshop.A widespreadserviceorgansiationaswellas
ourownservicedepartmentintheworksatGrazwill
bepleasedtobeusefultoyou.
Whenrequestinginformationororderingspareparts
pleaseneverforgetquotingtheenginenumber.
Numbersinbracketswithinthetextrefertotheillustra-
tions.
Outoftwonumbers,theoneontheleftofthe
obliquelineindicatesthenumbersofthefigure,theone
ontherightoftheobliquelinereferstothenumbers
withinthefigure.
Nowwewishyoua goodstartanda goodtimewith
yourPUCHmotor-cycle!
STEYR-DAIMLER-PUCH
Aktiengesellschaft
VI

2.
DESCRIPTION
—..,".-..........-—
H
7%
I
2.1
CONTROLS
Locationandworkingof
thecontrolsmaybeseen
fromthedatasheethereto
attached.
2.2FIRSTPUTTINGINTO
SERVICE
2.3BEFOREEVERYTRIP
2.4DRIVING
INSTRUCTIONS
2—1

2—2DESCRIPTION
2.2FIRSTPUTTINGINTOSERVICE
Afterfinalassembly,everyPUCHmotor-cyclehasto
undergoa trialtrip,itisthereforereadyforuse.Itis
nonethelessstronglyrecommendabletocarrytroughthe
followingcheckingsbeforeputtingthevehicleintooper-
ationforthefirsttime.
2.21Comparingthecharakteristicnumbers
Beforethefirsttrip,comparethecharacteristicnumbers
ofthevehiclewiththoseindicatedontheregistration
papers.
2.22Checkingtheoillevelinthegearbox
Areprovidedforthepurposeeitheranoilcontrolplug
ora dipstickontherighthandsidegearboxcover.
a)Oilcontrolplugversion
(fig.
1)
Withthevehicleinhorizontalposition(normal
posi-
tion),
oillevelingearboxshouldcomeuptothebot-
tomedgeoftheoilcontrolplug
(1/2,
2a/2).Incase
thatmarkisnotreached,takeofftheoilfillerplug
(1/1,
2a/l)and
fill
inmotoroil(seesection3.21)until
oilcomesoutoftheoilcontrolhole.Theoilcontrol
plug(1/2)shouldbescrewedinagainonlywhenno
moreoilpoursoutofthehole.
b)Dipstickversion(fig.2)
Checkoillevelathorizontal(normal)position.Screw
outdipstick(2/1),wipeitdryandputitandpull
outagain.Oilleveliscorrectwhenbetweenthetwo

DRIVINGINSTRUCTIONS2—3
marks.
If
oillevelisunderthelowermark,
fill
in
motoroil(seesection
3.21).
If
oillevelcomesuptoovertheuppermark,loosen
oildrain
pliug
(2/2)anddrainsomeoil.Before
measuringagain,wipethedipstickdry.
Whenevermeasuringoillevel,screwinentirelythe
dipstick!
2.23Checkingtheairfilter(forlocationseedatasheet)
Theintakemufflerairfiltermustbewettedbymotoroil
SAE40vor50,exceptvehicleswithdryairfilter.
2.24Checkingtheinflatingpressure
Forpressurefigures seedatasheet.
2.25Gasoline-oilmixturerefuelling
MixgasolinewithbrandedmotoroilSAE40or50(See
lubricantschart)ina
1
: 25 ratio
(=
4%),thatis40c.c.
on1 literofpetrol.
Important!Neverfill inpurepetrol!
2.3BEFOREEVERYTRIP
Youshouldcheck:
0
Fuelprovisions
9
Tyreinflatingpressure
0
Brakingefficiency
•
Lighting
•
Toolkit

2—4DESCRIPTION
2.4DRIVINGINSTRUCTIONS
2.41Startingtheengine
0
Openfuelcock.
#
Putinignitionkey(modelswithignitionlock).
%
Operatethechokeonlywenengine
cold,
ifneces-
sary,
operatethetickler.
0
Whenre-startinga hotengine,donotoperateeither
chokenotrickler.
0
Inautomaticmodelswithpedalswatchpositionof
changeleverfortreadle(seedatasheet).
0
Openthethrottleby
1A
(turnthrottletwist-gripbyone
thirdofitstravel).Attention:inautomaticmodels
openthrottleonlyslightly.
0In
automaticmodelswithpedalspullleverforrelease
ofstartingdevice(seedatasheet).
0
Crankenginebymeansofpedalsorkick-starter.
0In
casethechokehasbeenoperated,pushinpro-
portionasenginewarmsitselfup.
0
Aftera fewhundredyards,thechokeshouldbeturned
off!(Incaseofa Bing-carburetterwith
14
mm0 and
17
mm0,choketurnesoffautomaticallybyfully
openingthethrottle
manentarily.)
2.42Movingoff(Inautomaticmodelsjustopenthrottle)
£
Pullclutchcontrollever;engage
1
stgear.
%
Releaseclutchleverslowly,simultaneouslyopen
throttletwistgrip.
2.43Gearshifting(Inautomaticmodelsresultsautomatic-
allyaccordingtonumberofenginerevolutions)
DRIVINGINSTRUCTIONS2—5
Thebottomgearwhichyouarenowusingrepresentthe
startingandclimbinggear.Assoonascircumstances
willallow,youwillchangeup.Proceedasfollows:
0
Throttledown.
#
Operateclutchcontrolleveralmostatthesametime
andengagethenextgear.
0
Releaseclutchcontrollever.
#
Openthrottle.
Afterreachingmaximumspeedbyfullyopeningthe
throttletwistgrip,throttledowntoabout
3A;
thefallin
speedwillbehardlyperceptiblewhereasfuelconsump-
tionwillthusbeconsiderablyreduced.Throttleopening
shouldbeturnedtowhattheenginejustneeds-sharp
openingofthethrottletwist-griponlyincreasesfuel
consumption.Whendrivingspeedhastobereducedbe-
causeofa slopeortrafficcircumstances,changedown.
Proceedasfollows:
0If
necessary,applythebrakesandthesametime
0
throttleback,
9
operateclutchcontrolleverandchangedown,
0
releaseclutchcontrollever,
#
givethrottleagain.
Hintforownersofautomaticmodels
Whenrapidaccelerationrequiresevenquickergearshift-
ing,
throttledowncompletelyafterreachingabout
25km/handopenthrottleagainshortlyafterwards.Thus
secondgearshiftedmorequickly.
2—6DESCRIPTION
2.44Applyingthebrakes
Throttleback,
applyhandandfoot-operatedbrakesimultaneously.On
sandy,wetorslipperyroads,useprimarilythefoot-
operatedbrake.
Alwaysapplythebrakescautiously.Lockingwheels
reducethebrakingefficiencyandentailskiddingand
crashing.
2.45Stoppingandparking
#
Throttleback,
%
applythebrakes,
%
(Inapplicableinautomaticmodels)justbeforestopp-
ing,
operatetheclutchcontrolleverandengage
neutralgear.
In
ordertoshutofftheengine:
0
Press
short-circuiting
button.Pulloutignitionkey
(modelswithignitionlock),
%
shutfuelcock,
<0
shutoffthevehicle.
2.46Drivingdownhill
Whendrivingdownhill,theidlingengineactsasa brake.
Duringlongerdescents,openthethrottleeverynowand
theninordertogreasetheengine(thelubricantbeing
inthefuel).Ifnecessary,applythebrakes.Whendes-
cendingsteepgrades,engagebottomgear.
2.47Treadingwithshut-offengine
(Possible
onlyinmo-
delswithpedals,inautomaticmodelswithpedals
adjustchangeleverfortreadle[seedatasheet]).
DRIVINGINSTRUCTIONS2—7
0
Operateclutchcontrolleverandengage2ndgear
(3rdgear)whilstpedalling.
%
Mounttheauto-cycleandsetitgoinglikea bicycle
whitpulled-downclutchlever.
%
Beforestopping,engageneutralgear.
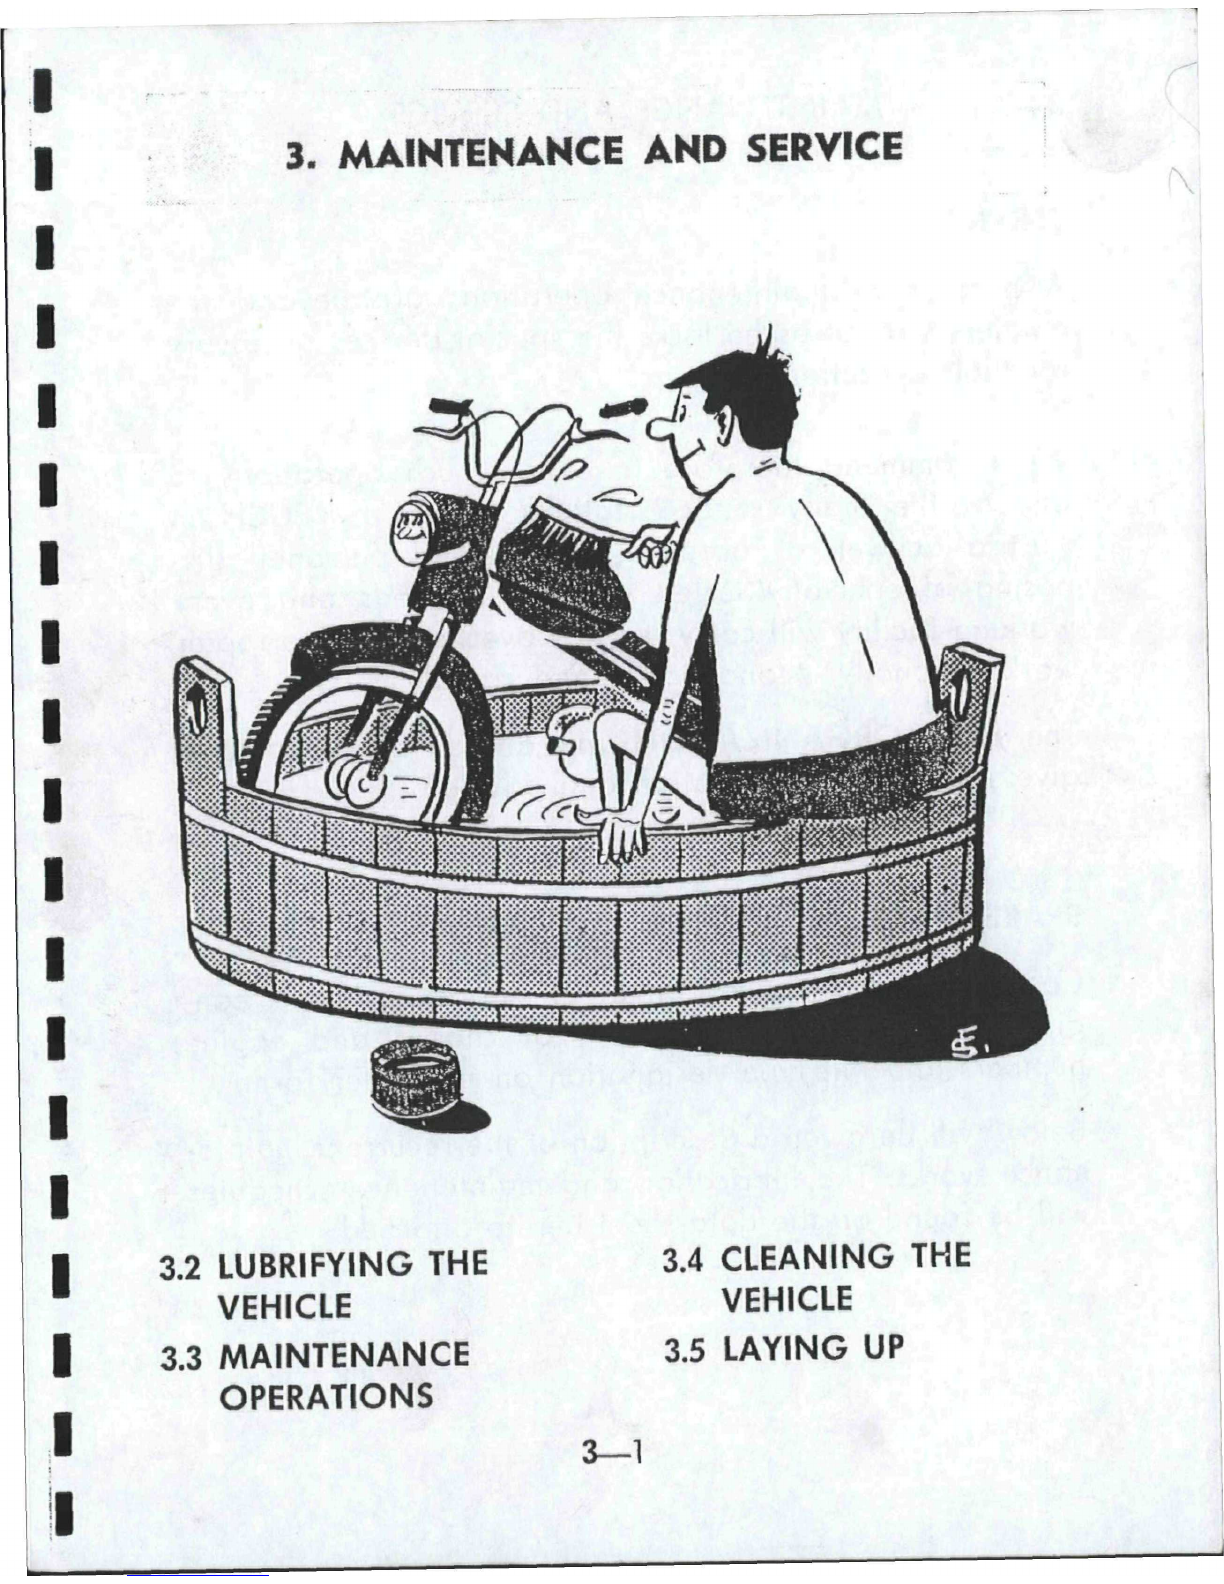
3.MAINTENANCEANDSERVICE
3.2LUBRIFYINGTHE
VEHICLE
3.3MAINTENANCE
OPERATIONS
3.4CLEANINGTHE
VEHICLE
3.5LAYINGUP
3—1

3—2MAINTENANCEANDSERVICE
SERVICE
Anumberofmaintenanceoperationsarebeyondthe
amateur'sreachashelacksthespecialdevicesnecessary
fortheirexecution.
Werecommendthereforetoentrustsuchoperationsto
one
ofthemanyservicestationssetupbyPUCHin
Austriaaswellasabroad.Theirskilledpersonelldis-
posingofspeciallytestedworkingmethodsandevery
workingfacilitywillcarryoutanyoverhaulingandrepair
workrationally,economicallyandrapidly.
ThePUCH-ORGANIZATIONwillalwaysbepleasedto
giveyoufurtherinformationandadvice.
SPAREPARTS
Correctandswiftexecutionofallsparesordersis
con-
ditionedbytheexactquotingofchassisandengine
numbersandfulltypedesignationontheorderform.
Belowwillbegivena descriptionoftherecurrentmainte-
nanceworks.Thelubricationandmaintenanceschedules
willbefoundonthedatasheetheretoattached.
LUBRIFYING
3—3
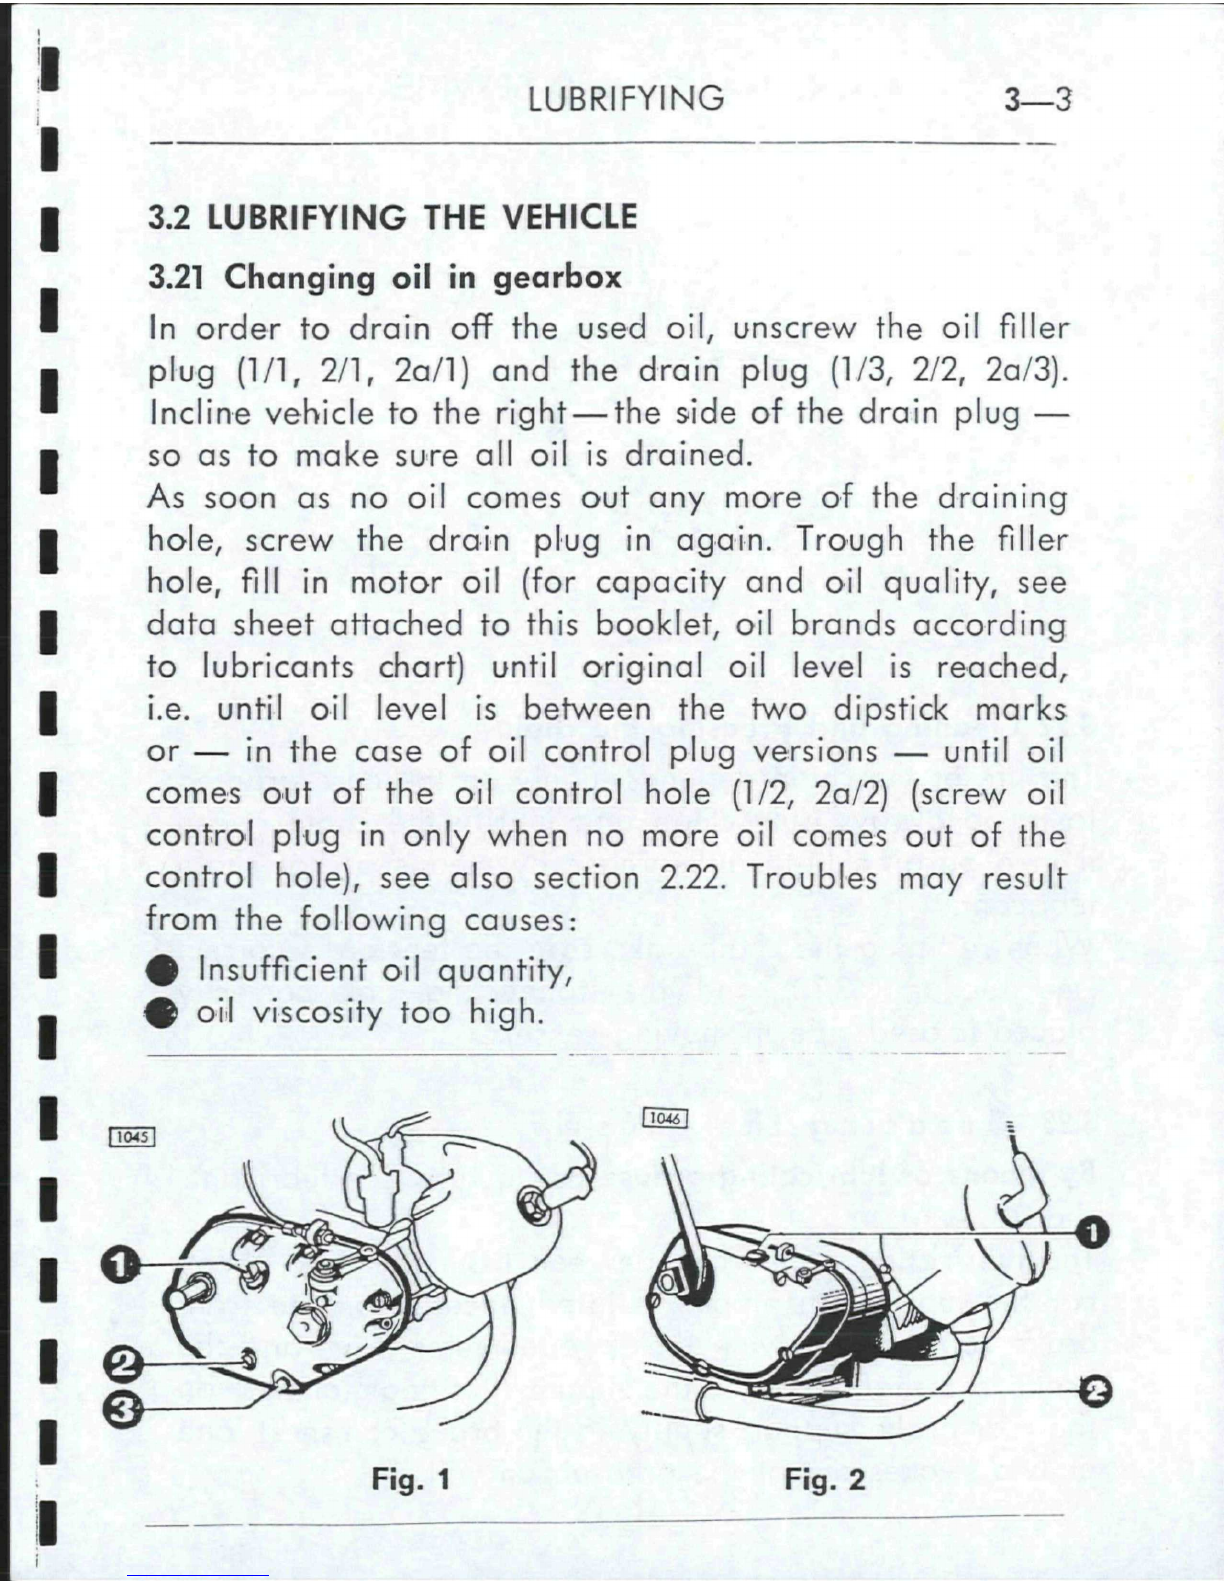
3.2LUBRIFYINGTHEVEHICLE
3.21Changingoilingearbox
In
ordertodrainofftheusedoil,unscrewtheoilfiller
plug
(1/1,
2/1,
2a/l)andthedrainplug(1/3,2/2,2a/3).
Inclinevehicletothe
right—
thesideofthedrainplug—
soastomakesurealloilisdrained.
Assoonasnooilcomesoutanymoreofthedraining
hole,
screwthedrainpluginagain.Troughthefiller
hole,
fill
inmotoroil(forcapacityandoilquality,see
datasheetattachedtothisbooklet,oilbrandsaccording
tolubricantschart)untiloriginaloillevelisreached,
i.e.untiloillevelisbetweenthetwodipstickmarks
or— inthecaseofoilcontrolplugversions— untiloil
comesoutoftheoilcontrolhole(1/2,2a/2)(screwoil
controlpluginonlywhennomoreoilcomesoutofthe
controlhole),seealsosection2.22.Troublesmayresult
fromthefollowingcauses:
0
Insufficientoilquantity,
%
oilviscositytoo
high.
[ToSI
DwU
h
c~-
[
\
0
I
<>
©
3
€>
Fig.
1 Fig.2
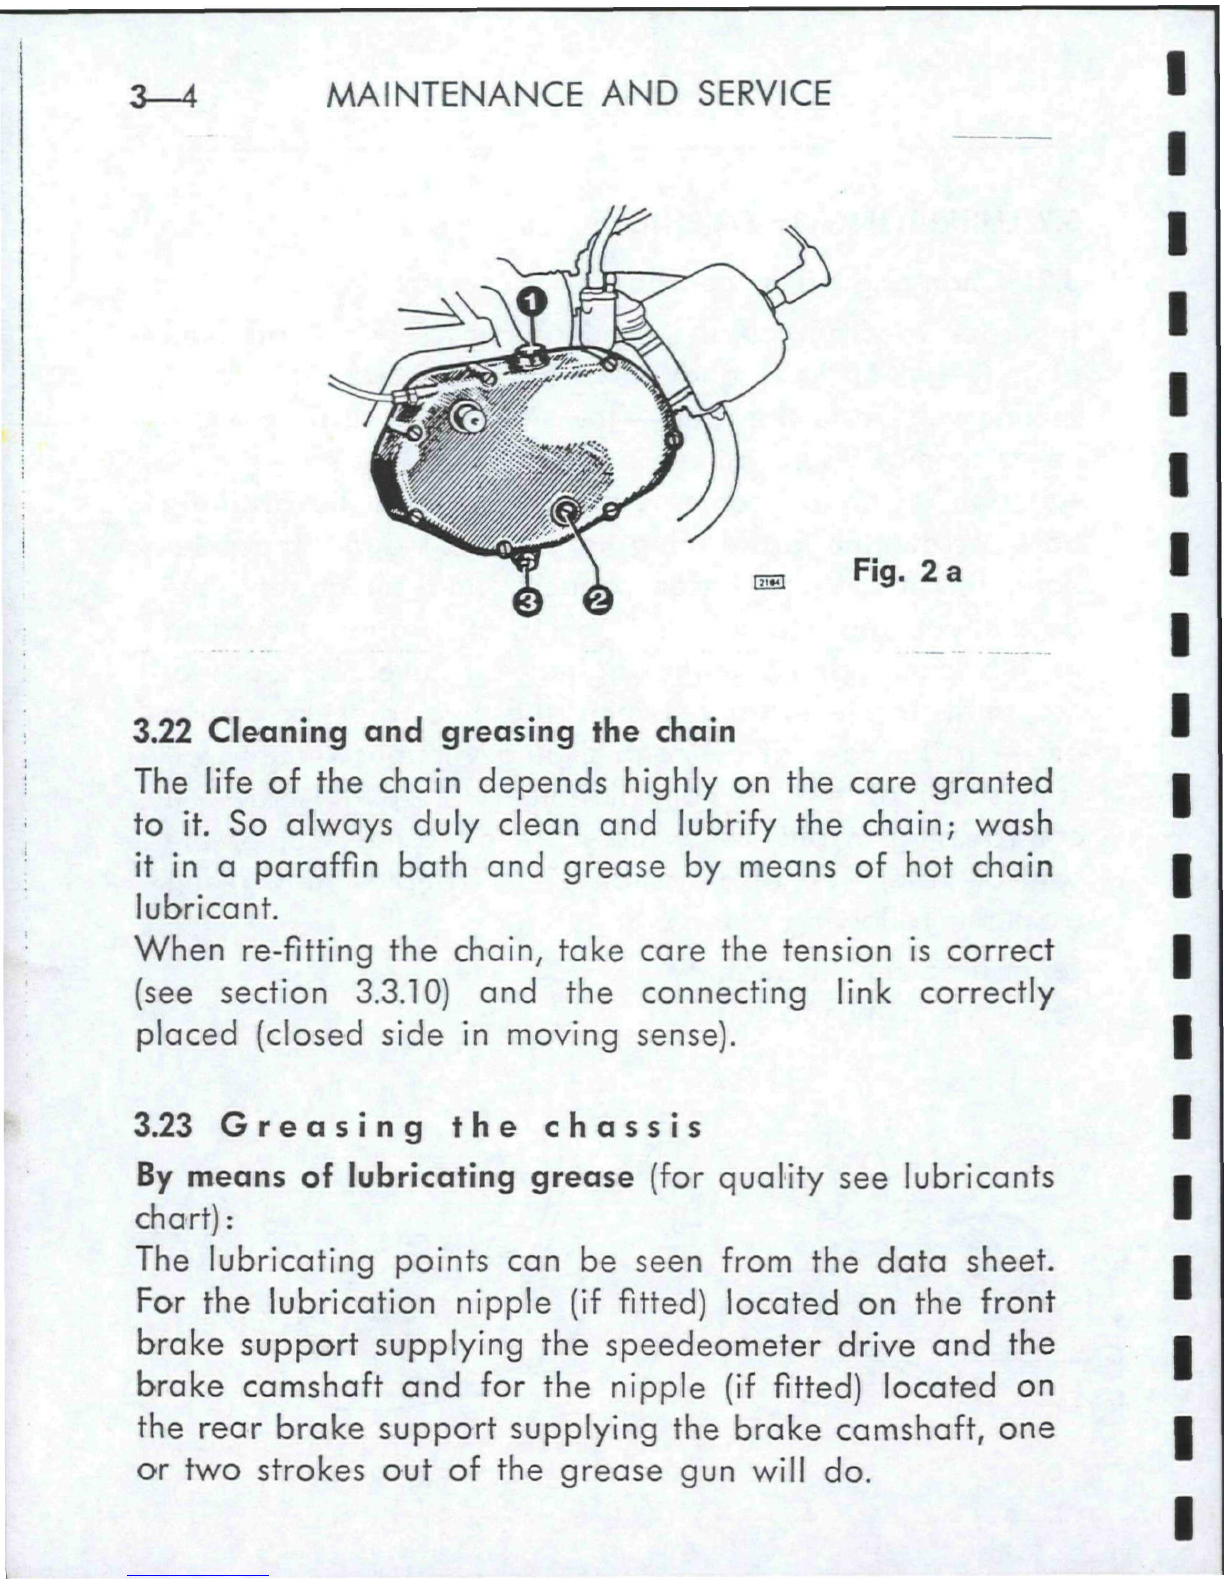
3—4MAINTENANCEANDSERVICE
Fig.
2 a
3.22Cleaningandgreasingthechain
Thelifeofthechaindependshighlyonthecaregranted
toit.Soalwaysdulycleanandlubrifythechain;wash
itina paraffinbathandgreasebymeansofhotchain
lubricant.
Whenre-fittingthechain,takecarethetensioniscorrect
(seesection3.3.10)andtheconnectinglinkcorrectly
placed(closedsideinmovingsense).
3.23Greasingthechassis
Bymeansof lubricatinggrease(forqualityseelubricants
chart):
Thelubricatingpointscanbeseenfromthedatasheet.
Forthelubricationnipple(iffitted)locatedonthefront
brakesupportsupplyingthe
speedeometer
driveandthe
brakecamshaftandforthenipple(iffitted)locatedon
therearbrakesupportsupplyingthebrakecamshaft,one
ortwostrokesoutofthegreasegunwilldo.

MAINTENANCEOPERATIONS3-5
Bymeansoflubricatingoil(qualityseelubricantschart):
0
Brakeadjustingscrewonfrontandrearwheel
0
Chaintensioningscrews
#
Gearshiftlinksandbearingpoints(iffitted)
4
Centralpropbearing
#
Saddlebearingpoints(iffitted)
0
Brakepedalbearing
#
Workingsurfacesofbrakeandclutchcontrollevers
#
Bowdencables(ifnecessary,takeoffheadlight
bracket)
3.24Changingoilinrearsuspensionunitandtelescopic
fork
Thisoperationshouldonlybecarriedout— accordingto
theinstructionsgivenintherepairmanual— bya
PUCH
servicestation(capacitiesgiveninthedatasheetattached
tothisbooklet).
3.25Lubrifyingthegreasefeltsupplyingtheignitioncams
LubrifythegreasefeltbymeansofBOSCHgrease
Ft!
v4.
Thelubricantmustnotreachthe
make-and-break
contacts
whereitwouldcauseexcessivewear.
3.3MAINTENANCEOPERATIONS
Entrustallworksthatyoufeeltobeoutofyourreach
toa PUCHrepresentative;hewillbepleasedtohelp
andadviseyou.
3.3.1Checkingthespark-plug
Screwthespark-plugoutofthecylinderandholditby
itsthreadedendagainstearth,e.g.thecylinderhead
3—6MAINTENANCEANDSERVICE
(plug
still
beingconnectedwiththeplugwire).Ifthe
startingdeviceisnowoperated,a powerfulsparkshould
flashoverbetweentheelectrodes.Oilyplugsorplugs
withdirtdepositsbetweentheelectrodeswillnotpro-
duceanysparkandmustbecleaned(woodensplinteror
steelbrush).
Whenreplacing,onlyusea spark-plugwhosethermal
valuecorrespondstothefigureindicatedinthedata
sheet.Thesparkgapshouldbebetween0,5to0,6mm.
If
thegapiswider,regapbybendingtheouterelec-
trode.
Whenscrewingtheplugin,takecareit
fits
well
intothethreadandmayeasilybeturned.Neverhave
recoursetoforcewhenscrewingin:Screwinbyhand
2or3 turns,onlythenyoumayusethespark-plug
wrench.
Standardplugaccordingtodatasheet.
3.3.2Decarbonizingtheengine
Theconstitutionofdepositsoncylindercover,piston
headandexhaustportisa necessarycorollaryofthe
workingofourcombustionengines(two-strokeengines),
buta lengthisa sourceoftroubles.Combustionpro-
ductsoriginatingfromoilaswellasfromfuelmust
thereforeberemovedfromtimetotime.
Cylindercoverandpistonhead
Removingthecarbondepositsfromcylindercoverand
pistonheadmustbecarriedoutbymeansofa blunt
edgedinstrument(screwdriverorthelike).Assurface
hardnessoflightalloysisrelativelylow,theirsurfaces
mayeasilybescratched.Scratchingistobeavoidedas
everynewscratchentailsinevitablytheconstitutionof

MAINTENANCEOPERATIONS 3—7
Fig.
3
newcarbondeposits.Fromthepistonhead,removeonly
scalydeposits;a uniformlytenuouslayerofoilcarbon
neednotberemoved.Beforerefittingthecylindercover,
thoroughlyremoveallcarbonremainsfrominnersideof
cylinder(clothusedshouldnotberavelling),rubwith
motoroil.Thenmakesurebyturningtheengineover
afewtimesthatenginerunseasily.Cleanfayingsur-
facesoncylinderondcylindercoverbywipingthem
andre-fitwithoutgasket.Tightenthefourcylinderhead
nutscrosswise.
Exhaustport
Inordertocleantheexhaustport,takeofftheexhaust.
Engagehighestspeedandturnengineoverbymeans
oftherearwheel(spark-plugunscrewed)tillpiston
reacheslowestpoint.Inautomaticmodelspossibleonly
bymeansofstartingdevice.Coutiouslyremoveoilcar-
bonfromexhaustport;takecarenottodamagepiston
orcylinderworkingsurfaces.Whencleaningtheexhaust
portitwillbepracticalalsotocleantheexhaustmuffler
(seefollowingchapter).

3—8 MAINTENANCEANDSERVICE
!!!}}):!'-»>llllUJll>l.im))nmn„:»,lM>»
K>.
•
',.
n|i
|||ff|^
"®^(K
Fig.
7a
MAINTENANCEANDSERVICE3—9
3.3.3Cleaningtheexhaustmuffler
It
isadvisabletocleantheexhaustmufflerafterhaving
cleanedtheexhaustport.
Dismantleanddisassembleexhaustmuffler:
Cleanexhaustpipebymeansofspecialbrushprovided
forthispurpose.Oilcarbondepositsmustberemoved.
Inthecaseoftherectangularexhaustmufflerfittedunder
theengine,stripandcleanonlyexhaustpipes.Inthe
caseofthelonglaterallymountedexhaustmufflers,
disassemblethemufflerafterscrewingoffthecentral
mufflerfastening.
Usea scraperforremovingtheoilcarbondepositsfrom
themufflerinside.
Oildepositsonfasteningdeviceandinthepipesofthe
after-silencermustcarefullyberemoved.Ifnecessary,
renewgaskets.
Wewarnagainstmodifyingthesilencerinside,especially
againstremovingthebaffleelements.Thiswouldonly
reduceengineoutputandraisefuelconsumption.Itisby
nomeanstruethatbydoingsooneachievesa higher
engineperformance.Moreoverchangesarelegallyfor-
bidden,
asthemodelhasbeenlicensedonlywiththe
originalmufflersonit.Incaseofalterations,boththe
ownerofthevehicleastheonewhoactuallycarried
throughthealterationareliabletoprosecution.
3.3.4Cleaningtheairfilter
Changefilterinmodelswithdryfilter.
Locationandaccessibilityoftheair
filter
ore illustrated
onthedatasheetattachedtothisbooklet.
This manual suits for next models
2
Other Puch Scooter manuals


