Trikke T5 JOGO User manual


Important Must Read Warnings,
Safety Information and Riding Tips
This owner’s manual is designed to help you make the most of your Trikke™ cambering
vehicle. Instructions and warnings have been carefully prepared to make your experience
as safe and enjoyable as possible. Use common sense while riding and enjoy your new
Trikke cambering vehicle. Read additional information on page 12.
READ AND UNDERSTAND THE ASSEMBLY, MAINTENANCE AND SAFETY
SECTIONS OF THE OWNER’S MANUAL BEFORE RIDING. ALWAYS FOLLOW
THE INSTRUCTIONS AND PAY ATTENTION TO ALL WARNINGS.
• ALWAYS WEAR PROPER SAFETY EQUIPMENT WHEN RIDING THE TRIKKE
CAMBERING VEHICLE INCLUDING AN ANSI, SNELL, CPSC, ASTM or DIN EN
1078 APPROVED HELMET. USE PROPER FOOTWEAR AND SECURE LACES ON
SHOES BEFORE RIDING.
• AVOID WATER, BUMPS, GRAVEL, SAND, CRACKS, UNEVEN SURFACES
OR OBSTACLES THAT MAY STOP YOU SUDDENLY OR CAUSE YOU TO LOSE
CONTROL. THE TRIKKE CAMBERING VEHICLE IS NOT INTENDED FOR OFF-
ROAD USE. AVOID RIDING AT NIGHT.
• HANDS FREE RIDING CAN BE DANGEROUS. USE BOTH HANDS TO HOLD
THE HANDLEBARS FIRMLY AT ALL TIMES. DO NOT PUSH TOO HARD ON
OR APPLY UNEVEN PRESSURE TO EITHER SIDE OF THE HANDLEBARS. DO
NOT MAKE SUDDEN SHARP TURNS OR APPLY YOUR BODY WEIGHT TO THE
HANDLEBARS WHEN TURNING. SUCH ACTIONS MAY CAUSE THE VEHICLE
TO “JACK-KNIFE” OR TO STOP SUDDENLY, WHICH CAN CAUSE SERIOUS
INJURY TO THE RIDER.
• DO NOT LEAN BACK OR PULL BACK ON THE HANDLEBARS. DOING SO
CAN CAUSE THE RIDER TO FALL OFF THE BACK OF THE VEHICLE POSSIBLY
RESULTING IN SERIOUS INJURY OR DEATH.
• POLYURETHANE WHEELS DO NOT PERFORM WELL ON WET PAVEMENT
OR ANY OTHER WET SURFACE. POLYURETHANE LOSES TRACTION ON MOST
WET SURFACES, AND WATER ON THE WHEELS CAN DRAMATICALLY REDUCE
THE EFFECTIVENESS OF THE BRAKES. RIDING IN ANY WET CONDITION IS
NOT RECOMMENDED.
• DOWNHILL RIDING IS NOT RECOMMENDED, ESPECIALLY FOR NOVICE
RIDERS. THE TRIKKE CAMBERING VEHICLE IS DESIGNED PRIMARILY
FOR USE ON FLAT DRY PAVEMENT. RIDING ON STEEP HILLS OR DOING
PROLONGED DOWNHILL RIDES IS NOT RECOMMENDED. PROLONGED USE
OF THE BRAKES WILL CAUSE THE REAR POLYURETHANE WHEELS TO
WEAR
DOWN PREMATURELY, DRAMATICALLY REDUCING THE EFFECTIVENESS OF
THE
BRAKES
OR EVEN CAUSING THEM TO FAIL. EXTREME CAUTION SHOULD
BE USED WHEN RIDING ON ANY HILL.
• DO NOT EXCEED THE RIDER WEIGHT RESTRICTIONS FOR EACH TRIKKE
MODEL:
TRIKKE 5 WEIGHT LIMIT 150 lbs. or 66 kg
TRIKKE 6 & 7 WEIGHT LIMIT 200 lbs. or 91 kg
TRIKKE 8 & 12 WEIGHT LIMIT 250 lbs. or 114 kg
Trikke Owner’s Manual
4/05/05
2

• ALWAYS INSPECT THE VEHICLE BEFORE EACH RIDE AND MAKE SURE
THAT THE HANDLEBAR QUICK RELEASE AND THE FOLDING MECHANISMS
ARE SECURELY LOCKED IN THE PROPER RIDING POSITION. READ THE
ASSEMBLY SECTION OF THE OWNER’S MANUAL FOR IMPORTANT ASSEMBLY
AND MAINTENANCE INFORMATION.
• TEST THE BRAKES FOR PROPER FUNCTION BEFORE EACH RIDE AND
DO NOT TURN THE HANDLEBARS MORE THAN 180ْ. THE BRAKE CABLES
CAN WRAP AROUND THE STEERING COLUMN AND POSSIBLY ENGAGE THE
BRAKES. MAKE SURE THAT YOUR BRAKE CABLES ARE NOT WRAPPED
AROUND THE STEERING COLUMN BEFORE EACH RIDING SESSION. ALWAYS
APPLY BOTH BRAKES EVENLY WITH YOUR WEIGHT DISTRIBUTED EVENLY
OVER EACH REAR WHEEL.
• CHILDREN SHOULD ALWAYS BE SUPERVISED BY AN ADULT. IT IS THE
PARENT OR GUARDIAN’S RESPONSIBILITY TO PROPERLY MAINTAIN AND
INSPECT THE VEHICLE BEFORE EACH RIDING SESSION. THE TRIKKE
CAMBERING VEHICLE IS NOT RECOMMENDED FOR CHILDREN UNDER 7
YEARS OF AGE.
• ALWAYS EXERCISE EXTREME CAUTION WHEN YOU ARE RIDING IN
PROXIMITY TO OTHER VEHICLES, PEDESTRIANS, AND ESPECIALLY IN
PROXIMITY TO CARS IF YOU ARE RIDING ON A STREET. BE SURE TO OBEY
ALL RULES OF THE ROAD.
• DO NOT MODIFY YOUR TRIKKE CAMBERING VEHICLE. ONLY USE
TRIKKE TECH, INC. APPROVED PARTS OR ACCESSORIES. SEE THE LIMITED
WARRANTY FOR OTHER USE RESTRICTIONS.
General Warnings:
• If you do not have the proper tools or fi nd that you are unable to understand the
assembly instructions, have a qualifi ed Trikke dealer assemble the Trikke™ cambering
vehicle for you. If a Trikke dealer assembles the vehicle for you, be sure to read the Riding
and Safety sections of the owner’s manual and watch the Riding and Safety video manual
before riding for the fi rst time.
• Immediately stop riding if you suspect that any part of the vehicle is not functioning
properly. Inspect the vehicle closely to confi rm what the problem is. Contact your dealer or
Trikke Tech, Inc. directly if you suspect that a malfunctioning or defective part is affecting
its safe operation.
• The front wheel is turned exactly 180 degrees to that of a bicycle. Unlike a bike, a
cambering vehicle’s front wheel actually trails behind the fork. Altering this wheel position
will change the intended performance of the vehicle. See the photos on page 4 of this
manual to see the proper manufacturer suggested position of the front fork.
• Riders performing in Trikke Tech, Inc. produced videos and photos are highly skilled
and specially trained professionals. Do not try these tricks yourself or you may lose control
and fall causing serious injury and even death.
• If you did not receive an instructional video in the box, or if the written or video manual
is damaged, please contact Trikke Tech, Inc. before attempting to assemble or ride your
Trikke cambering vehicle.
Trikke Owner’s Manual
4/05/05
3

TRIKKE ASSEMBLY MANUAL
Your pre-assembled Trikke
™
cambering vehicle requires handlebar attachment
,
front fork attachment for the T6, T7, T8, & T12
,
wheel attachment and brake
adjustment for the T12, and a quick maintenance checklist before riding. All of the
following information and more can be found on the
www.trikke.com
website.
This owner’s manual is also supplemented by the video Owner’s manual with
step-by-step instructions on the assembly process, how it works, and how to ride.
T12 o
wner
s
, please refer to the
separate
instruction manual document
specifically for the setu
p, adjustment and maintenance of the disc brakes.
Trikke Owner’s Manual
4/05/05
4
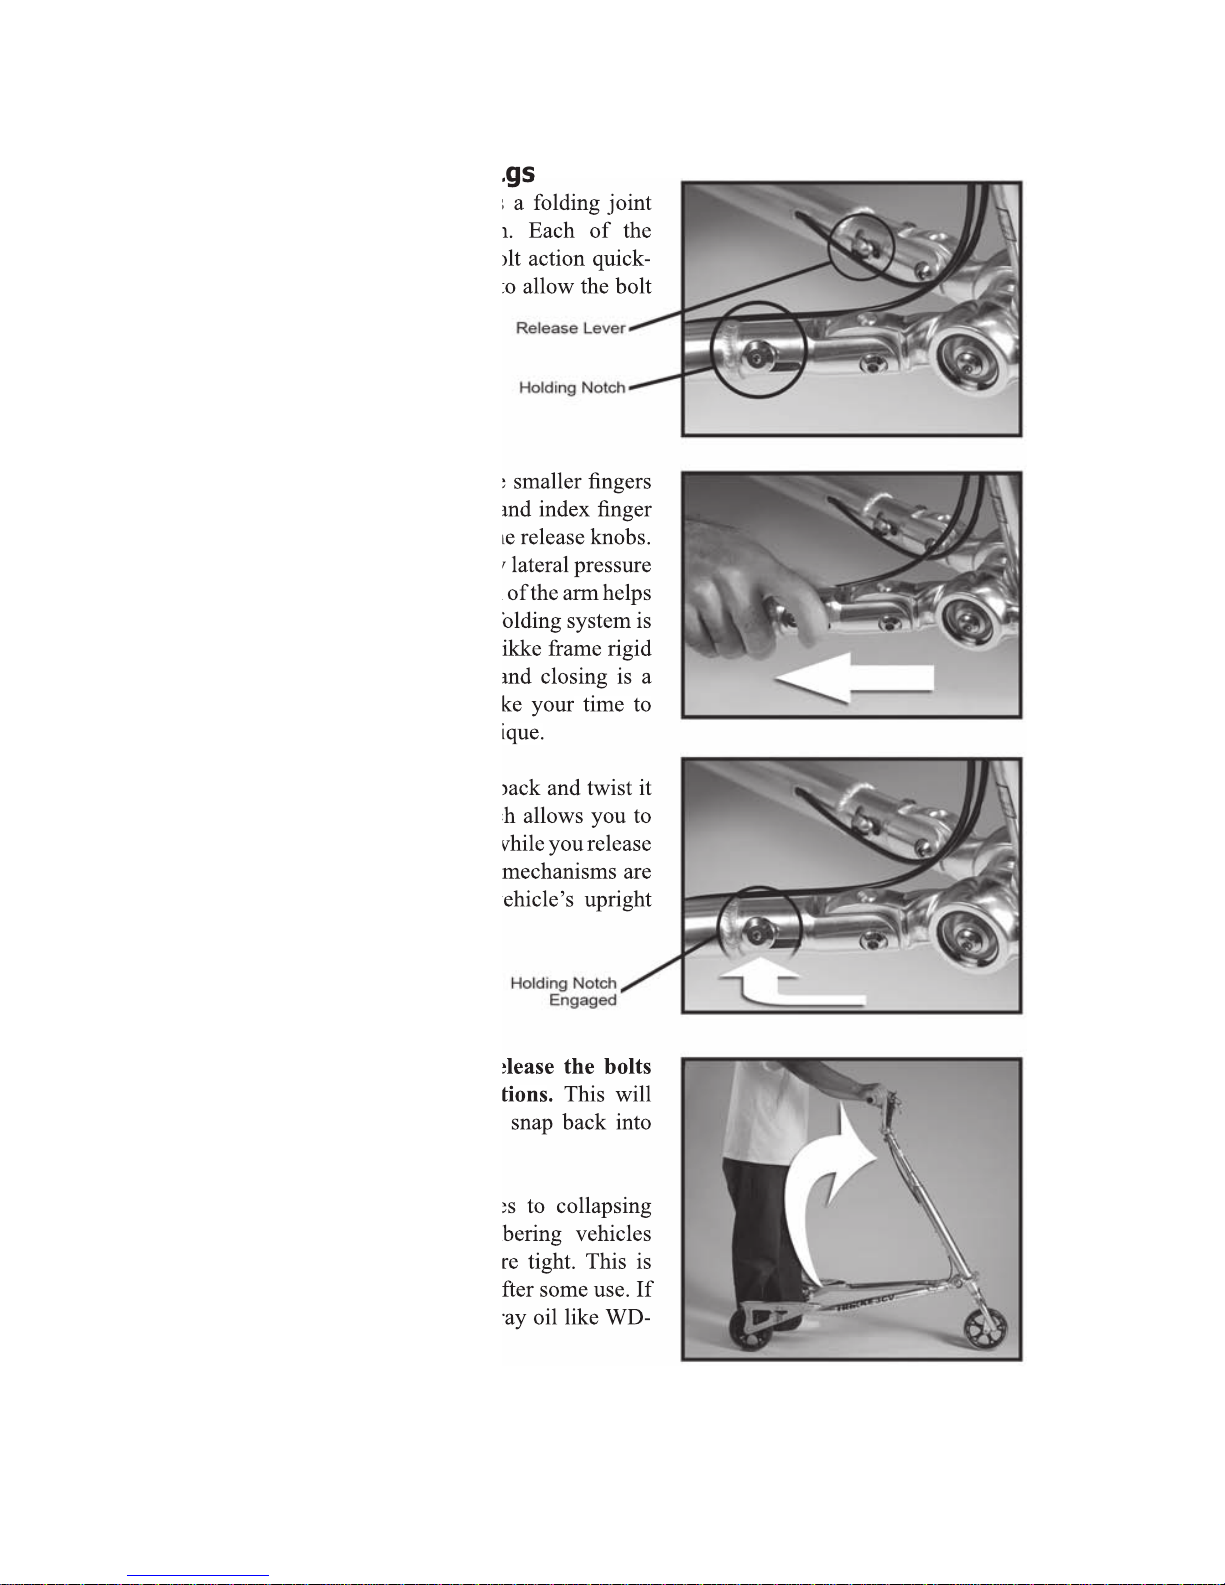
Step 1: Unfolding the Legs
Step 1: Unfolding the Legs
At the front of each leg there is a folding joint
At the front of each leg there is a folding joint
near the cambering mechanism. Each of the
near the cambering mechanism. Each of the
two joints has a spring loaded bolt action quick-
two joints has a spring loaded bolt action quick-
release mechanism with a notch to allow the bolt
release mechanism with a notch to allow the bolt
to be held in the open position.
Gripping the arm with your three smaller fi ngers
Gripping the arm with your three smaller fi ngers
and your palm, use your thumb and index fi nger
and your palm, use your thumb and index fi nger
to pull back
(see right arrow)
on the release knobs.
on the release knobs.
Tightness can occur if there is any lateral pressure
Tightness can occur if there is any lateral pressure
on the bolt. A light rocking motion of the arm helps
on the bolt. A light rocking motion of the arm helps
to release the bolt. Note that this folding system is
to release the bolt. Note that this folding system is
designed primarily to keep the Trikke frame rigid
designed primarily to keep the Trikke frame rigid
during riding. Ease of opening and closing is a
during riding. Ease of opening and closing is a
secondary design concern,
so
take your
take your
time to
take your time to take your
develope your own folding technique.
develope your own folding technique.
Once free, you can pull the bolt back and twist it
Once free, you can pull the bolt back and twist it
into the holding notch. This notch allows you to
into the holding notch. This notch allows you to
keep the bolt in the open position while you release
keep the bolt in the open position while you release
the other leg. When both release mechanisms are
the other leg. When both release mechanisms are
open, swing the legs into the vehicle’s upright
open, swing the legs into the vehicle’s upright
standing position.
At this point,
it is critical to release the bolts
it is critical to release the bolts
from their holding notch
positions
positions
.
This will
allow the spring loaded bolts to snap back into
allow the spring loaded bolts to snap back into
their locked riding position.
The same procedure also applies to collapsing
The same procedure also applies to collapsing
the vehicle. When Trikke cambering vehicles
the vehicle. When Trikke cambering vehicles
are new, sometimes the joints are tight. This is
are new, sometimes the joints are tight. This is
normal, and they will loosen up after some use. If
normal, and they will loosen up after some use. If
tightness continues, use some spray oil like WD-
tightness continues, use some spray oil like WD-
40 to lubricate the joints.
The vehicle should be in its unfolded standing
position in order to attach the handlebars.
Trikke Owner’s Manual
4/05/05
5
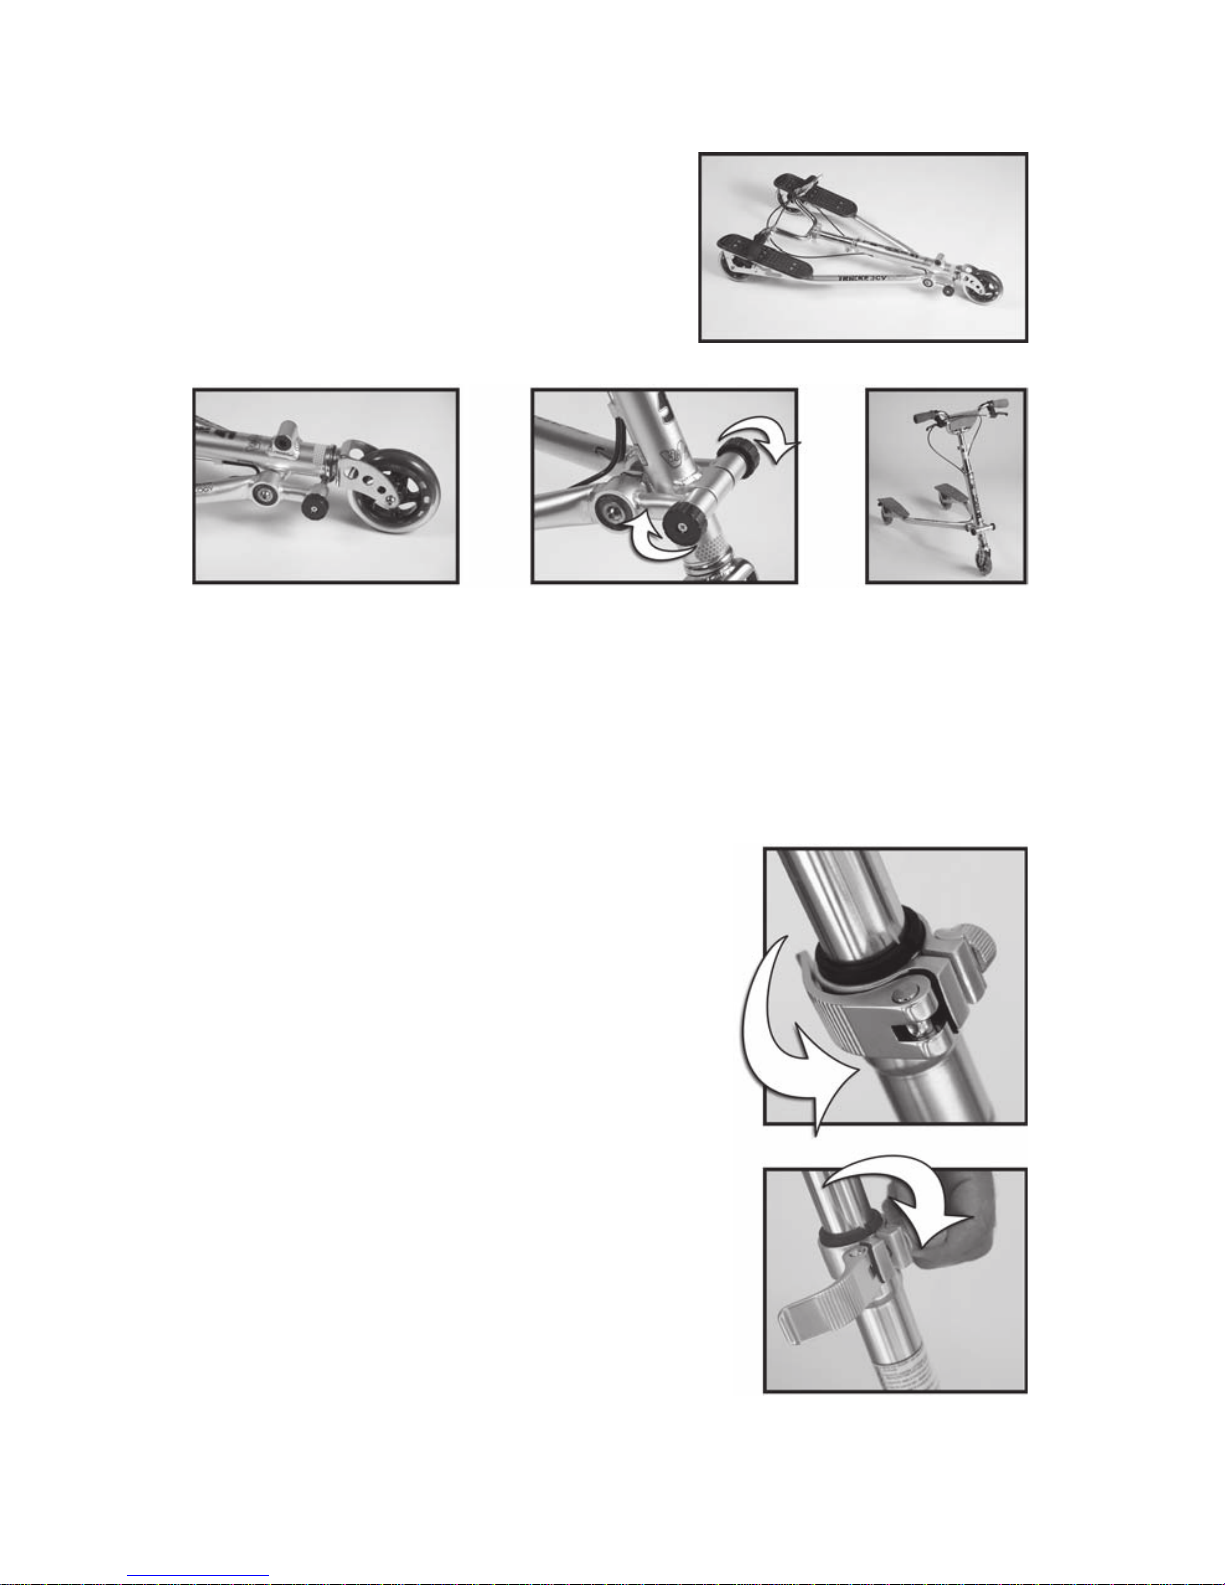
Step 2: Unfolding the W Version
The
W
version of the Trikke
5, the T5ws,
uses
a different method of folding. At the front of the
Trikke just above the front wheel is the cambering
axle
which has
black plastic knobs on either end.
Trikke Owner’s Manual
4/05/0
5
6
Twist the knobs counter to each other to unscrew the axle. Remove the axle without
removing the white bushings. Unfold the vehicle into the upright position to align the
cambering axle holes. Re-insert the axle pushing it all the way through. Screw the end knob
on and tighten fi rmly. The knobs have 5mm hex wrench holes so you can tighten with a
wrench if necessary. Make sure that the 4 white bushings do not slip out of the axle channel.
Repeat this procedure in reverse to refold the vehicle into its fl at storing position.
Step 3: Raising the Handlebars
Raise the steering column by fi rst unlocking the quick
release lever. Notice that there are some height locking
positions signifi ed by round holes down the back of the
handlebar riser tube (not on Trikke 5 models). There is
a spring loaded copper locking pin that snaps into these
holes to provide a second level of safety while riding.
Push the brass pin in to release the steering tube and
telescope the handlebars up to your preferred riding
height.
To attach the handlebars to the Trikke 6, 7, 8 & 12,
fi rst raise the steering column about 5 inches. When
retightening, make sure that the quick release fi rmly
locks the telescoping steering tube.
If the quick release is loose, use the adjustment fi nger nut
to tighten the quick release. Properly adjusted, it requires
a fi rm hand to close.

Step 4: Attaching the Handlebars
On the top side of the handlebar stem you will fi nd
four bolts securing the stem plate
(see photo right)
,
which you remove using the supplied 5mm Hex
wrench.
Remove the plate, but keep it nearby. To
insure that the whole steering system is facing the
correct direction (in the direction the vehicle will be
traveling), look down by the fl oor where the steering
column is touching the ground. The three inch fork
post has a spring loaded copper pin. Rotate the
handlebar stem until the pin is facing the direction the
vehicle will be traveling. This is important for proper
front fork alignment in Step 6 on page 8.
Trikke Owner’s Manual
4/05/05
7
Position the handlebars with the brake
cables crossing once behind the steering
column and again in front
(see white
arrows right)
.
This simple method insures
that the left brake lever actually operates
the left rear brake. If you fi nd that your
brakes are crossing, please start again
and properly mount the handlebars.
Once your brake cables are properly routed you can secure the
handlebars. Holding the handlebars on the bottom stem plate,
replace the top plate and the 4 bolts. With the bars properly
raked forward at about a
45°
angle (
20°
for Trikke 5) to the
steering column
(see photo left)
, center the bars and tighten the
four bolts in an alternating criss-cross pattern.
The photo to the right shows how the plate
should look, with even spacing
balanced front
to rear
between the plates. The gaps between
the plates should be even
(see white arrows
right)
. If the gaps are uneven, you run the
risk of stripping the stem threads. Balancing
the plate with even spacing between the front
and rear of the plates insures that all four bolts
have enough depth in the threaded holes.
(After learning how to ride, you can adjust the handlebar position to better suit your preferred
riding posture, but don’t rock them too far back as to inhibit proper folding. You can also adjust
the brake levers for riding comfort and ease of use)
Note: For all Trikke 5 models there are only 2 bolts. For T12 owners, the four bolts are actually on the front
Note: For all Trikke 5 models there are only 2 bolts. For T12 owners, the four bolts are actually on the front
of the BMX style stem --- not on top.
of the BMX style stem --- not on top.

Trikke Owner’s Manual
4/05/0
5
8
Step 5: Brake Tension Adjustment
Before turning the vehicle upside down to attach
the front fork on T6, T7, T8 & T12 models, turn the
brake tension adjustment screws as far in or towards
the brake-handle as they will go. The brake tension
adjusters can be found where the brake cables enter
the brake levers on the handlebars. You will actually
adjust the brake cables in step 7 before making fi nal
adjustments, but by doing this step you will optimize
your adjustment capabilities while riding.
Step 6: Attaching the Front Fork
Putting the front fork on in the proper
riding position requires a 5mm Hex wrench
(supplied). First, turn the vehicle upside down
so the fork post
(arrow right)
is aiming towards
the sky. You should do this procedure on a
carpet or soft surface to prevent scratching the
handlebars or foot platforms.
Inspecting the fork post you will fi nd a spring loaded copper
locking pin
(arrows above and left)
. You will also fi nd a hole to
secure the locking pin on the front face of the fork. This pin is
similar to that of a beach umbrella.
Simply align the locking pin with the hole
(arrow right)
and
push the front fork onto the fork post until the top of the fork
and the locking pin meet.
Depress the locking pin and slide the fork the fi nal inch or so
until the locking pin snaps into the hole
(arrow left)
.

Trikke Owner’s Manual
4/05/05
9
Step 6 (continued)
Now all you need to do is use the 5mm Hex wrench to
fi rmly
tighten the two bolts
(arrow right)
.
Leave the vehicle upside down for the next step.
Step 7: Adjusting the Brakes
Your brakes should be set properly at the factory, but we will tell you how to adjust them
for future reference.
T12 Roadster owners should refer to the T12 Roadster Brake
Adjustment Instructions for this step.
For all of the polyurethane wheeled models,
Access the brake system which is under the
foot platforms at each rear wheel.
First, unwind the cable’s tail
(see white
arrow)
. Using the smallest of the supplied
Hex wrenches, release the cable stay. The
cable stay is a barrel shaped object that holds
the cable to the brake pad arm. The
black
arrow
(photo right)
indicates where the
hex wrench access hole is and
black/white
arrow
where the cable stay is. The wrench (gray arrow) goes through the hole and into the
hex nut on one end of the stay (not visible).
Once you have inserted the wrench into the cable stay, turn the wrench to release
the brake
cable but do not allow the cable to slide out of the hole in the stay. For new cables, pull the
end of the cable towards the front wheel
with one hand
which will pull the slack out of the
cable and force the brake pad to touch the wheel. For readjustment of used cables, set the
brake pad to an eigth of an inch from the wheel. Retighten the hex nut on the cable stay and
re-stow the cable’s tail by wrapping it back around itself. (white arrow)
The desired result is to keep the brake pad as close to the wheel as possible without
rubbing. Keeping your cables tuned like this will optimize the operating effectiveness of
your brakes.
Step 6a: Setting the front fender on the T12
The T12 Roadster has a plastic fender or water guard for the front wheel. Before you
tighten down the two 5mm bolts on the T12 front fork, push the fender as far up into the
fork hole as possible and align the fender with the front wheel. Firmly tighten the bolts to
secure the front fork. This tightening will also clamp down on the fender to keep it in a
secure and properly aligned position.
Trikke Owner’s Manual
4/05/05
10
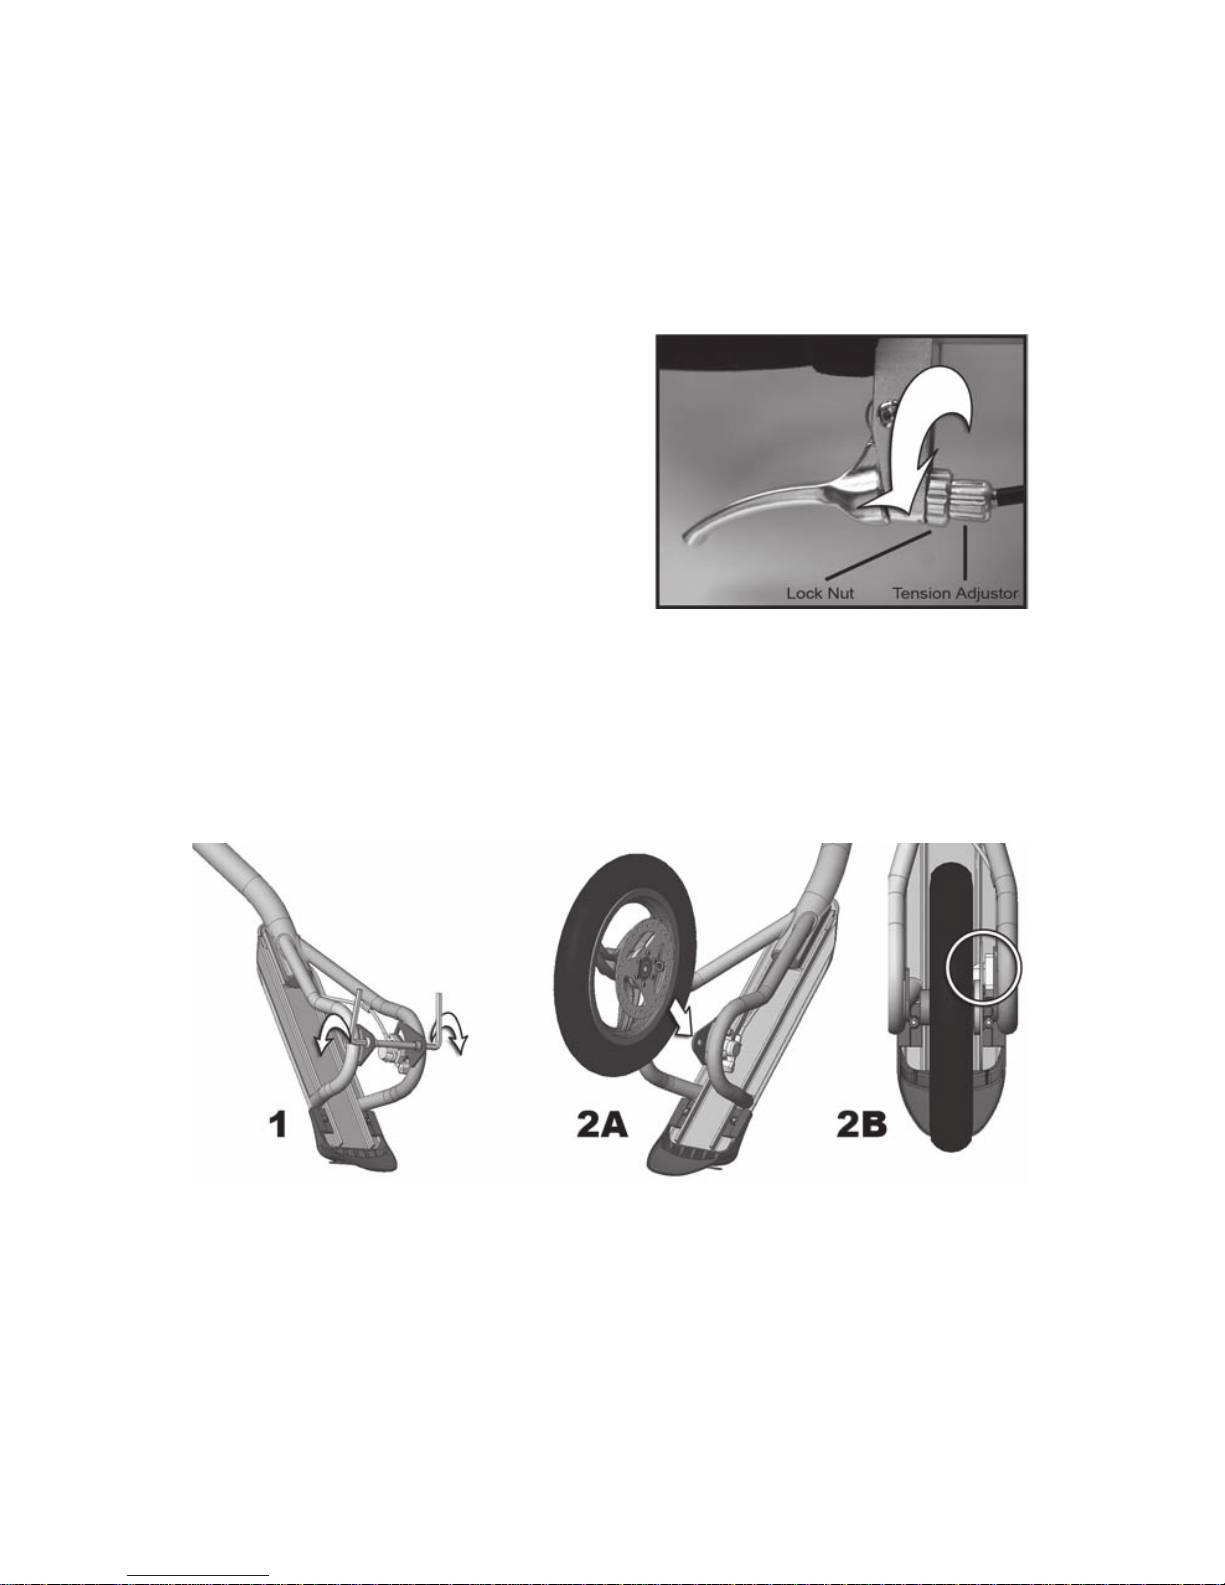
Step 8: Final Brake Cable Adjustment
Return the vehicle to its upright position and depress the brakes fi rmly several times to
stretch the cables. Properly adjusted in step 7, you will fi nd that the brakes are tight with
little play. Firmly depressing the brakes several times will stretch the cables just enough
so that the pads do not rub on the wheels but offer maximum braking power. After riding
for several hours, check the tension of the brake cables and readjust as needed to maintain
maximum braking power as follows.
If the brake levers depress all the way to the
hand
grip, use the brake cable tension adjusters
(photo right)
to optimize braking effectiveness.
By backing the adjustment screw out you are
actually tightening the cable. This increases
the effectiveness of the brake lever. If you go
too far, however, you can cause the brake pad
to rub on the wheel which will slow you down.
Adjust it as far as you can without any rubbing
and tighten the locking nut against the brake
handle to keep the adjuster from moving.
Follow the illustrations below for the attachment of the T12 rear wheels. You will use the
6mm ends of both hex wrenches supplied with your T12 Roadster for this procedure. You
will also turn the T12 onto its back in order to expose the bottom of the foot platforms.
The best working conditions are with the T12 foot platforms on a table top. First, use the
hex wrenches to remove the axles as seen below in illustration 1.
To insert the axle with washers and spacers in the proper sequence follow these instructions.
You will be working from left to right. See illustration on P.11.
1.
Make sure that there is just one washer on the axle.
2.
Push the axle through the left fork hole so that about 1/2 an inch of the axle is visible
on the inner side of the fork.
3.
Slide the fi rst spacer onto the short end of the axle with the wide portion of the spacer
facing the fork and the narrow end facing the wheel bearing.
4.
Place the wheel in rear fork, inserting the brake rotor into the brake caliper slot as
seen in the above illustration 2A.
5.
Push the axle into the bearing hole. Most likely, the axle will stop about 1/2 inch into
the bearing. The bearing spacer inside the wheel needs to be aligned with the axle.
Step 9: T12 Roaster Rear Wheel Attachment & Setup

Trikke Owner’s Manual
4/05/05
11
6.
The best way to align the bearing spacer is to push a Papermate ball point pen
through the right side of the wheel. While moving the pen around, put pressure on
the axle. when aligned, the axle will push right through the wheel and out through the
right side bearing. Pull the axle back to the left until it is fl ush with the outside of the
right bearing.
7.
The trickiest of these steps is to slide the right spacer between the wheel and the
right fork. Be sure to have the narrow end of the spacer facing the bearing. Using
fi ngers and some manuevering of the wheel you should be able to align the spacer
with the axle.
8. Push the axle through the spacer and into the hole on the right fork. Screw in the
6mm hex bolt with a washer and use both 6mm wrenches to fi rmly tighten the axle.
Step 9b: T12 Pneumatic Tires
The tires come with a lower pressure from the factory due to transport reasons. You will
need to adjust the tire pressure according to the rider’s weight and riding preferences.
Please do not exceed 80psi (5,4 bar) max. infl ation
. Example of recommended pressure:
rider’s weight: 170 lbs (77 kg) - tire pressure: front 47 psi (3,2 bar) / rear 80
psi (5,4 bar).
Tire press
ure
affects the riding performance: lower pressure makes for a smooth but slower
ride
, higher pressure
makes for a faster but bumpier ride.
Step 9a: Adjusting the T12 Disc Brakes
Please refer to the T12 Roadster Disc Brake Assembly Instruction Manual for detailed
instructions on setup, adjustment and maintenance of your T12 disc brakes. This manual
comes as a separate printed document in your T12 Roaster box.

Trikke Owner’s Manual
4/05/05
12
Final Assembly Check List for All Models
1. When you think that you have completed the assembly process, study the vehicle
one more time and compare it to the photograph on page 4.
2. Check the bolts that secure the front fork and handlebars. A good push and pull
on the handlebars will immediately indicate whether or not the stem plate is not
properly secured. The handlebars should not be able to rotate on the stem --- even
with all of your weight pushing on it.
3. Do a fi nal brake check by spinning both rear wheels. They should spin freely
until you apply the brakes. You should be able to vigorously squeeze the brake
levers without the levers depressing all the way to the handlebar.
4. Check the folding mechanism to insure that both of the rear legs are locked in
the riding position. Always check to make sure that you have taken both of the
release knobs out of the holding notch.
5. Always check all of the bolts before riding to insure that the
vehicle and all of
its components are operating properly.
Assembly Questions or Replacement Parts
For any questions regarding your Trikke, replacement parts or accessories, please go to the
www.trikke.com webs
ite for furth
er
details.
er details.er
Before riding for the fi rst time, please
t
ake several minutes to go over the
Important Riding and Safety Tips on page 2 and 3 of this manual. For the safety
of friends and others, it is their responsibility to read and understand all warnings
and safety information in this owner’s manual before riding.
Trikke Owner’s Manual
4/05/05
13
Trikke Riding Manual
Now that you have successfully assembled your new Trikke
™
cambering vehicle, we will
take you through some simple riding tips to help you get started. We always recommend
that you ride with a helmet and safety gear. Pay special attention to where you are riding,
your proximity to other people, and especially your proximity to cars if you are learning to
ride on a street or in a parking lot.
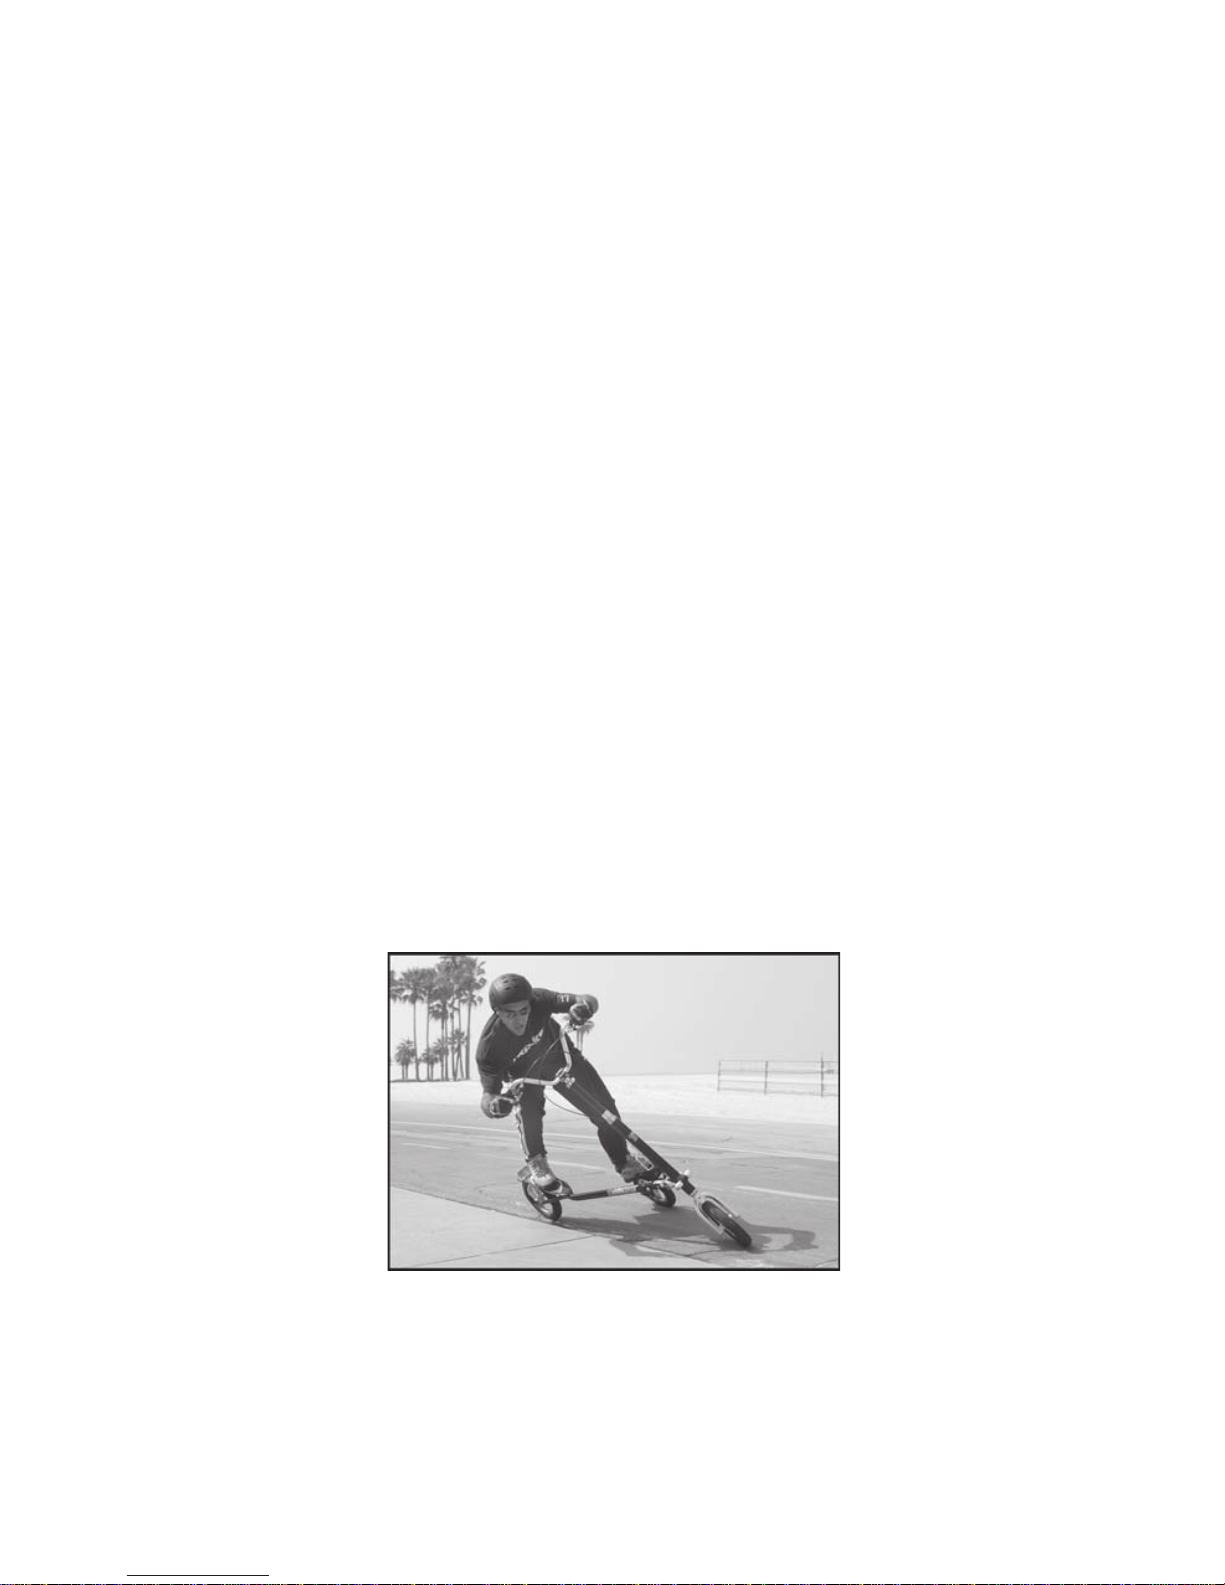
Athletes who are accustomed to skiing or inline
skating typically pick it up in a matter of minutes.
Don’t be discouraged if you can’t climb on
and speed away at 15 miles per hour. Being an
entirely new vehicle, it requires some new skills.
Regardless of your athletic background, you can
learn to ride a Trikke cambering vehicle in a
relatively short period of time --- usually in less
than an hour.
The greatest words of wisdom are:
“Keep going until you feel the sweet spot.” You’ll know it when you feel it. If friends or
family are riding for the fi rst time, for their safety please take the time to properly instruct
them and have them wear safety equipment.
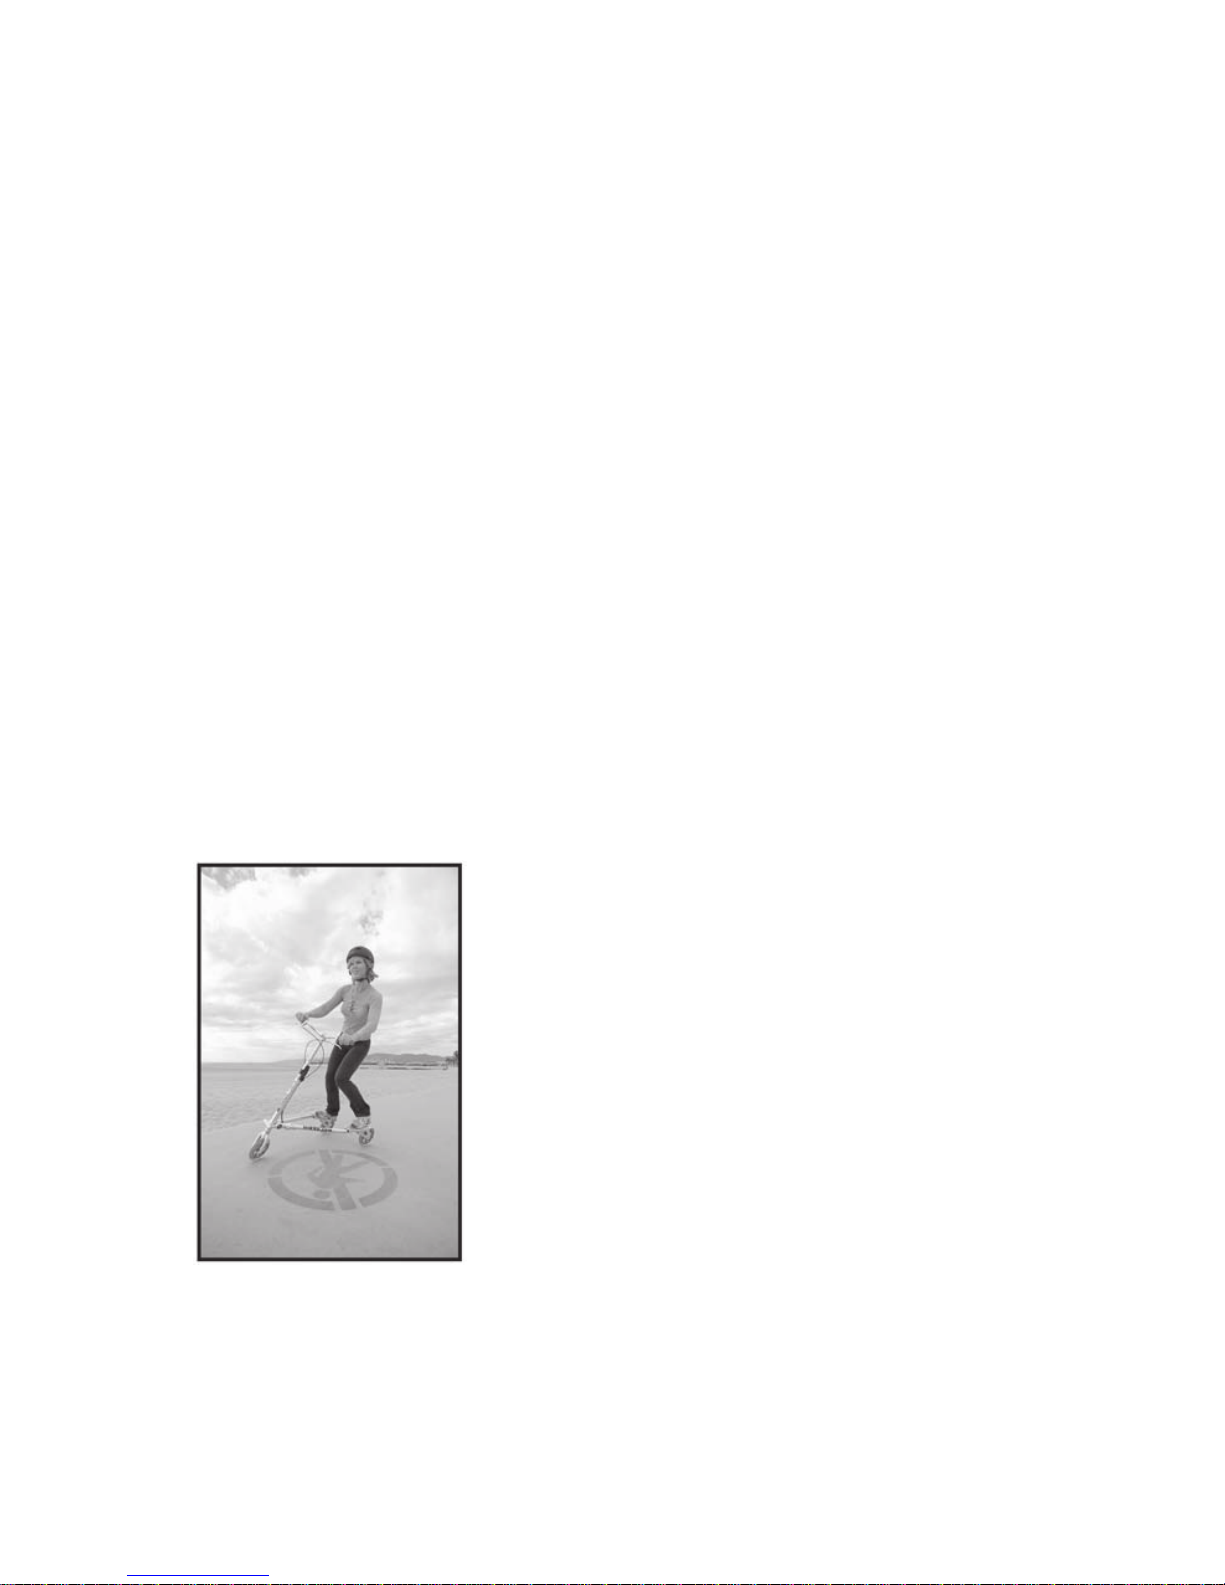
You are now embarking on a totally new experience for mankind. It is once in a century
that a truly new technology emerges to change our way of thinking about motion and its
application. Conservation of angular momentum is the physical principle that the Trikke
cambering vehicle harnesses in order to transfer the rider’s energy into forward momentum.
It is the painstaking research and development by Trikke Tech over a period of 12 years that
has optimized the melding of this principle with a human powered vehicle.
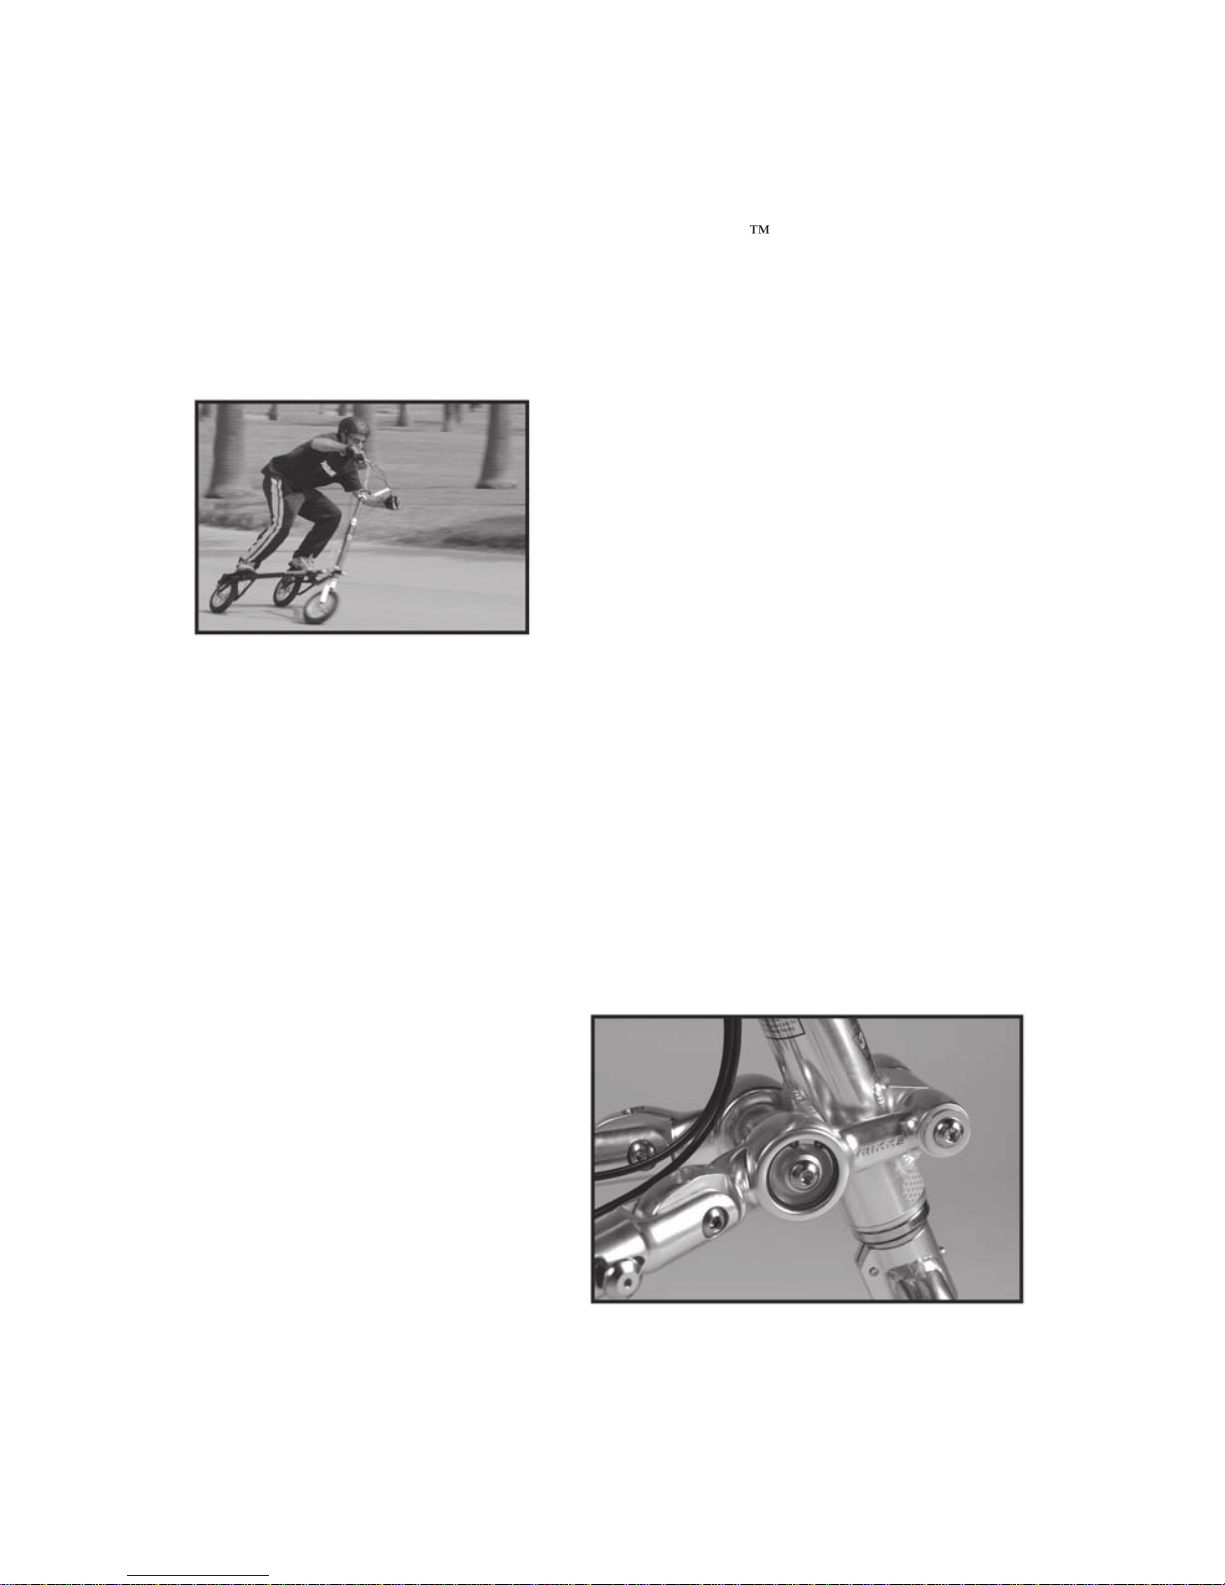
The exclusive 3CV™ Technology
developed by Trikke Tech is the
mechanism that makes this forward
propulsion possible. The unique
cambering mechanism is elegantly
simple yet provides the necessary
rigidity, geometry and resistance to the
rider’s motion to allow for optimum
control, speed, comfort, durability
and especially rider confi dence. You
are now the owner of the original
Trikke cambering vehicle.

Trikke Owner’s Manual
4/05/0
5
14
The following fi ve warnings have been selected from the list at the beginning
of this manual for more in depth description and instruction. Please read and
understand these and all warnings before riding.
Safety Issue #1: Riding in Wet Conditions
Because Trikke
™
cambering vehicles use hard polyurethane wheels, we want to warn you
about the potential hazards of riding on wet pavement. Just like inline skates or skateboard
wheels, Trikke wheels become very slick when wet, and the vehicle can come right out
from under you if you try to ride in wet conditions. If it’s raining or the pavement is wet
from dew or drizzle we do not recommend that you ride until it has dried completely. If you
encounter a puddle or a wet place in the pavement that you cannot avoid, we recommend
walking the vehicle until you are on dry pavement again. If you fi nd yourself on wet
pavement at any time while riding, coast straight through the wet area without turning.
When you reach dry pavement, give the wheels a few rotations to dry off before you do
any turns.
Safety Issue #2: Weight Distribution
Since you are essentially standing directly above the rear wheels, it is quite easy to go over
backwards by leaning back. Be careful to not lean back or distribute your body weight
behind the rear wheels. This warning is especially important for riders with restricted
movement, or reaction time. Great care should be taken to avoid getting into a situation in
which you have to quickly dismount the vehicle. If you are standing still on the vehicle it
is always recommended that you keep the brakes on. If for some reason you feel yourself
going off the back, putting the brakes on will help stop the vehicle from scooting out from
under you, but you should always step off as a precaution.
The best way to insure that you are always positioned properly on the vehicle and to
minimize the potential for going off the back is to distribute your weight evenly between
the front and rear wheels. Accordingly, you should not lean forward over or onto the
handlebars either but rather
move your toes up to the front of the foot platforms
and always
let the balls of your feet and toes carry most of your weight. Avoid rocking back on your
heels, pulling back on the handlebars or sticking your butt out behind the rear wheels. If
you put too much of your body weight over the rear wheels or behind them (in the case
of sticking your butt out) you will inevitably un-weight the front wheel. Besides the risk
of going off the back, the other reason for evenly distributing your weight is to insure that
your front wheel has plenty of traction, which leads us to the next safety issue.
Safety Issue #3: Handlebar Etiquette
Properly managing the handlebars and especially how far to the left and right you turn
them while you are riding is vital to your safety. Because the front wheel has been designed
to trail the fork, the handlebars have a tendency to turn on their own in the direction that
you are leaning the vehicle. Unlike a bicycle, which wants to go in a straight line, the front
wheel will actually accentuate a turn. Because of this condition, new riders need to
pay
special attention to not over steer.
Over steering can
cause the handlebars to cross up or
“jack knife” which will stop the vehicle suddenly and possibly cause an injury. Always
maintain fi rm control of the handlebars with both hands and never ride with one or no
hands. The Trikke cambering
vehicle requires both hands on the handlebars at all times.
Trikke Owner’s Manual
4/05/05
15
First time riders have a tendency to muscle the handlebars and throw their weight from side
to side. What propels the Trikke cambering vehicle forward is a combination of turning
and leaning the steering column, not jerking or thrusting the handlebars from side to side.
It is best to think in terms of more rocking and less turning. Long smooth turns are best
for beginners.
Because the handlebars are free to spin 360ْ it is possible for the brake cables to get twisted
around the steering column. If you try to ride with the cables twisted the vehicle will
probably feel sluggish because one of the brakes is probably partially engaged. Before
riding, always check to see that the brake cables are not wrapped around the steering
column.
Safety Issue #4: Riding Downhill
Because the Trikke cambering vehicle is a totally new machine with completely foreign
riding characteristics, we strongly recommend that you take your time when familiarizing
yourself with the vehicle and gradually test the performance boundaries of its riding
characteristics. This is especially important before attempting to ride up or down hills.
Both hill climbing and downhill riding are advanced and require that you become a strong
competent rider before even attempting hills --- up or down. As far as downhill riding is
concerned, we strongly recommend that you only ride down hills in which you can control
your speed with turns as you traverse the hill. Riding hills at speeds that require constant
braking is not recommended for three reasons: you can get up to speeds where your braking
distances are too long to stop you safely, you can fall causing serious injury or death,
and you will quite simply wear down your brake pads and rear wheels long before their
expected functional life expectancy.
The Trikke cambering vehicle will accelerate quickly down even the mildest grades, so
only ride at speeds and in an environment that are suitable for your skill level.
Safety Issue #5: Safety Equipment
Always wear safety equipment, especially a helmet. A helmet is a must when riding a
Trikke cambering vehicle or any wheeled vehicle for that matter. We also recommend that
you wear elbow and knee pads, especially for children and inexperienced riders. As stable
a platform as the vehicle is, there are always environmental conditions that might catch you
by surprise like cracks in the pavement or other vehicles.
Trikke Owner’s Manual
4/05/05
16
READ AND UNDERSTAND THE ASSEMBLY, MAINTENANCE AND SAFETY
SECTIONS OF THE OWNER’S MANUAL BEFORE RIDING. ALWAYS
FOLLOW THE INSTRUCTIONS AND PAY ATTENTION TO ALL WARNINGS.
Visit our website at www.trikke.com for information, replacement parts, new Trikke
products, and custom Trikke accessories like carrying bags, hats, t-shirts, high performance
wheels, water bottles, backpacks and more.
How to Ride
Step 1: Mount the Trikke
First, fi nd some smooth, fl at and open terrain to ride on. Parking lots, basketball courts
or tennis courts are perfect places to learn. It is best to spend plenty of time riding on fl at
ground before attempting hills --- up or down, and do not assume that you already know
how to ride a cambering vehicle. Even though it has familiar features like handlebars and
hand brakes, cambering vehicles have unique riding and balance characteristics that require
a familiarization period. The vehicle is easy to stand on. We recommend that you step up
onto the vehicle and spend a few minutes getting used to the riding position, the braking
system, and especially the range with which you can rock the steering column left and
right. This is especially important because it is exactly this rocking capability that propels
the vehicle forward. Get used to letting your arms do the rocking --- not your body.
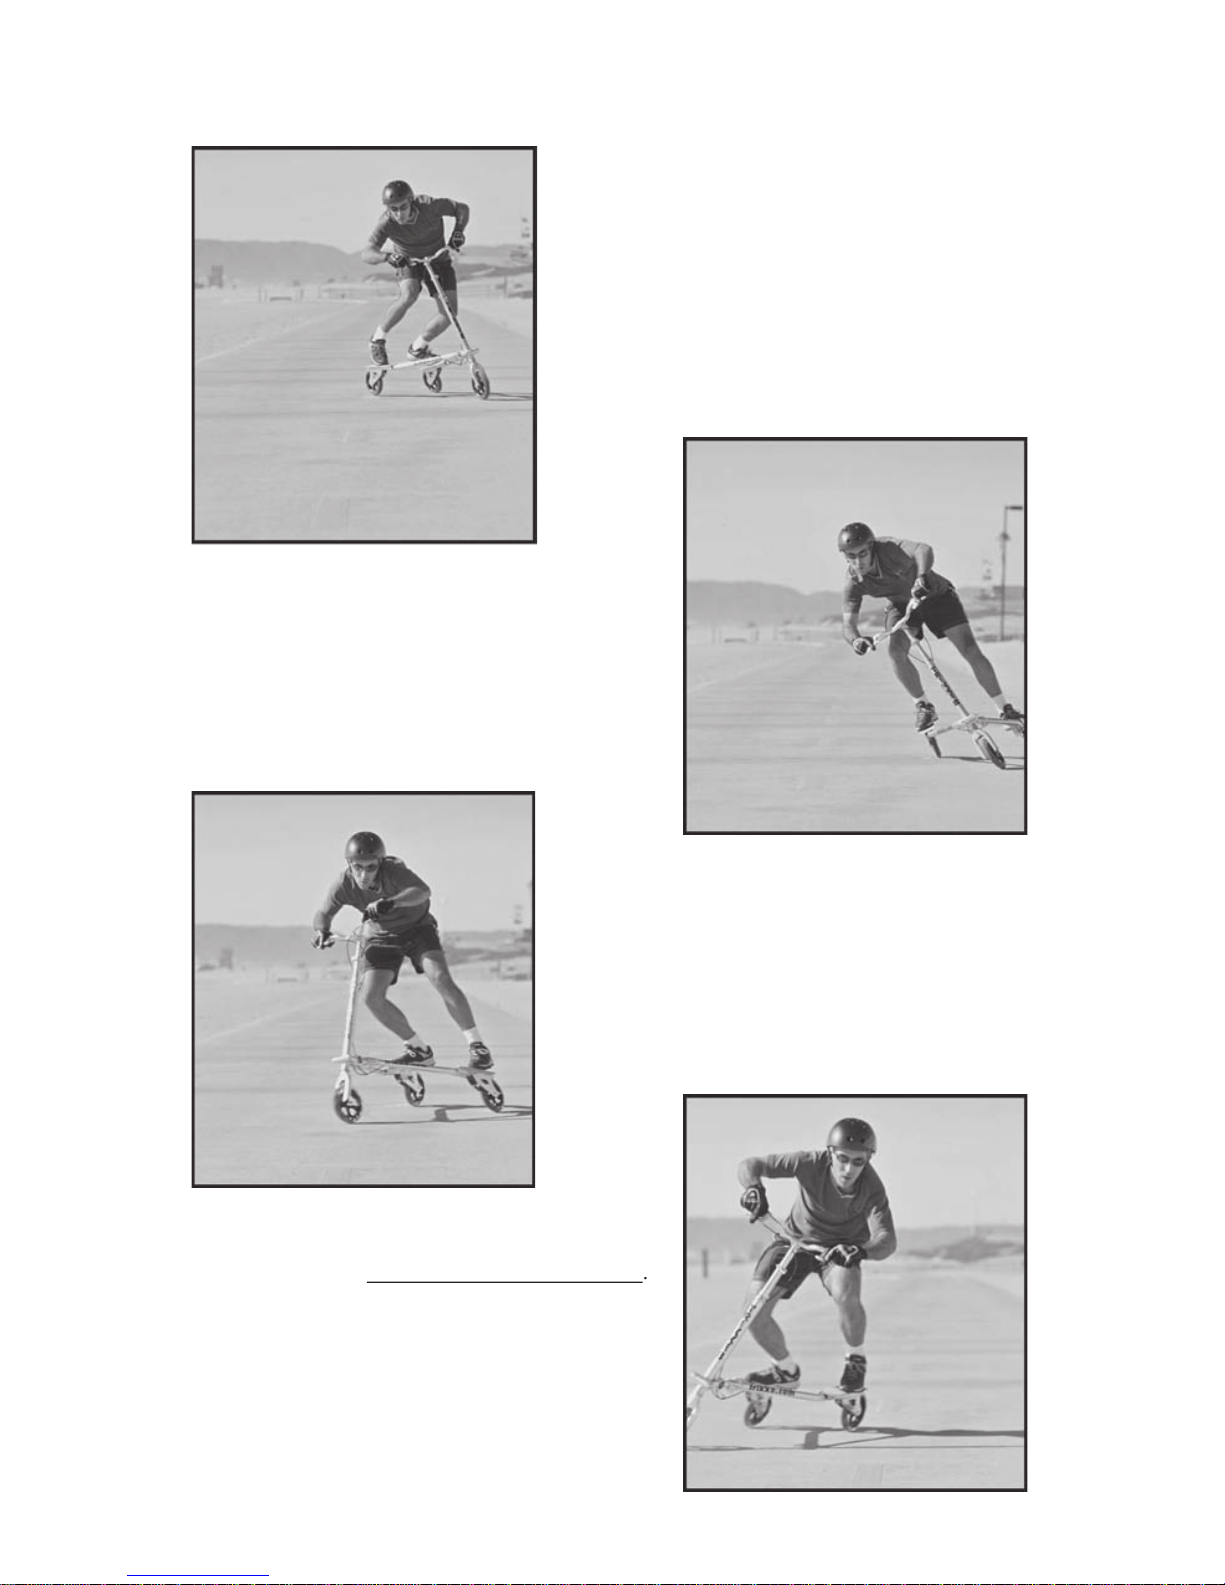
Step 2: Rock the Trikke
We recommend that you push off a few times like a scooter and simply ride around for
a few minutes to get used to the feel. It is especially important to establish a good riding
position that properly balances your weight between the front and rear wheels. First time
riders have a tendency to lean back onto their heels and to
pop unnecessary wheelies. This can be dangerous because
you can fall back and injure yourself. Scooting your toes
to the front of the platforms and riding on the balls of your
feet will help to distribute your weight to the front wheel.
Also, properly set, the handlebar height should force you
to lean a bit forward. This riding posture will give you
much better stability, control, and quick braking response.
Never lean back or pull back on the handlebars.
You can actually start moving without touching your feet
to the ground by rapidly turning the front wheel back and
forth. You will begin to pickup speed but will peak at only
a few miles an hour. Here is where it all comes together!
You are now turning the wheel back and forth to generate
forward motion and establishing a rhythm. No matter how bad you might be as a dancer,
the Trikke experience is very rhythmic in movement and timing. Stick with it. You’ll get
it. The beauty of what drives the Trikke cambering vehicle’s design forward is the addition
of one fi nal ingredient:
ROCKING THE STEERING COLUMN LEFT AND RIGHT AS YOU TURN THE
WHEEL LEFT AND RIGHT. A LEFT HAND TURN GETS A LEFT HAND ROCK.
Trikke Owner’s Manual
4/05/05
17
When you add the rock to the roll you are
essentially putting the rear wheels in a subtle yet
responsive position to generate forward thrust. It
will take a few minutes to catch on to a coordinated
combination of turning and rocking, but to those
who have any skiing or inline skating experience
you will immediately feel the similarities.
Your speed should pickup dramatically, and you
will feel the vehicle lunge forward with each turn.
Please note that it does not require that you make
tight turns. Rather, you should allow the vehicle
to kind of steer itself in a more graceful curving
path.
Many fi rst time riders tend to exaggerate the
turning of the handlebars thinking that they need
to continue with tight turns. Not so! The degree
of your turns should diminish as you begin to add
the rocking motion and as your speed increases.
Turning too hard can cause the vehicle to “Jack-
Knife” potentially causing you to fall. Take your
time.
Whatever you do,
do not muscle the handlebars
.
Experienced riders use a light touch on the
handlebars mostly for balance.

Trikke Owner’s Manual
4/05/05
18
Step 3: Weight Transfer
By this time you have dramatically increased your speed and should be getting to know
where the sweet spot is. When we say sweet spot, we mean the part of your turn where most
of your propulsion is generated. Typically, you will feel the outside wheel (your left rear
wheel during a right hand turn) drift away from you as you rock the vehicle to the right.
If you apply a little weight or a kick to that left foot as you turn you will accelerate even
more. A seasoned rider can actually propel the vehicle up to 18 miles per hour or better on
fl at ground…which is really moving.
The combination of these techniques will be new to you for sure, but be assured that riding
time will help you to create a smooth and beautifully coordinated movement. You will be
able to travel for miles with long graceful strides and rapid sprints. The beauty of it is that
you will always be looking ahead for places to carve and to add the skiing dimension to
what would have been a straight line ride on any other vehicle.
Step 4: Hill Climbing
Don’t be afraid to tackle hills, but make a point of graduating to steeper and steeper climbs
as your riding skills increase. We always say to new riders that hill climbing is an acquired
skill. You can try it, but you’ll probably frustrate yourself more than anything if you don’t
fi rst learn and master the basic skills of riding on fl at ground. The Trikke™ cambering
vehicle does slow down dramatically as you begin to climb a hill requiring a new and
physi
cally challenging tech
nique to be added to your growing Trikke repertoire.
Hill climbs require much more upper body fi nesse --- especially on steep grades. If you are
riding in an area that has unavoidable hills, we recommend climbing as much as you can
just to challenge yourself and then just walk or run it to the top.
Hill climbing really brings you full circle as you actually diminish the rocking and increase
the tightness of your turns as the steepness of the hill’s grade increases. It becomes almost
like a series of rapid punching motions to force the front wheel around in order to gain a
few more feet of pavement.
Whatever you do, take your time to graduate to steeper and steeper hills. In the end, the
most challenging of hill climbs will be attainable giving you a full body workout rarely
found in any other sport…if any at all.
Step 5: Downhill
Please read the Safety Issue #5 on page 13 of this manual. It best describes our
recommendations about riding downhill. Because of the pneumatic tires and disc brakes
on a T12, the T12 Roadster is best suited for downhill riding, especially prolonged
downhills.
Step 6: Proper Braking Technique
Because the Trikke cambering vehicle has brakes on both rear wheels, it is important to
learn how to optimize their effectiveness with some simple rules. First, always apply both
brakes together and evenly. Second, dispersing your weight evenly to each rear wheel is
crucial for maximum braking effectiveness. If you lift your weight from one foot platform
while braking you will cause that wheel to lose traction with the ground. Finally, do not
lean on the handlebars while braking.
Trikke Owner’s Manual
4/05/05
19
Step 7: Adding Upper Body Power
Once you get up to speed with normal riding technique you can move into a more advanced
practice of twisting your upper body and thrusting the vehicle into each lean with your arms
and shoulders. Essentially, you are throwing your upper body weight in the direction of
your turn in order to gain more speed. This technique is especially useful when accelerating
or hill climbing, and it defi nitely comes after learning the basics of riding a cambering
vehicle. The whole learning process will be a gradual development of your skills with each
time that you ride, but the beauty of it is that you will always learn something new with
each ride.
Enjoy your new cambering vehicle.
Trikke Accessories
Trikke offers a range of custom accessories designed specifi cally
for use with Trikke cambering vehicles. All of our accessories
and more can be found on our website at www.trikke.com or
through your Trikke dealer.
Trikke Custom Handlebars
:
Because all Trikke riders are not
the same, we offer a variety of custom handlebar accessory kits
to suite your look and style. Most popular is the Trikke Chopper
Handlebar Kit which features 20 inch chopper bars and all of the
necessary tools and parts to convert your Trikke 6 or Trikke 8
into a cool cruiser. Others include BMX style bars for the action
freestyle crowd.
Trikke Water Bottle & Cage
:
The Sport Series Trikke 8 Sport
model can be fi tted with a water bottle and cage on the back of
the steering column. Trikke offers a custom Trikke water bottle, a
cage, and hardware to easily mount to your cambering vehicle.
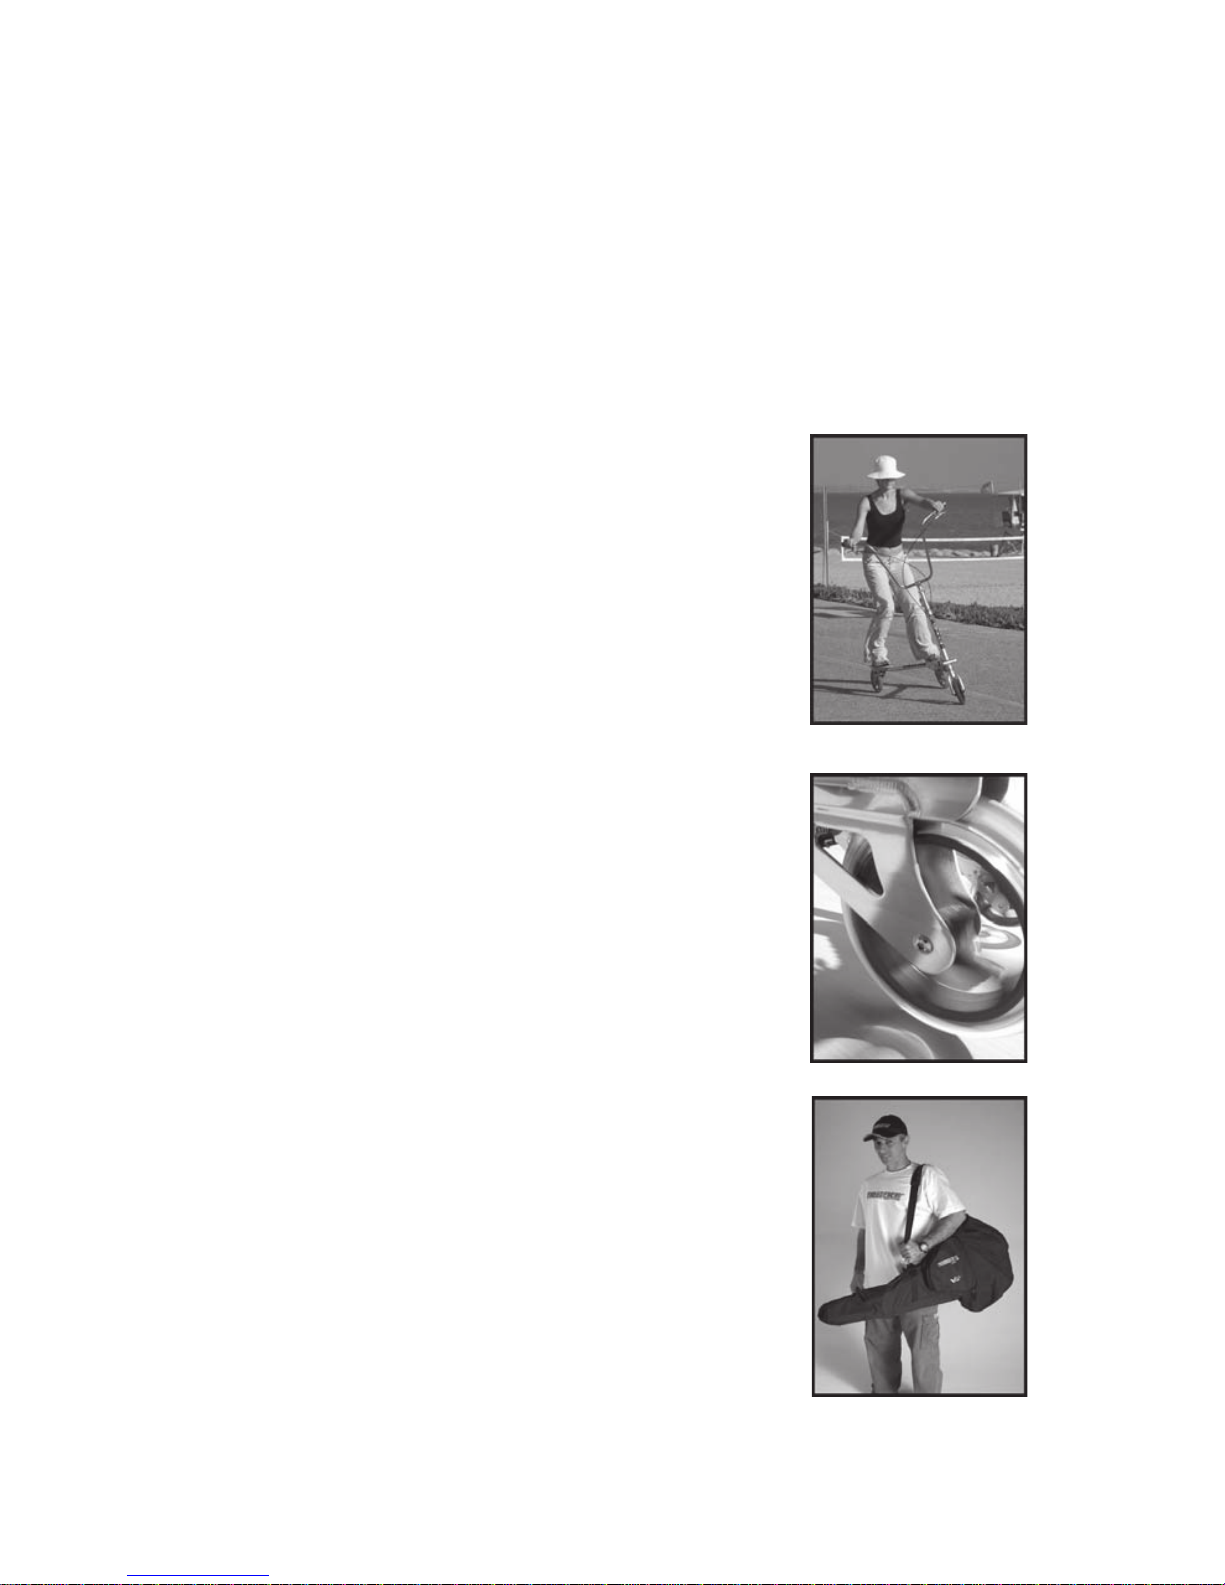
Trikke Wheels:
Trikke Tech continues the process of striving
for more speed with new releases of high-performance wheels
for all models. Check the website for the latest information about
performance related advances in cambering vehicle technology.
Trikke Carrying Bags:
Trikke Tech has designed custom fi t
carrying Bags for each of the available model sizes. These bags
are made from durable nylon fabric, are double stitched for
durability, and have extra padding in high friction areas. They
have pockets, handles, and a shoulder strap. These bags are
great for storing your vehicle and for travel.
Trikke Apparel:
Trikke Tech has designed a line of cool Trikke
shirts and caps for girls and guys. Check out the available colors
on www.trikke.com

Trikke Owner’s Manual
4/05/05
20
12 Month Limited Warranty
Subject to the following limitations, terms and conditions, Trikke Tech, Inc. (“Company”)
warrants to the original owner of each new Trikke™ cambering vehicle (“Vehicle”) that
the Vehicle when new is free of defective materials and workmanship. This warranty
shall expire twelve months from the date of the original purchase from Company or an
authorized dealer or representative and is conditioned upon the Vehicle being operated
under normal conditions and use, and properly maintained. This warranty is void if the
Vehicle was not purchased new or not properly assembled. Make sure to send in your
Owner Registration Card to Trikke Tech by mail or log on to www.trikke.com/registration
and register online.
If the Vehicle frame should break due to faulty materials or workmanship during the
warranty period, the Vehicle will be replaced subject to the Conditions of Warranty below.
If any part of the Vehicle fails to function properly due to faulty materials or workmanship
during the warranty period, such part will be repaired or replaced, at Company’s discretion,
subject to the Conditions of Warranty below.
Conditions of Warranty
This Limited Warranty is made only to the original owner of the new Vehicle purchased
from Company or an authorized dealer or representative, and it shall remain in force only
as long as the original owner retains ownership of the Vehicle. This Limited Warranty is
not transferable.
In order to exercise your rights under this limited warranty, the warranty claim must be
presented during the warranty period to Company or one of its authorized representatives,
together with a receipt, bill of sale or other appropriate written proof of purchase. The
original owner shall pay all delivery or shipping charges connected with delivery or
shipment of the defective frame or part to Company or its authorized dealer. Under no
circumstances does this limited warranty include the cost of travel, delivery or shipment to
Company or its authorized dealer. Such costs, if any, shall be borne by the original owner.
Company shall pay the shipping costs associated with shipment of a replacement Vehicle
and/or the shipment of a replacement or repaired part to the original owner. The original
owner shall be responsible for any re-assembly of the Vehicle required in connection with
any replacement or repair.
It is the responsibility of the original owner to ensure that all parts included in the factory-
sealed carton are properly installed and that all functional parts are adjusted properly. It
is also the responsibility of the original owner to perform or provide all reasonable and
necessary maintenance and adjustments to keep the Vehicle in good working condition.
This limited warranty does not apply to normal wear and tear, nor to claimed defects,
malfunctions or failures that result from abuse, neglect, shipping damage, damage caused
accidentally or deliberately, exceeding weight limits, improper assembly, improper
maintenance, alteration, collision, crash or misuse or improper use. The Vehicle has not
been designed, engineered, distributed manufactured, or retailed for uses in trick riding,
ramp riding, jumping, aggressive riding, riding on severe terrain, riding in severe climates,
riding with heavy loads, commercial activities, use with motors, or any similar activities;
such uses may damage the Vehicle, can cause serious injury to the rider, and in all cases
will void this warranty. The user assumes all risk of personal injuries relating to use of
the Vehicle, damage to or failure of the Vehicle and any such injury, damage or loss if
the Vehicle is altered in any way or if it is used for stunt-riding, ramp jumping, or similar
activities.
Other manuals for T5 JOGO
1
This manual suits for next models
4
Table of contents
Other Trikke Scooter manuals

Trikke
Trikke eV5 User manual

Trikke
Trikke E-Kit User manual

Trikke
Trikke T8 User manual

Trikke
Trikke T5 JOGO User manual

Trikke
Trikke DEFENDER 48V 2WD User manual

Trikke
Trikke uPT User manual

Trikke
Trikke Bikke User manual

Trikke
Trikke POSITRON 60V AWD User manual

Trikke
Trikke Tribred tree rein User manual

Trikke
Trikke T7 User manual


