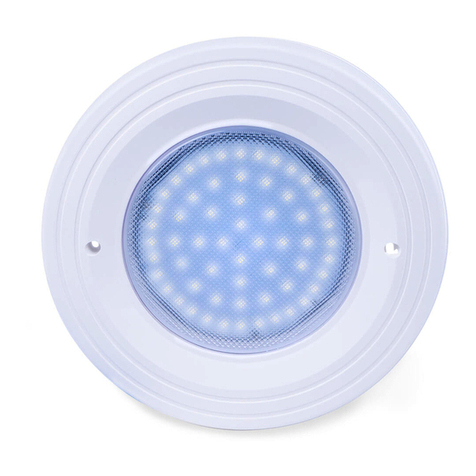
PUK POOL MINI User manual

ASSEMBLY AND OPERATING INSTRUCTIONS:
POOL MEDIUM
-Power consumption (nr. 6LED’s): 12W
-Voltage :2 Vdc
-Color Temperature : 3000K
-Lumen output: 1200lm
-Lens Type : 30°
-Insulation class: III
-IP protection: IP68 max 1mt depth
-Gross weight: 2kg
Made in Italy
COD. 303001
COD. 303002
COD. 303003
COD. 303004
COD. 303001
COD. 303002
-replace the damaged protective glass
-glass features: plane float glass - safety tempered
-getting rid of as urban waste forbidden
-separate collection is mandatory when the product is at the end of its life
-very low voltage feeding with security transformer
-Class III no earth required
-totally indefinite submerged operation - max allowed
depth
IP68
NB: These assembly instructions must be given to end users for correct maintenance and so that they know how to change the bulb.
The appliance must not be tampered with or transformed and it must be installed and used as supplied and in compliance with the
National Rules on Installations. Any non-compliant installations will invalidate all forms of guarantee. The company cannot be held
IK 09
POOL MAXI
-Power consumption (nr. 12LED’s): 2 W
-Voltage :2 Vdc
-Color Temperature : 3000K
-Lumen output: 2000lm
-Lens Type : 30°
-Insulation class: III
-IP protection: IP68 max 1mt depth
-Gross weight: 2.5kg
POOL MEGA
-Power consumption (nr. 18LED’s): 36W
-Voltage :2 Vdc
-Color Temperature : 3000K
-Lumen output: 2900lm
-Lens Type : 30°
-Insulation class: III
-IP protection: IP68 max 1mt depth
-Gross weight: 3,8kg
COD. 303003
COD. 303004 POOL MINI
-Power consumption (nr. LED’s): 8W
-Voltage :2 Vdc
-Color Temperature : 3000K
-Lumen output: 15 lm
-Lens Type : 30°
-Insulation class: III
-IP protection: IP68 max 1mt depth
-Gross weight: 1.3kg
Retain the in truction

WARNING: THIS LUMINAIRE MUST BE USED ONLY UNDER WATER, THEREFORE CAN’T WORK OUT OF WATER
National safety regulations must be followed during installation. No liability will be accepted for improper use or fitting. No liability will
be accepted in case of retrospective modification to the lights.
All fitting, installation and electrical work must be performed by qualified specialist staff.
-feeding must be done through a safety power (SELV) providing 2 V DC stabilized secondary tension.
The floodlight is supplied by us with the led pre-installed and connected with 3 meters cable section 2x1mm2 according CENELEC
HD 22.16.S1 (for AD8 water submersion).
The cable and the fixture must not be tampered with for any reason.
-max. installation depth 1m.
Important information and maintenance:
-Before installation, all parts must be checked for transport damage!
-The relamping must be done with maximum attention avoiding to dirty the sealing gasket and its contact surface. It is therefore
necessary before
-opening the fixture to carefully wipe the floodlight then unscrew the round frame by the proper key
-If the gasket is damaged, deformed or not in perfect conditions it is necessary to change it
-it is essential to do a frequent cleaning of the glass and of the outer surface of the fixture to avoid build up of mud and dirtiness
resulting in dangerous overheating due to uncorrect light and heat dissipation. Clean carefully the glass screen removing limestone
deposits by means of a scraper.
-Do not use high pressure cleaners
-Protect spotlights from freezing; if appropriate, they may need to be dismantled or specially protected
-Lost screws or nuts may only be replaced by screws from V A
-Depending on load (wattage) and water quality, we recommend changing the seals (on the glass pane, fitting, O-ring) and cable
every 5–8 years.
The cable length of the lights should be chosen in such a way that it is not necessary to extend in water or moist environments. Later
complaints resulting from this cannot be accepted.
-Only use stainless steel tools to avoid external rust!
-The operating devices must be connected without power, as otherwise discharges in the power supply may cause the LED to be
damaged. No primary voltage may be applied when changing the LED.
-Note polarity when changing the lights! The wrong polarity can damage the LED module
-It is recommended that the customer install an overvoltage protection in accordance with DIN VDE 0100- 3, DIN VDE 0100-53
and EN 62305.
-Install the polypropylene recessing housing in the concrete keeping the edge flush with the wall
-Connect the formwork to the corrugated tube
-Insert the cable through the pipe
-Making the connections to the driver respecting the polarity
-Insert the luminaire in the formwork and fix it by tighten the fixing screws
This manual suits for next models
7
