manuals.online logo
Brands
  1. Home
  2. •
  3. Brands
  4. •
  5. emaux
  6. •
  7. Swimming Pool Lighting
  8. •
  9. emaux S100 Series Reference guide

emaux S100 Series Reference guide

1-44-4
EMLI11070703
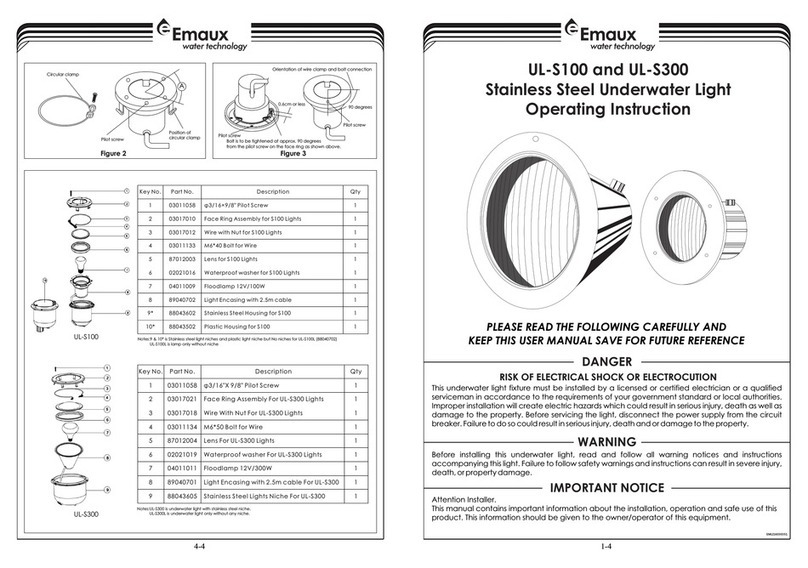
EMAUX Underwater Light S100 Series
For Concrete Pool Only
Table of Contents
Section I-General Information………………………………………………….........…................................ 2
Section II-Concrete Pool Installation Instructions………………….………............................................... 2-3
Section III-Replacement Part…………………........................................................................................ 4
Section IV-Bulb Replacement Procedures………………………........................……................................ 4
................................... ....................................
NOTE
ØUse for EMAUX underwater light UL-S100L (Code: 88040702), UL-S100P (Code: 88043802), UL-S100S (Code:
88043902), LED-S100L (Code: 88042302), LED-S100P (Code: 88044002) and LED-S100S (Code: 88044102) only
ØNot intended to be installed facing upward
ØIntended for fresh & salt water swimming pool
Installation Procedures
IMPORTANT SAFETY INSTRUCTIONS
READ AND FOLLOW ALL INSTRUCTIONS
SAVE THESE INSTRUCTIONS
UL-S100 AC 12V/75W
LED-S100 AC 12V/3W
2
STW 3/C 16AWG (1.31mm )
DANGER
IMPORTANT NOTICE
WARNING
Section IV Flood Lamp Replacement Procedure
1” (inch) = 25.4 mm (millimeter)
1. Turned off main electrical switch or circuit breaker, as well as the switch which operates the underwater light
itself.
2. Material required for installation,
i. New washer (Part Number: 2021048)
Ii. New flood lamp (Part Number: 4011057) or New LED bulb (Part Number: 04011016)
3. Loosen the pilot screw on the face ring assembly by a screw driver, and place the light fixture on deck
4. Loosen the bolt of the wire clamp by a screw driver, See Figure, 4. Then remove the face ring assembly from the
light encasing.
5. Remove and discard the old washer and the old flood lamp.
6. Install the new flood lamp and the new washer; make sure the washer is sat in the proper position.
7. While holding the fixture upright, place the lens and face ring on top of the light encasing.
8. Turn over the underwater light with the lens facing downward, hold the ends of the uni-tension clamp together.
Insert the bolt through one end of the bend end and then insert the other end through the other bent end and thread
the bolt into the nut. Using a screwdriver tighten the screw and nut until the distance between the ends of the
clamp equals 0.25 inches (6.4mm) or less; see Figure 5 .
9. Coil the extra cord around the fixture and place the light assembly into the niche.
10.Fasten the pilot screw of the face ring assembly to the niche.
11.Fill pool or spa until the underwater light is completely submerged in water before operating the light for more
than 10 seconds. Turn on main switch or circuit breaker, as well as the switch which specifically operates the
underwater light, to check for proper operation.
Remark:
Emaux Swimming Pool Equipment Co., Ltd
Long Zhu Industrial Park, Nan Lang Industrial Area, Nan Lang Town, Zhong Shan City, Guang Dong,
China.(+86)760 8552 7988 Shop A, Ground Floor, 41 Tin Hau Temple Road, North Point, Hong Kong. (+852)2832
9880
Visit us on the Internet at: www.emaux.com hk or www.emaux.com.au
Risk of Electrical Shock or Electrocution
This underwater light must be installed by a licensed or certified electrician in accordance with the
National Electrical Code and all applicable local codes and ordinances. Improper installation will
create an electrical hazard which could result in death or serious injury to pool users, installers, or
others due to electrical shock, and may also cause damage to property. Read and follow the specific
instructions below.
Before installing this product, read and follow all warning notices and instructions which are included. Failure
to follow safety warnings and instructions can result in severe injury, death, or property damage. Call
(+852)2832 9880 for additional free copies of this manual.
Attention Installer.
This manual contains important information about the installation, operation and safe use of this
product. This information should be given to the owner/operator of this equipment.
Figure 4 Loosen the bolt to
remove the face ring assembly
from the light encasing.
Screw
Wire Clamp
6.4mm
(0.25” or less)
Wire Clamp
Pilot Screw
Figure 5 Tighten the bolt until the distance
between the ends of the clamp equals 6.4mm
(0.25”) or less
Never operate this Underwater Light for more than 10 seconds unless it is totally submerged in
water. Without total submersion, the light assembly will get extremely hot, which may result in
serious bums or in damage of the lamp or lens. This may result in serious injury to pool users,
installers, or bystanders, or in damage to property.
WARNING
E331243
3-42-4
Section I - General Information.
A. Ensure that the electrical system of your pool conforms to the following requirements of the National Electrical
Code (NEC), and all local codes and ordinances. A licensed or certified electrician must install the electrical
system to meet or exceed those requirements before the niche (fixture-housing) is installed.
B. Some of the NEC requirements are listed below.
1. The NEC requires that the top of the light lens be at least 18 inches (457mm) below the water level. Be sure to
position niche so that you comply with this requirement. Some installers position niche 24 inches (610mm)
below anticipated water level to avoid any inspection authority issues with this requirement.
2. The lighting circuit must have a Ground Fault Circuit Interrupter (GFCI), and have an appropriately rated circuit
breaker.
3. The junction box or the low voltage transformer is located at least 8 inches (203mm) above water level and at
least 48 inches (1912mm) from the edge of the pool, see Figure 4.
4. The light fixture and all metal items within 5 foot (1534mm) of the pool must be properly electrically bonded.
5. The niche must be properly installed so the pilot screw hole is at the 6 o'clock position and that the top edge of the
underwater light's lens is at least 18 inches (457mm) below the surface of the water in the pool; see Figure 4.
6. The niche is properly electrically bonded and grounded via a ground connector located at the rear of the niche;
see Figure 2.
C. Use only EMAUX lighting fixtures in this niche to ensure proper bonding and grounding connections.
NOTE
............................................................................................................................................
The required orientation of all Emaux lights is with the pilot screw at the 6 o'clock position. This is guaranteed by
proper niche installation, see figure 8
.........................................................................................................................................................
Section II - Concrete Pool Installation Instructions
Installation of the niche
1. Prior to concreting the pool, put light niche in place. Be sure the top of the niche be at least 18 inches (457mm)
below the water level, see Figure 1 below,
Figure 1 - Wiring
2. Make sure the niche is aligned with the pilot screw hole on the face place is at the 12 o’clock position
3. For concreting the pool, make sure the face plate of the niche is not covered by concrete
4. Install the underwater light fixture, after the concrete is solidified.
5. Feed cord through conduit to junction box leaving at least 18 inches (457mm) of cord at the light fixture to coil
around the back of the light, see Figure 2. This 18 inches (457mm) of cord coiled around the light if for service after
the pool is filled with water.
Figure 2 Cord to coil around the back of the light fixture
6. Cut the cord at the junction box, leaving at least 6 inches (152mm) of cord to make connection
7. Strip 6 inches (152mm) of the outer cord jacket to expose the two insulation wires and make the wire connection to
the junction box.
8. Feed the paraffin to seal the connection
9. Secure the junction box cover in place
10. Before operating the light for more than 10 seconds, fill the pool with water until the underwater light is completely
submerged in water. To check for proper operation, turn on main street or circuit breaker as well as the switch that
operates the underwater light itself.
Section III - Replacement Parts
For UL-S100L (code: 88040702)
UL-S100P (code: 88043802)
UL-S100S (code: 88043902)
LED-S100L (code: 88042302)
LED-S100P (code: 88044002)
LED-S100S (code: 88044102)
Figure 3 Replacement Parts
SAVE THESE INSTRUCTIONS
Installation of the underwater light fixture
Never operate this Underwater Light for more than 10 seconds unless it is totally submerged in
water. Without total submersion, the light assembly will get extremely hot, which may result in
serious bums or in damage of the lamp or lens. This may result in serious injury to pool users,
installers, or bystanders, or in damage to property.
WARNING
Item NO. Part Number Product Description QTY Unit
1 3011058 φ3/16×9/8" Pilot Screw 1 Pc
2 3017010 Face Ring Assembly for S100 Lights 1 Set
3 3017012 Wire With Nut for S100 Lights 1 Pc
4 3021018 M6 Cushion Nut 1 Pc
5 3012006 M6 Cushion 2 Pcs
6 3011133 M6*40 Bolt for Wire 1 Pc
7 87012003 Lens for S100 Lights 1 Pc
8 2021048 Waterproof washer for S100 Lights 1 Pc
9 3011060 M3*8 Screw 2 Pcs
10 3017076 Reflector Cover 1 Pc
4011057 Flood lamp MR16 12V/75W 1 Pc
4011016 LED Bulb MR16 AC12V/3W 1 Pc
12 89040704 Light Encasing with 4.5m cable for S100 Lights 1 Set
13 89040705 S100 Stainless Steel Lights Niche 1 Set
14 89040706 S100 Stainless Steel Lights Plastic Niche 1 Set
11
8
5
4
1
7
6
3
2
9
10
11
12
13
14

This manual suits for next models

6

Other emaux Swimming Pool Lighting manuals

emaux E-Lumen X TOPAZ Series User manual

emaux

emaux E-Lumen X TOPAZ Series User manual

emaux UL-S100 User manual

emaux

emaux UL-S100 User manual

Popular Swimming Pool Lighting manuals by other brands

Hidrotermal HIDRO-PW100 Installation and maintenance manual

Hidrotermal

Hidrotermal HIDRO-PW100 Installation and maintenance manual

weltico 65030LB15 operating instructions

weltico

weltico 65030LB15 operating instructions

CanDock RGB installation manual

CanDock

CanDock RGB installation manual

Intex WL698 owner's manual

Intex

Intex WL698 owner's manual

Barthelme AQUALUC S:OLID Instructions for installation and operation

Barthelme

Barthelme AQUALUC S:OLID Instructions for installation and operation

Pahlen Poolbelysning 200 Installation instruction

Pahlen

Pahlen Poolbelysning 200 Installation instruction

Pentair Pool Products SpaBrite Installation procedures

Pentair Pool Products

Pentair Pool Products SpaBrite Installation procedures

ENERGY FOCUS Fiberstars Y20-6000 Procedure

ENERGY FOCUS

ENERGY FOCUS Fiberstars Y20-6000 Procedure

manuals.online logo
manuals.online logoBrands
  • About & Mission
  • Contact us
  • Privacy Policy
  • Terms and Conditions

Copyright 2025 Manuals.Online. All Rights Reserved.