PURE Chronos User manual

Owner’s manual

Copyright
Copyright 2005 by Imagination Technologies Limited. All rights reserved. No part of this
publication may be copied or distributed, transmitted, transcribed, stored in a retrieval
system, or translated into any human or computer language, in any form or by any means,
electronic, mechanical, magnetic, manual or otherwise, or disclosed to third parties
without the express written permission of Imagination Technologies Limited.
Disclaimer
Imagination Technologies Limited makes no representation or warranties with respect
to the content of this document and specifically disclaims any implied warranties of
merchantability or fitness for any particular purpose. Further, Imagination Technologies
Limited reserves the right to revise this publication and to make changes in it from time
to time without obligation of Imagination Technologies Limited to notify any person or
organization of such revisions or changes.
Trademarks
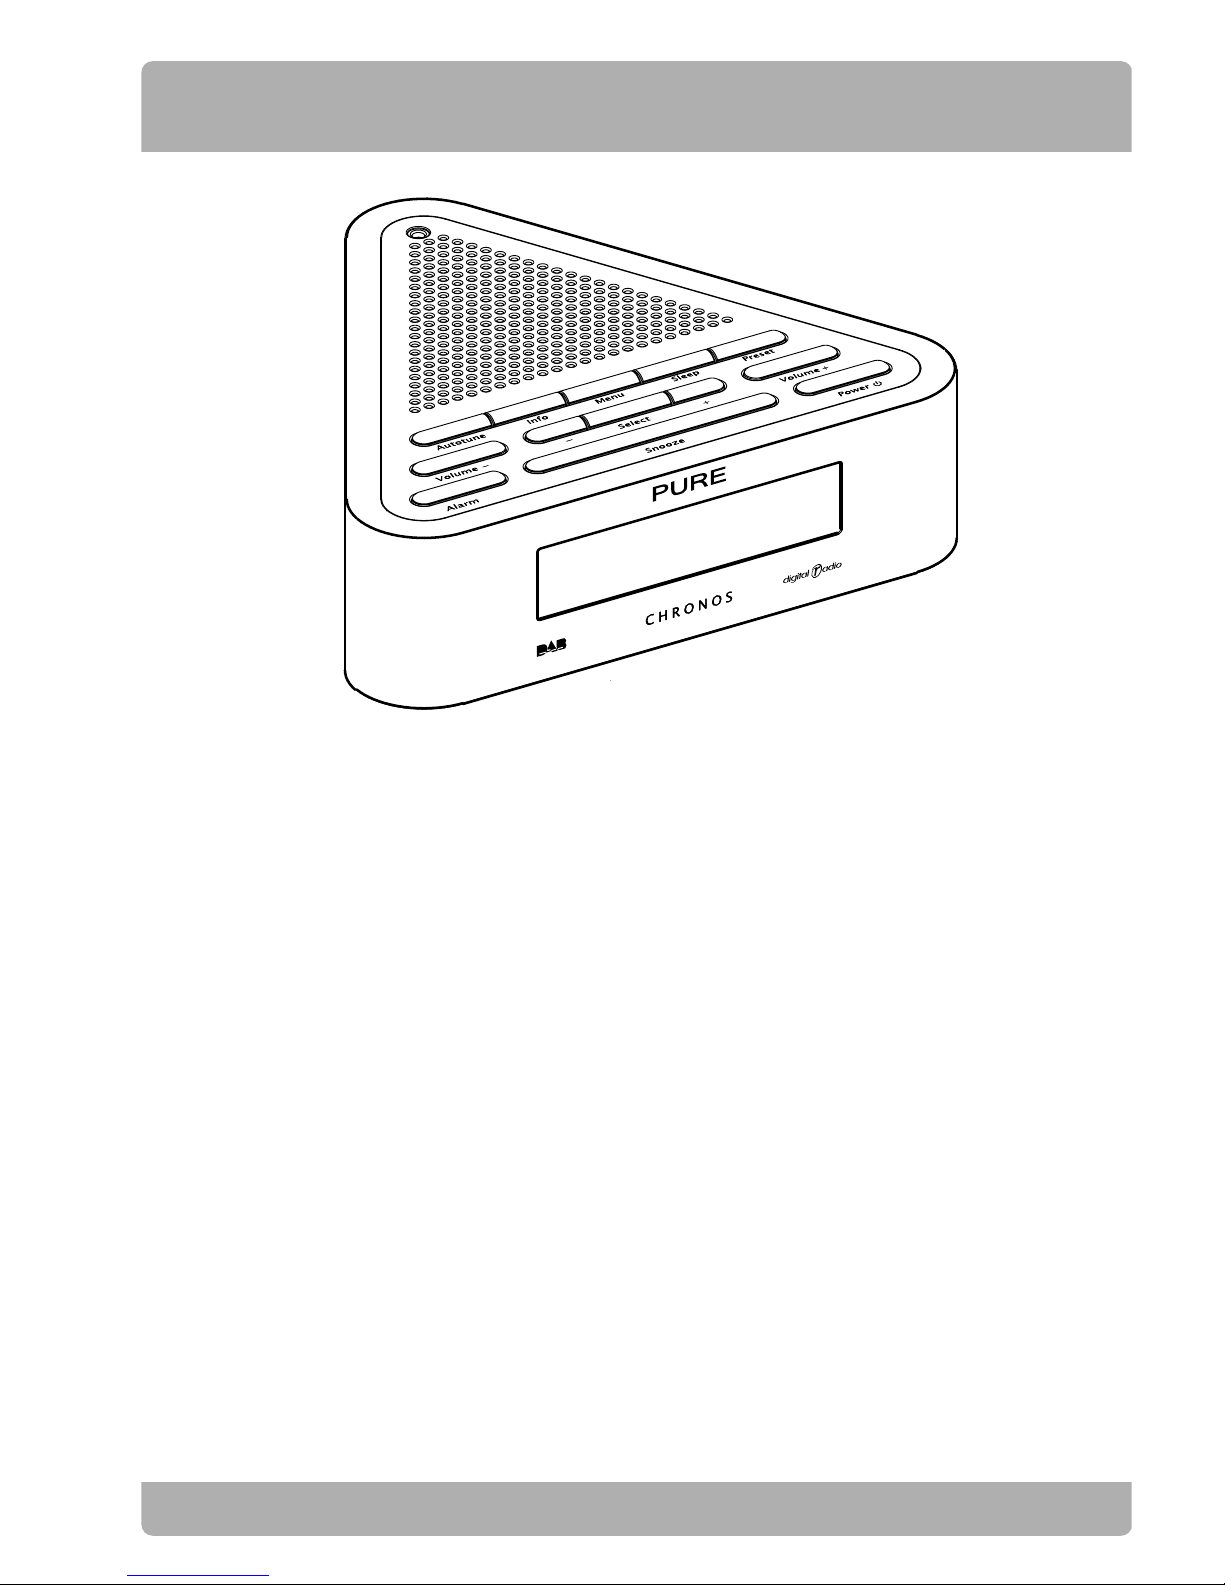
CHRONOS, the CHRONOS logo, PURE, the PURE logo, PURE Digital, the PURE Digital
logo, Imagination Technologies, and the Imagination Technologies logo are trademarks
or registered trademarks of Imagination Technologies Limited. All other product names
are trademarks of their respective companies.
Version 1 November 2005
Safety instructions
Keep the unit away from heat sources such as radiators, heaters or other
appliances that produce heat.
Position your unit to ensure good ventilation so that it will not overheat.
Do not cover the unit.
It is recommended to allow a minimum of 5cm free space around the unit
when choosing its location.
Do not place sources of naked flames (such as candles) on the unit.
Do not expose the unit to direct sunlight.
Do not use the unit near water.
Avoid objects or liquids getting into or onto the unit.
Do not remove screws from or open the unit casing.
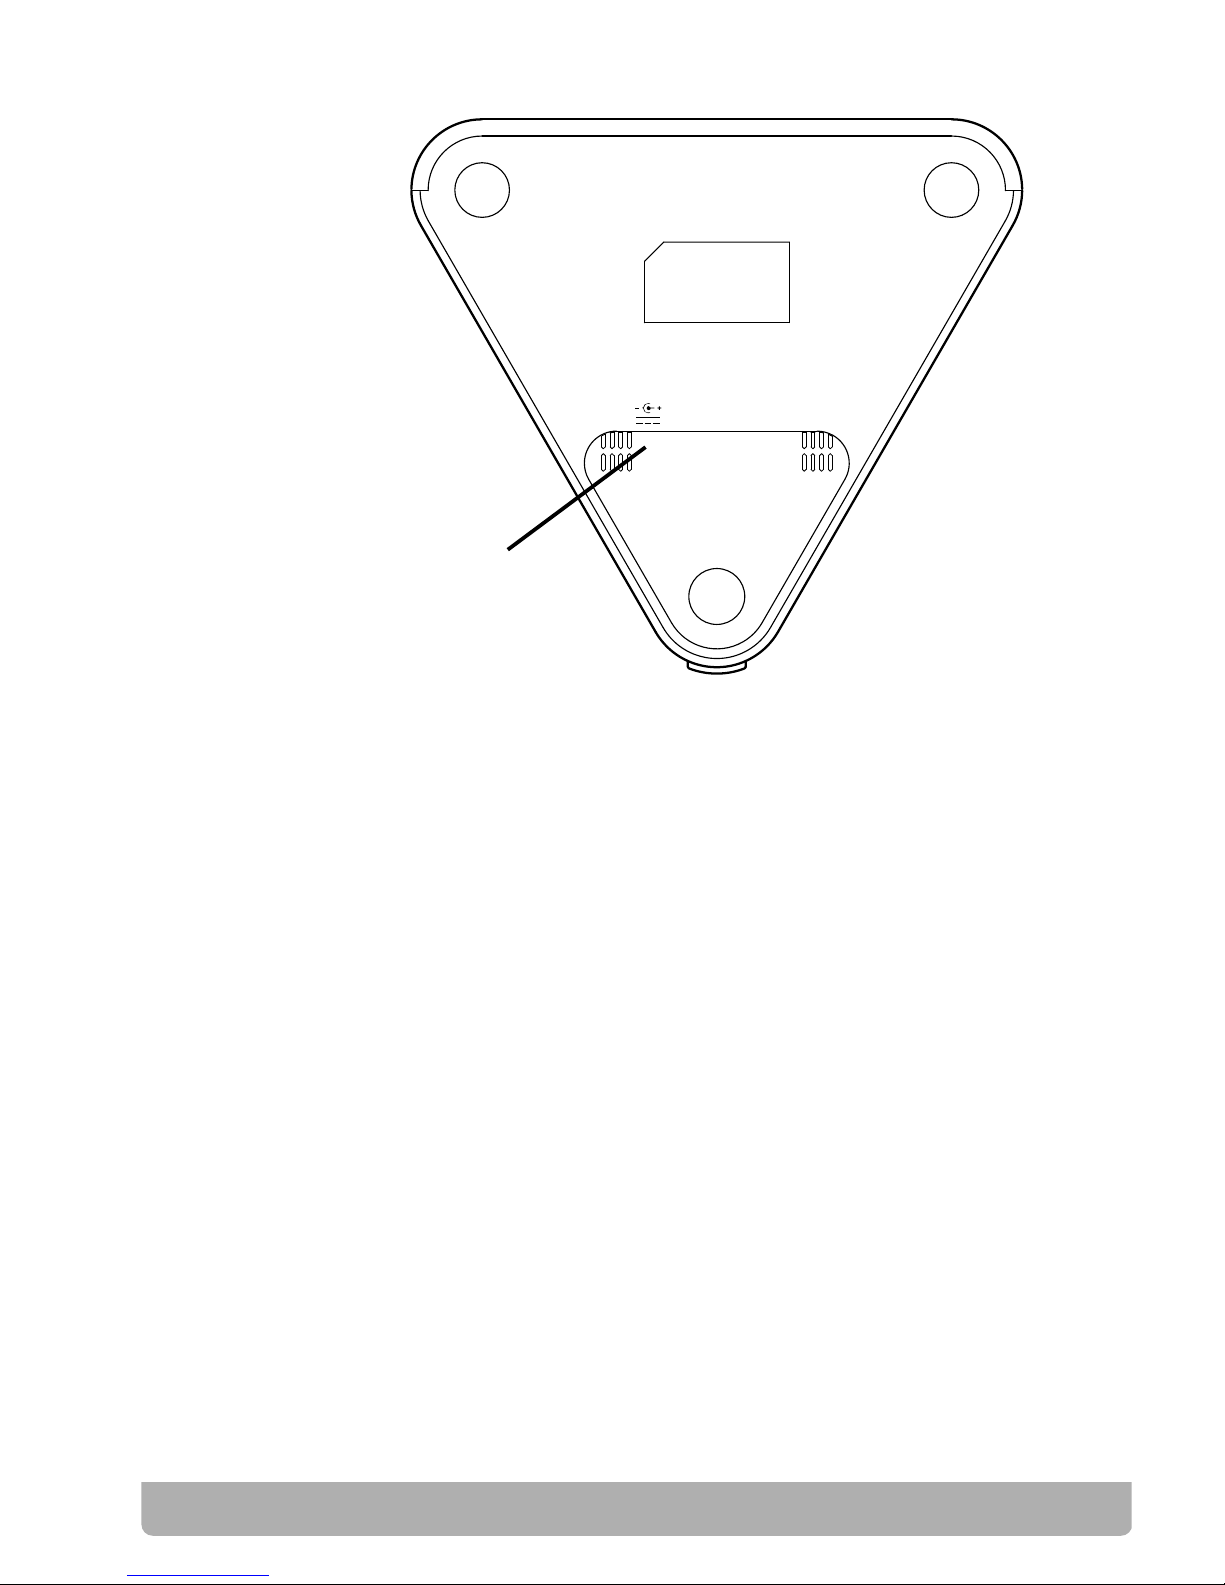
The CHRONOS product label is located on the underside of the unit.
Fit the mains adaptor to an easily accessible socket, located near the radio
and ONLY use the mains power adapter supplied.
Damage to hearing can occur with consistent exposure to high
volume when using headphones. Always check the volume level
before inserting headphones into your ears.

Contents
Introduction ..............................................................1
Overview diagrams ...................................................2
Top panel ...........................................................................2
Rear panel .........................................................................2
Base panel .........................................................................3
LCD screen icons ...............................................................3
Quick start ................................................................4
Using the radio .........................................................5
Selecting stations ..............................................................5
Changing the information displayed ..................................5
Storing and recalling presets ............................................6
Autotune ............................................................................7
Alarm and sleep timer settings ................................9
Setting up alarms ..............................................................9
Switching alarms on and off ............................................10
Silencing alarms .............................................................10
Changing the alarm snooze time .....................................11
Setting a sleep timer .......................................................11
Menu settings .........................................................12
Hints and tips ..........................................................14
Troubleshooting ..............................................................14
Resetting your CHRONOS ................................................15
Technical Support ............................................................15
Warranty information ......................................................15
Technical specifications ............................................16


1
Introduction
Thank you for choosing CHRONOS.
This manual provides guidance on how to use CHRONOS and
gives advice on what to do if you encounter problems.
Please read the safety instructions inside the front cover.
Register your product either online at www.pure.com/register or
using the warranty card. Include an e-mail address and we’ll keep
you up to date with the latest product information.
1

2
Overview diagrams
Top panel
Rear panel
Info
Changes the
information
shown on screen
Display
Adjust screen
backlight
between high
and low
Alarm
Access alarm, snooze,
sleep timer settings
and cancel alarms
Snooze
Snooze alarm for
set period
Power
Switch between
standby mode and
power on
Menu
Access setup
options
+ Select –
+/- scroll and
Select to choose
stations and
menu options
Display
9V DC
Display
9V DC
Preset
Access presets
Autotune
Scans DAB band
III frequency
range for new
stations
Volume +
Increase
radio volume
Volume –
Decrease
radio volume
Sleep
Set sleep timer
Headphone
socket (mutes
speaker)

3
Base panel
LCD screen icons
The following icons may be shown on screen:
♥ Identifies your ten favourite stations on the station list. See
page 12.
? Indicates that the station is currently unavailable or inactive.
If you select a station with this symbol CHRONOS will try to
reacquire the station, and if still unavailable, return to the
station you were listening to.
>> Indicates that the station is a primary station with one or
more secondary services available. Secondary services
accompany some stations, providing extra information or
alternative content and may only be broadcast at certain
times. At the time of writing not many secondary services
are available.
<< Indicates that the station is a secondary service associated
with a primary station as indicated above.
Display
9V DC
9V DC
Connect to
mains adapter

4
Quick start
So you’ve unpacked the box - here’s how to get up and running.
1. Unravel the aerial lead and hang it vertically if possible.
2. Insert the power adapter plug into the power socket
(
9V DC
) underneath your CHRONOS and connect the adapter
to the mains.
3. Press the Power button to switch your unit on. The backlight
comes on, an automatic search for DAB stations starts and
you see a progress indicator on screen.
The DAB stations found are put in a station list, ordered
alphanumerically and the first one on the list is selected and
you will hear it through the speaker.
To find out how to use other functions including changing stations,
settings alarms and changing settings, please read through the
rest of this manual.
PURE Chronos
Start up autotune

5
Using the radio
When you first switch on your CHRONOS it performs an autotune
to find all the DAB stations available in your area.
Selecting stations
The stations found during an autotune are stored in a list
ordered alphanumerically. The current station name is shown on
the top line of the screen.
To change stations press the +/- buttons to browse the station
list on the bottom line of the screen and press Select to change
to the station.
Changing the information displayed
Press the Info button at any time to change what you see on screen.
Scrolling text The default mode, broadcast by most stations.
Program type Type of content being broadcast.
Multiplex name Multiplex the current station belongs to.
Multiplexes, sometimes called ensembles, are
groups of stations owned and broadcast by a
single operator.
1Xtra - BBC
Browsing station list
BBC Radio 1
BBC National DAB
Example Info mode - Multiplex name

6
Time and date Time and date updated regularly from the
current multiplex. If your radio has been
unplugged from the mains there may be a
slight delay before the time appears when you
switch it on.
Channel DAB channel and frequency.
Mode Stereo or mono indicator and data rate at
which the signal is being transmitted. This rate
is set by the broadcaster to suit the type of
material. Higher rates generally mean higher
quality.
Sig. quality Signal quality. As a guide, values from 85
to 100 indicate good reception, 70 to 84
borderline reception and 0 to 69 poor
reception.
Press the Info button in standby to toggle between clock and date
or double height clock.
Storing and recalling presets
Presets enable you to store your favourite radio stations in a
presets list for easy access using the Preset button.
BBC Radio 1
Empty preset 1
Browsing the presets list

7
To save a preset
Press the Preset button, use the +/- buttons to browse the
presets list then press and hold the Preset button for around
three seconds to store the current station to the selected preset. .
The station is added to the presets list overwriting any previous
station and the preset number appears next to the name on the
station list.
To recall a preset
Press the Preset button, use the +/- buttons to browse the
presets list then press the Select button to recall the preset
shown on screen.
Autotune
You may want to perform an autotune if you move your radio or if
you want to receive a new multiplex.
The autotune option automatically scans the DAB frequency
range and stores all the stations found in the station list for easy
selection. Note Ensure your aerial cable is extended (ideally
vertically) before starting an autotune.
To perform an Autotune
Press the Autotune button to perform a full autotune scanning
the full Band III frequency range.
Alternatively press the Menu button and use +/- and Select
buttons to choose one of the following options:
Autotune... 12
Autotune in progress

8
Autotune UK Scans UK-only frequencies in Band III
Autotune full Scans the full range of digital frequencies in
Band III.
You can cancel autotune by pressing the Select button during
the tuning process.
The display will indicate tuning progress and how many stations
found at each stage. When finished, CHRONOS will return to
the station you were listening to and you will hear it through
the speaker/headphones. All the stations found are now stored
in the unit. If no stations are found, you see the message ‘No
stations available’ and the display shows an option menu.
Check your aerial is extended and try one of the available tuning
options.

9
Alarm and sleep timer settings
CHRONOS has four alarms which can switch CHRONOS on (if in
standby) and tune to the station you have chosen or sound a
buzzer. A sleep timer is also available enabling you to set a time
after which you want the radio to automatically switch off.
Setting up alarms
To set up an alarm:
1. Press the Alarm button or press the Menu button and use
+/- and Select buttons to choose the Alarm settings option.
2. Press the Select button and use +/- buttons to view current
Alarm 1/2/3/4 settings and press the Select button if you
want to change that alarm.
3. Press the +/- buttons to change the highlighted setting (e.g.
hours) and press Select to move to the next setting (e.g.
minutes).
Choose the alarm day between Weekday (Mon-Fri), Weekend (Sat-
Sun), Once or Daily and alarm type DAB (default) or Buzzer alarm.
If you select Once you can specify the year, month and date you
want the alarm to go off.
If you set a radio alarm the station will be the station you last
listened to and volume will be last volume listened at when the
alarm goes off. You see a bell symbol indicating that the alarm is
set.
Alarm settings
Set alarm
Alarm settings menu

10
When finished, to exit press the Menu button or wait a
moment. In standby you will see a bell symbol on the screen
indicating that an alarm is set.
Switching alarms on and off
Once you have set up your alarms as described above you can
quickly switch each individual alarm on or off as follows:
1. Press the Alarm button or press the Menu button and use
+/- and Select buttons to choose the Alarm settings option.
2. Use the +/- and Select buttons to choose the Alarm on/off
option.
3. Use the +/- buttons to view the Alarms you have set up and
press the Select button to toggle that alarm on or off.
Silencing alarms
When a radio or buzzer alarm goes off you have two options:
Snooze Press the Snooze button to snooze the alarm for the
period set. The radio or buzzer mutes. The alarm will
repeat when the snooze period has elapsed. You can
repeat the snooze as many times as you want.
Cancel Press the Alarm button to cancel the alarm or any
active snooze.
Alarm settings
Set alarm
Alarm on/off option

11
Changing the alarm snooze time
You can change how long the alarm snoozes when you touch the
Snooze button.
1. Press the Alarm button or press the Menu button and use +/-
and Select buttons to choose the Alarm settings and choose
Snooze. You see the current snooze time at the bottom of the
screen.
2. Press the +/- buttons to choose a snooze period between Off
and 60 minutes and push Select to confirm the change. The
snooze time set will apply to all alarms.
Setting a sleep timer
You can set a sleep timer after which CHRONOS will switch itself
into standby, ideal if you want to fall asleep listening to the radio.
1. Press the Sleep button or Press the Alarm or Menu button
and use +/- and Select buttons to choose the Alarm settings
and choose Sleep. You see the current Sleep time at the
bottom of the screen.
2. Press the +/- buttons to choose a a Sleep period between
Off and 60 minutes and push Select to confirm the change.
The top line will show ‘Sleep Activated’ to confirm that the
timer is set.

12
Menu settings
Press the Menu button and use the +/- and Select buttons to
choose one of the following menu options to customise the way
your CHRONOS works:
Alarm settings
Enables you to set up alarms, snooze time and sleep timer. See
pages 9-11 for details. Selecting this option is the same as
pressing the Alarm button.
Station order
Changes the order of stations on your station list. The current
order is highlighted. Choose from the following:
Alphanumeric Displays all stations in alphanumeric order.
Active station Displays active stations at the top of the
station list and inactive ones at the bottom, in
alphanumeric order. Inactive stations are those
on your station list but not currently available,
marked with a ’?’.
Trim stations Removes inactive stations from the station list.
Fav station Displays your ten favourite stations at the top
of the station list and the others below. Your
favourite stations are selected by how long you
listen to each station and shown by a heart
next to the name.
♥→ presets Available only when Fav station order (above)
has been selected. Transfers your ten favourite
stations to presets.
Manual tune
Enables you to find new stations or fine tune your reception.

13
You see a list of channels and frequencies. Each multiplex has a
different channel and frequency (e.g., BBC is channel 12B and
Digital One is 11D).
1. Select the frequency/channel you want from the list.
You see a signal strength display. The marker indicates the
minimum required level for reception and the filled blocks
indicate the current level.
2. Move your unit or aerial and try to raise the current level to
the marker or beyond. You see the multiplex name at the
bottom of the screen if a good signal is received and the
stations in that multiplex are added to the station list.
DRC value
DRC (Dynamic Range Control) value makes the quieter sounds
in a broadcast easier to hear at low volume or in a noisy
environment. The DRC level of a broadcast is set by the station
and sent with the signal. Check with the broadcasters to find out
if they use DRC on their stations. Press the +/- buttons to scroll
through the following options and press Select to choose one:
DRC 0 DRC is switched off. Broadcast DRC level is ignored.
DRC ½ DRC level is set to ½ that sent with the broadcast.
DRC 1 Applies the DRC level as sent with the broadcast.
Autotune UK & Autotune full
These options are described on page 7.
Sware version
Displays the software version installed on your CHRONOS. You
may be asked to quote this if you contact technical support.

14
Hints and tips
Troubleshooting
Display says ‘No stations available’
Check that your aerial cable is uncoiled and ideally hanging
vertically. Press the Autotune button to search for services. Try
moving to another location to find better reception.
(?) Inactive or unavailable stations
Inactive or unavailable stations are those which appear on the
station list but are not available because either you are outside
the broadcast area, have lost reception or the station is not
currently broadcasting. Unavailable stations have a ‘?’ before
their name on the station list.
I can’t access secondary services
At the time of publishing not many secondary services are
available. If secondary services are available for the currently
selected station the secondary ‘>>’ indicator will be shown on
the display next to the station name.
Display says ‘Station not available’
This may occur if a broadcaster takes a station off-air whilst you are
listening to it. If tuned to a secondary service CHRONOS re-tunes
to the associated primary service. If tuned to a primary service,
CHRONOS waits until service resumes or you pick a new station.
I hear a ‘burbling’ sound on some stations
Although DAB is excellent at providing quality audio from very
little signal, the quality can suffer if the signal strength is too low.
If that happens, a ‘burbling’ sound can sometimes be heard.
Clock shows the wrong time
This may happen if the multiplex you last tuned to broadcasts an
incorrect time signal, try tuning to a station in another multiplex.

15
Resetting your CHRONOS
The reset option removes all presets, stored stations and favourite
station settings and resets all options to defaults. You may want to
use this option to restore default values.
1. Press and hold the Menu button for more than two seconds.
The display will ask ‘Press Select to confirm reset...’
2. Press the Select button to confirm the reset or press no
buttons for around seven seconds to cancel the reset.
Technical Support
The Troubleshooting section on page 14, lists some of the more
likely reasons for problems you might have with your
CHRONOS. If you still have a problem with your unit, either visit
the support section of our website at www.pure.com/support or
contact us using the details on the back cover of this manual.
Warranty information
Imagination Technologies Ltd. warrants to the end user that this
product will be free from defects in materials and workmanship in
the course of normal use for a period of two years from the date of
purchase. This guarantee covers breakdowns due to manufacturing
or design faults; it does not apply in cases such as accidental
damage, however caused, wear and tear, negligence, adjustment,
modification or repair not authorised by us. Please register your
product with us online or using the warranty card. Should you have
a problem with your unit please contact your supplier or contact
PURE Support at the address shown on the rear of this manual.

16
Technical specifications
General DAB digital clock radio with full Band III
DAB reception capability. Fully compliant
with ETS 300 401 and capable of decoding
all DAB transmission modes 1-4 up to and
including 192 kb/sec.
Speaker Single 2.5 inch drive unit.
Audio power output 2W (@ 10% THD)
Frequency range DAB – Band III (174-240 MHz), with fast
Autotune feature
Aerial Captive wire aerial
Input connector 9V DC power adapter socket (230V adapter
supplied)
Input power 9V 0.7A
Output connector 3.5mm socket for headphones
LCD display Easy to read white-on-blue LCD
with 16 x 2 character display and
adjustable backlight.
Power supply 230V AC to 9V DC external power
adapter. Low-power standby mode.
Approvals CE marked. Compliant with the EMC and
Low Voltage Directives (89/336/EEC and
73/23/EEC)
Dimensions 190 mm (width) x 60 mm (height)
x 170 mm (depth)
Other manuals for Chronos
1
Table of contents
Other PURE Stereo System manuals

PURE
PURE DMX-60 User manual

PURE
PURE EVOKE Flow User manual

PURE
PURE DMX-20 User manual

PURE
PURE SIROCCO 150 User manual

PURE
PURE DTM-300 User manual

PURE
PURE Contour User manual

PURE
PURE Contour 200i Air User manual

PURE
PURE SIROCCO 550 User manual

PURE
PURE EVOKE Flow User manual

PURE
PURE DTM-300 User manual