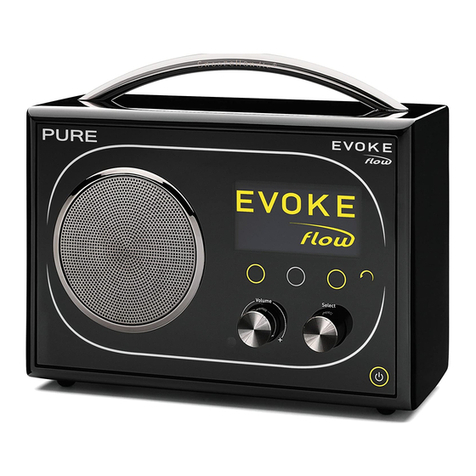
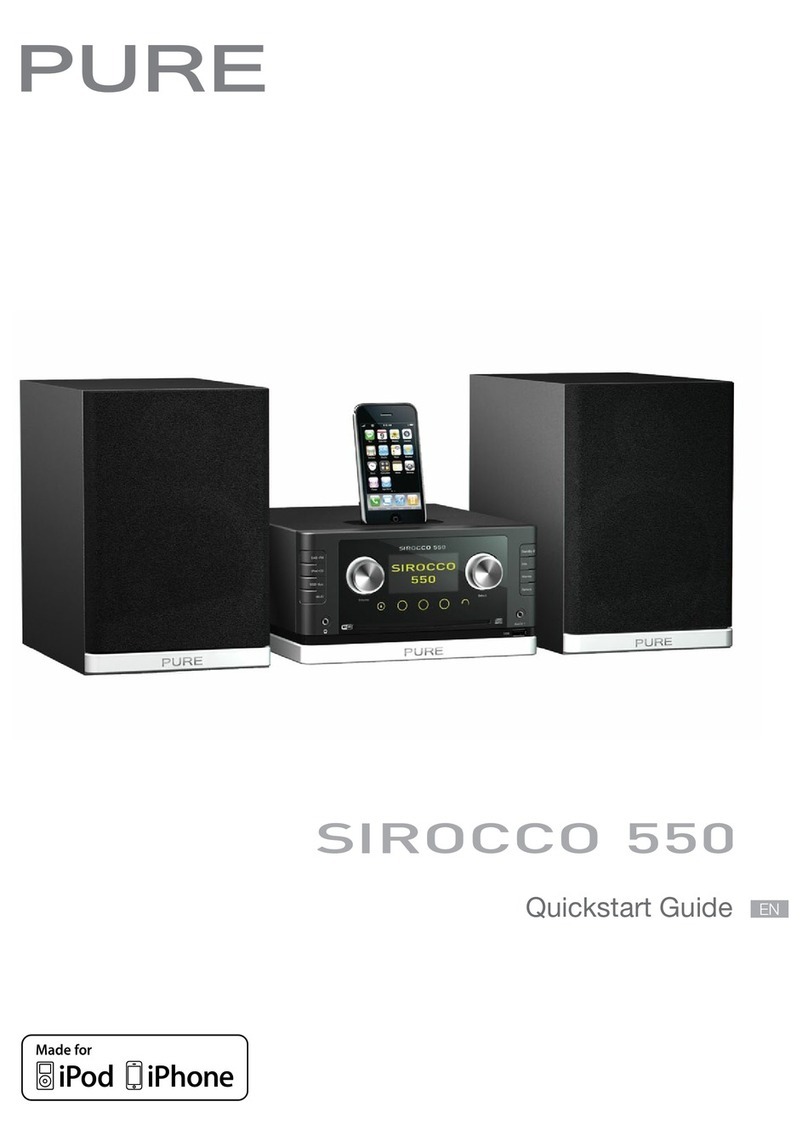
PURE SIROCCO 550 User manual

SIROCCO 550
Owner’s Manual
This is the Owner’s Manual for
Sirocco 550. It expands on the
Quickstart and covers some of the
more advanced options and
settings.

2
Contents
Alarms, timers and clock
Using the alarms .........................................................................................................................3
Using the sleep timer ..................................................................................................................4
Setting the clock .........................................................................................................................4
Changing the clock between 12 or 24 hour display.....................................................................5
Ethernet and Wi-Fi network connections
Using an Ethernet connection to your network ............................................................................6
Ethernet settings.........................................................................................................................7
Wi-Fi settings ..............................................................................................................................8
Media streaming
Media streaming using PURE FlowServer....................................................................................9
The Lounge
The Lounge website..................................................................................................................10
Connecting Sirocco 550 to the Lounge ....................................................................................10
The Lounge settings .................................................................................................................11
Source specific settings
CD settings...............................................................................................................................12
USB settings.............................................................................................................................13
Media player settings ................................................................................................................14
Digital radio settings..................................................................................................................15
FM settings ..............................................................................................................................16
General settings
Display settings.........................................................................................................................17
Audio settings ...........................................................................................................................18
Additional settings.....................................................................................................................19
Help & Specifications
Help and advice ........................................................................................................................20
Technical specifications.............................................................................................................22

3
Using the alarms
Sirocco 550 has two alarms which can be set to sound a tone, play a track or tune in to a radio
station. The alarms work whether Sirocco 550 is in standby or switched on.
Setting an alarm
1. Press the Alarms button or press Options and select Alarm or timer.
2. Select Alarm 1 settings or Alarm 2 settings. The current settings for that alarm will be displayed.
3. Tap Edit to adjust the alarm settings.
4. Use the Select dial to change settings. Tap the arrows at the bottom of the screen to move
forward or back through the settings.
5. To save settings and exit at any time, tap Save (this is useful if you want to change a single
setting, such as the alarm time).
Setting an alarm step-by-step
1. Select On to switch the alarm on or Off to switch the alarm off. The current status (On/Off) is
displayed on the top line of the screen.
2. Adjust the hours and minutes for your alarm time using the Select dial.
3. Select when you want the alarm to sound: Once, Daily, Weekdays, Weekends, Every Saturday
or Every Sunday.
4. Choose either Lounge station, Digital radio, FM, iPod, CD or Tone for your alarm:
Lounge station Select a station from your Lounge favourites, or choose Last tuned and the
alarm will tune to the most recent Lounge station you listened to.
Digital radio Select a station or Last tuned to tune to the most recent digital station
you listened to.
FM Plays the last FM station that Sirocco 550 was tuned to.
iPod Plays the last track listened to on your iPod or iPhone. Sounds a tone alarm if
no iPod or iPhone is docked.
CD Plays the current CD, starting from the first track.
Tone Sounds a beeping tone.
5. Tap Save – your alarm is now set. The icon is displayed when an alarm is set. Alarm time(s)
are displayed on-screen in standby.
An alarm will sound for a maximum of one hour before cancelling automatically. Alarms will not
operate if Sirocco 550 is turned off using the power switch on the rear.
Alarm 1 On
Edit
07:00 DR
Last tuned
Daily (Mon-Sun)
Current alarm settings

4
Snoozing or cancelling a sounding alarm
Cancel an alarm by pressing Alarms, Options or Standby ( ), or snooze the alarm by tapping
Snooze.
Adjusting the snooze time
The default alarm snooze time is 9 minutes. You can adjust this if you would prefer a different
snooze duration.
1. Press the Alarms button or press Options and select Alarm or timer.
2. Select Snooze time. Use the Select dial to adjust the duration of the snooze.
Using the sleep timer
The sleep timer switches Sirocco 550 into standby after a set period of time.
Setting the sleep timer
1. Press the Alarms button or press Options and select Alarm or timer.
2. Select Sleep timer.
3. Use the Select dial to adjust the length of the sleep timer in 15 minute steps.
A set sleep timer is indicated by in the icon bar.
Cancelling a sleep timer
To cancel a sleep timer, return to the sleep timer settings and press Clear or switch Sirocco 550
into standby.
Setting the clock
The clock will automatically set itself using your network connection, or a digital/FM radio signal.
However, if you cannot receive an updated time, or see the message ‘Time not available’, the time
and date can be set manually.
1. Press the Alarms button or press Options and select Alarm or timer.
2. Select Set Clock.
3. Use the Select dial to adjust the time and date. Tap or to move to the previous or next
setting.
4. Tap OK to save.
00:15
Sleep timer (hh:mm)
OKClear Save Menu
Set clock
OK
07:00 hh:mm
13 05 2011 dd mm yyyy
Adjusting the sleep timer
Setting the clock

5
Changing the clock between 12 or 24 hour display
You can choose whether the clock displays 12 or 24 hour times.
1. Press the Alarms button or press Options and select Alarm or timer.
2. Select Set 12/24 hr. clock.
3. Use the Select dial to choose between 12 hour or 24 hour display.
Set 12/24 hr. clock
- 24 hour -
12 hour
24 hour
Choosing 12/24 hour time display

6
Using an Ethernet connection to your network
The optional PURE mini USB Ethernet adapter enables Sirocco 550 to use a wired network
connection rather than using a wireless connection. Connect an Ethernet (RJ45) cable from your
router to the socket on the adapter and connect the adapter to the mini USB port on the rear of
Sirocco 550.
Setup your connection
If you selected Ethernet as your connection type during the first start up of Sirocco 550 (or after a
factory reset), you should now be connected to your network.
To change your connection type to Ethernet
From either the Lounge or Media Player sources, press Options and select Network settings >
Select network type > Ethernet. Sirocco 550 will apply the new setting and connect to your network.
The status of your connection is indicated by the network status icon on Sirocco 550’s display:
Active wired connection Wired connection inactive/disconnected
Adapter status lights
100Mbps Lit when adapter is working at full connection speed (100 Megabits per second)
LAN Flashes on and off to indicate network activity
USB Lit when correctly connected to Sirocco 550 USB port
Troubleshooting
• If any of the status lights do not light up, check that all cable connections are secure, and that
both Sirocco 550 and your internet connection are working correctly.
• Try clearing your network settings (Press Options and select Network settings > Clear network
settings)
• If you still experience problems, perform a factory reset. (Press and hold Options until you see
the Factory reset confirmation screen). This will restore Sirocco 550’s settings to their default
and you will be able to select Ethernet as your connection type during startup.
RJ45 Socket
Connect the
cable from your
router here
Mini USB connector
For connecting to
Sirocco 550
Adapter Status lights
Lit when active (see right)

7
Ethernet settings
These settings are only available when using an Ethernet connection. Press Options from either
The Lounge or Media player, then select Network settings to view options for configuring your
Ethernet network connection.
View details
Displays the configuration of the network that Sirocco 550 is connected to:
IP address Sirocco 550’s IP address.
Net mask The configured network mask.
DNS Domain Name Server IP address.
Router Gateway router IP address.
MAC address MAC address (a fixed address that identifies your Sirocco 550).
IP address
Choose between DHCP (dynamic) or Static. If you select Static you can then select and manually
enter the IP address, Net mask, DNS and Router information.
Clear network settings
Sirocco 550 will delete all previous Ethernet network details and try to reconnect.
Select network type
Change your internet connection type between Ethernet and Wi-Fi.
Ethernet settings
View details
IP address
Clear network settings
Ethernet settings screen

8
Wi-Fi settings
These settings are only available when using a Wi-Fi connection. Press Options from either The
Lounge or Media player, then select Network settings to view options for configuring your Wi-Fi
network connection.
Connection wizard
Scans for and connects to available wireless networks.
View details
Displays the configuration of the wireless network that Sirocco 550 is connected to:
Network name The network name (SSID) is shown at the top of the screen.
Encryption The encryption method is listed (WEP, WPA or WPA2).
IP address Sirocco 550’s IP address.
Net mask The configured network mask.
DNS Domain Name Server IP address.
Router Gateway router IP address.
Radio Name The name used to identify your Sirocco 550 on the Lounge website.
MAC address MAC address (a fixed address that identifies your Sirocco 550).
Access point MAC address of the wireless router that Sirocco 550 is connected to.
Manual setup
Manually configure your wireless network settings (for advanced users only).
Retry connection Attempts to reconnect to the selected network.
Network name Scan for networks or Enter SSID manually to specify a new SSID for your
wireless network.
Encryption mode Change the encryption mode between WEP, WPA (PSK), WPA2 (PSK) or None.
Sirocco 550 automatically detects the mode for your network. Only change this
setting if you think the encryption mode is incorrect.
Key or password Enter a new encryption key or password.
IP address Choose between DHCP (dynamic) or Static.
Clear network settings
Deletes previous Wi-Fi connections, passwords and settings and performs a fresh network scan.
Select network type
Changes your connection type between Wi-Fi and Ethernet.
Wi-Fi settings
Connection wizard
View details
Manual setup
Wi-Fi settings screen

9
Media streaming using PURE FlowServer
If you have music stored on your computer, you can stream it to Sirocco 550 so you can
listen using the Media player source. To do this you can download our media server software,
FlowServer. It is available for Microsoft®Windows XP, Windows Vista, Windows 7 and Apple Mac
OS®X 10.3 or higher.
To download a copy of FlowServer, go to the Lounge website, www.thelounge.com, and click on
Downloads.
Installing FlowServer
Our step-by-step guides will take you through the installation process. Visit our support site at
http://support.pure.com or click on the links below:
FlowServer for Windows step-by-step
FlowServer for Mac OS step-by-step
Finding and entering your FlowServer license key
During installation, or on first start up of FlowServer (depending on your operating system) you will
be asked to enter a FlowServer license key. To find your key:
Log in to the Lounge and click on Sirocco 550 under My Favourites, then click on Device info.
This will show you useful information about Sirocco 550. Next to ‘FlowServer Key’ is a link to your
license key. Click this link to reveal your key (see illustration).
Viewing Sirocco 550’s details on the Lounge.
(FlowServer license key highlighted)

10
The Lounge website
Open an account at the Lounge (www.thelounge.com) and you can connect Sirocco 550 to the
Lounge to make your favourite internet content more manageable. You can create folders and
organize your favourites online and synchronize them with all of your Lounge-connected radios.
If you are already a member of the Lounge, see ‘Connecting Sirocco 550 to the Lounge’ below.
When you have filled in your details we’ll send you an e-mail containing a membership activation
link. Click this and your membership will be activated so you can log in.
Connecting Sirocco 550 to the Lounge
1. Log in to the Lounge website and click on ‘Add Device’ under My Favourites in the left hand
menu. You will be given a connection code to enter into Sirocco 550.
2. From Lounge settings on Sirocco 550, select Register with the Lounge to enter your code.
Use the Select dial to highlight and select characters, tap Delete to erase characters, and tap
Save to finish.
3. Your registered Sirocco 550 is now listed under My Favourites on the Lounge.
In certain countries you can also now sign up for our FlowSongs service which enables you to
buy music direct from your Sirocco 550 or any other connected PURE internet radio. Music
you purchase is available for you to listen on the Lounge, to download for your MP3 player, and
available from any connected PURE internet radios. Check our website www.pure.com for the
latest information about FlowSongs and whether it is available in your region.
Entering your registration code on
Sirocco 550
Your Sirocco 550
connected to the Lounge
ABCDEFGHIJKLM
NOPQRSTUVWXYZ
sp0123456789
Enter registration code
DelSaveMore...
QPZKE
The Lounge homepage

11
The Lounge settings
These settings are only available when listening to the Lounge source. Press Options, then select
The Lounge settings.
Clear favourites
Select Clear favourites to remove all internet stations/podcasts/PURE Sounds from your favourites
list on Sirocco 550 and on the Lounge if connected.
View/change radio name
You can rename Sirocco 550 to help identify it more easily when using the Lounge website. By
default this name is ‘My Sirocco 550’. To change it, select View/change radio name. The current
name is shown at the top of the screen. Use the Select dial to enter a new name and tap Save to
confirm.
Register with the Lounge
Enter your Lounge registration code if you have not already done so.
The Lounge settings
Clear favourites
View/change radio name
Register with the Lounge
Lounge registration code entry
screen
Changing your Sirocco 550’s name
Lounge settings screen
ABCDEFGHIJKLM
NOPQRSTUVWXYZ
sp0123456789
Enter registration code
DelSaveMore...
QPZKE
ABCDEFGHIJKLM
NOPQRSTUVWXYZ
sp0123456789
Enter radio name
DelSaveMore...
Jenny’s Room

12
CD settings
These settings are only available when listening to a CD. Press Options, then select CD settings.
Repeat
Select the repeat type:
Off (default) Tracks are played until the end of the current album or folder.
All Continuously repeats the current album or folder.
Track Repeats the current track.
Shuffle
Select the order that tracks in the current album or folder are played:
Off (default) Tracks play in the order that they are displayed on-screen.
On Tracks play in random order.
When Shuffle is on, tapping or selects a random track from the current album or folder.
CD settings
Repeat
Shue
CD settings screen

13
USB settings
These settings are only available when listening to a USB device. Press Options, then select USB
settings.
Repeat
Select the repeat type:
Off (default) Tracks are played until the end of the current album or folder.
All Continuously repeats the current album or folder.
Track Repeats the current track.
Shuffle
Select the order that tracks in the current album or folder are played:
Off (default) Tracks play in the order that they are displayed on-screen.
On Tracks play in random order.
When Shuffle is on, tapping or selects a random track from the current album or folder.
USB settings
Repeat
Shue
USB settings screen

14
Media player settings
These settings are only available when listening to the Media player source. Press Options, then
select Media player settings.
Repeat
Select the repeat type:
Off (default) Tracks are played until the end of the current album, folder, playlist or search
results.
All Continuously repeats the current album, folder, playlist, or your search results.
Track Repeats the current track.
Shuffle
Select the order that tracks in the current album, folder, playlist or search results are played:
Off (default) Tracks play in the order that they are displayed on-screen.
On Tracks play in random order.
When Shuffle is on, tapping or selects a random track from the current album, folder,
playlist or search results.
Media server
View technical details about your media server or rescan for alternative servers.
Current details The name of your media server.
The name of the server software you are using, e.g., FlowServer.
The software version of your server software.
The IP address and port of your media server.
A web address for further information or software updates.
Scan for servers Scans for all available media servers.
Media player settings
Repeat
Shue
Media server
Media player settings screen

15
Autotune
Stations found: 52
Cancel
Digital radio settings
These settings are only available when listening to Digital radio. Press Options, then select Digital
radio settings.
Autotune
Search for new digital radio stations and remove inactive stations. You can stop an autotune before
it has finished by tapping Cancel. When an autotune has finished Sirocco 550 will tune to the last
station you listened to.
Station order
Change the order in which digital radio stations are displayed:
Alphanumeric Lists all stations in alphanumeric order (0-9, A-Z).
Active station Lists stations that are active (currently broadcasting) at the top of the station list.
Multiplex Lists stations in groups according to their Multiplex (a group of national or local
stations broadcast by the same operator).
Trim station list
Remove inactive digital radio stations (marked ‘?’) from the station list.
Dynamic range control
Change the Dynamic Range Control (DRC) settings. DRC makes the quieter sounds in a digital
radio broadcast easier to hear at a low volume or in a noisy environment.
Off Any DRC broadcast sent by the station is ignored.
Half DRC level is set to half that sent with the broadcast.
Full (default) DRC level is applied as sent with the broadcast.
Note that only certain stations broadcast DRC.
Autotune
Digital radio settings
Autotune
Station order
Trim station list
Digital radio settings

16
FM settings
These settings are only available when listening to FM radio. Press Options, then select FM settings.
FM tuning
Switch between Seek tune and Manual tune.
Seek tune Automatically tunes to the next station with a strong signal.
Manual tune Tunes up or down in steps of 0.5 MHz.
FM stereo
Switch between receiving FM stations in Mono or Stereo (default). Mono may improve the clarity of
weaker signals.
FM settings
FM tuning
FM stereo
FM settings

17
Display settings
Adjust display options, such as information displayed while you are listening to each source,
screen brightness and duration. Press Options then select Display to open the menu. Use the
Select dial to browse and select from the options below:
Information
Press Info to change the information displayed on-screen. The options depend on the active source:
Digital radio
Scrolling text Text information broadcast by the current station. May include song titles,
programme details, news, etc.
Broadcast info The Multiplex to which the station belongs, a description of the station’s content
(e.g., ‘Pop music’), the bit rate (audio quality) of the broadcast in kbps and a
Stereo/Mono indicator.
Reception info The current channel and frequency, signal quality and signal strength.
Time and date The date with a full-screen clock.
The Lounge
Description Station Description.
Information about the current station, e.g., UK Rock.
Time offset Most stations will be live streams, but otherwise displays how far into a
broadcast a the station is.
If connected wirelessly, displays a bar representing signal strength.
Station URL The URL address of the current station.
Time and date The date with a full-screen clock (as in standby mode).
Media player
Track info Artist and album information (id3 tags).
Progress bar and timers indicating the current track position.
If connected wirelessly, displays a bar representing signal strength.
Time and date The date with a full-screen clock.
BBC Radio 6Music
Now playing: Juicy Fruit
by Mtume
♥Flow
DR
Fri 14 Jan 2011
11:03
Scrolling text (digital radio)
Time and date (all sources)
Location and
Genre
Wi-Fi signal
strength
Wi-Fi signal
strength
Time offset/
duration

18
FM radio
Scrolling text Text information broadcast by the current station. May include song titles,
programme details, news, etc.
Reception info The current frequency and signal strength.
Time and date The date with a full-screen clock.
iPod, CD and USB
Track info Artist, track title and album title information (if available).
Time offset/duration Progress bar and timers indicating the current track position.
Time and date The date with a full-screen clock.
There are no information options for the AUX audio sources.
Active and Standby operation
You can adjust the brightness level and the duration that the screen is illuminated.
Select Active operation to adjust the display settings that apply when Sirocco 550 is switched on
or Standby operation to adjust the display settings that apply when in standby.
Screen duration The length of time the screen is illuminated after a button or dial is pressed.
Choose between Always on (default) or Off after 7 seconds.
Brightness Automatic Adjusts the brightness automatically using the light sensor on
the front panel of Sirocco 550.
Manual Set the brightness level using the select dial.
Audio settings
Press Options (or Tone on the remote), then select Bass and Treble to adjust the Bass and Treble
settings of Sirocco 550 between -5 (low) and 5 (high). Tap OK to store your settings. You can also
access the settings directly by pressing the Tone button on your remote control.
BBC Radio 1
98.9 MHz Stereo
♥Flow
FM
Brightness when active
- Automatic -
5
OK Automatic
FM reception info
Manual brightness setting
Setting the bass and treble levels
Bass & Treble
- Bass -
TrebleOK
Treble -1
5
Bass

19
Additional settings
Upgrade
Software updates may be issued in the future to provide new features and functions.
To upgrade over your wireless or Ethernet network (recommended)
1. Tap Options, select Additional settings > Upgrade > Network.
2. Sirocco 550 will search for any available upgrades. If an update is available the message ‘New
version available: vX.X’ will appear on screen (X.X is the version number, i.e. v2.1).
3. Tap OK to download and install the new software. This can take up to 5 minutes.
To upgrade using a USB cable (when your network is not available)
1. Visit http://support.pure.com to check if an update is available for Sirocco 550.
2. If updates are listed on the website, download the most recent update to your computer.
3. Connect Sirocco 550 to your PC’s USB port using a USB cable (not supplied). Run the update
software on your computer and follow the instructions.
Warning: Do not switch Sirocco 550 off while it is updating.
Bind remote
Re-connect your remote control to Sirocco 550. Simply follow the instructions on-screen. You may
want to try this if you experience problems with your remote.
Language
Switch the display language between English, French, German, Italian and Spanish.
Additional settings
Upgrade
Bind remote
Language
Bind remote
Press and on your
remote at the same
time
Additional settings menu
Binding the remote

20
Help and advice
I am having trouble connecting to my network (Wi-Fi and Ethernet)
• Sirocco 550 cannot connect to wireless networks that are hidden or protected, such as office networks, without a WEP, WPA or WPA2 key or
password. Unless your network is ‘open’ (this is generally not recommended due to the risk of unauthorized access), make sure you have your
WEP, WPA or WPA2 key or password to hand.
• Sirocco 550 needs to be positioned within the range of your wireless network, which will be reduced if there are walls between your router and
Sirocco 550. Although Sirocco 550 is very good at picking up wireless networks, the strength of the Wi-Fi signal will vary depending on your router
and the surrounding environment. If Sirocco 550 fails to find your wireless network, or the signal drops off, move it closer to the router.
• If connected using an using a PURE mini USB Ethernet adapter, ensure your Ethernet cable is securely connected to the adapter and that the
adapter is fully connected to Sirocco 550. Check that the status indicator lights are working. Test your Ethernet connection using another device.
Screen displays ‘Station not available’ when listening to the Lounge
• It is possible that a station may be off air, or has changed its address. If a particular station will not play, visit http://support.pure.com for more help.
Media player is not working
• To share music files with Sirocco 550, we recommend that you install FlowServer. FlowServer is available from the Downloads section of the
Lounge website at www.thelounge.com.
• Make sure that your computer is switched on.
• Make sure your music files are saved as a supported file format: MP2, MP3, WMA4, WMA7, WMA8, WMA9, AAC (including .m4a) or Real Audio.
• Sirocco 550 cannot play files which are restricted by Digital Rights Management (DRM).
Video is not playing, or suffers from interference
• Check that your iPod or iPhone is correctly docked, you have selected iPod as the source and the TV Signal output is set correctly on your iPod or
iPhone (NTSC or PAL).
• Check that you are viewing the correct source on your TV or monitor. You can usually change this using your TV remote or monitor control panel.
• Ensure that the video cable is connected securely to both Sirocco 550 and your TV or monitor.
CD is not recognised or does not play
• Try re-inserting the CD, making sure it is label side up.
• Check that the CD is not scratched or damaged in any way.
• Check that the CD you are using contains music in the correct format: CD Audio/MP3/WMA4 or higher.
Other manuals for SIROCCO 550
2
Table of contents
Other PURE Stereo System manuals

PURE
PURE Contour 200i Air User manual

PURE
PURE DMX-60 User manual

PURE
PURE Evoke User manual

PURE
PURE SENSIA 200D CONNECT User manual

PURE
PURE SIROCCO 550 User manual

PURE
PURE Evoke C-F6 User manual

PURE
PURE EVOKE Flow User manual

PURE
PURE DMX-20 User manual

PURE
PURE EVOKE Flow User manual

PURE
PURE Contour User manual