Pyle PLMR90UW User manual


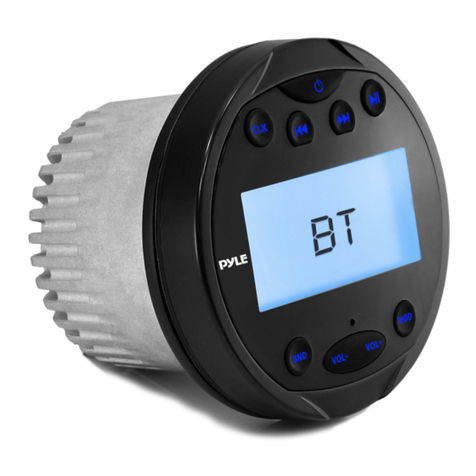
The round-style headunit receiver radio features Bluetooth technology allowing music to wirelessly stream from
your compatible Bluetooth-enabled device. Control the audio from a distance -- all from your handheld device.
Marine grade waterproof construction makes this unit perfect for upgrading your marine audio system. The input
and output connectors allow you to connect external devices and speaker systems for a more convenient and
selective listening experience.
Warning:
It is recommended you seek the assistance of a professional upon installation.
Be sure to provide adequate clearance behind the receiver where mounting. Be sure as to avoid obstruction of any existing
wires, fuel lines, electronic circuitry or vehicle safety features prior to installation. Make sure to safely and securely prepare the
area of installation as to avoid any disruption of your vehicle's mechanical, electrical or safety systems.
Choose a mounting location with a flat surface to ensure a flush and water-tight fit.
To prevent any interference, distortion or accidental operation -- due to radio frequency waves or extreme temperature,
choose a mounting and installation location farthest from the engine compartment.
Disconnect the battery to ensure there will be no shorted wires during the installation procedure.
Do not submerge the unit in water.
Installation of Marine audio components requires experience and expertise with a variety of mechanical and electrical
knowledges and practices. This user manual provides basic and general installation and operation instructions for your new
marine receiver, it may not show the exact installation methods which may be required for your particular installation. Always
consult a professional prior to installation and mounting.
Care and Maintenance:
Clean the player with a slightly damp, soft cloth using a mild household cleaner. Do not use solvents such as benzene, thinner,
or other commercially hazardous chemical cleaners. Be sure to regularly inspect the connections on the rear of the unit for
corrosion and correct as needed.
Mounting:
Choose a mounting location on the dash / instrument panel that will allow room for proper connecting to the power source.
Take into consideration how you will use the input connectors, output connectors, USB connector and the antenna jack if
necessary. Prepare the area for installation by carefully removing any interior trim panels and obtrusive materials as
necessary. Route wire harnesses away from sharp edges, and ensure that no harnesses wire/connector will be pinched or
pierced during reassembly.
Once a suitable location has been determined, drill the hole and secure the stereo using the included screws and metal
mounting U-shape bracket.
Cut a hole in the designated area with a diameter of 3.0'' and depth of at least 3.9'' (to accommodate for the bracket mounting
hardware and cables/wiring.)Make sure the receiver fits snug into the drilled opening.
Insert the screw bolts into the back of the receiver. The "U" bracket then slides over the screw bolts and secures the receiver
to the dash opening, using hex nuts to tighten the fit. The hex nuts can continue to be tightened against the bracket for secure
and stable fitting against your dash / console panel.
Before cutting any panel, ALWAYS ensure that there is sufficient clearance behind the panel, and that no wire harnesses, fuel
lines, moving linkages, or any other critical components are exposed to damage by your choice of location. NEVER risk damage
to the hull while cutting your opening.

Installation / Mounting:
Be sure to install the U-shaped bracket so it fits flush to the interior of the mounting wall. The receiver face should sit flush on
your dash / console panel.
The two threaded bolts screw into the rear of the receiver housing. The bolts then slide through the U-shaped bracket and are
tightened from the other ends by nuts. Be sure as to avoid pinching any cables/wiring, and not too over-tighten the nuts.
Ensure a water tight seal is created between your receiver and the dash / console panel, as to not allow moisture into the
opening compartment.
*Please Note: The yellow RCA Video Connectors
can only be found on model PLMR94W.

Wiring:
Colored Wires
A
White / Black Stripe
Front Left SPK -
B
White
Front Right SPK +
C
Gray / Black Stripe
Front Right SPK -
D
Gray
Front Right SPK +
E
Green / Black Stripe
Rear Left SPK -
F
Green
Rear Left SPK +
G
Purple / Black Stripe
Rear Right SPK -
H
Purple
Rear Right SPK +
I
Blue
Auto Antenna
J
Black
GND
Wires / Connectors
K
USB
USB Flash
L Antenna
Radio
Antenna
M
RCA (Gray)
R Ch. Output
N
RCA (Gray)
L Ch. Output
*O
RCA Video
(Gray)
Video Output
P
RCA (Black)
R Ch. Input
Q
RCA (Black)
L Ch. Input
*R
RCA Video
(Brown)
Video Input
S
Red
Acc
T
Yellow
B+ 12V
*Please Note: The yellow RCA Video Connectors
('O' and 'R') can only be found on model PLMR94W.
Visit www.Pyleh^A.com for more
detailed product-specific information

Control:
A
Clock
Press the buon to display the me. Hold in the buon unl the digits begin to blink. Once the digits
are blinking you can set the me, use the previous and next buons to adjust the numbers, then press
the clock buon again, while blinking, to move between hours and minutes.
B
Previous
Scan to the previous radio staon or, when in USB or Bluetooth mode, jump to the previous track.
C
Power/Source
Power ON / OFFLong Press:
Short Press: Change source.
Long Press: BAS-TRE-BAL-FAD-EQ-LOUD-CT(INDEP/SYNC)-BEEP-CLOCK(12/24)-P_VOL-DX-ST
Short Press: Preset or save staon.
-
The unit is powered ON once the LCD backlight display is blue.
D
Next
Menu
Scan to the next radio staon or, when in USB or Bluetooth mode, jump to the next track.
E
Play / Pause
Play or pause your streaming audio (USB - Bluetooth)
F
G
Volume - / +
Minimum volume: 0, Maximum volume: 43
H
Band
Press the buon to jump between radio bands (AM 1, AM 2, FM 1, FM 2, FM 3). You can save up to a
total of 30 radio staons (12 AM, 18 FM).
To set a staon, tune to your desired staon, then press and hold the Play / Pause buon. The screen
will then display 'SAVE CH 1' - you can press the Play / Pause buon to assign a different save channel.
Pressing the Play / Pause buon again, will ask you to save to: 'SAVE CH 1', 'SAVE CH 2', 'SAVE CH 3',
etc. Please note: the staon will save the channel in the designated 'band' you are currently in.
A
Band
B
Previous
C
Power/Source
D
Next
E
Play / Pause
F
Menu
G
Volume - / +
H
Clock
Button Layout

Bluetooth Pairing:
1. Power on your receiver radio
When your unit is ON, it is ready to be 'paired' with your compatible Bluetooth-enabled device
2. From your smartphone or tablet, search for Bluetooth networks can select 'PyleUSA'
The pairing process may take up to 1 minute and your device must be within range of the receiver to connect
3. Once successfully paired, the 'B' icon will appear on the receiver's LCD display.
You can then press the 'MOD' button on the receiver to change between audio modes
Audio modes: AUX, Radio, 'BT' - Bluetooth
Troubleshooting
Problem Possible Cause Possible Solution
No power
1. Incorrect wiring
2. Blown fuse
3. Low battery voltage
1. Double-check wiring connections
2. Replace fuse
3. Check the voltage of the vehicle battery with a multimeter.
Voltage must be at least 11V
No Sound
1. Loose speaker connection
2. Bad speaker
3. Output blown
4. Volume too low on the connected
external device
1. Double check connections
2. Replace bad speaker with known good speaker and connect
3. Send unit in for repair
4. Increase volume of media device
*Be su
re to check all connections and make sure the unit is
properly ground
No Reception 1. Antenna not firmly connected 1. Insert antenna firmly
USB Memory Not
Being 'Read' 1. File types must be compatible 1. Convert the file types to an appropriate and compatible format
No Bluetooth
Connection
1. You are not paired to the receiver
from your device
2. Out of range
3. The connection is already in use
1. Choose the correct Bluetooth network from your device
2. Bring your compatible Bluetooth device closer to the receiver
3. The receiver may be paired to another device. Be sure to
disconnect the Bluetooth pairing connection from all other
devices, and attempt Bluetooth pairing again.
Visit www.Pyleh^.com for more
detailed product-specific information

PLMR94W (White)
Waterproof Bluetooth Marine Digital Media Receiver
Marine Stereo Receiver Radio System
Bluetooth Wireless Music Streaming
Digital Media Audio File Playback
USB Flash Drive Reader
Marine Grade Waterproof Construction
AM/FM Radio with Station Preset Memory
RCA (L/R) Audio Input Connector Jacks
Ability to Connect Additional Audio Devices
RCA (L/R) Audio Output Connector Jacks
Ability to Connect to External Speaker Systems
RCA Video Input / Output Connector Jacks
Built-in Pre-Amplifier for Subwoofer / Amplifier Connection
LCD Digital Display, Button Illumination
ID3 Tag Song Information Readout
Digital Audio Media File Support
Front Panel Touch Button Controls
Audio Input Source Selectable
Audio, Video and Image Digital File Support
For Marine/Boat In-Console Dashboard Panels
Includes Remote Control, Mounting Bracket, Power/Wiring
Harness
Bluetooth Streaming
Built-in Bluetooth for Wireless Audio Ability
Works with All of Your Favorite Devices
(iPhone, Android, Smartphone, iPad, Tablet, etc.)
Bluetooth Version: 2.1
Bluetooth Wireless Range: 10' Feet
Technical Specs:
Peak Power Output: 4 x 40 Watt
RMS Power Output: 4 x 20 Watt
Frequency Response: 20Hz-20kHz (+/-3dB)
Marine Grade Rating: IPX5
Impedance: 4 Ohm
S/N Ratio: 55dB
Stereo Separation: >30dB, @ 1kHz
AM/FM-MPX PPL Tuning
Radio Tuner Presets: 18FM, 12AM
AM Frequency Range: 530-1710MHz
FM Frequency Range: 87.5-107.9MHz
Maximum USB Flash Support: 32GB
Digital Media File Support: MP3, MP4, WMV, WAV, MOV &
More
Zero Current Draw
Dimensions:
Receiver Diameter: 4.0''
Cut-Out Diameter: 3.5''
Mounting Depth: 2.5''
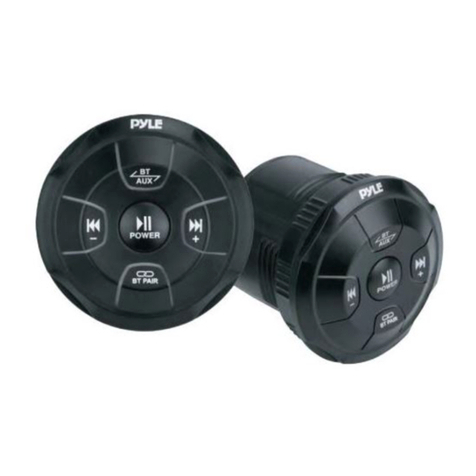
PLMR90UW (White)
PLMR91UB (Black)
PLMR91US (Silver)
Waterproof Bluetooth Marine Digital Media Receiver
Marine Stereo Receiver Radio System
Bluetooth Wireless Music Streaming
Digital Media Audio File Playback
USB Flash Drive Reader
Marine Grade Waterproof Construction
AM/FM Radio with Station Preset Memory
RCA (L/R) Audio Input Connector Jacks
Ability to Connect Additional Audio Devices
RCA (L/R) Audio Output Connector Jacks
Ability to Connect to External Speaker Systems
Built-in Pre-Amplifier for Subwoofer / Amplifier Connection
LCD Digital Display, Button Illumination
ID3 Tag Song Information Readout
Digital Audio Media File Support
Front Panel Touch Button Controls
Audio Input Source Selectable
For Marine/Boat In-Console Dashboard Panels
Includes Mounting Bracket, Power/Wiring Harness
Bluetooth Streaming
Built-in Bluetooth for Wireless Audio Ability
Works with All of Your Favorite Devices
(iPhone, Android, Smartphone, iPad, Tablet, etc.)
Bluetooth Version: 2.1
Bluetooth Wireless Range: 10' Feet
Technical Specs:
Peak Power Output: 4 x 40 Watt
RMS Power Output: 4 x 20 Watt
Frequency Response: 20Hz-20kHz (+/-3dB)
Marine Grade Rating: IPX5
Impedance: 4 Ohm
S/N Ratio: 55dB
Stereo Separation: >30dB, @ 1kHz
AM/FM-MPX PPL Tuning
Radio Tuner Presets: 18FM, 12AM
AM Frequency Range: 530-1710MHz
FM Frequency Range: 87.5-107.9MHz
Maximum USB Flash Support: 32GB
Digital Media File Support: MP3, WMA
Zero Current Draw
Dimensions:
Receiver Diameter: 4.0''
Cut-Out Diameter: 3.5''
Mounting Depth: 2.5''

FCC Statement:
This device complies with part 15 of the FCC Rules. Operation is subject to the
following
two conditions: (1) This device may not cause harmful interference, and (2) this
device
must accept any interference received, including interference that may cause
undesired
operation.
This equipment has been tested and found to comply with the limits for a Class B
digital
device, pursuant to part 15 of the FCC Rules. These limits are designed to provide
reasonable protection against harmful interference in a residential installation. This
equipment generates,usesandcanradiate radiofrequency energy and,if notinstalled
and used in accordance with the instructions, may cause harmful interference to radio
communications. However, there is no guarantee that interference will not occur in a
particularinstallation. Ifthisequipmentdoescauseharmfulinterferenceto radioor
television reception, which can be determined by turning the equipment off and on,
the
user is encouraged to try to correct the interference by one or more of the following
measures:
—Reorient or relocate the receiving antenna.
—Increase the separation between the equipment and receiver.
—Connect the equipment into an outlet on a circuit different from that to which the
receiver is connected.
—Consult the dealer or an experienced radio/TV technician for help.
Caution: Any changes or modifications not expressly approved by the party
responsible
for compliance could void the user's authority to operate the equipment.
This equipment complies with FCC radiation exposure limits set forth for an uncontrolled
environment. This transmitter must not be co-located or operating in conjunction with any
other antenna or transmitter.
This equipment should be installed and operated with minimum distance 20cm between the
radiator&your body.
Other manuals for PLMR90UW
1
This manual suits for next models
3
Table of contents
Other Pyle Receiver manuals
Popular Receiver manuals by other brands

Ferguson
Ferguson ARIVA Link 200 user manual

Teleco
Teleco TVDMM868A06 installation instructions

Elinchrom
Elinchrom El-Skyport Instructions for use

Molpir
Molpir DVBT0003 user manual

Wildlife Materials International
Wildlife Materials International TRX-16S manual

DMP Electronics
DMP Electronics 1100D installation guide