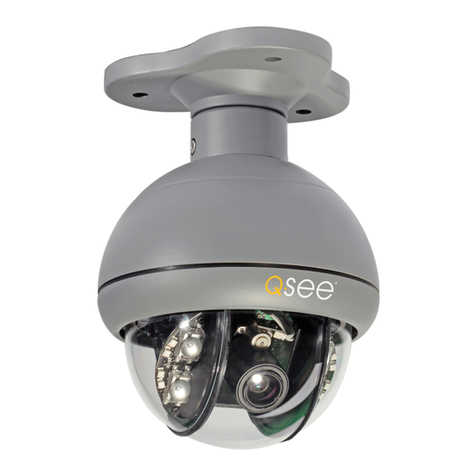
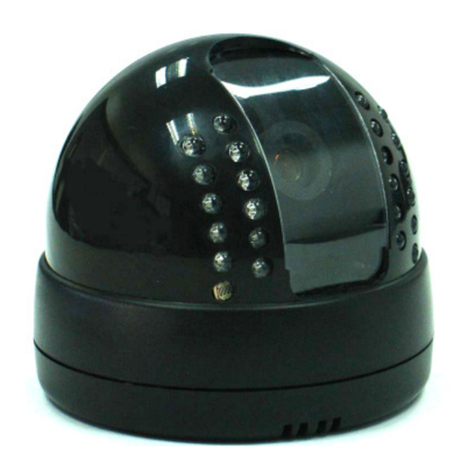
Q-See QSLO2712 User manual

English 1
The manual provides us with general principles and methods concerning the
introduction of PTZ Domes’ operation and installation. Please have a careful reading
before making installation.
This integrated PTZ Dome series, with built-in DSP of high performance, can combine integreated
camera and decoders. It adopts pan-digital controlling, ensuring a flexible program. Reaching all-round
and complete clearance monitoring in the true sense, due to high-accuracy rotating system, freely and
fast position and successive track scanning. Exview performance makes it possible to adapt all the
environment (bright / dark) and different goals (far / near). In other words, it belongs to one kind of
integreated design with a system of high reliability.
This series can combine many protocols, such as PELCO-P/D and so on. The specific operation may
vary while using different systems. And we should take the present system as basis. Concerning the
specific operation details, please contact system manufacturers and the corresponding distributors
directly!
1.Don’t take it apart freely
To prevent electric shocks, don’t separate screw
or housing。
All the componence of the machine must be
prepared by the professionals。
As for the maintenance, it should be carried out
by qualified experts。
2.Please use the camera carefully
Don’t use it as you like, to avoid striking and
shocking, be sure to use or store it appropriately。
3.Don’t expose the camera to rain or
moisture (except outdoor used model)
It is designed inside of the house, so be sure to
avoid rain and moisture。
Turn off the power supply and maintain it by
qualified person。
The moisture may affect the cameras and lead to
electric risk。
4. Don’t install indoor PTZ Dome outside
the house
It may influence the life expectation of the dome
5. Don’t use intensified or grinded detergent
to clean it
Please use dry and soft clothto clean it when it
isdirty. If seriously dirty, please use moderate
detergent. Pay more attention to its appearance
while cleaning and erase the remains.
6. Don’t aim at the sun
Be sure not to aim it at the sun or any other
brightobjects, whether in use or not. Or, it may
cause the pisture unclear.
7. Avoid exposing it to the light source or
hard light too long
If the facula appears on the screen due to the light
source, the image may fade to some extent
Safty Announcements
Preface

2 English
8. Avoid installing it reversedly
It’s designed for ceiling or wall mount. So if
installed upside down, such as installing on the
floor, it may cause it out of order.
9. Please use it according to the required
temperature, humidity and power supply
Don’t use it under the circumstance of high
temperature or humidity. Leave it away from
heat-generating equipments, such as warm vapor,
stoveand so on.
10. Placing it away from air-conditioner’s
entrance point
The lens may generate fog due to the
water-condensing under the following
circumstance:
Quick changes from high to low temperature
caused by turning on/off the air-conditioner from
time to time.
Quick changes from high to low temperature
caused by opening/closing the door occasionally
Used under the conditions that the glasses can
generates fog.
Used in the house full of smog or dust.
If the lens covered with fog generatede by
water-condensing, put the cover down and clean
the appearance with a piece of soft cloth.
11. Consumer Goods
Some components, such as lens drive, cooling
fan (electrical engineering), built-in sliding loop
may be weared out due to long-term using.
Concerning its update and maintenance, please
consult to maintenance center.
12. Don’t make it point to the same object
too long
If so, the object’s shadow will appear on the
screen
13. Don’t install it on some places easy to
shake
Install a shake-eliminating device when having
cameras close to bridge, plane or vehicle.

English 3
Main Features
1、Built-in decoder
zDigital design, data will not be lost while power
fail.
zWith recovery function while turning on-the
users can run it as you like.
zAuto operating function whenreceived no orders.
zPreset positions 128(LG/CNB camera series
support presets 56), speed adjusted.
zPreset speed : 200º-280º/s adjustable ,the
horizontal max speed 280º/s、vertical280º/s
z3 patterns, time range can reach 3 minutes at
least, and can save many kinds of P/T or lens’
operation and presets.
z3 preset patrolling scanning routes, each contains
32 presets, and the presets’ time and speed can
be separately programmed.
zSupport many scanning methods, such as auto
scan, fram scan etc.
zThe domes’ ID belongs to soft ID setting, can be
edited on the inside menu.
zIntegreated multi-protocol control:
PELCO“P”
PELCO“D”
zQuickly separated driver
z4ch alarm input;2ch assiting output.
zAlarm input-1.2ch active alarm, 3,4ch alarm
(On/Off)
zAssiting output-used to control relay choosen
freely
zPrivacy zones up to 6, can be moved along with
the dome.(area adjustable)
zPropotional zoom lens, P/T speed and depth of
zoom lents will decrease in propotion.
2、Integreated assembling design, built-in P/T
z6inch transparent cover, black and
non-transparent rotation dome, ensuring safty
monitor.
zBeautiful and exquisite appearance,compact
structure, fast assemble and disassemble.
zCeiling mount, inside / outside pendent mount.
zHorizontally controlling speed 0.1º-280º/s,max
speed adjustable,200º-280º/s
zManual control speed0.1º-280º/s vertically,max
speed adjustable, 200º-280º/s
zWith vertical auto flip function, reach 180°
vertically successive monitoring.
z360ºcontinuously horizontal rotation,
all-direction monitor
zComply with IP66/CE standard
zBuilt-in surge protection device
3、Built-in zoom lens, integreated digital color
cameraof highsensitivityandresolution
zMany high-resolution cameras of various models
provided bydifferent manufacturers can be
available..
zAuto focus, manual priority.
zAuto iris
zSharpeness adjustable (manual)
zAuto shift from C-W/B.
4、Built-in OSD Menu
zBuilt-in multi-functional video OSD,functional
parameters of cameras and P/T function can be
settable, with easy operation.
zSet 16 main subjects display
zBuilt-in direction display
zBuilt-in dome’s temperature display
4 English
1、Basic Requirement
All the electric work must comply with the latest
electric rulesand regulations, fire-prevention and
allied rules and regulations ;
Check whether all the attachments arelisted
according to the packing list,to insure the dome’s
application and installationare complied with the
correspondent reques. Please contactsupplier
while problems raised. And be sure to use this
product according tooperation/ working
environment.
2、Check Installation Space and
Construction Intensity of the spot
The installation space should be large enough to
contain the products. The spots (ceiling, wall,
braket) shouldbear the weight of the whole
products
4 times softy modulus are requested
3、Prepairing work regarding the cable
To choose suitable cable according to the
transmitting distance:
(1)75Ω;
(2)copper conducting wire;
(3)95﹪knitting copper shield
● RS485telecommunication cable(refer to appendix
Ⅲ)
4、DIP Switch Setting
To set DIP Switch according to the Baud
Rate and Protocol(refer to appendix SW3)
5、Please keep all the packing materials of
Dome
Please keep the packing materials aftertaking the
dome out, then you can use the original packing
materials to wrap up mthe products and diliver it
to the agent or manufacturer if something is
wrong with it. Well, if you don’t use the original
materials, the goods may be destroyed in
transportation and caused extra charge.
Domestic
Model
International
Model
Max Distance
(foot\m)
RG59/U RG59/U 760ft(229m)
5C-2V RG6/U 1,000ft(506m)
7C-2v RG11/U 1,500ft(457m)
Installing Preparation

English 5
■Indoor/Outdoor Dome Structure(drawing as follows)
Main structure of indoor/outdoor dome structure
Contain three parts,please confirm the packaging to ensure a complete products
Wall-mount Dome:
Up-cover
Integrated Chip
Down-cover
Indoor/Outdoor Dome Structure

6 English
■ Wall-mount bracket installation Size
Wall-mount dome can be used indoor/outdoor environment with strong wall,Concerning the details,
please refer to P7-9.
■ Ceiling-mount Bracket Installation Size
Ceiling-mount dome can be used indoor/outdoor environment with strong ceiling,Concerning the
details, please refer to P7-9.
Bracket Installation Size

English 7
TurningBox
Video line、
Control line、
power supply
screw
■Installation Steps:
FIG45
FIG46
FIG47
FIG48
FIG49
First: Bracket Installation
a.Installation of pendent braket
1、It can be used indoor/outdoor strong door
Attention:a. The wall should be thick enough to fix
inflating bolt.
b. The wall should support at least 4 times
weight of the dome
c. Please be sure about airproof, waterproof
and avoid moisture if fixed outside the
house
2、According to the wall-mount bracket installation drawing,
mark dimension,take the installing hole as moulding
board,Take the fixing hole under the braket as moulding
board,draw a fixing hole and drill it. Get video line,
controlling line, power source line (alarm signal line
requested by alarming function) across the braket and
make a steady one(as shown on FIG 45):
b.Installation of ceiling-mount bracket
1、It can be used indoor/outdoor strong ceiling structure.
Attention:a. The ceiling should be thick enough to fix
inflating bolt.
b. The ceiling should support at least 4 times
weight of the dome
c. Please be sure about airproof, waterproof
and avoid moisture if fixed outside the
house
2、According to the ceiling-mount bracket installation
drawing,mark dimension,take the installing hole as
moulding board,Take the fixing hole under the braket as
moulding board,draw a fixing hole and drill it. Get video
line,controlling line, power source line (alarm signal line
requested by alarming function) across the braket and
make a steady one(as shown on FIG 46):
Second: Installation of the up-cover
1、Loosen the screw on the overturning box and open the
turning board.(as shown on FIG 47)
2、Make the lines getting through the braket enter into the
up-cover and screw the up-cover tightly to the braket.
If it is used outside, please tangle the connection point
of the screw with waterproof adhesive plaster and then
tighten up , lock and fix the screw.(as shown on FIG 48、
49)
Indoor/ Outdoor PTZ Dome Installation

8 English
SW3 DIP Switch
FIG50
FIG51
3、(As shown on FIG 50 and connection sketch map),Make
connection between cable line (video line, controlling line,
power source line, alarm signal line requested by alarming
function) and the corresponding connection terminal on the
connecting board of the up-cover. And ensure an accurate
connection
①:Three power supply connection sketch map:
Caution:The power supply of the dome in this
system is DC15V or AC24V input,
please connect it according to the
wiring FIG.
②:RS485 input/2ch output point connection sketch
map:
③:4ch alarm input point connection sketch map:
④:Video connection sketch map:
connectvideoline
①
④
②
③
⑤

English 9
FIG52
FIG53
FIG54
FIG55
4、Set SW3 buton on the connection board of rotation box
an appropriate protocol and baud rate. (As to the
specificmethod,,please refer to the appendis’s
SW3code setting in the end of the manual),And then
loosen the screw , lock the rotation box tightly (as
shown on FIG 51)
Third : Install the integreated chip
1、Be sure the red card and the green card of the chip are
corresponding with the red lable and the green lable
and then push upward. Insert the green card first and
then the red one. You can be sure that it’s been
installed already when you hear two meticulous sound.
For the sake of safty, swing the chip from one side to
another to ensure a steady installation (as shown FIG
52)
2.、Normally, the red indicator is on when the power is
supplied.
Fouth: Installation of the down-cover
1、Paint the lubrication on the circle of “O” shape and
fix it on the circle groove in the down-cover.
Connect the end of safty rope in the down-cover to
the fixed hole on the embeded up-cover.(as shown
on FIG 53)
2、Make the screw’s fixed hole on the down-cover
match the button seat on the edge of the up-cover.
Press the down-cover tightly and tighten up the screw
and lock the down-cover.(as shown on FIG 54.、55)

10 English
Please turn off all the equipments’ power supplyand read the manual carefully before connecting!
Attention
yThe following work should be carried out by professionals or system installing expertsunder
theciecumstance of local situation;
yThe power supply should be DC15V or AC24V input! Please use the special power supply that
equipped on this product!
Connection Sketch Map

English 11
The serie-integreated PTZ dome belongs to built-in OSD menu, you can make various settings to cam,
len, P/T and some system parameter through the menu. This chapter will give you a complete
recognization to the PTZ dome and make settings easily and quickly as you like.
■ Self-Inspection Display While Power Supplied
Carry out self-inspection program after power supplied, and then the initial information will
appears on the screen: company name, PTZ subject, controlling protocol, baud rate, ID as well as
cam mode.
■Basic Operation of Menu and Keyboard
The Basic operation of the menu: move menu strip, enter into sub-menu, return to up-menu, choose
menu item, change fixed number, confirm, save and cancel setting.
1、Keyboard Function Instruments:
【OPEN】Iris open order. Stands for enlarging the iris when choosing picture. During menu setting,
it refers to entering into sub-menu or certain item, as well as saving the appointed
number .
【CLOSE】Iris close order. Stands for minishing the iris when choosing picture. During menu
setting, it refers to returning to sub-menu or certain item, as well as quitting the
appointed number .
【FAR】Far focus, stands for gathering far when setting pictures, indicating enlarging privacy zone
left and right during menu privacy zones setting
【NEAR】Near focus, stands for gathering near when setting pictures, indicating minishing privacy
zone left and right during menu privacy zones setting
【TELE】Pull lens near, stands for increasing lens’ enlarging times when setting pictures.
indicating enlarging privacy zone up and down during menu privacy zones setting
【WIDE】Push lens far, stands for decreasing lens’ enlarging times when setting pictures.
indicating minishing privacy zone up and down during menu privacy zones setting
Basic Function Instruction of Menu
Address: 001
Baudrate: 2400
Protocol: Pelco D
Tile reference ok
Pan reference ok
Main Firmware V3.11
Bottom Firmware V1.1
Company Title Display
Product Model Display
ID Address
Baud Rate
Protocol
Tile Reference Inspection
Pan Reference Inspection
Main Software Ver
Bottom Software Ver
Camera Model Display

12 English
P/T Upward:Stands for upward rotation of the camera when setting pictures. Indicates moving
menuor changing settings upwards during setting menu
P/T Downward:Stands for downward rotation of the camera when setting pictures. Indicates
moving menuor changing settings downwards during setting menu
P/T Rightward:Indicates rotation of cameras rightward
P/T Leftward:Indicates rotation of cameras leftward
Remarks:When operating menu, you can quicken changing speed if you operate P/T continuously
up and down. When choosing menu up and down, the cursor will skip the present item
that can’t be set.
2、Menu Signal Instruction:
→The present cursor, the present item
﹡The present choosen item
△The item has sub-menu
■Methods of enter into main menu:
Call preset No.95 or No.64 to enter: press “9” “5” key, then Press “preset” or press “6” “4” , then
“preset”.
Remarks:The operation and program is taking PELCO’s controlling system as example.
The methods of calling main menu and presets may vary from manufacturer to
manufacturer. F you use other’s operation system , please take present
keyboard as basis.
Methods of Enter Into Main Menu

English 13
Cam Function Setting
P/T Function Setting
Main Menu
Info Function Setting
Alarm Function Setting
Menu Index
↓
Camera
▽
Pan
▽
Info
▽
Alarm
▽
Selfact Nothing
Lerisure Time 005
Address 001
System reset
→Alarm1 act Nothing
Alarm1 out 1 Off
Alarm1 out 2 Off
Alarm2 act Nothing
Alarm2 out 1 Off
Alarm2 out 2 Off
Alarm3 act Nothing
Alarm3 out 1 Off
Alarm3 out 2 Off
Alarm4 act Nothing
Alarm4 out 1 Off
Alarm4 out 2 Off
→Main Title
Title Info Off
Place Info Off
Temperature Off
↓
Pattern
▽
Patrol
▽
Scan
▽
Home place
Autoflip On
Tilt Max speed 110
Pan Max speed 120
Preset speed 124
↓
Exposure
▽
White Balance
▽
Privacy Zone
▽
Other
▽
Custom Recall
Zoom Speed 005
Focus Speed 001

14 English
Exp Sub-Menu
W/B Sub-Menu
Camera Function Setting
Privacy Zone Sub-Menu
Other Sub-Menu
Remarks: This is menu index of Sony camera function setting
→Digital Zoom Of
f
Reverse Off
AutoICR Off
ICR Off
Display Off
→Exp Mode Auto
Shutter speed 1/50
Iris F2.8
Gain 0dB
Bright 013
Back Light Off
Slow Shutter Off
ExpComp Off
Exp Comp Set 0 dB
Aperture 005
→Set Mask 1
Set Mask 2
Set Mask 3
Set Mask 4
Set Mask 5
Set Mask 6
→WB Mode Auto
RGain 215
B Gain 168
↓
Exposure
▽
White Balance
▽
Privacy Zone
▽
Other
▽
Custom Recall
Zoom Speed 005
Focus Speed 001
Sony: Camera Menu Index

English 15
Exp Sub-Menu
W/B Sub-Menu
Camera Function Setting
Lens Sub-Menu
镜头
Privacy Zone Sub-Menu
Other Sub-Menu
Remarks: This is menu index of Hitachi camera function setting.
Hitachi: Camera Menu Index
→Reverse Of
f
Aperture mode Off
Aperture HL 050
Aperture VL 040
→Exp Mode Auto Exp
WDR Off
Back Light Off
BLC Level 202
Iris Auerage 091
→Shade Setting 003
Mask Color R 008
Mask Color B 008
Set Mask 1
Set Mask 2
→WB Mode Auto
RGain 658
B Gain 444
↓
Exposure
▽
White Balance
▽
Lens
▽
Privacy Zone
▽
Other
▽
Zoom Speed High
Focus Speed 016
→Digital Zoo
m
On
Dzoom MAG mag.2

16 English
Remarks:The Menu of “LG/CNB” camera series is the function setting menu
“LG/CNB” camera possess itself.
As for the specific introduction of menu index, it is omitted.
Concerning the details, please refer to inner function setting menu
of “LG/CNB” cameras.
P/T Function Menu
→Auto scan S 060
Auto scan TP
Frame scan S 060
Frame scan T 005
Frame scan TP
Scan limit L
Scan limit R
→Setup Pattern 1
Setup Pattern 2
Setup Pattern 3
Run Pattern 1
Run Pattern 2
Run Pattern 3
→Setup Patrol 1 Of
f
Setup Patrol 2 Off
Setup Patrol 3 Off
Run Patrol 1
Run Patrol 2
Run Patrol 3
ID Preset Speed Stop
→1 060 128 003
2 001 050 030
3 010 120 240
4 020 100 030
5 000 120 030
6 030 110 030
7 000 120 030
8 000 120 030
Save Patrol
↓
Pattern
▽
Patrol
▽
Scan
▽
Home place
Autoflip On
Tilt Max speed 110
Pan Max speed 120
Preset speed 124
P/T Function Setting Menu Index
LG/CNB: Camera Menu Index

English 17
This series PTZ processes built-in OSD with powerful function, all the functions can be operated by
main menu easily and obviously:
Main menu Display:
Main Menu
A
Camera function setting
(refer to P18-53)
Through this item, users can set each
parameter of camera in a flexible way
according to different environmentor
requirement.
B P/T Function Setting(refer to
P54-68)
Through this item, users can set the
folloeing function: pattern, patrol, scan,
home place, auto flip, tilt max speed, pan
max speed and preset speed.
C
Info Function Setting(refer
to P69-71)
Through this item, users can set the
following items: 16 main title program,
main menu display, Place information,
inside real-time temperature display.
D
Alarm Function Setting
(refer to P72-73)
Support 4ch alarm input, 2ch alarm output.
Alarm function can be set through this
item.
E
Self-act Function Setting
(refer to P74)
Through this item, it will carry out the
appointed conduct set by users when it is
during leisure time or haven’t received any
effective orders.
F
Leisure Time Setting(refer to
P74)
From the time when it doesn’t receive any
orders, if still get no orders during the
time fixed by users, it will carry out certain
function set by users in “self -act” And
leisure time should be 3-240s (available)
G
Dome Structure ID Setting
(refer to P75)
This series Dome ID belongs to soft setting,
ID Address from No.1-255 can be set
available
H System Reset Setting(refer to
P76)
Through this item, users can set all system
reset operation.
↓
Camera
▽
Pan
▽
Info
▽
Alarm
▽
Self act
Nothing
LerisureTime 010
Address 001
System reset
Main Menu Function Setting
A Camera Setting
B P/T Setting
C Info Setting
D Alarm Setting
E Self act Setting
F Leisure T Setting
G ID Address
H System Reset Setting

18 English
MainMenu CamFunctionSetting
Attention:Cameras’ menu may vary from manufacturer to manufacturer.
The users can set up all the parameters of the sony camera through this
item and can reach a flexible setting according to different environment
and requirement.
■Exp Sub-Menu(refer to P19-24)
The users can reach their needed picture
effect through setting the exp mode: shutter
speed, iris, gain, brightness, backlight
compensation, electric shutter, compensation
and aperture.
■ W/B Sub-Menu(refer to P25-27)
Through this item, whilt balance mode
(manual/auto) available, red gain and blue
gain adjustable.
■ Privacy Zones Sub-Menu
(refer to P28-29)
It support 6 privacy zones, and users can
by this item.
■ Other Sub-Menu(refer to
P30-33)
Through this item, we can set zoom
speed,ICR and info display.
■ Customs Menu(refer to P34)
The users can set reset mode (recall,
reset, set)
■ Zoom Speed Setting(refer to
P35)
Zoom speed 0-7 grade adjustable.
■ Focus Speed Setting(refer to
P35)
Focus speed 0-7 grade adjustable
↓
Camera
▽
Pan
▽
Info
▽
Alarm
▽
Selfact Nothing
Lerisure Time 005
Address 001
System reset
↓
Exposure
▽
White Balance
▽
Privacy Zone
▽
Other
▽
Custom Recall
Zoom Speed 005
Focus Speed 001
A Sony Camera Function Setting
■ Exp Sub-Menu
■ W/B Sub-Menu
■ Privacy Zone Sub-Menu
■ Other Sub-Menu
■ Custom
■ Zoom Speed Setting
■ Focus Speed Setting

English 19
Sony Camera Function Setting
■Exposure Sub-menu Setting:
Camera Function Setting Exp Sub-Menu
● Exp Mode Setting(refer to P20)
Level can be adjustable through exp parameter
under different exp mode.
● Shutter Speed Setting(refer to P21)
It can be used under the condition of exp mode
(manual) and Shutter P.
● Iris Setting (refer to P21)
It belongs to Iris P setting and can be used
under the condition of exp mode (manual) and
Shutter P.
● Gain Setting(refer to P22)
It can be used only the exp mode is manual.
● Brightness Setting(refer to P22)
It can be used only when exp mode is bright P
● B/L Compensation Setting(refer to
P23)
It may cause shadow of the backlighting objects
due to strong light. And iris can be adjustable a
● Slow Shutter Setting(refer to P23)
When it is used during the night (lack of light),
the picture will be more clear by using slow
shutter to make light-capturing time long.
● Exp Compensation Setting(refer
to P23)
The users can set this item, “on” or “off”
means open or close
● Exp Compensation Set(refer to
P24)
Only when the Exp Comp setting is on,can this
item be set. And its set is ranging from
-10.5-10.5.
● Aperture(refer to P24)
The bigger the figure, the more clear the
picture; the smaller the figure, the softer the
pictu
autoly to adapt different light changes and then
make the picture more clear.
↓
Exposure
▽
White Balance
▽
Privacy Zone
▽
Other
▽
Custom Recall
Zoom Speed 005
Focus Speed 001
↓
Exp Mode Auto
Shutter speed 1/50
Iris F2.8
Gain 0dB
Bright 013
BackLight Off
Slow Shutter Off
ExpComp Off
Exp Comp Set 0dB
A
p
erture 005
● Exp Mode Setting
● Shutter Speed Setting
● Iris Setting
● Gain Setting
● Bright Setting
● Backlight Setting
● Slow Shutter Setting
● Exp Comp Setting
● Exp Comp Set
● Aperture Setting

20 English
Sony Camera Function Setting
●Exp Mode Setting:
)Operating Method As follows:
1、Call preset 95 or 64 to enter into main menu.
2、Move cursor to choose【Camera】,press【OPEN】(open iris
order)for confirmation,enter into camera function setting,
3、Move cursor and choose【Exposure】in the【Camera】,
press【OPEN】key(namely open iris order)for conformation,
enter into exp sub-menu setting.
4、Move cursor in【Exposure】and chose 【Exp Mode】,
press 【OPEN】key(namely open iris order)for
confirmation,enter into mode to choose setting item,
It can be set as follows:
【Auto】:Auto exp mode.it belongs to default setting,the
camera can adjust suitable exp set according to the
objects’ brightness and CCD sensitivity autol.
Under this mode, manual is not effective to set
level
【Mauual】:Manual mode. Under this mode,any exp mode is
available.
【ShutterP】:Shutter Priority Mode
【IrisP】:Iris priority mode
【Bright】:Brightness control priority
5、Use P/T up and down-ward order to change exp mode up and
down.
6、Press 【OPEN】key (open iris order) for confirmation, save
exp mode setup and exit. Press 【CLOSE】key (close iris
order), lose exp mode setup and exit.
Main Menu
Cam Function Setting
Exp Sub-menu Finction
Setting
Exp Mode Setting
﹡Exp Mode Auto
Shutter speed 1/50
Iris F2.8
Gain 0dB
Bright 013
Back Light Off
Slow Shutter Off
ExpComp Off
Exp Comp Set 0dB
A
p
erture 005
↓
Exposure
▽
White Balance
▽
Privacy Zone
▽
Other
▽
Custom Recall
Zoom Speed 005
Focus Speed 001
↓
Exp Mode Auto
Shutter speed 1/50
Iris F2.8
Gain 0dB
Bright 013
Back Light Off
Slow Shutter Off
ExpComp Off
Exp Comp Set 0dB
A
p
erture 005
↓
Camera
▽
Pan
▽
Info
▽
Alarm
▽
Selfact Nothing
Lerisure Time 005
Address 001
System reset
Table of contents
Other Q-See Security Camera manuals

Q-See
Q-See IR DOME SERIES User manual

Q-See
Q-See QTN8043B User manual

Q-See
Q-See QS2350C User manual

Q-See
Q-See QSDS1312D User manual

Q-See
Q-See EFFIO-E User manual

Q-See
Q-See QCW3MP16 User manual

Q-See
Q-See QCW3MP16 User manual

Q-See
Q-See QSICC2PK User manual

Q-See
Q-See QS926C User manual

Q-See
Q-See QCN8009D User manual

Q-See
Q-See QSWLOC User manual

Q-See
Q-See QCW2MPSL User manual

Q-See
Q-See QCN7005B User manual

Q-See
Q-See EasyView QN6401X User manual

Q-See
Q-See QSDS14273W User manual

Q-See
Q-See QSDS13358A User manual

Q-See
Q-See QSDS1349D User manual

Q-See
Q-See QSZ515D User manual

Q-See
Q-See QSICC User manual

Q-See
Q-See Security Camera User manual