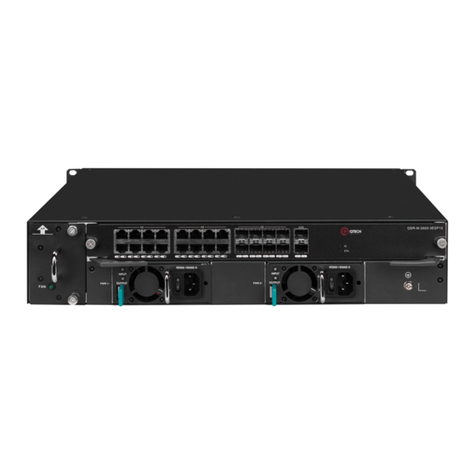
q-Tech QSR-3920 Series User manual

INSTALLATION MANUAL
www.qtech.ru
QSR-3920 Series Router Installation
Manual
QSR-3920-08

www.qtech.ru
Copyright Statement
Copyright2020 QTECH LLC. All rights reserved.
Without the written approval of the Company, no company or individual is allowed to
extract, reproduce, translate or propagate this Manual, in whole or in part, in whatsoever
manner.
QTECH is the trademark of QTECH LLC. All other trademarks, product marks and trade
names referenced herein are owned by their owners respectively.
This Manual may be subject to changes on account of product upgrade or other causes.
QTECH reserves the right to revise this Manual without any notice. Subject to the laws
and regulations, QTECH LLC shall, under no circumstance, be responsible for any
accident, negligence, breach of contract, defamation and infringement of copyright or
intellectual property right incurred by using the related content of this Product Manual or
this website, assume any liabilities for damage with respect to any special, incidental,
indirect or secondary losses and any losses on profit, data, business reputation or
expected economy so caused or bear any legal liabilities so arisen.
Safety Statement
Important! Please read the product safety and compatibility information before energizing
and enabling the product.
Environmental Statement
This product complies with the design requirements in terms of environmental protection
and shall be stored, used and disposed in accordance with the related national laws and
regulations.

www.qtech.ru
PREFACE
Manual Introduction
This manual introduces the appearance, hardware, and installation preparation and method of
the QSR-3920 series router, as well as its basic use and daily maintenance in terms of
energization & operation, troubleshooting and equipment maintenance.
Product Version
This manual is applicable to the product versions as below.
Product name
Product Version
QSR-3920 series router
QSR-3920-08(V1)
Target Users
The major target users of this Manual are:
Hardware Installation Engineer
Debugging Engineer
Site Maintenance Engineer
System Maintenance Engineer
Convention
Convention of screen output formats
Format
Description
Screen print
Screen output
Keywords of
Screen print
Key information of screen output (red part)
Convention of icons and signs
Format
Description
Note:
Supplement to or emphasis on the aforesaid.

www.qtech.ru
Caution:
Matters that need attention while installing or operating the
equipment, which are important for proper installation and
operation.
Warning:
Operations prohibited or required to follow the specified
steps; otherwise, personal injuries or equipment damages are
possible.
Convention of command formats
Format
Description
Bold
Keywords of command line
Italic
Parameters of command line
Brace “{ }”
Options in the brace are compulsory.
Bracket “[ ]”
Options in the bracket are optional.
Angle bracket “<>”
Information in the angle bracket is not displayed.
Square bracket “【
】”
Contents in the square bracket need attention.
Upright slash “|”
A sign to separate the options, with the same meaning as “or”.
Slash “/”
A sign to separate the options, indicating a multi-choice
operation.
For the purpose of this manual, the icons have the definitions as below:
Icons
Description
This icon and its related description generally refer to the
switch.
Product Details
The manual matching with the product is as follows:
Manual
Description

www.qtech.ru
QSR-3920 Series Router
Configuration Manual
Detailed introduction to the methods and steps of
configuring the equipment software functions, with
the typical cases made available for reference.
Technical Support
Technical support hotline: +7 (495) 797-33-11 * 555
Email (feedback): [email protected]
Revision History
The Revision History is the summary of all manual updates. The latest version includes all
previous updates.
Version
Revision date
Description
V1.0
2017-10-10
First issue
V1.1
2018-1-24
Add the contents of QSR-M-3920-3ESP3, QSR-M-
3920-3ESP10

www.qtech.ru
Table of contents
PREFACE 3
ROUTER INTRODUCTION 9
QSR-3920-08 Appearance and Hardware 9
Introduction to 3ESP Card 10
Introduction to MIFC Card 10
Introduction to M-3920 Interface Sub Card 11
Introduction to MX9 Series Card 12
Introduction to Power Module 12
AC Power Module 13
Air Passage of QSR-3920 Series Router 13
QSR-M-3920-FAN Fan Module 14
INSTALLATION PREPARATIONS 15
Check Router Running Environment 15
Safety Precautions 15
General Safety 15
Electrical Safety 15
Static Safety 16
Laser Safety 17
Installation Tools, Instruments, and Equipment 17
Open-Package and Inspection 17
ROUTER INSTALLATION 17
Install Router 17
Install Router to Workbench 18
Install Router to Cabinet 18
Ground the Router 22
Install Interface Sub Card Components (Optional) 24
Install USIM Card 24
Install 4G Antenna 26
(Optional) Install SPD 28
Install AC Power SPD 28
(Optional) Install Port Lightning Protector 29
Install Power Supply 30
Installation Preparations 30

www.qtech.ru
Install Power Module 31
Connect Power Cable 31
Installation Preparations 31
Connect AC Power Cable 31
Check after Installation 32
POWER ON AND RUN ROUTER 33
Log into Router 33
Connect Console Cable 33
Set PC HyperTerminal Parameters 34
Power on and Start 38
Check after Power on 40
Access Network 40
Access Network via Ethernet Twisted Pair 40
Access Network via Fiber 41
Hardware Management 44
View Software and Hardware Version Information of Router 44
View Power Module Status Information 45
View System Environment Temperature Information 47
View Fan Status Information 47
View Swappable Optical Module Information 48
TROUBLESHOOTING 50
Troubleshooting of Configuration System 50
Troubleshooting about no Display on Terminal 50
Troubleshooting about Messy Code on Terminal 50
Troubleshooting about Fan 50
Troubleshooting about Power 51
Get Technical Support 51
ROUTER MAINTENANCE 53
Change Module 53
Change Power Module 53
3ESP Card 54
Change MX9/M-3920 Interface Card 56
Change Fan Module 57
Change Swappable Optical Module 58
De-dust the Router 60

Installation Manual
1. Router Introduction 9
www.qtech.ru
ROUTER INTRODUCTION
QSR-3920-08 Appearance and Hardware
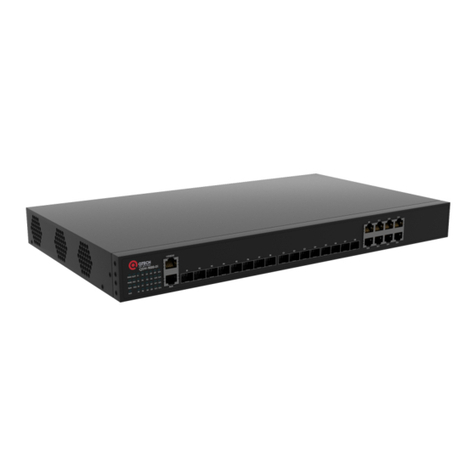
QSR-3920 series router only has one product model: QSR-3920-08.
QSR-3920-08 router has three kinds of slots: 3ESP, LX9, and MX9. The three
slots are respectively inserted with RM3E-3ESP card, QSR-LX9-M-24GETS
sub card, and MX9 interface card.
3ESP: Server Processing Unit business processing card, responsible for
packet forwarding and control processing. Refer to "Appendix A2
Specifications of 3ESP interface card " for specific specifications
MX9 interface card: including QSR-MX9-M-4GET, QSR-MX9-M-4GEF and
other interface cards. Refer to "Appendix A7 Specifications of MX9
interface card " for specific specifications.
LX9 interface card: include QSR-LX9-M-24GETS interface card.
The dimension of QSR-3920-08 is 442mm × 365mm × 88.6mm (W x D x H). The front appearance
diagram of QSR-3920-08 is shown in Figure 1-1, and the rear appearance diagram is shown Figure
1-2.
Figure 1-1 QSR-3920-08 front appearance
1.Cabinet bracket
2. LX9 interface card slot
3.MX9 interface card slot
4.MIFC card slot
5.Static wrist socket
6.Chassis air vent

Installation Manual
1. Router Introduction 10
www.qtech.ru
Figure 1-2 QSR-3920-08 rear appearance
1. Fan slot
2. Power slot
3.3ESP card slot
4. Grounding stud
Introduction to 3ESP Card
3ESP card is the core of QSR-3920 router, which is responsible for packet forwarding and control
processing. QSR-3920-08 must be configured with only one 3ESP card. QSR-3920-08 supports
three types of 3ESP cards, QSR-M-3920-3ESP3, QSR-M-3920-3ESP5, and QSR-M-3920-3ESP10.
The appearance of QSR-M-3920-3ESP5 card is as follows:
Figure 1-3 QSR-M-3920-3ESP5 appearance
1. Screw
2.Puller
3. Port status indicator
4.Function port
5. Card status indicator
6.Card component area
The 3ESP card of QSR-3920 router supports hot-swap.
Introduction to MIFC Card
MIFC card is the management interface card of QSR-3920 router. The serial port, U disk interface,
DC0 port and system status indicator of the device are all on the card.

Installation Manual
1. Router Introduction 11
www.qtech.ru
Warning
The MIFC card of QSR-3920-08 router prohibits hot-swap operation.
The MIFC card of QSR-3920-08 router can only be inserted to slot 9.
The appearance of the MIFC card is as follows:
Figure 1-4 MIFC appearance
1.Micro USB port
2.CONSOLE port
3.DC0 port
4.USB port
5. Card status indicator
6. Reset function button
7. Screw
8. Circuit board component area
Introduction to M-3920 Interface Sub Card
The M-3920 sub card slot of QSR-3920 router supports inserting QSR-LX9-M-24GETS interface
sub card. The 24GETS interface card supports 24 10/100/1000M Ethernet ports, and its main
function is to complete data forwarding.
Figure 1-5 The appearance of M-3920 series card
1. Circuit board component area
2.Scew
3. Service port
4.Port indicator
5.Hot-swap indicator
6.Hot-swap button

Installation Manual
1. Router Introduction 12
www.qtech.ru
The QSR-LX9-M-24GETS card of QSR-3920 router supports hot-swap.
Introduction to MX9 Series Card
The QSR-3920 router supports six MX9 card slots. Each card slot supports inserting 1GE, 4GET,
1E1, 4CE1 and other forms of sub cards, which are mainly used as expansion functions.
Figure 1-6 The appearance of MX9 series card
1. Circuit board component area
2.Screw
3. Service port
4.Port indicator
Introduction to Power Module
QSR-3920-08 only supports the AC power module. QSR-3920-08 supports 1+1 redundant backup
of two AC powers.
The power module of QSR-3920 router has the following specification:
Specification
Description
Applicable Product Model
QSR-M-3920-PWR-AC
AC power module
QSR-3920-08
The QSR-3920-08 router provides two power module slots to realize 1 + 1
redundant backup of the power module, and the power module can also
realize load balancing.
The power module of QSR-3920 router supports hot-swap.

Installation Manual
1. Router Introduction 13
www.qtech.ru
AC Power Module
The appearance of AC power module:
Figure 1-7 Power module
1. Indicator
2.Power module lock shrapnel
3.Fan outlet
4.Handle
5.Power switch
6.AC power socket
7.Installation hole of cable anti-stripping
strap
Air Passage of QSR-3920 Series Router
The air flow direction of QSR-3920 series router chassis is left in and right out, and the diagram
is as follows:
Figure 1-8 Air flow direction of QSR-3920 series router chassis
Keep the air passage of QSR-3920 router unblocked during the operation.

Installation Manual
1. Router Introduction 14
www.qtech.ru
QSR-M-3920-FAN Fan Module
QSR-M-3920-FAN fan module is a required module of QSR-3920-08, which supports hot-swap.
Each QSR-3920-08 has one fan slot, which should be installed with one fan module QSR-M-3920-
FAN to ensure the normal operation of the system. The schematic of the fan module is as follows.
Figure 1-9 QSR-M-3920-FAN module
1. Handle
2. Fan indicator
3.Installation screw of fan card
4.Fan blade
5.Circuit board component area

Installation Manual
2. Installation Preparations 15
www.qtech.ru
INSTALLATION PREPARATIONS
When the router is delivered, there is the packing list. Please confirm
whether the accessories are complete and good according to the items in
the packing list. If there is damaged or loss, please contact QTECH technical
staff to replace.
Check Router Running Environment
QSR-3920 series routers must be used indoors. To ensure the normal running of the router, take
the corresponding measures to meet the environment requirement of the router running:
Air conditioning and ventilation system can ensure the normal running temperature and
humidity conditions of the router. For details, refer to Appendix C1 Environment
Requirement.
The good grounding is the basis of the router running and the important guarantee
conditions of preventing lightning and resisting interference. Ensure that grounding meets
the grounding specifications. For details, refer to Appendix D1 Router Grounding
Specifications.
Ensure that the cleanness of the equipment room meets the requirement. Do not place the
router in the environment with lots of dust, such as in the being renovated passage.
Safety Precautions
General Safety
Keep the router clean and dust-free; do not place the router in the damp
place.
Electrical Safety
Please check whether there are potential dangers. For example, the power
is not grounded, power supply grounding is not reliable, and the ground is
wet.
Before moving the router, be sure to remove all external cables (including
power cable).

Installation Manual
2. Installation Preparations 16
www.qtech.ru
When maintaining with power, it is recommended that there are two or
more persons in the field.
When closing the power, check and ensure that the power is turned off.
Static Safety
To avoid the static from damaging the electronic parts of the router, we need to take the anti-
static measures.
When installing the components of the router, especially installing the
components with the circuit board (such as board), we should wear anti-
static wrists.
When holding the circuit board, please hold the edge of the circuit board
and do not touch the components or printed circuit.
For the security, please check the resistance of the anti-static wrists. The
resistance between the body and the ground should be 1-10 megohms.
The using steps of the anti-static wrists are as follows:
Step 1:
Put the hand into the anti-static wrist.
Step 2:
Tighten the fastener and ensure that the piece metal on the anti-static wrist is
well contacted with the skin.
Step 3:
Insert the anti-static wrist into the anti-static wrist jack on the router chassis or
clip the alligator clip of the anti-static wrist to the grounding terminal of the
chassis.
Step 4:
Ensure that the anti-static wrist is well-grounded. The using method of the anti-
static wrist is shown in the following figure.
Figure 2-1 Using method of anti-static wrist

Installation Manual
3. Router Installation 17
www.qtech.ru
Laser Safety
For the QSR-3920 series router with the optical interface, avoid directly
viewing the laser beam from the optical module inside. Viewing the laser
beam from the optical module inside directly may damage your eyes.
Installation Tools, Instruments, and Equipment
Needed tools:
Phillips srewdriver
Slotted screwdriver
Anti-static wrist
Paper knife
Cables:
PGND cable and power cable
Console cable
Optional cable
Equipment and instruments:
Configurable termianl (a common PC or a laptop)
Multimeter
Open-Package and Inspection
QSR-3920 series router adopts the carton packaging. The package comprises the carton, plastic
bags, protection EPE and other packaging materials. The open-package steps are as follows:
Step 1:
View the carton label, and confirm the router model in the carton.
Step 2:
Use a paper knife to gash the tape along the lid commissure; be careful when
using the knife and do not insert too deep to avoid damaging equipment inside.
Step 3:
Open the carton, remove the protection EPE, and then you can get out of the
router.
ROUTER INSTALLATION
Install Router
Based on different installation positions, the router can be installed in the following two modes:

Installation Manual
3. Router Installation 18
www.qtech.ru
Install the router to the workbench.
Install the router to the cabinet.
Install Router to Workbench
Place the router on the clean workbench. Pay attention to the following operation during the
installation:
Ensure the stability and well-grounding of the workbench.
There is 10cm heat dissipation space around the router.
Do not place heavy things on the router.
Install Router to Cabinet
This section describes how to install the QSR-3920 series router to the 19-inch standard cabinet.
Installation Preparations
QSR-3920 series router is 2U high, so ensure that enough installation space is reserved for
the router.
Check the grounding and stability of the cabinet and ensure that there is no obstacle inside
and around the cabinet affecting the router installation.
1U is 44.45mm. Here, U is short for Rack Unit.
Install Slide to Cabinet
The slide supports the router weight. If a slide is already on the cabinet, skip this section.
Before installing the slide, please confirm whether the bearing capacity of
the slide meets the weight requirements of QSR-3920 chassis and internal
card. Please refer to "Appendix A specifications of complete device and
common modules" for the weight of each component.
Besides the slide, a tray also can be used to support the router. The
installation process of the slide is the same as that of the tray. Therefore,
the tray installation process is omitted in this installation manual.
Ensure that the distance between the slid to the bottom cabinet is 2U and
three holes on the square hole bar is 1U, as shown in Figure 3-1.

Installation Manual
3. Router Installation 19
www.qtech.ru
Figure 3-1 The minimum slide height
The following describes how to install a slide to the 19-inch standard cabinet.
The installation steps of the slide are as follows:
Step 1:
Ensure the installation position of the slide on the cabinet and mark the
installation hole position using a marker.
The space height above the slide must be larger than the to-be-installed router chassis height
and enough margin is reserved (1U margin is recommended).
To ensure the stability of the cabinet, try to place a heavy and high router
below the cabinet.
Step 2:
Install the slide on the two sides, respectively. The slides installed on the both
sides must be at the same height. Then, tighten the fixing screws.
The appearance and installation methods of different cabinets and slides
may vary. This section is just for your reference. Goods in kind prevail.
Install Floating Nut to Cabinet
Before installing the chassis to the cabinet, first install the floating nut on the upright square
hole bar on the both sides in the front of the cabinet.

Installation Manual
3. Router Installation 20
www.qtech.ru
Step 1:
Mark the installation position of the floating nut on the upright square hole bar using
a marker by comparing with the installation hole position on the router hanging ears.
Figure 3-2 Install floating nuts
1.Installation locating plate of floating
nut
2. Load bearing tray
3.Cabinet square hole column
Step 2:
Install the floating nuts on the marked positions. A floating nut must be installed
on each installation hole on the hanging ear.
Figure 3-3 Install the floating nut
Other manuals for QSR-3920 Series
1
This manual suits for next models
1
Table of contents
Other q-Tech Network Router manuals

q-Tech
q-Tech QSW-9010 User manual

q-Tech
q-Tech QSW-3900 User manual

q-Tech
q-Tech QSR-2920 Series User manual

q-Tech
q-Tech QSR-2920 Series Instruction sheet

q-Tech
q-Tech SMS Lite 4G User manual

q-Tech
q-Tech QSR-2830 User manual

q-Tech
q-Tech QSW-2900 User manual

q-Tech
q-Tech QSR-3920 Series Instruction sheet