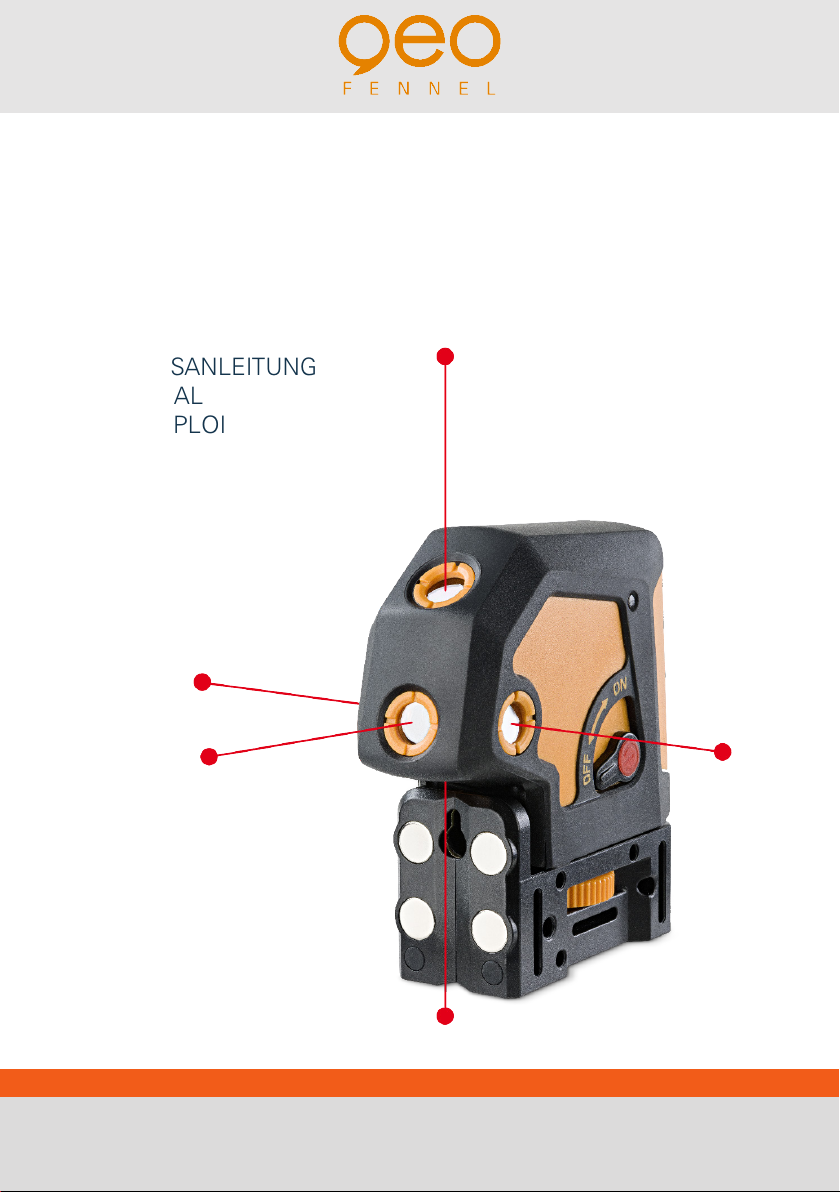
QEO Geo5P User manual

BEDIENUNGSANLEITUNG
USER MANUAL
MODE D‘EMPLOI
www.geo-fennel.de
www.geo-fennel.com
www.geo-fennel.fr
DE | EN | FR
Geo5P

2
DE
Sehr geehrter Kunde,
vielen Dank für das Vertrauen, welches Sie uns beim Erwerb Ihres neuen geo-FENNEL-Gerätes ent-
gegengebracht haben. Dieses hochwertige Qualitätsprodukt wurde mit größter Sorgfalt produziert und
qualitätsgeprüft.
Die beigefügte Anleitung wird Ihnen helfen, das Gerät sachgemäß zu bedienen. Bitte lesen Sie ins-
besondere auch die Sicherheitshinweise vor der Inbetriebnahme aufmerksam durch. Nur ein sachge-
rechter Gebrauch gewährleistet einen langen und zuverlässigen Betrieb.
geo-FENNEL
Precision by tradition.
Inhaltsverzeichnis
1. Lieferumfang A
2. Bedienelemente B
3. Bedienung C
4. Sicherheitshinweise D
• Selbstnivellierender 5-Punktlaser Geo5P
• Multifunktionale Halterung
• Magnetische Zieltafel
• 3 x AA Alkalinebatterien
• Geopolstere Tasche
• Bedienungsanleitung
LIEFERUMFANG
A
FUNKTIONEN
Für Ablotungen, Ausrichtung von Bauelementen, Nivellierungen, Übertragung von Punkten und viele
weitere Anwendungen.

3
DE
Technische Daten
Selbstnivellierbereich ±3,5°
Genauigkeit ± 2 mm / 10 m
Arbeitsbereich 30 m*
Laserdiode 635 nm
Laserklasse 2
Stromversorgung 3 x AA Alkalinebatterien
Betriebsdauer 20 h
Temperaturbereich -10°C bis +50°
Staub-/Wasserschutz IP 54
Gewicht (nur Gerät) 0,5 kg
BEDIENELEMENTE B
*abhängig von den Lichtverhältnissen
Instrument fixing hand wheel
Hanging hole
Strong megnet
Belt slot
9
11
12
10
1/4″Screw
1/4″5/8″Screw
Strong megnet
78
6
1/4″Screw
On/Off switch
Output window
Output window
1
3
2
1. Laseraustrittsfenster
2. AN-/AUS-Knopf
3. 1/4“-Gewinde (Kamerastativ)
4. Batteriefachdeckel
5. Laseraustrittsfenster
6. 1/4“-Adapter
7. Magnete
8. 5/8“-Gewinde für Baustativ
9. Magnete
10. Schlitze für Befestigungsriemen
11. Öffnung für Lochhängung
12. Schraube zum Befestigen des Gerätes auf der
multifunktionalen Halterung
Self-calibration aperture
Battery cover
Output window
4
5
Self-calibration aperture
Battery cover
Output window
Self-calibration aperture
Battery cover
Output window
Self-calibration aperture
Battery cover
Output window
Self-calibration aperture
Battery cover
Output window

4
DE
Batterien einlegen
• Batteriefachdeckel (4) öffnen und 3 x AA Alkalinebatterien ein-
legen (korrekte Polarität beachten). Batteriefachdeckel wieder
schließen. Wenn die AN-/AUS-LED blinkt, Batterien gegen
neue austauschen (kompletten Satz)
• Gerät mit dem AN-/ AUS-Knopf (2) einschalten.
• 5 Laserpunkte werden gleichzeitig ausgesendet (oben, unten, vorn, links, rechts).
• Ein optischer (blinkende Punkte) und akustischer Alarm zeigt an, dass das Gerät ausserhalb des
Selbstnivellierbereiches aufgestellt wurde. In diesem Fall eine waagerechte Position suchen.
• Der Geo5P kann mit dem 1/4“-Gewinde (3) direkt auf ein Kamerastativ montiert werden.
MULTIFUNKTIONALE HALTERUNG
Gerät mit der multifunktionalen Halterung verbinden.
Nun kann das Gerät mit einem Bau- oder Kurbelstativ mit 5/8“-Gewinde
verbunden werden.
Die multifunktionale Halterung bietet eine Vielzahl von Anwendungs-
möglichkeiten.
Befestigung an magnetischen Oberflächen
mit den eingebauten Magneten.
BEDIENUNG
C

5
DE
Befestigung an vertikalen und horizontalen Rohren, Ständern, Pfeilern, ...
mit dem Befestigungsriemen.
PRÜFUNG DER NIVELLIERGENAUIGKEIT:
Gerät in 10 m Entfernung parallel zu einer Wand aufstellen. Einschalten. Laserpunkt „A“ auf Wand
markieren. Gerät um 90° nach rechts drehen und Laserpunkt „B“ markieren. Gerät um 180° zu Position
„B“ drehen und Laserpunkt „C“ markieren.
Wenn die horizontale Differenz der 3 Punkte A, B und C nicht größer als 4 mm ist, liegt das Gerät
innerhalb der Toleranz.
Wenn die Abweichung größer als 4 mm ist, ist das Gerät dejustiert. In diesem Fall wenden Sie sich bitte
an geo-FENNEL oder einen autorisierten Fachhändler.
Befestigung an einem Nagel / einer Schraube mit dem Loch in der multifunktionalen Halterung.
ANWENDUNGSBEISPIEL

6
DE
SICHERHEITSHINWEISE
UMSTÄNDE, DIE DAS MESSERGEBNIS VERFÄLSCHEN KÖNNEN
Messungen durch Glas- oder Plastikscheiben; verschmutzte Laseraustrittsfenster; Sturz oder starker Stoß. Bitte
Genauigkeit überprüfen.
Große Temperaturveränderungen: Wenn das Gerät aus warmer Umgebung in eine kalte oder umgekehrt gebracht wird,
vor Benutzung einige Minuten warten.
ELEKTROMAGNETISCHE VERTRÄGLICHKEIT
Es kann nicht generell ausgeschlossen werden, dass das Gerät andere Geräte stört (z.B. Navigationseinrichtungen);
durch andere Geräte gestört wird (z.B. elektromagnetische Strahlung bei erhöhter Feldstärke z.B. in der unmittelbaren
Nähe von Industrieanlagen oder Rundfunksendern).
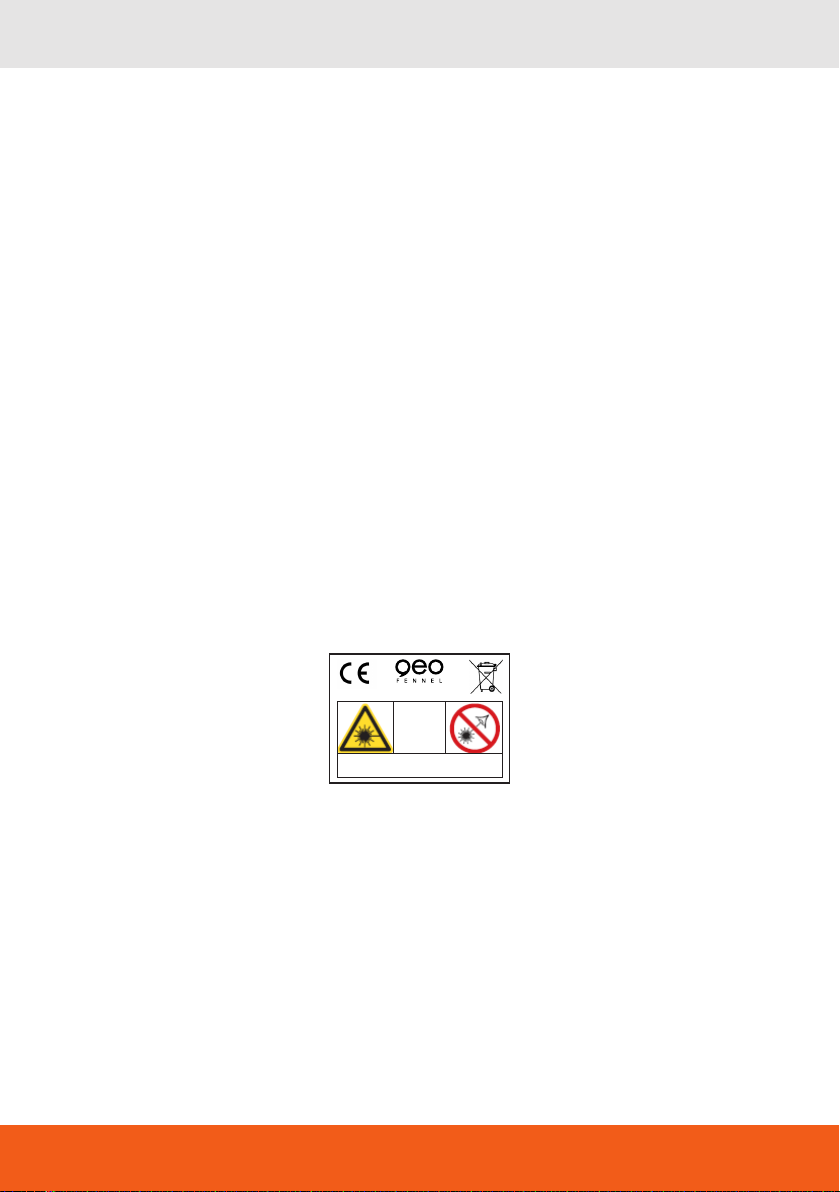
CE-KONFORMITÄT
Das Gerät hat das CE-Zeichen gemäß den Normen EN 61326:1997, EN 55022, EN 61000-4-2/-3.
UMGANG UND PFLEGE
Messinstrumente generell sorgsam behandeln. Nach Benutzung mit weichem Tuch reinigen (ggfs. Tuch in etwas
Wasser tränken). Wenn das Gerät feucht war, sorgsam trocknen. Erst in den Koffer oder die Tasche packen, wenn es
absolut trocken ist.Transport nur in Originalbehälter oder -tasche.
GARANTIE
Die Garantiezeit beträgt zwei (2) Jahre, beginnend mit dem Verkaufsdatum. Die Garantie erstreckt sich nur auf Mängel
wie Material-oder Herstellungsfehler, sowie die Nichterfüllung zugesicherter Eigenschaften. Ein Garantieanspruch
besteht nur bei bestimmungsgemäßer Verwendung. Mechanischer Verschleiß und äußerliche Zerstörung durch Ge-
waltanwendung und Sturz unterliegen nicht der Garantie. Der Garantieanspruch erlischt, wenn das Gehäuse geöffnet
wurde. Der Hersteller behält sich vor, im Garantiefall die schadhaften Teile instand zusetzen bzw. das Gerät gegen ein
gleiches oder ähnliches (mit gleichen technischen Daten) auszutauschen. Ebenso gilt das Auslaufen der Batterie nicht
als Garantiefall.
HAFTUNGSAUSSCHLUSS
1. Der Benutzer dieses Produktes ist angehalten, sich exakt an die Anweisungen der Bedienungsanleitung zu
halten. Alle Geräte sind vor der Auslieferung genauestens überprüft worden. Der Anwender sollte sich trotzdem
vor jeder Anwendung von der Genauigkeit des Gerätes überzeugen.
2. Der Hersteller und sein Vertreter haften nicht für fehlerhafte oder absichtlich falsche Verwendung sowie daraus
eventuell resultierende Folgeschäden und entgangenen Gewinn.
3. Der Hersteller und sein Vertreter haften nicht für Folgeschäden und entgangenen Gewinn durch Naturkatastro-
phen wie z.B. Erdbeben, Sturm, Flut, usw. sowie Feuer, Unfall, Eingriffe durch Dritte oder einer Verwendung
außerhalb der üblichen Einsatzbereiche.
4. Der Hersteller und sein Vertreter haften nicht für Schäden und entgangenen Gewinn durch geänderte oder
verlorene Daten, Unterbrechung des Geschäftsbetriebes usw., die durch das Produkt oder die nicht mögliche
Verwendung des Produktes verursacht wurden.
5. Der Hersteller und sein Vertreter haften nicht für Schäden und entgangenen Gewinn resultierend aus einer nicht
anleitungsgemäßen Bedienung.
6. Der Hersteller und sein Vertreter haften nicht für Schäden, die durch unsachgemäße Verwendung oder in Verbin-
dung mit Produkten anderer Hersteller verursacht wurden.
D

7
DE
WARN- UND SICHERHEITSHINWEISE
· Richten Sie sich nach den Anweisungen der Bedienungsanleitung.
· Anleitung vor Benutzung des Gerätes lesen.
· Blicken Sie niemals in den Laserstrahl, auch nicht mit optischen Instrumenten. Es besteht die Gefahr von Augen-
schäden.
· Laserstrahl nicht auf Personen richten.
· Die Laserebene soll sich über der Augenhöhe von Personen befinden.
· Niemals das Gehäuse öffnen. Reparaturen nur vom autorisierten Fachhändler durchführen lassen.
· Keine Warn- oder Sicherheitshinweise entfernen.
· Lasergerät nicht in Kinderhände gelangen lassen.
· Gerät nicht in explosionsgefährdeter Umgebung betreiben.
· Diese Gebrauchsanleitung ist aufzubewahren und bei Weitergabe der Lasereinrichtung mitzugeben.
LASERKLASSIFIZIERUNG
Das Gerät entspricht der Lasersicherheitsklasse 2 gemäß der Norm DIN IEC 60825-1:2014.
Das Gerät darf ohne weitere Sicherheitsmaßnahmen eingesetzt werden.
Das Auge ist bei zufälligem, kurzzeitigem Hineinsehen in den Laserstrahl durch den Lidschlussreflex geschützt.
Laserwarnschilder der Klasse 2 sind gut sichtbar am Gerät angebracht.
Bitte unbedingt beachten:
Wenn Sie Geräte zur Reparatur / zur Justage an uns zurücksenden, entnehmen Sie bitte unbedingt aus
Sicherheitsgründen Akkus oder Batterien aus dem Gerät!
Danke.
BESTIMMUNGSGEMÄSSE VERWENDUNG
Das Gerät sendet einen sichtbaren Laserstrahl aus, um z.B. folgende Messaufgaben durchzuführen: Ermittlung von
Höhen; rechten Winkeln, Ausrichtung von horizontalen und vertikalen Bezugsebenen (abhängig vom Gerät).
Laser
2
IEC 60825-1:2014
P ≤ 1 mW @ 635 - 670 nm
www.geo-fennel.de
GERMANY

8
EN
Dear customer,
Thank you for your confidence in us having purchased a geo-FENNEL instrument.
This manual will help you to operate the instrument appropriately.
Please read the manual carefully - particularly the safety instructions. A proper use only guarantees a
longtime and reliable operation.
geo-FENNEL
Precision by tradition.
Contents
1. Supplied with A
2. Features B
3. Operation C
4. Safety notes D
• Self-levelling 5 Point Laser Geo5P
• Multi-functional mount
• Magnetic target
• 3 x AA Alkaline battery
• Padded carrying case
• User manual
SUPPLIED WITH
A
FUNCTIONS
For plumbing, alignments, levelling, transfer of points and many more applications.

9
EN
FEATURES B
Technical data
Self-levelling range ±3,5°
Accuracy ± 2 mm / 10 m
Working range 30 m*
Laser diode 635 nm
Laser class 2
Power supply 3 x AA Alkaline batteries
Operating time 20 h
Temperature range -10°C to +50°
Protection class IP 54
Weight (instrument only) 0,5 kg
*depending on the room illumination
1. Laser emitting window
2. ON/OFF knob
3. 1/4“ thread for camera tripod
4. Battery compartment cover
5. Laser emitting window
6. 1/4“ adapter
7. Magnets
8. 5/8“thread for builder‘s tripod
9. Magnets
10. Slits for fixing belts
11. Hanging hole
12. Screw for fixing the instrument on the
multi-functional mount.
1/4″Screw
On/Off switch
Output window
Output window
1
3
2
Instrument fixing hand wheel
Hanging hole
Strong megnet
Belt slot
9
11
12
10
1/4″Screw
1/4″5/8″Screw
Strong megnet
78
6
Self-calibration aperture
Battery cover
Output window
4
5
Self-calibration aperture
Battery cover
Output window
Self-calibration aperture
Battery cover
Output window
Self-calibration aperture
Battery cover
Output window
Self-calibration aperture
Battery cover
Output window

10
EN
Insert the batteries
• Open the battery compartment cover (4) and insert
3 x AA Alkaline batteries (ensure correct polarity).
Close the battery compartment cover. The flashing
ON/OFF LED shows that the batteries have to be
replaced.
• Power on the instrument with the ON/OFF knob (2).
• 5 laser points will be projected simultaneously (up, down, forward, left, right).
• A visual (blinking laser points) and audible alarm indicates that the unit was set up outside of the
compensator range. Set it up on a more even surface!
• Geo5P can be connected to a camera tripod or a floor-to-ceiling pillar by means of the
1/4“ thread (3).
MULTI-FUNCTIONAL MOUNT
Connect Geo5P to the multi-functional mount. Now it can be
connected to a builders‘ or elevating tripod by means of the 5/8“
thread.
The multi-functional mount offers various possibilities of use.
Attach it to metal parts by use of the incorporated
magnets.
OPERATION
C

11
EN
ACCURACY CHECK
Set up instrument parallel to a wall at a distance of 10 m. Switch the instrument on.
Mark a visible laser point “A” at the wall.Turn the unit by 90° to the right and mark laser point „B”. Turn
the instrument by 180° to position “B” and mark laser point “C”.
The horizontal deviation of the 3 marked points A, B and C must not exceed 4 mm.
If the deviation exceeds 4 mm the instrument is out of tolerance. In this case please contact
an authorized workshop.
Fix it to horizontal or vertical frames, poles, pipes, ... by
use of the fixing strap.
Fix the instrument to a nail / screw with the hole of the multi-functional mount.
EXAMPLE OF APPLICATION

12
EN
DSAFETY NOTES
SPECIFIC REASONS FOR ERRONEOUS MEASURING RESULTS
Measurements through glass or plastic windows; dirty laser emitting windows; after the instrument has been dropped
or hit. Please check the accuracy.
Large fluctuation of temperature: If the instrument will be used in cold areas after it has been stored in warm areas (or
the other way round) please wait some minutes before carrying out measurements.
ELECTROMAGNETIC ACCEPTABILITY (EMC)
It cannot be completely excluded that this instrument will disturb other instruments (e.g. navigation systems); will be
disturbed by other instruments (e.g. intensive electromagnetic radiation nearby industrial facilities or radio transmitters).
CE-CONFORMITY
The instrument has the CE-mark according to EN 61326:1997, EN 55022, EN 61000-4-2/-3.
CARE AND CLEANING
Handle measuring instruments with care. Clean with soft cloth only after any use. If necessary damp the cloth with
some water. If the instrument is wet clean and dry it carefully. Pack it up only if it is perfectly dry. Transport in original
container / case only.
WARRANTY
This product is warranted by the manufacturer to the original purchaser to be free from defects in material and
workmanship under normal use for a period of two (2) years from the date of purchase. During the warranty period,
and upon proof of purchase, the product will be repaired or replaced (with the same or similar model at manufacturers
option), without charge for either parts or labour. In case of a defect please contact the dealer where you originally
purchased this product. The warranty will not apply to this product if it has been misused, abused or altered. Without
limiting the foregoing, leakage of the battery, bending or dropping the unit are presumed to be defects resulting from
misuse or abuse.
EXCEPTIONS FROM RESPONSIBILITY
1. The user of this product is expected to follow the instructions given in the user manual. Although all instruments
left our warehouse in perfect condition and adjustment the user is expected to carry out periodic checks of the
product’s accuracy and general performance.
2. The manufacturer, or its representatives, assumes no responsibility of results of a faulty or intentional usage or
misuse including any direct, indirect, consequential damage, and loss of profits.
3. The manufacturer, or its representatives, assumes no responsibility for consequential damage, and loss of profits
by any disaster (earthquake, storm, flood etc.), fire, accident, or an act of a third party and/or a usage in other
than usual conditions.
4. The manufacturer, or its representatives, assumes no responsibility for any damage, and loss of profits due to
a change of data, loss of data and interruption of business etc., caused by using the product or an unusable
product.
5. The manufacturer, or its representatives, assumes no responsibility for any damage, and loss of profits caused
by usage other than explained in the users‘ manual.
6. The manufacturer, or its representatives, assumes no responsibility for damage caused by wrong movement or
action due to connecting with other products.

13
EN
SAFETY INSTRUCTIONS
· Follow up the instructions given in the user manual.
· Do not stare into the beam. The laser beam can lead to eye injury. A direct look into the beam (even from greater
distance) can cause damage to your eyes.
· Do not aim the laser beam at persons or animals.
· The laser plane should be set up above the eye level of persons.
· Use the instrument for measuring jobs only.
· Do not open the instrument housing. Repairs should be carried out by authorized workshops only. Please contact
your local dealer.
· Do not remove warning labels or safety instructions.
· Keep the instrument away from children.
· Do not use the instrument in explosive environment.
· The user manual must always be kept with the instrument.
LASER CLASSIFICATION
The instrument is a laser class 2 laser product according to DIN IEC 60825-1:2014.
It is allowed to use unit without further safety precautions.
Eye protection is normally secured by aversion responses and the blink reflex.
The laser instrument is marked with class 2 warning labels.
Please note:
If you return instruments for repair / for adjustment to us please disconnect batteries or rechargeable batteries
from the instrument - this is for safety reasons!
Thank you.
INTENDED USE OF INSTRUMENT
The instrument emits a visible laser beam in order to carry out the following measuring tasks (depending on the instru-
ment): Setting up heights, horizontal and vertical planes, right angles.
Laser
2
IEC 60825-1:2014
P ≤ 1 mW @ 635 - 670 nm
www.geo-fennel.de
GERMANY

14
FR
Cher client,
Nous tenons à vous remercier pour la confiance que vous avez témoignée, par l‘acquisition de votre
nouvel instrument geo-FENNEL.
Les instructions de service vous aideront à vous servir de votre instrument de manière adéquate. Nous
vous recommandons de lire avec soin tout particulièrement les consignes de sécurité de ladite notice
avant la mise en service de votre appareil. Un emploi approprié est l‘unique moyen de garantir un fonc-
tionnement efficace et de longue durée.
geo-FENNEL
Precision by tradition.
Contenu
1. Contenu A
2. Description B
3. Opération C
4. Consignes de sécurité D
• Laser à 5 points automatique Geo5P
• Support multi-fonctions
• Cible magnétique
• 3 x AA piles alcalines
• Sacoche rembourrée
• Mode d‘emploi
CONTENU
A
CARACTÉRISTIQUES
Pour tous types d‘application en intérieur. Report facile du sol au plafond. Projette 5 points à un
angle de 90°.

15
FR
DESCRIPTION B
*en fonction des conditions lumineuses
Donnés techniques
Plage d‘autonivellement ±3,5°
Précision ± 2 mm / 10 m
Plage de travail 30 m*
Diode de laser 635 nm
Classe de laser 2
Alimentation 3 x AA piles alcalines
Autonomie 20 h
Plage de température -10°C à +50°
Étanchéité IP 54
Poids (instrument sans piles) 0,5 kg
1. Fenêtre de sortie du faisceau laser
2. Bouton MARCHE / ARRÊT
3. 1/4“ filetage (trépied d‘appareil photo)
4. Couvercle du logement de piles
5. Fenêtre de sortie du faisceau laserr
6. Adaptateur 1/4“
7. Aimants
8. 5/8” filetage pour un trépied de chantier
9. Aimants
10. Fentes pour courroies de fixation
11. Ouverture pour la fixation trou
12. Vis pour fixer l‘instrument sur le support
multi-fonctions
1/4″Screw
On/Off switch
Output window
Output window
1
3
2
Instrument fixing hand wheel
Hanging hole
Strong megnet
Belt slot
9
11
12
10
1/4″Screw
1/4″5/8″Screw
Strong megnet
78
6
Self-calibration aperture
Battery cover
Output window
4
5
Self-calibration aperture
Battery cover
Output window
Self-calibration aperture
Battery cover
Output window
Self-calibration aperture
Battery cover
Output window
Self-calibration aperture
Battery cover
Output window

16
FR
Piles
• Enlever le couvercle du logement de piles (4) et y placer
3 piles AA (veiller à la polarité correcte).
Remplacer le jeu complet des piles, lorsque le voyant
MARCHE/ARRÊT commence à clignoter.
• Mettre en marche l’appareil à l’aide du bouton MARCHE/ARRÊT (2) .
• 5 points laser sont projetés simultanément (haut, vers le bas, devant, droite, gauche).
• Une alarme optique (points clignotants) et acoustique indique que l’appareil est placé hors de la
plage d’autonivellement; dans ce cas, rechercher une position qui soit davantage à l’horizontale.
• Le laser Geo5P peut être monté directement sur un trépied d’appareil photos ou sur un pied à une
seule branche, à l’aide de la pièce (3) à filetage de 1/4“.
SUPPORT MULTI-FONCTIONS
Relier l’appareil au support multi-fonctions. A présent, il est
possible de fixer l’appareil sur un trépied de chantier ou un trépied à
manivelle à filetage de 5/8“. Le support multi-fonctions offre un
grand nombre d’applications.
Fixation sur une surface magnétique avec des aimants du
support.
OPÉRATION
C

17
FR
Fixation à des tuyaux verticales et horizontales, supports,
colonnes, ... avec les courroies de fixation.
VÉRIFICATION DE LA PRÉCISION DU NIVEAU
Placer l’appareil parallèlement et à 10 m d’une paroi. Le mettre en circuit.
Marquer sur la paroi la trace ponctuelle du laser désignée ”A“. Faire pivoter l’appareil de 90° vers la droite
et marquer la trace désignée ”B“. Faire pivoter à nouveau l’appareil de 180°par rapport au point ”B” et
marquer la trace ponctuelle du laser désignée ”C”.
Si la différence de distance horizontale entre les points A, B et C est inférieure à 4mm, l’appareil sera
considéré comme étant dans les tolérances.
Si la différence de distance est supérieure à 4mm, l’appareil sera considéré comme déréglé et il faudra
s’adresser à un concessionnaire autorisé.
Fixation sur un clou / une vis au moyen du trou du support multi-fonctions.
EXEMPLE D‘APPLICATION

18
FR
INDICATIONS D‘AVERTISSEMENT ET DE SÉCURITÉ
· Prière de respecter les instructions fournies dans le mode d’emploi du niveau.
· Lire ces instructions avant d’utiliser l’instrument.
· Ne jamais regarder le faisceau laser, même pas avec un appareil optique, à cause du risque de lésions oculaires
pouvant en résulter.
· Ne pas diriger le faisceau laser sur une personne.
· Le plan du faisceau laser doit se trouver à hauteur des yeux de l’opérateur.
· Ne jamais ouvrir soi-même le boîtier du niveau.
· Faire exécuter les réparations éventuelles uniquement par un spécialiste autorisé.
· Ne pas enlever les indications d’avertissement et de sécurité portées sur le niveau.
· Éviter que l’instrument ne soit touché ou manipulé par des enfants.
· Ne pas utiliser le niveau dans un milieu à risque d’explosions.
NOTICES DE SÉCURITÉ
D
CIRCONSTANCES POUVANT FAUSSER LES RÉSULTATS DE MESURES
Mesures effectuées à travers des plaques de verre ou de matière plastique; mesures effectuées à travers la fenêtre
de sortie du faisceau laser lorsqu‘elle est sale. Mesures après que le niveau soit tombé ou ait subi un choc très fort.
Mesures effectuées pendant de grandes différences de température - p.ex. lorsque l‘instrument passe rapidement
d‘un milieu très chaud à un autre très froid; attendre alors quelques minutes d‘adaptation avant de réutiliser le niveau.
NETTOYAGE ET REMISAGE
Essuyer l‘instrument mouillé, humide ou sali en le frottant uniquement avec un tissu de nettoyage. Quant à l‘optique,
la nettoyer avec un tissu fin comme p. ex. un tissu feutré de lunettes.
Ne jamais remiser un instrument humide dans un coffret fermé! Le laisser sécher auparavant au moins pendant un
jour dans un local chauffé! Transport seulement dans l‘étui original.
COMPATIBILITÉ ÉLECTROMAGNETIQUE
De manière générale, il n‘est pas exclu que le niveau ne dérange d‘autres instruments (p.ex. les dispositifs de navigati-
on) ou qu‘il puisse lui-même être dérangé par d‘autres appareils (p. ex. soit par un rayonnement électromagnétique dû à
une élévation de l‘intensité du champ, soit par la proximité d‘installations industrielles ou d‘émetteurs de radiodiffusion).
CONFORMITÉ CE
Le niveau porte le label CE conformément aux normes EN 61326:1997, EN 55022, EN 61000-4-2/-3.
GARANTIE
La durée de garantie est de deux (2) ans à partir de la date d‘achat. Cette garantie ne couvre que les défauts tels
que le matériel défectueux ou les anomalies de fabrication, ainsi que le manque des propriétés prévues. Le droit à la
garantie n‘est valable que si l‘utilisation du niveau a été conforme aux préscriptions. En sont exclus l‘usure mécanique
et un endommagement externe par suite d‘usage de la force et/ou d‘une chute. Le droit à la garantie prend fin lorsque
le boîtier a été ouvert. Dans un cas couvert par la garantie, le fabricant se réserve le droit de remettre en état les
éléments décectueux ou d‘échanger l‘instrument par un autre identique ou similaire (possédant les mêmes caracté-
ristiques techniques). De même, un endommagement résultant d‘un écoulement de l‘accumulateur n‘est pas couvert
par la garantie.

19
FR
EXCLUSION DE LA RESPONSABILITÉ
1. L‘utilisateur de ce produit est tenu de respecter ponctuellement les instructions du mode d‘emploi. Tous les instru-
ments ont été très soigneusement vérifiés avant leur livraison. Toutefois, l‘utilisateur devra s‘assurer de la précision
de ce niveau avant chaque emploi.
2. Le fabricant et son représentant déclinent toute responsabilité dans le cas d‘utilisation incorrecte ou volontaire-
ment anormale ainsi que pour les dommages consécutifs en découlant, tout comme pour les bénéfices non
réalisés.
3. Le fabricant et son représentant déclinent toute responsabilité pour les dommages consécutifs et les bénéfices
non réalisés par suite de catastrophes naturelles, comme p. ex. tremblement de terre, tempête, raz de marée etc.
ainsi que d‘incendie, accident, intervention malintentionnée d‘une tierce personne, ou encore dus à une utilisation
hors du domaine d‘application normal de l‘instrument.
4. Le fabricant et son représentant déclinent toute responsabilité pour les dommages et les bénéfices non réalisés
par suite de modification ou perte de données, interruption du travail de l‘entreprise etc., à savoir les dommages
qui découlent du produit lui-même ou de la non-utilisation du produit.
5. Le fabricant et son représentant déclinent toute responsabilité pour les dommages et le bénéfices non réalisés par
suite d‘une manoeuvre non conforme aux instructions.
6. Le fabricant et son représentant déclinent toute responsabilité pour les dommages et les bénéfices non réalisés
qui decoulent d‘une utilisation inadéquante ou en liaison avec des produits d‘autres fabricants.
CLASSIFICATION DES LASERS
Ce niveau correspond à la classe de sécurité des lasers 2, conformément à la norme DIN IEC 60825-1:2014. De ce fait,
l’instrument peut être utilisé sans avoir recours à d’autres mesures de sécurité. Au cas où l’utilisateur a regardé un
court instant le faisceau laser, les yeux sont tout de même protégés par le réflexe de fermeture des paupières.
Les pictogrammes de danger de la classe 2 sont bien visibles sur le niveau.
Merci de respecter le suivant impérativement:
Si vous retournez des instruments pour réparation / ajustage vous devez - pour des raisons de sécurité -
impérativement enlever les accus.
Merci.
UTILISATION CONFORME AUX PRESCRIPTION
Le niveau projette un faisceau laser visible, pour effectuer p.ex. les travaux de mesures suivants: détermination de
hauteurs, tracé d’angles droits, pointage de plans de référence horizontaux et verticaux ainsi qu’obtention de points
d’aplomb (dépendant de l‘instrument).
Laser
2
IEC 60825-1:2014
P ≤ 1 mW @ 635 - 670 nm
www.geo-fennel.de
GERMANY

geo-FENNEL GmbH
Kupferstraße 6
D-34225 Baunatal
Tel. +49 561 / 49 21 45
Fax +49 561 / 49 72 34
info@geo-fennel.de
www.geo-fennel.de
Technische Änderungen vorbehalten.
All instruments subject to technical changes.
Sous réserve de modifications techniques.
Precision by tradition.
01/2016
Table of contents
Languages:
Other QEO Laser Level manuals