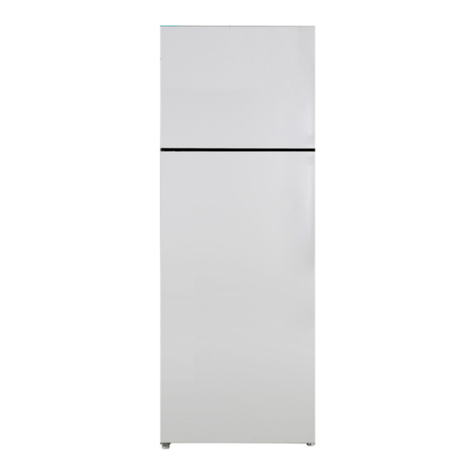
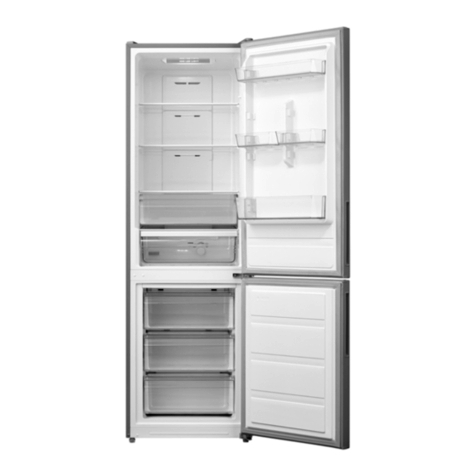
Qilive Q.6252 User manual

Combine refrigerator
Q.6252
FR Réfrigérateur combiné

EN
FRFR
User manual P. 7
Manuel d’utilisation P. 21

EN
FR
1
3
8
7
6
5
2
4

EN
FRFR
9
10
11
12
13
14
15
16
17

EN
FR
1 2 3
4 5 6
7 8 9

EN
FRFR
10 11 12
13 14 15
16 17 18

7
EN
1. SAFETY INFORMATION
Before using this electrical appliance, read the instructions
below and keep these instructions for future reference:
1. This appliance can be used by children aged from
8 years and above and persons with reduce physical,
sensory or mental capabilities or lack of experience
and knowledge if they have been given supervision
or instruction concerning the use of the appliance in
a safe way and understand the hazards involved.
2. Children shall not play with the appliance.
3. Cleaning and user maintenance shall not be made
by children without supervision.
4. This appliance is intended to be used in household
and similar applications such as
- staff kitchen areas in shops, ofces and other
working environments;
- farm houses and by clients in hotels, motels and
other residential type environments;
- bed and breakfast type environments;
- catering and similar non-retail applications.
5. This product is a household refrigerator and shall be
only suitable for the storage of food and beverage.
According to national standards, household
refrigerators shall not be used for other purposes,
such as storage of blood, drugs or biological products.
TABLE OF CONTENTS:
1. SAFETY INFORMATION P. 7
2. TECHNICAL DATA P. 11
3. DESCRIPTION P. 11
4. INSTALLATION P. 11
5. USE P. 13
6. MAINTENANCE AND CLEANING P. 17
7. TROUBLESHOOTING P. 19
8. WARRANTY AND LIMITATIONS OF LIABILITY P. 20

8
EN 6. Warning: When positioning the appliance, ensure
the supply cord is not trapped or damaged.
7. The appliance cannot be built into furniture, wall or
similar locations.
8. Beforeconnectingtheappliancetoanelectricaloutlet,
make sure that the local power supply corresponds
to that indicated on the rating label afxed to the
appliance.
9. A special plug is installed to the power cable of
your appliance. This plug must be plugged into a
grounded wall outlet with at least 16 A. If you should
not have such a wall outlet, have it installed by a
qualied electrician.
10. Warning – Do not damage the refrigerant circuit.
11. The refrigerant gas R600a that is contained in the
refrigerator is a natural gas. It is not harmful to
the environment, but combustible. It is therefore
important to transport and install your refrigerator
carefully so as not to damage the refrigerant ducts.
In the event of a gas leak, avoid contact with nearby
ames or res and ventilate the room.
12. Risk of electric shock! Do not try to repair the
appliance yourself. In case of malfunction, repairs
must be carried out by qualied personnel.
13. If the supply cord is damaged, it must be replaced
by the manufacturer, its service agent or similarly
qualied persons in order to avoid a hazard.
14. Warning – Keep ventilation openings, in the
appliance enclosure or in the built-in structure, clear
of obstruction.
15. Warning – Do not use mechanical devices or other
means to accelerate the defrosting process, other
than those recommended by the manufacturer.
16. Warning – Do not use electrical appliances inside
the food storage compartments of the appliance,
unless they are of the type recommended by the
manufacturer.
9
EN
17. Do not store explosive substances such as aerosol
cans with a ammable propellant in this appliance.
18. Do not put ammable, explosive, volatile and highly
corrosive items in the refrigerator to prevent damages
to the product or re accidents.
19. Do not place ammable items near the refrigerator
to avoid res.
20. Do not place items such as bottled or sealed container
of uid such as bottled beers and beverages in the
freezer compartment to prevent bursts and other
losses.
21. The appliance has to be unplugged after use and
before carrying out user maintenance on the
appliance.
22. Tips for cleaning the appliance can be found in the
“MAINTENANCE AND CLEANING” chapter.
23. This marking indicates that this product should
not be disposed with other household wastes
throughout the EU. To prevent possible harm
to the environment or human health from
uncontrolled waste disposal, recycle it responsibly to
promote the sustainable reuse of material resources.
To return your used device, please use the return
and collection systems or contact the retailer where
the product was purchased. They can take this
product for environmental safe recycling.
24. Disposeoftheapplianceaccordingtolocalregulations
as it uses ammable blowing gas and refrigerant.
25. Before scrapping the appliance, remove the doors to
prevent children from becoming trapped.
26. Risk of suffocation! Keep all packaging materials out
of the reach of children and babies!
27. Recycle packaging materials in accordance with
regulations.Askyourlocalauthoritieswherecollection
centres or waste disposal centres are located.
28. To avoid contamination of food, please respect the
following instructions:

10
EN - Opening the door for long periods can cause
a signicant increase of the temperature in the
compartments of the appliance.
- Clean regularly surfaces that can come in contact
with food and accessible drainage systems.
- Clean water tanks if they have not been used for
48 h; ush the water system connected to a water
supply if water has not been drawn for 5 days.
- Store raw meat and sh in suitable containers in
the refrigerator, so that it is not in contact with or
drip onto other food.
- Two-star frozen-food compartments are suitable
for storing pre-frozen food, storing or making ice
cream and making ice cubes.
- One-, two- and three-star compartments are not
suitable for the freezing of fresh food.
- If the refrigerating appliance is left empty for long
periods, switch off, defrost, clean, dry, and leave
the door open to prevent mould developing within
the appliance.
29. Children aged from 3 to 8 years are allowed to load
and unload refrigerating appliances.
30. WARNING: Do not locate multiple portable socket-
outlets or portable power supplies at the rear of the
appliance.
This symbol shows that this appliance used a
ammable refrigerant. If the refrigerant is leaked
and exposed to an external ignition source, there
is a risk of re.
This symbol indicates the coldest part of the
appliance. It denes the highest level of this zone.

50/60Hz

12
EN 1. Place the appliance in a well ventilated room on a dry, stable and level surface, away
from direct sunlight and other heat sources.
2. Ensure sufcient air circulation at the rear of the appliance. Do not place the
appliance against a wall to avoid noise caused by vibration. Make sure that the air
can still circulate freely around the appliance. Insufcient ventilation would result
in malfunction and increased energy consumption. Leave a space of at least
10 cm between the appliance and the wall, and at least 30 cm between the top of the
appliance and the ceiling.
3. Leave enough space to access and open the door easily. If necessary, change the
direction of door opening as described below.
4.3 Level feet
If the appliance tilts in some way, adjust the height of the left/right foot (2) of the appliance
to be in a horizontal level.
Turn the foot (2) clockwise or counter clockwise to adjust the height.
Note: If the appliance is not level, the door and the door seal will not be closed properly.
4.4 Reverse door
Ensure the appliance is unplugged and empty. To take the door off, it is necessary to tilt
the appliance backwards. You should rest the appliance on something solid so that it will
not slip during the door reversing process. All parts removed must be saved to do the
reinstallation of the door. Do not lay the appliance at as this may damage the coolant
system. It is better that 2 people handle the appliance during assembly.
1. Screw off the hinge cover screw, remove the hinge cover, and insert the communication
wire into the hole on the cabinet top (Fig. 1).
2. Remove the 4 screws of the upper hinge, remove the hinge, and pry up the door
bushing and small end cap cover on the door (Fig. 2).
3. Insert the door bushing and door communication wire into the hole on the door, and
then put on the small end cap cover (Fig. 3).
4. Screw off the 2 screws as shown to remove the hole cover on the cabinet top, get the
cabinet communication wire out of the hole, pry up the small end cap cover on the
door, and get out the door bush and door communication wire (Fig. 4).
5. Insert the door bush into the round hole on the door, and put on the small end cap
cover (Fig. 5).
6. Move the refrigerator door upward by over 50mm to remove the door (Fig. 6).
7. Screw off the 3 screws of the middle hinge cover, and then remove the middle hinge
(Fig. 7).
8. Move the freezer door upward by over 50mm to remove the door (Fig. 8).
9. Remove the adjustable front feet under the lower hinge, and screw off the 4 screws
of the lower hinge to disassemble the lower hinge (Fig. 9).
10. The door disassembly is nished (Fig. 10).
11. Assemble the door and lower hinge accessories correspondingly on the opposite
side. Take the door bushing out as shown, and assemble it in the corresponding
position on the opposite side (Fig. 11).
12. Screw off the screws of the stopper as shown, and assemble them to the other side
of the door (Fig. 12).
13. Remove the axle and two stoppers on the lower hinge, and assemble them to the
position as shown (Fig. 13).
14. Assemble the refrigerator and freezer doors to the opposite side. Remove the
adjustable front foot as shown by hand, assemble the lower hinge at the other side of
the cabinet, and x the screws (Fig. 14).
15. Assemble the shorter adjustable front foot at the lower hinge side, and adjust the
height of the foot to level the refrigerator (Fig. 15).
16. Install the freezer door, turn the middle hinge by 180°, assemble it on the other side
of the cabinet, and screw up the 3 screws to x the middle hinge (Fig. 16).

13
EN
17. Install the refrigerator door, assemble the left upper hinge at the other side of the
cabinet, and use a tool to screw up the 4 screws to x the upper hinge. Then, connect
the door communication wire and the cabinet communication wire, install the left
upper hinge cover, and x it using a screw. Assemble the whole cover at the other
side of the cabinet, and screw up the whole cover (Fig. 17).
18. The doors are now left-hinged (Fig. 18).
4.5 Positioning
Install this appliance at a location where the ambient temperature corresponds to the
climate class indicated on the rating plate of the appliance. This ensures the correct
operation of the appliance.
Climate class Ambient temperature
SN +10°C to +32°C
N +16°C to +32°C
ST +16°C to +38°C
T +16°C to +43°C
4.6 Electrical connection
Before plugging in, ensure that the voltage and frequency shown on the rating plate
correspond to your domestic power supply. The appliance must be earthed. The power
supply cable plug is provided with a contact for this purpose. If the domestic power
supply socket is not earthed, connect the appliance to a separate earth in compliance
with current regulations, consulting a qualied electrician.
The manufacturer declines all responsibility if the above safety precautions are not
observed.
5. USE
5.1 First use
Before using the appliance for the rst time, wash the interior and all internal accessories
with lukewarm water and some neutral soap so as to remove the typical smell of a brand
new product, then dry thoroughly.
Important!
• Do not use detergents or abrasive powders, as these will damage the nish.
• After transport, unpacking and installation, let the appliance rest at least 2 hours in
vertical position before connecting to the power supply.
• Let the appliance run for at least 2 hours before inserting fresh or frozen foods.
5.2 Function setting
When the refrigerator is connected to power supply for the rst time, all icons on the
display panel illuminate for 2 seconds and the system runs in smart mode by default.
When all the doors are closed, the display turns off automatically if there is no button
operation within 3 minutes. When the display is off, it will light up if any door is opened
or any button is pressed.
The following button operations are valid only when the buttons are unlocked and
illuminate on the display.

14
EN 5.2.1 Temperature setting
5.2.1.1 Setting the temperature of the refrigerator compartment
Press the refrigerator button (Fridge) (14) to select the refrigerator zone, the corresponding
icon ashes. Then press the Temp. Zone button again to adjust the temperature, nally
press the OK/Lock or wait for 5 seconds to validate the above temperature setting.
The fridge temperature setting cycles 5 6 7 8 OFF 2 3 4 5°C.
OFF refers to Fridge Off, and when OFF takes effect, the fridge will stop cooling.
5.2.1.2 Setting the temperature of the freezer compartment
Press the Temp. Zone button to select the freezer zone, with the corresponding icon
ickering, and then press the Temp. Zone button again to adjust the temperature, nally
press the OK/Lock or wait for 5 seconds to validate the above temperature setting.
The freezer temperature setting cycles -18 -17 -16 -24 -23 -22 -21 -20
-19 -18°C.
5.2.1.3 Fast cooling mode
When the fast cooling mode is enabled, the temperature will be set at 2°C, with the
compartment temperature reduced rapidly, so that foods can be kept in fresh condition
with their nutrition not lost.
Repeatedly press the Function button (16) to select fast cooling, the Fast Cooling icon
(10) ashes. Then press the OK button (17) within 5 seconds for conrmation. If the OK
button (17) is not pressed within 5 seconds, the setting will be invalidated. To exit fast
cooling mode, press the Function button (16) to select fast cooling, the Fast Cooling icon
(10) ashes. Then press the OK button (17) for conrmation. When the smart mode or
holiday mode is enabled, the fast cooling mode will be disabled automatically.
5.2.1.4 Fast freezing mode
When the fast freezing mode is enabled, the freezer temperature will be set at -32°C
automatically. After 26 hours the fast freezing mode is cancelled. Cooling down the
freezer temperature in a rapid manner is benecial to the prevention of food nutrition
against lost and the preservation of freshness.
Repeatedly press the Function button (16) to select fast freezing, the Fast Freezing icon
(11) ashes. Then press the OK button (17) within 5 seconds for conrmation. If the OK
button (17) is not pressed within 5 seconds, the setting will be invalidated. To exit fast
freezing mode before 26 hours have elapsed, press the Function button (16) to select
fast freezing, the Fast Freezing icon (11) ashes. Then press the OK button (17) for
conrmation. When the smart mode is enabled, the fast cooling mode will be disabled
automatically.
5.2.1.5 Vacation mode
When the vacation mode is enabled, the refrigerator temperature will be set at 14°C. When
you are out for a quite long time, you can set the holiday mode to keep the refrigerator
running with low energy consumption, while ensuring the fresh food compartment is free
from undesirable smell and the freezer compartment operates normally. Be sure to take
out all foods from the fresh food compartment before setting this function.
Repeatedly press the Function button (16) to select vacation, the Vacation icon (11)
ashes. Then press the OK button (17) within 5 seconds for conrmation. If the OK
button (17) is not pressed within 5 seconds, the setting will be invalidated. To exit fast
vacation mode, press the Function button (16) to select vacation, the Vacation icon (10)
ashes. Then press the OK button (17) for conrmation. When the smart mode or fast
cooling mode is enabled, the vacation mode will be disabled automatically.

15
EN
5.2.1.6 Smart ECO mode
When the smart mode is enabled, the temperature of the fresh food compartment is set
at 4°C, and that of the freezer compartment at -18°C, so that foods can be stored under
best conditions while the refrigerator is running more efciently.
Repeatedly press the Function button (16) to select smart ECO, the Smart ECO icon
(11) ashes. Then press the OK button (17) within 5 seconds for conrmation. If the OK
button (17) is not pressed within 5 seconds, the setting will be invalidated. To exit smart
ECO mode, press the Function button (16) to select smart ECO, the Smart ECO icon
(10) ashes. Then press the OK button (17) for conrmation. When the vacation mode
or fast freezing mode is enabled, the smart ECO mode will be disabled automatically.
5.2.2 Door open alarm
If the refrigerator door is open for more than 3 minutes, a buzzer alarm will sound, which
can be stopped by pressing any button, but will be restored after 3 minutes if the door
stays open. The alarm is not cancelled until the door is closed.
5.2.3 Power cut memory
In case of a power failure, the refrigerator will return to the previous operating mode after
the power supply is restored.
5.2.4 Power-on delay
In order to protect the refrigerator compressor from being damaged in the case of
short-time power failure (i.e., less than 5 minutes), the compressor will not be started
immediately after it is powered on.
5.2.5 Over-temperature alarm (only after power outage)
When the refrigerator is powered on and the freezer sensor temperature is higher than
-10°C, the digits of the freezer temperature display start ashing. The freezer temperature
can be displayed when any button is pressed, and the normal display will be restored
when any button is pressed again or after 10 seconds.
5.2.6 Fault alarm
In case E0, E1, E2, EH, or EC is displayed on the display, this indicates a malfunction of
the refrigerator. Please contact the customer service.
5.3 Freezing fresh food
The freezer compartment is suitable for freezing fresh food and storing frozen and deep-
frozen food for a long time.
Place the fresh food to be frozen in the freezer compartment.
The maximum amount of food that can be frozen in 24 hours is specied on the rating
plate of the appliance.
The freezing process lasts 24 hours: during this period do not add other food to be
frozen.
5.4 Storing frozen food
When rst starting-up or after a period out of use, before putting the product in the
compartment let the appliance run at least 2 hours on a higher setting.
WARNING: In the event of accidental defrosting (for example the power is off), the
defrosted food must be consumed quickly or cooked immediately and then re-frozen
(after being cooked).

16
EN 5.5 Thawing food
Frozen food can be thawed in the refrigerator compartment or at room temperature before
being cooked, depending on your needs. Follow the food manufacturer’s instructions on
the packaging.
WARNING: Thawed foods cannot be re-frozen. Consume quickly.
5.6 Hints for freezing and storing frozen food
To obtain the best performance, observe the followings.
• The maximum quantity of food which can be frozen in 24 hours is shown on the rating
plate of the appliance.
• The freezing process takes 24 hours. No further food to be frozen should be added
during this period;
• Only freeze top quality, fresh and thoroughly cleaned, foodstuffs;
• Prepare food in small portions to enable it to be rapidly and completely frozen and to
make it possible subsequently to thaw only the quantity required;
• Wrap up the food in tin foil or polythene and make sure that the packages are airtight;
• Do not allow fresh, unfrozen food to touch food which is already frozen, thus avoiding
a rise in temperature of the latter.
• Lean foods store better and longer than fatty ones; salt reduces the storage life of
food;
• Water ices, if consumed immediately after removal from the freezer compartment,
can possibly cause the skin to be freeze burnt.
• It is advisable to show the freezing in date on each individual pack to enable you to
keep tab of the storage time.
• Be sure that frozen foodstuffs are transferred from the food store to the freezer in the
shortest possible time.
• Do not open the door frequently or leave it open longer than absolutely necessary.
Once defrosted, food deteriorates rapidly and cannot be re-frozen.
• Do not exceed the storage period indicated by the food manufacturer.
• Do not store bottled drink in the freezer compartment to prevent burst or other losses.
5.7 Hints for fresh food refrigeration
To obtain the best performance, observe the followings.
• Do not store warm food or evaporating liquids in the refrigerator.
• Cover or wrap the food, particularly if it has a strong avour. Wrap in polythene bags
and place on the glass shelves above the vegetable drawer.
• For safety, store in this way only one or two days at the most.
• Cooked foods, cold dishes should be covered and may be placed on any shelf.
• Fruit and vegetables should be thoroughly cleaned and placed in the special drawer
(crisper) provided.
• Butter and cheese should be placed in special airtight containers or wrapped in tin foil
or polythene bags to exclude as much air as possible.
• Milk bottles should have a cap and should be stored in the door racks.
• Bananas, potatoes, onions and garlic, if not packed, must not be kept in the fridge.

17
EN
6. MAINTENANCE AND CLEANING
For hygienic reasons, the appliance interior (including interior
accessories) should be cleaned regularly.
Caution! Always disconnect the mains plug from the wall
outlet before cleaning.
Important! Never use detergent, solvents/abrasive products,
sharp objects or wire brushes for cleaning, as this will damage the
nish.
6.1 Cleaning
1. Remove all interior accessories (e.g. shelves and drawers)
from the compartment of the appliance. Clean them with
lukewarm water and some neutral soap. Rinse with water and
dry thoroughly.
2. Clean the inside of the appliance with a damp cloth and some
neutral soapy water. Wipe with a warm damp cloth and then
dry thoroughly before replacing the accessories inside the
appliance.
3. Wipe the outside of the appliance with a soft dry cloth. Never
use solvents.
• Regularly check the door seals and wipe clean to ensure they
are free from debris.
• Dust off the back of the appliance regularly. This will improve the
performance of the appliance and save electricity consumption.
6.2 Defrosting
The appliance is equipped with an automatic defrosting function.
Due to seasonal changes, a thick layer of frost may form. To
defrost manually, unplug the appliance from the power supply,
then remove excess frost with a dry cloth.
Defrosting regularly helps to lower the energy consumption of the
appliance.
6.3 Lamp
This product contains a lamp. In the event of a fault, contact a
qualied technician to inspect and/ or replace the lamp.

18
EN 6.4 Transportation
Caution! Do not place the appliance upside down or
sideways. During transportation, the appliance inclination
must not exceed 45°.
• Do not lift the appliance by holding the top edges of the appliance.
Hold the appliance by its base or sides.
• Before moving the appliance, remove all food and secure the
components properly.
• Tape the door to secure them.
• Tape the power cord to the side of the appliance to prevent
damage during transportation.
6.5 Storage
• If the appliance is not used for an extended period, unplug it
from the power supply, remove all food and clean the appliance.
• During storage, leave the door slightly open to prevent the
formation of unpleasant odours.

19
EN
7. TROUBLESHOOTING
Warning!
Refer to the Safety section.
If the malfunction persists, contact an authorised service centre or a similarly
qualied specialist.
Problem Possible cause Solution
Appliance does not
operate. Not connected to power
supply. Plug the appliance into a
suitable power outlet.
Blown or defective fuse. Check fuse and replace it if
necessary.
Defective power cord or
plug. Check and repair by a
qualied electrician.
Appliance freezes or
cools too much. Inappropriate temperature
settings Adjust the temperature to a
lower setting.
Appliance does not
freeze or cool enough. Inappropriate temperature
settings Adjust the temperature to a
higher setting.
Large quantity of hot/
warm food placed in the
appliance
Allow food to cool down before
placing it in the appliance.
Heat source placed near
the appliance Move the heat source further
from the appliance.
Door opened for an
extended period of time. Close the door as soon as
possible.
Ensure the door is properly
closed.
Appliance emits loud
noises. Appliance not level Adjust feet to level the
appliance.
Appliance touching a wall
or furniture. Move the appliance and leave
enough free space around it.
Odorous food not wrapped Closely wrap the odorous
food.
Appliance has
peculiar smell. Food spoiled Remove the spoiled food.
Interior not clean Clean the interior.

20
EN 8. WARRANTY AND LIMITATIONS OF LIABILITY
This product is guaranteed for a period of 36 months (dened by local law, as per the
period on the receipt) from the date of purchase against any failures resulting from
manufacturing or material defects.
This warranty does not cover damage caused by improper installation, improper use, or
normal wear and tear of the product.
More specically, the warranty does not cover:
- Damage or problems caused by improper use, accident, alteration or electrical
connection of improper intensity or voltage.
- Modied products, those whose warranty seal or serial number have been damaged,
altered, removed or oxidised.
- Replaceable batteries and accessories are guaranteed for a period of 6 months.
- Battery failure, due to overcharging or failure to comply with the safety instructions
in the manual.
- Cosmetic damage, including scratches, dents, or any other element.
- Damage caused by any intervention carried out by an unauthorised person.
- Defects caused by normal wear and tear or due to normal ageing of the product.
- Software updates due to a change in network settings.
- Product failures due to the use of third party software to modify, change or adapt the
existing software.
- Product failures caused by use without accessories approved by the manufacturer.
- Oxidised products.
Under no circumstances can the manufacturer be held responsible for the loss of data
stored on the disk. Similarly, the manufacturer is not required to verify that the SIM/SD
cards are removed from the returned products.
Repaired or replaced products may include new and/or reconditioned components and
equipment.
TERMS AND CONDITIONS OF IMPLEMENTATION
To obtain a warranty service, you are requested to return your product to the customer
service desk of your retail outlet with your proof of purchase (receipt, invoice, …), the
product and its supplied accessories, with its original packaging.
It is important to have the date of purchase, the model and the serial or IMEI number on
hand as information (this information usually appears on the product, the packaging or
your proof of purchase).
Failing this, you must return the product with the accessories necessary for its proper
operation (power supply, adaptor, etc.).
In the event that your claim is covered by the warranty, the after-sales service may, within
the limits of local law, either:
- Repair or replace defective parts.
- Exchange the returned product with a product that has at least the same functionality
and that is equivalent in terms of performance.
- Refund the product at the purchase price of the product mentioned on the proof of
purchase.
If one of these 3 solutions is made use of, this does not extend or renew the warranty
period.
Other manuals for Q.6252
1
Table of contents
Languages:
Other Qilive Refrigerator manuals

Qilive
Qilive Q.6522 User manual

Qilive
Qilive Q.6899 User manual

Qilive
Qilive Q.6756 User manual

Qilive
Qilive Q.6597 User manual

Qilive
Qilive Q6663 User manual

Qilive
Qilive Q.6756 User manual

Qilive
Qilive Q.6916 User manual

Qilive
Qilive Q.6950 User manual

Qilive
Qilive Q.6252 User manual

Qilive
Qilive Q.6602 User manual