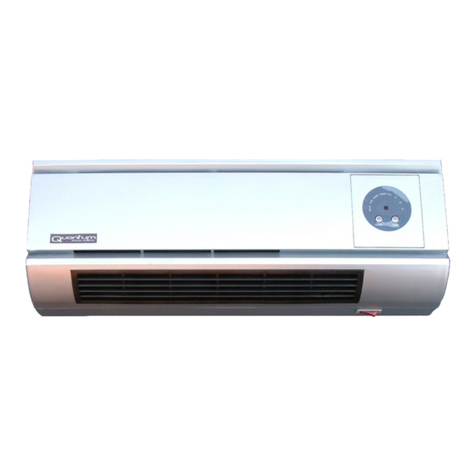
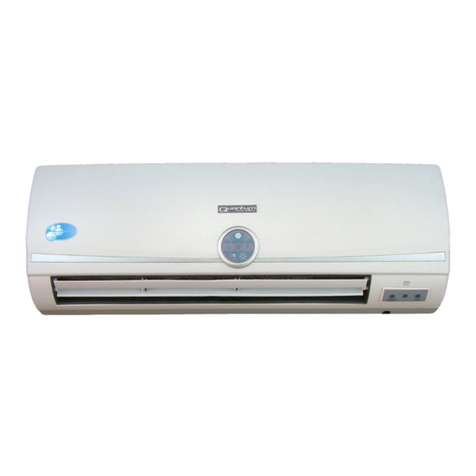
Quantum Ecoelec QE-7019 User manual

QE7019
USER INSTRUCTIONS
CERAMIC ELEMENT ROOM HEATER WITH REMOTE CONTROL
MODEL No. QE-7019
Thank You very much for your custom
You have purchased one of the most modern and re iab e e ectrica app iances current y avai ab e, which we know wi
give you ong and re iab e service.
As with a e ectrica app iances, it is important that a safeguards are fo owed. We therefore ask you to read through
these instructions carefu y and to keep them in a safe p ace for future reference.
This manua can be down oaded from the Quantum Ecoe ec website at
.quantum-ecoelec.com/support
IN THE BOX
A ong with these instructions the box shou d a so contain the fo owing items
The most important item is a QE-7019 wa heater
1 - Remote contro
2 - Woodscrews, 35 mm ong
2 - p astic wa -p ugs used for fixing the heater to a brick or concrete wa
If there is anything missing or you have any questions, p ease ca 05602-045420 between 8:00am and 4:00pm Mon to
Fri and we wi do our best to he p you.
We can be contacted by emai at:- [email protected]
CONFORMITY
This product is CE, TÜV & RoHS marked and conforms to these standards.
ENVIRONMENTAL PROCTECTION
European directive 2002/96/EC on waste e ectrica and e ectronic equipment (WEEE), requires that
o d househo d e ectrica app iances must not be disposed of in the norma unsorted househo d waste.
P ease recyc e where faci ities exist.
Check with your oca Authority on recyc ing advice and disposa sites in your area.

INSTALLATION INSTRUCTIONS
ALL ELECTRICAL WORK SHOULD BE CARRIED OUT BY A COMP
1 Decide on a suitab e ocation.
2 Mark the position for the 2
No.8 Woodscrews
3
Fit the screws eaving the screws protruding 15mm from the wa .
4
Mark the position on the wa for the 13A Fused Spur connection
5 Insta the fused spur back box
and supp y cab e
6 Mount the heater on to the 2
off No.8 Woodscrews
7 Ensure that the mains supp y is
turned
8 Connect the supp y
to the fused spur front p ate.
9 Connect the unit to the
front p ate as described be ow
10 Rep ace the front p ate.
11 Insta ation is now comp ete.
CONNECTION DETAILS
THIS UNIT MUST BE CONNECTED TO THE MAINS SUPPLY BY A SWITCHED SPUR
The wires in the cab e attached to this unit are co oured in accordance with the fo owing code:
BROWN
======================
GREEN/YELLOW ===
=
BLUE
====================
THIS APPLIANCE MUST BE EARTHED
As the co ours may not correspond with the markings indentifying the termina s in the fused spur proceed as fo ows.
•
B ue wire must be connected to the termina marked ‘N LOAD’
•Brown wire
must be connected to the termina marked ‘L LOAD’
•
Green/Ye ow wire must be connected to the termina ‘E’ or marked
ALL ELECTRICAL WORK SHOULD BE CARRIED OUT BY A COMP
E
TENT ELECTRICIAN
No.8 Woodscrews
. (supp ied)
Fit the screws eaving the screws protruding 15mm from the wa .
Mark the position on the wa for the 13A Fused Spur connection
.
and supp y cab e
. (Surface mount or sunken)
off No.8 Woodscrews
.
turned
off.
to the fused spur front p ate.
front p ate as described be ow
.
THIS UNIT MUST BE CONNECTED TO THE MAINS SUPPLY BY A SWITCHED SPUR
The wires in the cab e attached to this unit are co oured in accordance with the fo owing code:
======================
LIVE
=
================== EARTH
====================
NEUTRAL
THIS APPLIANCE MUST BE EARTHED
As the co ours may not correspond with the markings indentifying the termina s in the fused spur proceed as fo ows.
B ue wire must be connected to the termina marked ‘N LOAD’
must be connected to the termina marked ‘L LOAD’
Green/Ye ow wire must be connected to the termina ‘E’ or marked
TENT ELECTRICIAN
THIS UNIT MUST BE CONNECTED TO THE MAINS SUPPLY BY A SWITCHED SPUR
The wires in the cab e attached to this unit are co oured in accordance with the fo owing code:
-
As the co ours may not correspond with the markings indentifying the termina s in the fused spur proceed as fo ows.

QE7019
OPERATION
There may be a trace of smoke or odour during the first few minutes of initia use or when the unit has not been used
for a period of time. This is quite norma and wi quick y disappear.
FROM THE FRONT PANEL
To switch on the app iance press the red rocker switch to the ON position. The switch is ocated on the RIGHT hand side
of the unit. (Later units do not have this switch)
Pressing the ON/OFF button on the front pane of the heater wi switch the FAN on and open the vane.
Pressing the ON/OFF again se ects 1000W ow heat setting.
By Pressing the ON/OFF button again the 2000W high heat setting wi be se ected.
Press again to turn vane swing ON.
Press again to turn the unit OFF.
The timer can be set from ½ hour to 7 ½ hours by pressing the TIMER button which steps up ½ hour with each press.
To turn off the unit press the ON/OFF button on the front pane as detai ed above or press the RED rocker switch to the
OFF position. (Later mode s do not have this switch)
FROM THE REMOTE CONTROL
The remote contro requires two AAA batteries. (not supp ied)
To switch on the app iance press the red rocker switch to the ON position as detai ed above.
Press the ON/OFF button on the remote contro to switch on the FAN.
Pressing the 1000W button wi se ect the ow heat setting.
Pressing the 2000W button wi se ect the high heat setting.
The timer can be set from ½ hour to 7 ½ hours by pressing the TIMER button which steps up ½ hour with each press.
Press the swing button to start the vane swinging.
To turn off the unit press the ON/OFF button.
ATTENTION. When the unit is switched off the unit wi continue to b ow coo air for 60 seconds before shutting down.
A therma over oad protector is bui t into the unit to prevent overheating. If the unit overheats it wi shut down
automatica y.

QE7019
CARE AND CLEANING
•
The unit shou d be c eaned regu ar y.
•
Iso ate from the mains supp y and a ow the unit to coo . Wipe over with a damp c oth.
•
Do not use detergents or abrasives.
•
Do not scrape the surfaces with sharp hand too s.
•
Use a vacuum c eaner to remove dust and f uff from the vents.
SAFETY WARNINGS
•
This product is not a toy. It shou d not be used by chi dren or infirm persons without supervision.
•
The app iance must be fastened to a wa with the air out et to the bottom. DO NOT mount the unit any other way.
•
Iso ate from the mains supp y when not in use or when c eaning the unit.
•
DO NOT operate the app iance with a damaged cord. If the supp y cord is damaged it must be rep aced to avoid any
hazard.
•
Parts of the heater casing may get hot when in use. Do not et bare skin touch any hot surface as they cou d burn.
•
Do not a ow the unit to get wet.
•
Do not use the heater in dusty environments or where f ammab e vapours are present.
•
Do not p ace the heater near any other source of heat.
•
Do not cover the heater. A fire may occur if the heater comes into contact with any f ammab e materia (Curtains,
Drapes, Bedding etc...) when in use.
•
Do not use the unit in the immediate vicinity of bathtubs, showers, wash basins or swimming poo s.
•
Do not eave switched on unattended overnight.
•
Do not use outdoors.
•
Do not use this app iance for other than its intended purpose. This app iance is for interior use on y.
•
Do not attempt to repair, disassemb e or modify the app iance in any way. There are no user-serviceab e parts
inside.
•
Do not insert, or a ow to be inserted any foreign objects into the in et or output openings as this may cause an
e ectric shock, fire or damage to the unit.
•
It is not possib e use an externa programmer, timer or any other device to switch the heater on automatica y, as a
fire risk exists, a positive manua press of a button is needed to switch the unit ON.
•
On y use the bui t in autotimer whi e the unit is supervised.
GUARANTEE & WARRANTY
This product is covered with a 12 month manufacturer’s warranty from the date of purchase against fau ty
workmanship and components. Proof of date of purchase wi be required.
Shou d you need to return the unit p ease ca QUANTUM ECOELEC on 05602-045420 for a Returns Authority Number
(RAN) a ong with our fu posta address for any repairs that may be necessary?
TECHNICAL SPECIFICATION
Supp y Vo tage
230
-
240V
Timer Contro
0.5
–
7.5 Hours
Power rating
10A MAX
Remote Contro Range
7 metres MAX
Frequency
50Hz
Remote power source
2 x AAA Batteries
Output Power
1000 or 2000 Watts
QE©
QE-7019 ISS.2
Table of contents
Other Quantum Ecoelec Heater manuals
Popular Heater manuals by other brands

Tylo
Tylo CROWN COMBI ELITE user guide

Circontrol
Circontrol Post eVolve Smart Series Service manual

Finnleo
Finnleo Fonda Series Installation and operating instructions

Kermi
Kermi SGE1A Series Instructions for installation and use

BRINKMAN
BRINKMAN PORTABLE CATALYTIC SPACE HEATER owner's manual

KING
KING PGH2440TB Installation and Maintenance