manuals.online logo
Brands
  1. Home
  2. •
  3. Brands
  4. •
  5. Quark-Elec
  6. •
  7. Receiver
  8. •
  9. Quark-Elec QK-A027 Plus User manual

Quark-Elec QK-A027 Plus User manual

V1.0(02/22)
QK-A027+
USING THE CONFIGURATION SOFTWARE (WINDOWS):
Ad-hoc WiFi passwords can be changed for security and memorability.
WiFi can be changed from Ad-hoc (default) to staon or standby mode.
Staon mode is congured by inpung your router/access point details into the conguraon
soware (once congured, the correct sengs must be entered into your chart soware).
Filtering: using the black list funcon
If desired, selected NMEA sentences can be blocked from chosen input/s, using the ’black list‘
eld. Remove the ‘$’ or ‘!’ from the 5 digit NMEA talker and sentence idener and insert separat-
ed by commas. For example to block ‘!AIVDM’ and ‘$GPAAM’ enter ‘AIVDM,GPAAM’ .
Up to 8 sentences types can be ltered from each input port. If blacklisng SeaTalk1 data, block
the corresponding NMEA message (see the manual for a full list of converted messages).
Roung your data
As a default, all data input (excluding any ltered data) is routed to all outputs . Data can be routed
to limit the data ow to certain outputs by un-cking the corresponding boxes in the conguraon
soware. Please be aware, with the current rmware version the USB and WiFi is only a one-way
port, it doesn’t output any data even the output box has been cked.
Monitor the data stream via USB
Use the ‘display’ tab on the conguraon tool to monitor all input data including the data
received through NMEA 2000 backbone (both PCDIN and NMEA 0183 format).
NMEA Default Baud rates can be adjusted as required. Default baud rates sengs are:
• NMEA IN 4800bps, NMEA OUT: 38400bps. These can be adjusted as required.
LAN sengs: IP, gateway address and subnet mask can be setup for ethernet usage.
Setup the output format of the NMEA 2000 messages. Please be aware, with the current rmware
version, the NMEA 2000 is only a one-way port, it doesn’t output any data even the output format
has been selected.
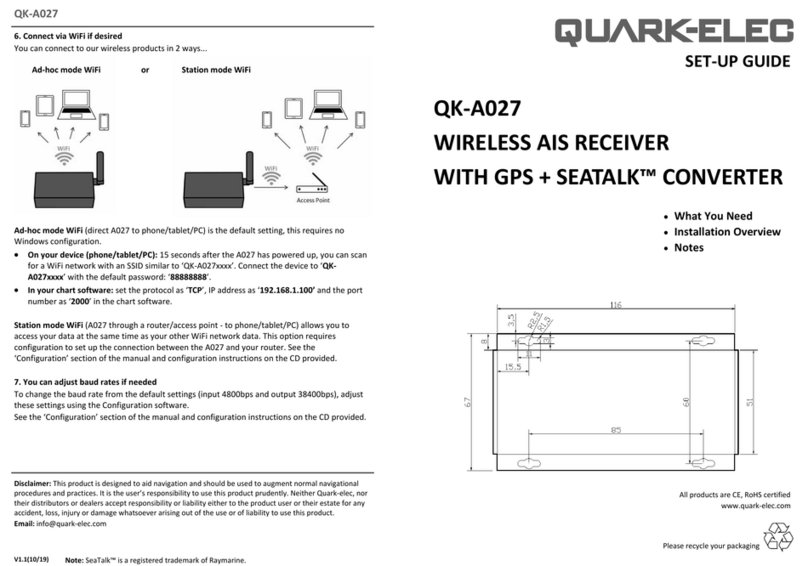
10. Standard WiFi Ad-hoc connec-
on on your wireless device:
15 seconds aer the A027+ has
powered up, scan for a WiFi network
with an SSID similar to ‘QK-
A027xxxx’. Connect to ‘QK-A027xxxx’
with the default password: ‘88888888’.
Chart soware: in your chart soware,
set the protocol to ‘TCP’, IP address to
‘192.168.1.100’ and port number to
‘2000’
For staon mode WiFi or to disable WiFi, use the conguraon soware (see below).
11. Follow your marine soware/app instrucons for adding input/output data sources.
A general overview can be found in the A026+ manual.
Disclaimer: This product is designed to aid navigaon and should be used to augment normal navigaonal procedures
and pracces. It is the user’s responsibility to use this product prudently. Neither Quark-elec, nor their distributors or
dealers accept responsibility or liability either to the product user or their estate for any accident, loss, injury or
damage whatsoever arising out of the use or of liability to use this product.
SET-UP GUIDE
All products are CE, RoHS cered
www.quark-elec.com
Please recycle your packaging
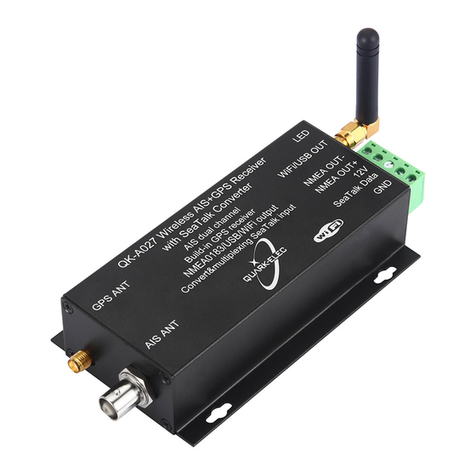
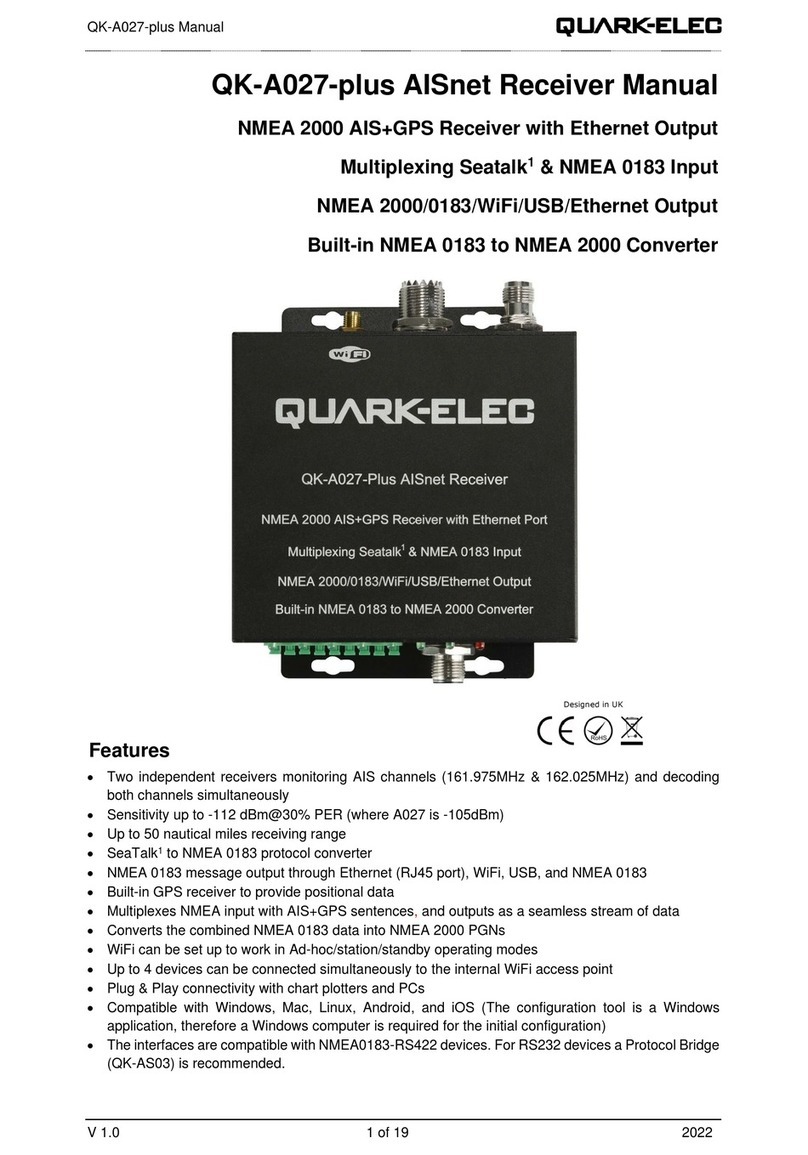
QK-A027+ NMEA 2000 AIS+GPS RECEIVER
NMEA 2000/0183/WIFI/USB/ETHERNET OUTPUT
MULTIPLEXING SEATALK & NMEA 0183 INPUT WITH
SEATALK TO NMEA 0183 CONVERTER
BUILT-IN NMEA 0183 TO NMEA 2000 CONVERTER
This is an overview only. Familiarize yourself with the manual and the manuals of
any connecng devices before installaon. It is always recommended that
electronic equipment be installed by an experienced installer.
QK-A027+
BEFORE LEAVING HOME:
12V power required, the A027+ isn’t powered by the NMEA 2000 backbone.
Conguraon soware is oponal and only needed for specic features.
To use any of the following features, you will require the conguraon soware:
• Changing WiFi mode from Ad-hoc to staon or standby mode.
• Setup IP and gateway address for ethernet (RJ45 port).
• Adjusng baud rates from their default sengs (NMEA 0183 input as 4.8kbps, output as
38.4kbps).
• Filtering unwanted or excess data.
• Roung data away for certain output devices.
• Full diagnoscs monitoring of the data streams.
Conguraon soware (Windows) will be required to adjust these sengs (see back of this guide
for more informaon). Driver may be required for older Windows PCs. This may install
automacally to Windows 10 systems (if not, it is on the free CD and at quark-elec.com)
INSTALLATION
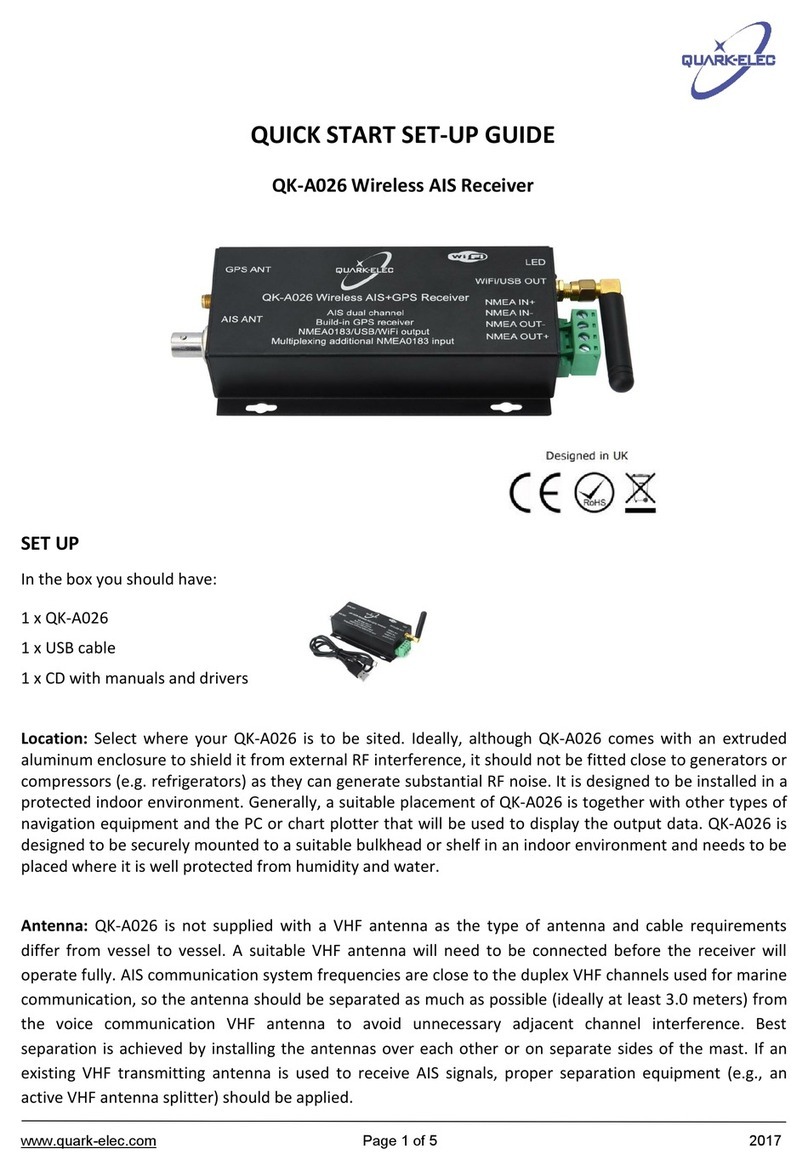
1. Mounng: Consider your locaon…
• Dry, sturdy locaon 0.5m from other WiFi/VHF equipment.
• Ensure you have the correct length of cables needed. If drilling holes for your cabling, seal
around any holes to prevent damage to your vessel or equipment.
2. Disconnect power from NMEA 2000 backbone and disconnect power from all NMEA and
SeaTalk1 devices to be connected.
3. Connect your Antennas: VHF and GPS
• Connect VHF: If you want to use one VHF antenna for both the A027+ and a VHF radio (or
other purposes), then you will need an acve splier. This splier will protect the A027+ and
other VHF equipment. If you do not use one, the two signals will signicantly damage each
device connected as well as reducing the signal.
If using two VHF antennas, place them as far away as possible from each other (min 3 metres).
• Connect GPS if desired: The GPS antenna should be located outside where the sky is visible
for best results.
4. Connect any input/output devices.
• NMEA 0183 input/output: Connect the ‘+’ and ‘-‘ terminals of the NMEA input/output on the
A027+ to the ‘+’ and ‘-‘ terminals of the output/input on the instrument.
• The A027+ uses NMEA 0183-RS422. If your connecng device uses the older NMEA 0183-
RS232 and you are having issues with your NMEA connecon, you may nd swapping these
terminals works for your device. Alternavely, connect it using a Protocol Bridge (QK-AS03).
• SeaTalk input: Take care to connect the ‘+’, ‘Data’ and ‘-’ correctly. Swapping any of these
wires can permanently damage the A027+.
5. Connect the ethernet cable to the RJ45 port if LAN funcon is needed. A crossover cable will
be required if connected to a computer directly, otherwise a straight cable will work for routers
or switches.
6. Connect the A027+ to your un-powered NMEA 2000 backbone.
7. Connect the un-powered 12V cable to the A027+, then power up.
8. Re-connect power to your connected devices and NMEA 2000 backbone.
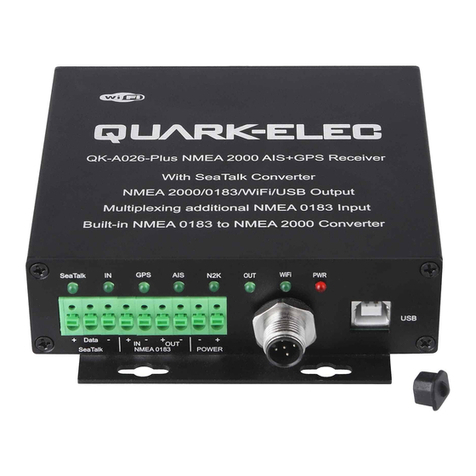
9. Check LED lights are working as expected.
• SeaTalk1 and NMEA IN LEDs will ash for each valid message received on the respecve device
• GPS: LED ashes every second while receiving a valid message.
• AIS: LED ashes for each valid AIS message received.
• N2K: LED will ash for each valid NMEA 2000 PGN sent out on 2000 port.
• OUT: LED will ash for each valid message sent out on the NMEA 0183 output.
• WiFi: LED will ash for each valid NMEA message sent to WiFi or Ethernet output.
• PWR (Power): LED light is constantly lit in red when the device is powered.
QK-A027+

Other Quark-Elec Receiver manuals

Quark-Elec QK A021 Technical manual

Quark-Elec

Quark-Elec QK A021 Technical manual

Quark-Elec QK-A026+ User manual

Quark-Elec

Quark-Elec QK-A026+ User manual

Quark-Elec QK-A021 User manual

Quark-Elec

Quark-Elec QK-A021 User manual

Quark-Elec QK-A027 User manual

Quark-Elec

Quark-Elec QK-A027 User manual

Quark-Elec QK-A027-plus User manual

Quark-Elec

Quark-Elec QK-A027-plus User manual

Quark-Elec QK-A026 User manual

Quark-Elec

Quark-Elec QK-A026 User manual

Quark-Elec QK-A022 User manual

Quark-Elec

Quark-Elec QK-A022 User manual

Quark-Elec QK-A024 User manual

Quark-Elec

Quark-Elec QK-A024 User manual

Quark-Elec A026+ NMEA 2000 User manual

Quark-Elec

Quark-Elec A026+ NMEA 2000 User manual

Quark-Elec QK-A026 Technical manual

Quark-Elec

Quark-Elec QK-A026 Technical manual

Quark-Elec QK-A028 User manual

Quark-Elec

Quark-Elec QK-A028 User manual

Quark-Elec QK-A027 User manual

Quark-Elec

Quark-Elec QK-A027 User manual

Quark-Elec QK-A028 User manual

Quark-Elec

Quark-Elec QK-A028 User manual

Quark-Elec QK-A026 Technical manual

Quark-Elec

Quark-Elec QK-A026 Technical manual

Quark-Elec QK-A012 User manual

Quark-Elec

Quark-Elec QK-A012 User manual

Quark-Elec QK-A027 User manual

Quark-Elec

Quark-Elec QK-A027 User manual

Popular Receiver manuals by other brands

Audio Control BVD-10 Installation and operation manual

Audio Control

Audio Control BVD-10 Installation and operation manual

Taramp's Homee Life Sound THS 3600 instruction manual

Taramp's

Taramp's Homee Life Sound THS 3600 instruction manual

Camsat CAM 5816h Multi-Rx manual

Camsat

Camsat CAM 5816h Multi-Rx manual

Wired Ocean S-Box Owner's and installation guide

Wired Ocean

Wired Ocean S-Box Owner's and installation guide

Hi-Tec HAS-02MB manual

Hi-Tec

Hi-Tec HAS-02MB manual

SHENZHEN GUIYUAN INDUSTRY DEVELOPMENT S1F1-DC quick start guide

SHENZHEN GUIYUAN INDUSTRY DEVELOPMENT

SHENZHEN GUIYUAN INDUSTRY DEVELOPMENT S1F1-DC quick start guide

Emtec S885 user manual

Emtec

Emtec S885 user manual

Keyautomation RX4U Instructions and warnings for installation and use

Keyautomation

Keyautomation RX4U Instructions and warnings for installation and use

Icom IC-R10 Service manual

Icom

Icom IC-R10 Service manual

Wyrestorm RX-70-POH instruction manual

Wyrestorm

Wyrestorm RX-70-POH instruction manual

IMG STAGE LINE TXS-875 instruction manual

IMG STAGE LINE

IMG STAGE LINE TXS-875 instruction manual

IMG STAGE LINE TXS-606 instruction manual

IMG STAGE LINE

IMG STAGE LINE TXS-606 instruction manual

Sunfire Bob carver's Ultimate receiver user manual

Sunfire

Sunfire Bob carver's Ultimate receiver user manual

R/Evolution 500Plus user manual

R/Evolution

R/Evolution 500Plus user manual

Icom IC-R100 instruction manual

Icom

Icom IC-R100 instruction manual

CO/Tech 51050X10 instruction manual

CO/Tech

CO/Tech 51050X10 instruction manual

Black Box AC155A-R2 user manual

Black Box

Black Box AC155A-R2 user manual

Ublox EVA-M8M Hardware Integration Manual

Ublox

Ublox EVA-M8M Hardware Integration Manual

manuals.online logo
manuals.online logoBrands
  • About & Mission
  • Contact us
  • Privacy Policy
  • Terms and Conditions

Copyright 2025 Manuals.Online. All Rights Reserved.