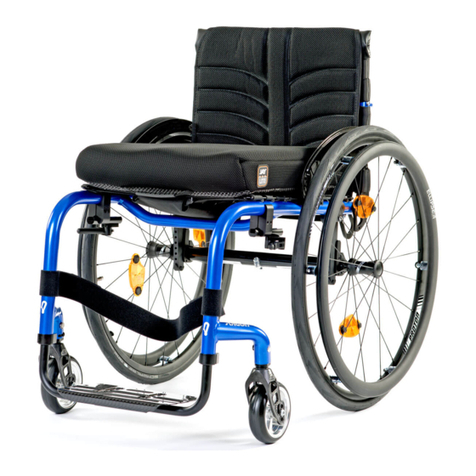
Quickie Easy 160i Manual

Directions for use
Brugervejledning
Bruksanvisning
Brukerveiledning
Easy 160i
000 690 608.EMS

2 EASY 160i
ENGLISH
If you are visually impaired, this document can be viewed in pdf format at
www.Sunrisemedical.co.uk or alternatively is available on request in large text.
Hvis du har nedsat syn, kan dette dokument ses i PDF-format på
www.SunriseMedical.dk eller alternativt kan det stilles til rådighed i stor tekst.
Om du är synskadad kan detta dokument visas i PDF-format på
www.SunriseMedical.se eller också på begäran i stor text.
Hvis du har redusert syn kan du se denne informasjon i et PDF-format på vår nettside
www.SunriseMedical.no, eller du kan bestille brukerveiledningen med stor skrift.
Innehållsförteckning (SV) 31
Innholdsfortegnelse (NO) 45
Table of Contents (UK) 3
Indholdsfortegnelse (DK) 17
www.sunrisemedical.com

EASY 160i 3
ENGLISH
Foreword
Dear Customer,
We are very happy that you have decided in favour of a high-
quality product from SUNRISE MEDICAL.
This owner's manual will provide numerous tips and ideas so
that your new wheelchair can become a trustworthy and reliable
partner in your life.
Maintaining close ties to our customers means a lot to us at
Sunrise Medical. We like to keep you up-to-date about new and
current developments at our company. Keeping close to our
customers means: fast service, as little red tape as possible,
working closely with customers. When you need replacement
parts or accessories, or if you just have a question about your
wheelchair – we are there for you.
We want you to be satisfied with our products and service. At
Sunrise Medical we are constantly working to develop our
products further. For this reason, changes can occur in our
palette of products with regard to form, technology and
equipment. Consequently, no claims can be construed from the
data or pictures contained in this user’s manual.
The management system of SUNRISE MEDICAL is certified
to EN ISO 9001, ISO 13485 and ISO 14001.
As the manufacturer, SUNRISE MEDICAL, declares
that the lightweight wheelchairs conform to the
Medical Device Regulation (2017/745).
Notice to the user and/or patient: Any serious incident that has
occurred in relation to the device should be reported to the
manufacturer and the competent authority of the Member State
in which the user and/or patient is established.
B4Me special adaptations
Sunrise Medical strongly recommends that in order to ensure
that your B4Me product operates, and performs as intended by
the manufacturer; all the user information supplied with your
B4Me product is read and understood, before the product is first
used.
Sunrise Medical also recommends that the user information is
not discarded after reading it, but it is kept safely stored for
future reference.
Medical Device Combinations
It may be possible to combine this Medical device with one or
more other Medical Device or other product. Information on
which combinations are possible can be found at www.
Sunrisemedical.co.uk. All combinations listed have been
validated to meet the General Safety and Performance
Requirements, Annex I Nr. 14.1 of the Medical Device
Regulation 2017/745.
Guidance on the combination, such as mounting, can be found
at www.SunriseMedical.co.uk
IMPORTANT:
DO NOT USE YOUR
WHEELCHAIR UNTIL THIS
MANUAL HAS BEEN READ
AND UNDERSTOOD. NOT
FOLLOWING THESE
INSTRUCTIONS MAY RESULT
IN PHYSICAL INJURY,
DAMAGE TO THE PRODUCT
OR DAMAGE TO THE
ENVIRONMENT!
Please contact your local, authorised SUNRISE MEDICAL
dealer if you have any questions concerning the use,
maintenance, or safety of your wheelchair.
In case there is no authorised dealer in your area, or you have
any questions, contact Sunrise Medical either in writing or by
telephone.
Sunrise Medical
Thorns Road
Brierley Hill
West Midlands
DY5 2LD
England
Phone: 0845 605 66 88
Fax: 0845 605 66 89
www.SunriseMedical.co.uk

4 EASY 160i
ENGLISH
Contents Use
Wheelchairs are exclusively for a user who is unable to walk or
has limited mobility, for their own personal use in- and outdoor.
The maximum weight limit (includes both the user and any
weight of accessories fitted to the wheelchair) is marked on
the serial number label, which is affixed to the crossbar or
stabiliser bar below the seat.
Warranty can only be taken on if the product is used under the
specified conditions and for the intended purposes.
The intended lifetime of the wheelchair is 5 years.
Please DO NOT use or fit any 3rd party components to the
wheelchair unless they are officially approved by Sunrise
Medical.
Area of Application
Indications
The varieties of fitting variants, as well as the modular design,
mean that it can be used by those who cannot walk or have
limited mobility because of:
• Paralysis
• Loss of extremity (leg amputation)
• Extremity defect deformity
• Joint contractures/joint injuries
• Illnesses such as heart and circulation deficiencies,
disturbance of equilibrium or cachexia, Neurological disease
patterns, Muscle dystrophy, Hemiplegia as well as for elderly
people who still have strength in the upper body.
Contraindications
The wheelchair shall not be used without attendant in case of:
• Perception disorder
• Imbalance
• Loss of both arms, if not supported by a caregiver
• Joint contracture or joint damage on both arms
• Seating disability
When considering provision, please also note the body size,
weight, physical and psychological constitution, the age of the
person, living conditions and environment.
1.0 General Safety Notes and Driving Limits 5
2.0 Transportation 7
3.0 Overview 9
4.0 Handling 10
5.0 Options 10
Quick-release axles 10
Step Tubes 10
Brakes 10
Footboard 11
Footrest 11
Headrests 12
Castor 12
Perforated plate 12
Rear seat height 12
Adjustable back sling 12
Height-adjustable backrest 13
Backrest angle 13
Rear Wheel Extension 13
Lap strap 13
Sideguard 13
Push Handle 13
Anti-tip tubes 14
Seat sling 14
Seat depth growth 14
Crutch holder 14
Tray 14
Stabilising bar 14
Transit wheels 14
Options – One Hand Operation 14
6.0 Tyres and Mounting 15
7.0 Trouble Shooting 15
8.0 Maintenance 15
9.0 Technical data 15
10.0 Nameplates / Guarantee 16
11.0 Torque 16

EASY 160i 5
ENGLISH
1.0 General Safety Notes and Driving Limits
The engineering and construction of this wheelchair has been
designed to provide maximum safety. International safety
standards currently in force have either been fulfilled or
exceeded in parts. Nevertheless, users may put themselves at
risk by improperly using their wheelchairs. For your own safety,
the following rules must be strictly observed.
Unprofessional or erroneous changes or adjustments increase
the risk of accident. As a wheelchair user, you are also part of
the daily traffic on streets and pavements, just like anyone else.
We would like to remind you that you are therefore also subject
to any and all traffic laws.
Be careful during your first ride in this wheelchair. Get to know
your wheelchair.
Before each use, the following should be checked:
• Quick-Release Axles for Rear Wheels
• Velcro on seats and backrests
• Tyres, tyre pressure, and wheel locks.
Before changing any of the adjustments of this wheelchair, it is
important to read the corresponding section of the Owner’s
manual.
It is possible that potholes or uneven ground could cause this
wheelchair to tip over, especially when riding uphill or downhill.
When riding over a step or up an incline frontally, the body
should be leaning forward.
DANGER!
NEVER exceed the maximum load of 140 kg for driver plus any
items carried on the wheelchair. If you exceed the maximum
load, this can lead to damage to the chair, or you may fall or tip
over, lose control and may lead to serious injury of the user and
other people.
When it is dark, please wear light clothing or clothing with
reflectors, so that you can be seen more easily. Make sure that
the reflectors on the side and back of the wheelchair are clearly
visible. We would also recommend that you fit an active light.
To avoid falls and dangerous situations, you should first
practice using your new wheelchair on level ground with good
visibility.
When getting on or off the wheelchair, do not use the
footboards. These should be flipped up beforehand and swung
to the outside as far as possible. Always position yourself as
close as possible to the place where you wish to sit.
Only use your wheelchair properly. For example, avoid travelling
against an obstacle without braking (step, kerb edge) or
dropping down gaps.
The wheel locks are not intended to brake your wheelchair. They
are only there to ensure that your wheelchair does not begin
rolling unintentionally. When you stop on uneven ground, you
should always use the wheel locks to prevent such rolling.
Always apply both wheel locks; otherwise, your wheelchair could
tip over.
Explore the effects of changing the centre of gravity on the
behaviour of the wheelchair, for example on inclines, slopes, all
gradients or when overcoming obstacles. Do this with the secure
aid of a helper.
With extreme settings (e.g. rear wheels in the most forward
position) and less than perfect posture, the wheelchair may tip
over even on a level surface.
Lean your upper body further forward when going up slopes and
steps.
Lean your upper body further back when going down slopes and
steps. Never try to climb and descend a slope diagonally.
Avoid using an escalator which may lead to serious injury in the
event of a fall.
Do not use the wheelchair on slopes > 10°. The Dynamic safe
slope is dependant on the chair configuration, the users abilities
and the style of riding. As the users abilities and style of riding
cannot be pre-determined then the max safe slope cannot be
determined. Therefore this must be determined by the user with
the assistance of an attendant to prevent tipping. It is strongly
recommended that inexperienced users have Ant-tips fitted.
It is possible that potholes or uneven ground could cause this
wheelchair to tip over, especially when riding uphill or downhill.
Do not use your wheelchair on muddy or icy ground. Do not use
your wheelchair where pedestrians are not allowed.
To avoid hand injuries do not grab in between the spokes or
between the rear wheel and wheel lock when driving the
wheelchair.
In particular when using lightweight metal handrims, fingers will
easily become hot when braking from a high speed or on long
inclines.
Only attempt stairs with the help of an attendant. There is
equipment available to help you, e.g. climbing ramps or lifts,
please use them. If there is no such equipment available, then
the wheelchair must be tipped and pushed, never carried, over
the steps (2 helpers). We recommend that users over 100 kg in
weight do not use this stairway manoeuvre!
In general, any anti-tip tubes fitted must be set beforehand, so
that they cannot touch the steps, as otherwise this could lead to
a serious fall. Afterwards the anti-tip tubes must be set back to
their correct position.
6 EASY 160i
ENGLISH
Make sure that the attendant only holds the wheelchair using
securely mounted parts (e.g. not on the footrests or the
sideguards).
When using the lifting ramp make sure that the anti-tip tubes
fitted are positioned outside the danger area.
Secure your wheelchair on uneven ground or when transferring
(e. g. into a car) by using the brakes.
If and whenever possible, during a journey in a specially fitted
vehicle for disabled people, vehicle occupants should use the
seats in the vehicle and the appropriate restraint system. This is
the only way to ensure that occupants will have the maximum
protection if there is an accident. When using safety elements
offered by SUNRISE MEDICAL and using a specially designed
safety system, lightweight wheelchairs can be used as a seat
when being transported in a specially fitted vehicle. (See the
Chapter on “Transportation”).
Depending on the diameter and setting of the castors, as well
as the centre of gravity setting of the wheelchair, the castors
may begin to wobble at high speeds. This can lead to the
castors being blocked and the wheelchair may tip over.
Therefore, please make sure that the castors are adjusted
correctly (see the Chapter “Castors”). In particular, do not travel
on an incline without brakes, travel at a reduced speed. We
recommend that novice users use anti-tip tubes.
Anti-tip tubes should prevent the chair tipping over backwards
unintentionally. Under no circumstances should they take the
place of transit wheels, and be used to transport a person in a
wheelchair with the rear wheels removed.
When reaching for objects (which are in front of, to the side or
behind the wheelchair) make sure that you do not lean too far
out of the wheelchair, as if you change the centre of gravity
there is a risk of tipping or rolling over. The hanging of
additional load (back pack or similar items) onto your chair
backposts can affect the rearward stability of your chair,
especially when used in combination with recliner backrests.
This can cause the chair to tip backwards causing injury.
For thigh amputees you must use anti-tip tubes.
Before setting off, check that your tyre pressure is correct. For
rear wheels it should be at least 3.5 bar (350 kPa). The max.
pressure is indicated on the tyre. The knee-lever brakes will
only work if there is sufficient tyre pressure and if the correct
setting has been made (see the Chapter on “Brakes”).
If the seat and back sling are damaged, you must replace them
immediately.
Be careful with fire, in particular with burning cigarettes. Seat
and back slings can be set alight.
If the wheelchair is subject to direct sunlight for a long period of
time, then parts of the wheelchair (e.g. frame, legrests, brakes
and sideguard) may become hot (>41°C).
Always make sure that the quick-release axles on the rear
wheels are set properly and lock in. If the button on the quick-
release axle is not pressed in, the rear wheel cannot be
removed.
WARNING!
The effect of the knee-lever brake as well as the general driving
characteristics are dependant on tyre pressure. The wheelchair
is significantly lighter and easier to manoeuvre when the rear
wheels are pumped up correctly and both wheels have the
same pressure.
WARNING!
Make sure that your tyres have sufficient tread! Please note that
you are subject to any and all traffic laws when driving in public
traffic.
WARNING!
Always be careful with your fingers when working or adjusting
the wheelchair!
The wheelchairs shown and described in this user guide may
not correspond in every detail exactly to your own model.
However, all instructions are completely relevant, regardless of
possible detail differences.
The manufacturer reserves the right to alter without notice any
weights, measurements or other technical data shown in this
manual. All figures, measurements and capacities shown in this
manual are approximate and do not constitute specifications.
We at SUNRISE MEDICAL have been awarded the ISO 13485
Certificate, which affirms the quality of our products at every
stage, from R & D to production. This product complies with the
standards set forth in EU directives. Optional equipment and
accessories are available at extra charge.

EASY 160i 7
ENGLISH
DANGER!
There is a risk of serious injury or death if this if this advice is
ignored!
Transportation of your wheelchair within a vehicle:
A wheelchair secured in a vehicle will not provide the equivalent
level of safety and security of a vehicle seating system. It is
always recommended that the user transfers to the vehicle
seating. It is recognised that this is not always practical for the
user to be transferred and in these circumstances where the
user must be transported whilst in the wheelchair the following
advice should be followed:
Confirm that your chair is crashtest suitable (see nameplate or
crashtest bracket at the rear of the chair (Fig. I)
1. Confirm that the vehicle is suitably equipped to transport a
passenger in a wheelchair, and ensure the method of access/
egress is suitable for your wheelchair type. The vehicle should
have the floor strength to take the combined weight of the user,
the wheel chair and accessories.
2. Sufficient space should be available around the wheelchair to
enable clear access to attach, tighten and release the
wheelchair and occupant tie down restraints and safety belts.
3. The occupied wheelchair must be located in a forward facing
position and secured by the wheelchair tie down and occupant
restraint straps (WTORS tie downs meeting the requirements of
ISO 10542 Part 2 or SAE J2249) in accordance with the
WTORS manufacturer’s instructions.
4. The wheelchair’s use in other positions within a vehicle has
not been tested e.g. transportation in a side facing position
must not be carried out under any circumstances (Fig. A).
5. The wheelchair should be secured by a Tie Down Restraint
system, conforming to ISO 10542 or SAE J2249 with non-
adjustable front straps and adjustable rear straps, which
typically use Karabiner clips/S hooks and tongue and buckle
fittings. These restraints generally comprise of 4 individual
straps that are attached to each corner of the wheelchair.
6. The tie-down restraint system should be fitted as shown on
the following pages.
7. The tie–down restraints should be attached as close as
possible at an angle of 45 degrees and tightened securely in
accordance with the manufacturer’s instructions.
8. Alterations or substitutions must not be made to the
wheelchair tie down points or to structural and frame or
components without consulting the manufacturer. Failure to do
so will invalidate the ability of a Sunrise Medical wheelchair to
be transported within a vehicle.
2.0 Transportation 9. Both pelvic and upper torso restraint belts must be used to
restrain the occupant to reduce the possibility of head and chest
impacts with the vehicle components and serious risk of injury
to the user and other vehicle occupants. (Fig. B) The upper
torso restraint belt should be mounted to the vehicle “B” pillar -
failure to do so will increase the risk of serious abdominal
injuries to the user.
10. A head restraint suitable for transportation (see label on
headrest) must be fitted and suitably positioned at all times
during transportation.
11. Postural supports (lap straps, lap belts) should not be used
or relied on for occupant restraint in a moving vehicle unless
they are labelled as meeting the requirements specified in ISO
7176-19:2001 or SAE J2249.
12. The safety of the user during transportation depends upon
the diligence of the person securing the tie-down restraints and
they should have received appropriate instructions and/or
training in their use.
13. Wherever possible remove and stow safely away from the
wheelchair, all auxiliary equipment, for example:
Crutches, Loose cushions and Tray Tables.
14. Articulating/elevating leg rest should not be used in the
elevated position when the wheelchair and user are being
transported and the wheelchair is restrained using Wheelchair
Transport and Occupant Restraints.
15. Reclining backrests should be returned to an upright
position.
16. The manual brakes must be firmly applied.
17. Restraints should be mounted to the vehicle “B” pillar and
should not be held away from the body by wheelchair
components such as armrest or wheels.
Fig.A Fig.B

8 EASY 160i
ENGLISH
Occupant Restraints Instruction
1. The pelvic restraint belt must be worn low across the front of
the pelvis so that the angle of the pelvic belt is within the
preferred zone of 30 to 75 degrees to the horizontal.
A steeper (greater) angle within the preferred zone is desirable
i.e. closer to, but never exceeding 75 degrees. (Fig. C)
2. The upper torso restraint belt must fit over the shoulder and
across the chest as illustrated Fig d and e
Restraint belts must be adjusted as tightly as possible
consistent with user comfort.
Restraint belt webbing must not be twisted when in use.
The upper torso restraint belt must fit over the shoulder and
across the shoulder as illustrated in Fig D and E.
3. The attachment points to the chair are the inner front side
frame just above the castor, and the rear side frame. The straps
are fitted around the side frames at the intersection of the
horizontal and vertical frame tubes. (See Fig. G-H-I)
4. The tie down symbol (Fig F) on the wheelchair frame
indicates the position of the wheelchair restraint straps. The
straps are then tensioned after the front straps have been fitted
to secure the wheelchair.
Transportation >>>
Fig. F
Transportation >>>
Positioning of wheelchair tie down restraints on wheelchair:
1. Location of the front and rear tie down labels (Fig. G - H).
2. Position of the front (Fig. I) and rear (Fig. J) wheelchair tie
down restraint and the tie down label.
3. Side view of tie down straps (Fig. K).
Fig. H
Fig. I
Fig. J
Fig. G
Fig. K
30°
75°
Fig.D
Fig.E
PREFEREDPREFERED
ZONEZONE
Fig.C

EASY 160i 9
ENGLISH
3.0 Overview
We at SUNRISE MEDICAL have been awarded the ISO 13485
certificate, which affirms the quality of our products at every
stage, from R & D to production.
This product complies with the standards set forth in EU
directives. Optional equipment and accessories are available at
extra charge
1. Push handle
2. Sling backrest
3. Sideguard
4. Seat sling
5. Footboard
6. Castor
7. Castor adapter
8. Castor fork
9. Quick-release axle
10. Brake
11. Handrim
12. Drive wheel
12
3
4
56
7
8
9
10
11
12

10 EASY 160i
ENGLISH
12mm with solid tyres
14mm with pneumatic tyres
4.0 Handling
Folding up
First remove the seat cushion
from the wheelchair and flip-up
the footboard (continuous) or
footboards.
Take hold of the sling or the seat
tubes in the middle, from below
and pull upwards. The chair will
fold up.
To fold your wheelchair so that it
is as small as possible, e.g., to
put into a car, you can remove the footrests (depending on the
model). To do this, push the release lever from the outside and
swing the footrest to the side, then pull the footrest out of the
frame tube.
Brakes
Wheel locks
Your wheelchair is equipped
with two wheel locks. They are
applied directly against the
tyres.
To engage, press both wheel
lock levers forward against
the stops (Fig. 4.5 and 4.7).
To release the wheel lock, pull
the levers back to their original
positions.
Braking power will decrease
with:
• Worn tyre tread
• Tyre pressure that is too low
• Wet tyres
• Improperly adjusted wheel
locks
The wheel locks have not been
designed to be used as brakes
for a moving wheelchair. The
wheel locks should therefore
never be used to brake a
moving wheelchair. Always use
the handrims for braking.
Make sure that the interval
between the tyres and wheel
locks complies with the given
specifications (Fig. 4.6 and 4.8).
To re-adjust, loosen screw (1)
and set the appropriate interval.
Tighten screw (see the page on
torque).
ATTENTION!
After each adjustment of
the rear wheels, check the
interval to the wheel locks and
readjust if necessary.
Quick-release axles
Quick-release axles on rear
wheel
The rear wheels are equipped with
quick-release axles. The wheels
can, therefore, be installed or
removed without using tools. To
remove a wheel, simply depress
the quick-release button on the
axle (1) and pull it out.
ATTENTION!
Hold the quick-release button on the axle depressed when
inserting the axle into the frame to mount the rear wheels.
Release the button to lock the wheel in place. The quick-
release button should snap back to its original position.
Step Tubes
Step Tubes
Step tubes are used by attendants
to push a wheelchair over an
obstacle. Simply step on the tube
to push a wheelchair, for example,
over a kerb or step.
Unfolding
Before unfolding, undo the
folding bracket
Press down on the seat tube (see
figure). The wheelchair will unfold.
Then press the seat tube into the
support. This process is easier
if you tip the chair a little, so that
there is no load on one of the rear
wheels and then the chair will
unfold more easily.
ATTENTION!
Risk of trapping fingers
Brake lever extension
The longer lever helps to minimise the effort needed to set
the wheel locks. The brake lever extension is screwed to the
brakes. By raising this, it can be flipped forward.
ATTENTION!
Incorrect mounting of the
wheel lock will result in a
higher effor to operate. This
might cause the wheel lock
extension lever to break.
Leaning onto the wheel
lock extension lever while
transferring will cause the lever
to break. There is a risk it could
break. Splashing water from
tyres might cause the wheel lock
to malfunction.
5.0 Options
Fig. 4.1
Fig. 4.2
Fig. 4.4
1
Fig. 4.3
Fig. 4.9
4.8 Standard brake
1
Fig. 4.8
4.7 Standard brake
Fig. 4.7
4.6 Knee lever brake
1
3 mm
Fig. 4.6
4.5 Knee lever brake
Fig. 4.5

EASY 160i 11
ENGLISH
Footboard
Drum brake
Drum brakes permit safe and
convenient braking for an
attendant.
They can also be applied with
the aid of a locking lever (1). The
locking lever must snap audibly
into place. Performance of the
drum brakes is not dependant on
the air pressure inside the tyres.
The wheelchair cannot be pushed when the drum brakes are
set.
ATTENTION!
Drum brakes should only be adjusted by authorised dealers.
One-hand operation
The wheelchair is equipped with
two wheel locks, which can either
be used both together or from
each side individually. They are
applied directly against the tyres.
To engage, press the wheel lock
lever forward against the stop (Fig.
4.12). To release the wheel lock,
pull the levers back to their original
positions. The one-arm brake is
always delivered with a brake lever extension.
The longer lever helps to minimise the effort
needed to engage the wheel locks. The brake
lever extension is screwed to the brakes. By
raising this, it can be flipped forward.
Braking power will decrease with:
• Worn tyre tread
• Tyre pressure that is too low
• Wet tyres
• Improperly adjusted wheel locks
The wheel locks have not been designed to be used as brakes
for a moving wheelchair. The wheel locks should therefore
never be used to brake a moving wheelchair. Always use the
handrims for braking.
Make sure that the interval between the tyres and wheel locks
complies with the given specifications (Fig. 4.11). To re-adjust,
loosen screw (1) and set the appropriate interval. Tighten screw
(see the page on torque).
ATTENTION!
After each adjustment of the rear wheels, check the
interval to the wheel locks and readjust if necessary.
Incorrect mounting of the wheel lock will result in a higher effor
to operate. This might cause the wheel lock extension lever
to break. Leaning onto the wheel lock extension lever while
transferring will cause the lever to break. There is a risk it could
break. Splashing water from tyres might cause the wheel lock
to malfunction.
Footboard
There are several footboards
available. These can be flipped up
to make it easier to transfer to/from
the chair.
Angle-adjustable footboard
The footboard can be flipped up
to make it easier to transfer to/
from the chair.
It can be adjusted to alter the angle
to the ground. Tighten screw (1) on
the outside. By loosening the clips
(2) the footboard can be moved
to three positions both forwards
and backwards. By adjusting the
set screw (3) the footboard can be
changed to a horizontal position.
To do this, the footboard must be
flipped up. Make sure that after
any adjustment work, all screws
are tightened correctly (see the
page on torque). Ensure that you
maintain the minimum gap to the
floor (25 mm).
Lower Leg Length
By undoing the clamp screw (1), you can adjust the lower
leg length. Loosen the clamp screw, adjust the tube with the
footboard to the desired position. Tighten clamp screws again
(see the page on torque). Ensure that the plastic push joint is
located under the clamp screw in the correct position. Ensure
that the plastic push joint is located under the clamp screw in
the correct position.
Footrest
Footrest and swing away latch
When fitting the footrests these are fitted in
the swung-away position. Then simply turn
them inwards until the interlock engages
(1). To remove the footrests, use the lever
(2) and swing the footrest outwards and
lift off. Check that the footrest is correctly
engaged.
ATTENTION!
The footrests are not designed to be used to lift or carry
the wheelchairs with an occupant.
The footrest can be adjusted easily using eccentric nuts. You
can change the setting as follows: Release the screw. Rotate
the eccentric nut. Check that the lock clicks into place and
releases correctly. To fit the eccentric bolts firmly, hold with the
wrench and tighten the screw (see the page on torque).
1
Fig. 4.13
Fig. 4.12
3 mm
1
Fig. 4.11
1
Fig. 4.10
1
Fig. 4.14
2
Fig. 4.15
3
Fig. 4.16
1
2
Fig.4.17

12 EASY 160i
ENGLISH
Flip-up footrest - standard or
with length compensation
To flip up:
Pull the footrest upwards and
adjust to the desired height. When
doing this, the footrest clicks
audibly into place.
To lower:
Briefly take the load off the footrest
by lifting the lower leg and then
push the release lever. In this way you can swing the footrest
downwards. As soon as you let go of the lever, the footrest will
click back into place.
Risk of trapping fingers!
When moving the footrest up or down, do not put your
fingers in the adjusting mechanism between the frame and
the moving parts of the footrest.
ATTENTION!
The footrests are not designed to be used to lift or carry
the wheelchairs with an occupant.
Headrests
Headrests
The headrest can be raised and
moved horizontally both forwards
and backwards. To do this, loosen
the screw (1 or 2). Now you can
adjust to the desired position.
Tighten screws again (see the
page on torque).
Castor
Castor, Castor adapter, Castor fork
From time to time the wheelchair may veer slightly to the right
or left, or the castors may flutter. This may be caused by the
following:
• The forward or reverse wheel motion has not been set
properly.
• The castor angle has not been adjusted properly.
• Castor and/or rear wheel air pressure is incorrect;
wheels do not turn smoothly.
The optimum adjustment of the castors is required so that the
wheelchair runs in a straight line. The castors should always be
adjusted by an authorised dealer.
The castor plates must be re-adjusted, and the wheel locks
must be checked any time the rear wheel position has been
altered.
Perforated plate
Adjustable back sling
Perforated plate (only Germany)
The position of the centre of
gravity in relation to the rear wheel
is an important factor for easy
and comfortable driving. Several
positions are possible. If you move
the perforated plate to the rear (1)
in the frame holes (2), the chair is
in a safe position, but at the same
time is not so manoeuvrable, as
it is when the perforated plate is
positioned further forward. By moving the axle adapter (3) in the
perforated plate, the seat height of the chair can be adjusted.
Make sure that after any adjustment work, all screws are
tightened correctly (see the page on torque).
ATTENTION!
If necessary, the brakes and castors must be re-adjusted.
Check the setting of the castor
adapter (1) by placing a set-
square next to it and looking at it
from the front. Make sure that the
adapter is at right angles to the
floor. By undoing the screws (2)
and moving the adapter, you can
then re-adjust the wheels to their
optimum position, by adjusting the
corresponding hex nuts. Make sure that after any adjustment
work, all screws are tightened correctly (see the page on
torque).
Front seat height Easy 160
To adjust the front seat height,
please undo the screws A (2
on each side) and adjust to the
desired seat height. Make sure
that both sides are at the same
height, and then re-tighten the
screws. Please observe the Nm
torque value (see the page on
torque).
Rear seat height
Rear seat height
Loosen the 4 screws (2 on each
side) and remove them from the
axle plate. Then move the axle
adapter to the desired height and
after that, re-tighten the screws.
Make sure that both sides are set to the same position. Please
observe the Nm torque value (see the page on torque).
Adjustable back sling
The adjustable back sling can
be adjusted for tension by using
several straps. The back sling
upholstery can be accessed from
the inside via an opening and can
be padded to suit individual tastes.
21
3
Fig. KFig. K
Fig. 4.22
1
2
Fig. 4.19
Fig. 4.18
1
Fig. 4.24
1
2
90°
Fig.4.20
Fig.4.21
Fig.4.23

EASY 160i 13
ENGLISH
Rear Wheel Extension
The larger the wheelbase the
greater security against your
wheelchair tipping over. To do
this, screw the axle adapter (1) to
the frame at the desired height.
Please ensure that the steel pin
(2) is correctly fitted into the holes
provided in the frame. Make sure
that after any adjustment work, all
screws are tightened correctly (see
the page on torque).
ATTENTION!
Wheel locks must be adjusted to
match the new position!
Sideguard
Push Handle
Height-adjustable push handles
These handles are secured with
pins to prevent them from sliding
out unintentionally. Opening the
quick-release lever (1) makes
it possible to adjust the height
of the push handles (3) to meet
your individual needs. As you
move the lever, you will hear a
locking mechanism; you may now
easily position the push handle as
desired. The nut (2) on the tension lever determines how tightly
the push handles are clamped into place. If the nut is loose
after adjusting the tension lever, the push handle will also be
too loose. Turn the push handle from side to side before use to
make sure that it is clamped securely enough into place. After
adjusting the handle height, always clamp the tension lever (1)
securely into place. If the lever is not secure, injuries could result
when ascending stairs.
Lap strap
Lap strap
The lap belt enhances wheelchair
safety. The lap belt is fastened to
the frame as shown in the picture.
Height-adjustable backrest
Easy 160
Loosen screw B and push the
backrest tube C to the desired
height. Then re-tighten the screw
B. Please observe the Nm torque
value (see the page on torque).
Adjust both sides in the same
way and then, using the Velcro
fasteners, set the sling to the
desired position.
Backrest angle
Backrest angle
Undo the screw A and pull the
screw out of its position. Set the
desired angle and then re-tighten
the screw.
Make sure that the angle is set
the same on both sides. Please
observe the Nm torque value (see
the page on torque).
Sideguards - clothes protector
The clothes protector prevents
clothes getting dirty from spray
water. You can set the position in
relation to the rear wheel by moving
the sideguard. To do this, remove
the screws (1 and 2). After setting to
the desired position, re-tighten the
screws (see the page on torque).
ATTENTION!
Neither the side-guards nor the armrests are to be used for
lifting or carrying the wheelchair.
Standard sideguard, flip-up,
removeable with short or long
armrests
The sideguard with shaped front
edges will allow you to get up close
to a table. To flip the armrest up,
push the lever (1) forwards, so
that the sideguard is released. The
height of the armrest (2) can be
adjusted by fitting the sockets (3)
at different positions.
To do this release the screws (4),
move the sockets (3) and then
re-tighten the screws (4) (see the
page on torque).
ATTENTION!
Neither the side-guards nor the armrests are to be used for
lifting or carrying the wheelchair.
Sideguard, flip-up, removable with short or long armrests,
height-adjustable
The armrest can be height-adjusted as follows.
Push the lever (1) upwards and move the armrest (2) to the
desired height. Release the lever and press the armrest (2)
downwards until you hear it click into place. Always check that
the sideguards are correctly engaged. To flip the armrest up, pull
the lever (3) so that the sideguard is released.
ATTENTION!
Neither the sideguards nor the armrests are to be used for
lifting or carrying the wheelchair.
RISK OF TRAPPING FINGERS: When using a 24" (609.6mm)
rear wheel the armpad must be moved one level up.
1
2
3
Fig. 4.33
2Fig. 4.31
1
2
Fig. 4.30
1
Fig. 4.29
2
Fig. 4.28
1
Fig. 4.27
Fig. 4.32 1
Fig.4.25
Fig.4.26

14 EASY 160i
ENGLISH
Stabilising bar
The stabilising bar gives the backrest
its stability. To be able to fold the
chair, you must turn the knobs (1)
on the end of the push handle and
remove the stabilising bar, then you
can fold the wheelchair easily. To
replace the stabilising bar, you must
retighten the knobs, so that it is
locked in place.
Anti-tip tubes
Anti-tip tubes
The anti-tip tubes (1) provide
additional safety for inexperienced
users when they are still learning
how to operate their wheelchairs.
Anti-tip tubes (1) prevent a
wheelchair from tipping over
backwards. The anti-tip tube (1)
can be swung downwards by
pushing it or rotated forwards.
There should be a gap of 30 mm
to 50 mm to the floor. To go up or down a step (e.g. kerb) the
anti-tip tubes must be swung forwards, to prevent them from
touching the ground.
Transit wheels
Stabilising bar
Transit wheels
Travel wheels should be used wherever
your wheelchair would be too wide if
the rear wheels were used. After the
rear wheels have been removed with
the aid of the quick-release axles, the
transit wheels can immediately be used
to continue riding. The transit wheels
are mounted so that they are approx. 30
mm above the ground when not in use.
They are thus out of the way when riding,
transporting, or when tipping to pass over
obstacles.
ATTENTION!
Without rear wheels, your
wheelchair has no wheel locks.
Seat sling
Standard seat sling
The seat sling has a Velcro fastening on one side. This allows
you to infinitely adjust the seat sling. To re-adjust the tension of
the seat sling, fold the wheelchair slightly. Remove the screws
(1) and pull the front plugs (2) forwards out of the frame. Then
the seat sling (3) can be pulled
forward out of the frame. By
unfastening the Velcro, the seat
sling can now be re-adjusted.
Follow the instructions in the
opposite direction to refit the seat
sling. Make sure that after any
adjustment work, all screws are
tightened correctly (see the page
on torque).
ATTENTION!
In order to maintain safety, at least 50% of the Velcro
surfaces must be in contact with each other.
Seat depth growth
Seat depth growth
You can easily alter the seat depth
by using the Velcro fastener on the
seat sling.
Separate sling A from sling B, set
the desired position and then push
both slings back together, one on
top of each other.
Tray
Tray
The tray provides a flat surface.
The tray must be adjusted once
to the width of the seat by an
authorised dealer. When carrying
out a functional test, the user must
be sitting in the wheelchair.
Crutch holder
Crutch holder
This device permits crutches to
be transported directly on the
wheelchair.
It has a Velcro loop to fasten
crutches or other aids.
ATTENTION!
Never try to use or even remove
the crutches or other aids while moving.
3
12
1
Fig. 4.35
1
Fig. 4.34
1
Fig. 4.37
Fig. 4.38
1
Fig. 4.39
Fig. 4.40
Fig. 4.41
Fig.4.36
Options – One Hand Operation
One Hand Operation
(Fig. 4.42 - 4.42.1)
To propel the chair straight
forward both handrims
must be used. To fold the
wheelchair disconnect the
telescopic bar by pushing it
inward (1). To take off the
wheels, press the locking
button on the axle (2).
CAUTION!
Make always sure that the
connections are set
properly to avoid
injuries.
Fig. 4.42
Fig. 4.42.1
2
1

EASY 160i 15
ENGLISH
6.0 Tyres and Mounting
Tyres and Mounting
Always make sure that you maintain the correct tyre pressure,
as this can have an effect on wheelchair performance. If the tyre
pressure is too low, rolling resistance will increase, requiring
more effort to move the chair forward. Low tyre pressure also
has a negative impact on manoeuvrability. If the tyre pressure is
too high, the tyre could burst.
The correct tyre pressure for a given tyre is printed on the
surface of the tyre.
Tyres can be mounted the same way as an ordinary bicycle
tyre.
Before installing a new inner tube, you should always make
sure that the base of the rim and interior of the tyre are free of
foreign objects. Check the pressure after mounting or repairing
a tyre. It is critical to your safety and to the wheelchair’s
performance that regulation air pressure be maintained and that
tyres are in good condition.
8.0 Maintenance
Maintenance
• Check the tyre pressure every 4 weeks. Check all of the tyres
for wear or damage.
• Check the brakes approximately every 4 weeks to make sure
that they are working properly and easy to use.
• Tyres can be mounted the same way as an ordinary bicycle
tyre.
• All of the joints that are critical to using your wheelchair safely
are fitted with self-locking nuts. Check every 3 months to
make sure that all bolts are secure (see the page on torque).
• Self-locking nuts should only be used once and should be
replaced after single use.
• Use only mild household cleansers when your wheelchair
is dirty. Use only soap and water when cleaning the seat
upholstery.
• If your wheelchair should ever get wet, please dry it after use.
• A small amount of sewing-machine oil should be applied to
quick-release axles approximately every 8 weeks.
Depending on the frequency and type of use, we recommend
taking your wheelchair to your authorised dealer every 6
months, to have it inspected by trained personnel.
ATTENTION!
Sand and sea water (or salt in the winter) can damage the
bearings of the front and rear wheels. Clean the wheelchair
thoroughly after exposure to these conditions.
9.0 Technical data
Overall width:
• With standard wheels including handrims,
close mount: SW + 180 mm
• With drum brake wheels including handrims,
close mount: SW + 230 mm
Folded dimensions:
• with rear wheels: approx. 300 mm
• without rear wheels: approx. 220 mm
Weight in kg:
from 13.1 kg
Maximum load:
Approved to load of 140 kg
7.0 Trouble Shooting
Wheelchair pulls to one side
• Check tyre pressure
• Check to make sure wheel turns easily (bearings, axle)
• Check angle of castors
• Check to make sure both castors are making proper contact
with the ground
Castors begin to wobble
• Check angle of castors
• Check to make sure all bolts are secure; tighten if necessary
(see the page on torque)
• Check to make sure both castors are making proper contact
with the ground
Wheelchair does not fit in the support
• The chair is still new, or the seat or back slings are still stiff,
this will ease through frequent use
Wheelchair is difficult to fold up
• Adjustable backrest sling is too stiff, loosen slightly.
Wheelchair squeaks and rattles
• Check to make sure all bolts are secure; tighten if necessary
(see the page on torque)
• Apply small amount of lubrication to spots where movable
parts come in contact with one another
Wheelchair wobbles
• Check angle of castors
• Check tyre pressure
• Check to see if rear wheels are adjusted differently

16 EASY 160i
ENGLISH
10.0 Nameplates / Guarantee
Nameplate
The name plate is located on either the cross-tube or the frame
cross tube and also on the back page of the user’s manual.
The name plate indicates the exact model designation as well
as other technical specifications. Please provide the following
information whenever you have to order replacement parts or to
file a claim
• Serial Number
• Order number
• Month/Year
11.0 Torque
30 Nm
10 Nm
30 Nm
1.5 Nm
30 Nm
10 Nm
5 Nm
7 Nm
Torque for M6 screws is 7 Nm, unless otherwise specified.
10 Nm
10 Nm
7 Nm
7 Nm
30 Nm
Loctite243
Loctite243
Loctite243
Loctite243
SAMPLESAMPLE
Sunrise Medical GmbH
Kahlbachring 2-4
D-69254 Malsch / Germany
2021-04-29
Rollstuhl
TYPE:
203211633358678
ISO 7176-19:2008
Easy 160i
140 kg max 10° 540 mm 540 mm
kg
Guarantee
We are very happy that you have decided in favour of a high-
quality product from Sopur. As a sign of our gratitude, we are
providing you with a 5-year guarantee on all frame components
and on the cross-tube assembly as well as 1 year on all other
components. We are not responsible for any damage resulting
from inappropriate or unprofessional installation and/or repairs,
through neglect and wear, or from changes in any wheelchair
components caused either by the user or by third parties. In
such cases, this guarantee shall be considered null and void.
Personalised wheelchairs cannot be exchanged.
Easy160i Product Name/SKU Number.
XXXX-XX-XX
ISO 7176-19:2008
Maximum safe slope with anti-tip tubes
fitted, Depends on wheelchair setting,
posture and physical capabilities of the user.
CE Mark.
User’s Guide.
Date of manufacture.
Serial number.
This symbol means Medical Device.
Manufacturer’s address.
Crash tested according to
ISO 7176-19:2008.
XXX mm
Seat depth.
Seat width.
XXX mm
Load Maximum.
XXX kg
kg
max X°

EASY 160i 17
DANSK
Forord
Kære kunde,
Det glæder os meget, at De har valgt et førsteklasses produkt
fra SUNRISE MEDICAL.
I denne brugervejledning kan du finde mange gode råd og
idéer, som vil gøre din kørestol til en velkendt og pålidelig
partner i dagligdagen.
Det at bevare tæt kontakt med vores kunder betyder meget for
Sunrise Medical. Derfor vil vi gerne holde dig informeret om nye
og aktuelle produkter. At være tæt på vores kunder betyder
også, at vi tilbyder så hurtig og ukompliceret service som muligt
i nært samarbejde med kunderne. Hvis du har brug for
reservedele eller tilbehør, eller hvis du blot har et spørgsmål
angående din kørestol, står vi klar til at rådgive dig.
Vi ser naturligvis helst, at du er tilfreds med vores produkter og
service. Hos Sunrise Medical arbejder vi konstant på at
forbedre vores produkter. Der kan derfor forekomme ændringer
i udvalget af produkter, hvad angår udformning, teknologi og
udstyr. Som følge heraf kan der ikke rejses erstatningskrav på
baggrund af oplysninger eller illustrationer i denne
brugervejledning.
SUNRISE MEDICALs kvalitetsstyringssystem er godkendt i
henhold til EN ISO 9001, ISO 13485 og ISO 14001.
Som producent af disse letvægtskørestole
erklærer SUNRISE MEDICAL hermed, at de
overholder bestemmelserne i forordningen for
medicinsk udstyr (2017/745).
Bemærkning til brugeren og/eller patienten: Alvorlige
hændelser, der opstår i relation til enheden, skal indberettes til
producenten og den kompetente myndighed i det medlemsland,
hvor brugeren og/eller patienten bor.
B4Me særlige indretninger
Sunrise Medical anbefaler på det kraftigste, at brugeren læser
og forstår alle oplysninger, der leveres sammen med B4Me
produktet, før produktet anvendes første gang. Dette skal gøres
for at sikre, at B4Me produktet fungerer efter producentens
hensigt.
Sunrise Medical anbefaler ligeledes, at oplysningerne om
produktet ikke bortskaffes, når de er blevet læst, men
opbevares til fremtidig brug.
Kombinationer med medicinsk udstyr
Dette medicinske udstyr kan muligvis kombineres med andet
medicinsk udstyr eller et andet produkt. Information om hvilke
kombinationer, der er mulige, kan findes på
www.SunriseMedical.dk. Alle de angivne kombinationer er
blevet valideret, så de opfylder kravene til generel sikkerhed og
ydeevne, Bilag I, punkt 14.1 i Forordning om medicinsk udstyr
2017/745.
Vejledning om kombination, så som montering, kan findes på
www.SunriseMedical.dk
VIGTIGT:
DU MÅ IKKE BRUGE
KØRESTOLEN FØR DU HAR
LÆST OG FORSTÅET DENNE
VEJLEDNING. HVIS DISSE
ANVISNINGER IKKE FØLGES,
KAN DET RESULTERE
I PERSONSKADE,
BESKADIGELSE AF
PRODUKTET ELLER SKADE
PÅ MILJØET.
Hvis De har spørgsmål vedrørende brugen af Deres kørestol,
vedligeholdelse eller sikkerhed, bedes De kontakte Deres
autoriserede SUNRISE MEDICAL-forhandler.
Såfremt der ikke findes en autoriseret forhandler i dit område,
eller hvis du har yderligere spørgsmål, er du velkommen til at
skrive eller ringe til os:
Sunrise Medical Aps
Mårkærvej 5-9
2630 Taastrup
Denmark
+45 70 22 43 49
Sunrisemedical.dk

18 EASY 160i
DANSK
Indholdsfortegnelse Anvendelse
Kørestole er konstrueret til at anvendes af gangbesværede eller
bevægelseshæmmede personer og er udelukkende beregnet til
deres personlige brug såvel inden- som udendørs.
Den maksimale brugervægt (som omfatter brugeren og
vægten af evt. tilbehør monteret på kørestolen) er angivet
på det serienummermærkat, som findes på tværrøret eller
støttestangen under sædet.
Garantien gælder kun, såfremt produktet anvendes til de
påtænkte formål og under de forudsætninger, der angives i
denne vejledning.
Kørestolens forventede levetid er 5 år.
Der må IKKE anvendes eller monteres nogen form for
tredjepartskomponenter på kørestolen, medmindre sådanne er
officielt godkendt af Sunrise Medical.
Anvendelsesområde
Indikationer
De mange forskellige monteringsmuligheder samt kørestolens
modulbaserede konstruktion betyder, at denne kørestol er egnet
til brugere, som er gangbesværede eller bevægelseshæmmede
på grund af:
• Lammelse
• Tab af lemmer (benamputering)
• Deformiteter/misdannelser i benene
• Ledkontraktion/ledskader
• Sygdomme som f.eks. hjerte- eller kredsløbsproblemer,
manglende balanceevne eller kakeksi, muskeldystrofi,
hemiplegi. Desuden er kørestolen egnet til ældre personer,
som stadig har kræfter i overkroppen.
Kontraindikationer
Kørestolen må ikke anvendes uden ledsager i tilfælde af:
• Perceptionsforstyrrelse
• Ubalance
• At begge arme mangler, hvis vedkommende ikke understøttes
af en omsorgsperson
• Ledkontraktur eller ledskade på begge arme
• Nedsat siddefunktion
Inden man henviser til en bestemt kørestolsmodel, bør man tage
hensyn til brugerens kropsstørrelse og vægt samt personens
fysiske og psykiske helbred, alder, boligforhold og omgivelser.
1.0 Generelle bemærkninger angående sikkerhed og
kørselsbegrænsninger 19
2.0 Transport 21
3.0 Oversigt 23
4.0 Håndtering 24
5.0 Indstillinger 24
Quick-release-aksler 24
Tippepedal 24
Bremser 24
Fodplade 25
Fodstøtte 25
Nakkestøtte 26
Svinghjul 26
Hulplade 26
Bageste sædehøjde 26
Justerbar ryg polstring 26
Højdejusterbart ryglæn 27
Ryglænsvinkel 27
Forlænger til baghjul 27
Hofteselen 27
Sidestykker 27
Skubbehåndtag 27
Antitipstøtter 28
Sædepolstring 28
Ekstra sædedybde 28
Stokkeholder 28
Bakke 28
Stabiliseringsstang 28
Transithjulene 28
Valgmuligheder - Enhåndsbetjening 28
6.0 Dæk og montering 29
7.0 Fejlsøgning 29
8.0 Vedligeholdelse 29
9.0 Tekniske data 29
10.0 Navnemærkater / Garanti 30
11.0 Tilspændingsmomenter 30

EASY 160i 19
DANSK
1.0 Generelle bemærkninger angående sikkerhed og kørselsbegrænsninger
Kørestolen er udviklet og konstrueret sådan, at den yder
maksimal brugersikkerhed og enten opfylder eller overgår
gældende internationale sikkerhedsstandarder. Ikke desto
mindre kan brugere komme til skade ved forkert brug af
kørestolen. Af sikkerhedsmæssige grunde skal nedenstående
regler overholdes.
Uautoriserede eller ukorrekte tilpasninger eller justeringer øger
risikoen for ulykker. Som kørestolsbruger er du en del af den
daglige trafik på veje og fortove, ligesom alle andre trafikanter.
Derfor vil vi gerne minde dig om, at du dermed skal overholde
alle gældende færdselsregler.
Vær forsigtig, når du anvender kørestolen første gang. Lær
kørestolen at kende.
Følgende bør kontrolleres hver gang, inden kørestolen anvendes:
• Baghjulenes quick-release-aksler
• Velcro på sæde og ryg
• Dæk, dæktryk og bremser.
Inden der foretages justeringer af kørestolen, er det vigtigt, at
man læser det pågældende kapitel i brugervejledningen
Huller i vejen eller ujævne overflader kan forårsage, at
kørestolen tipper, især ved kørsel op eller ned ad bakker. Læn
dig altid forover, når du kører forlæns op over et trin eller op ad
en skråning.
RISIKO!
Man må ALDRIG overskride den maksimale belastning på
140 kg som gælder for brugeren samt eventuelle ting, der
transporteres på kørestolen. Hvis den maksimale belastning
overskrides, kan dette medføre skader på kørestolen samt risiko
for, at du falder ud, at kørestolen vælter, eller at du mister
kontrollen, hvorved du selv og andre kan udsættes for alvorlige
personskader.
Når du færdes i mørke, bør du altid være iført lyst tøj eller tøj
med reflekser, så du bedre kan ses. Sørg for, at reflekserne i
hver side og bag på kørestolen er fuldt synlige. Det anbefales
også, at du monterer en egentlig lygte på kørestolen.
For at undgå, at kørestolen vælter, eller at der opstår andre
farlige situationer, bør du altid øve dig i brugen af den nye
kørestol på en jævn kørselsflade med godt udsyn.
Undgå brug af fodpladerne ved ind- og udstigning af kørestolen.
Fodpladerne bør slås op og svinges så langt ud til siden som
muligt, inden du stiger ud eller ind. Sørg altid for, at kørestolen
holder så tæt som muligt på det sted, hvor du har tænkt dig at
sidde.
Sørg for altid at anvende kørestolen på forsvarlig vis. F.eks. bør
du altid undgå at køre ind mod eller over forhindringer (såsom
trin og kantsten) uden at bremse imens, og du bør ikke lkøre
hjulene hårdt ned i huller, mellemrum o.l.
Bremserne er ikke beregnet til at bremse en kørestol i
bevægelse. De er kun monteret for at sikre, at kørestolen ikke
pludselig begynder at køre af sig selv. Når du stopper på en
ujævn overflade, bør du altid bremse kørestolen for at undgå, at
den kører af sig selv. Slå altid begge bremser til, da kørestolen
ellers kan tippe.
Sørg for at afprøve, hvad der sker, når ændringer af
tyngdepunktet påvirker kørestolens balance, f.eks. op og ned
ad skråninger eller ved kørsel over forhindringer. Dette bør altid
udføres med hjælp fra en erfaren ledsager.
I forbindelse med indstillinger i yderposition (f.eks. hvis
baghjulene sidder så langt fremme som muligt), hvor brugeren
ikke har den rette kropsholdning, risikerer man, at kørestolen
vælter selv på jævne kørselsflader.
Sørg for at læne overkroppen fremad ved kørsel op ad
skråninger og trin.
Sørg for at læne overkroppen tilbage ved kørsel op ad
skråninger og trin. Man må under ingen omstændigheder køre
skråt (diagonalt) op eller ned ad en skråning.
Kørestolen må ikke anvendes på rulletrapper, da dette
medfører risiko for alvorlige personskader, hvis kørestolen
vælter.
Kørestolen må ikke anvendes på skråninger > 10°. Den
maksimale hældningsgrad for sikker kørsel på skråninger er
dynamisk, dvs. den afhænger af kørestolskonfigurationen,
brugerens fysiske evner samt den måde, brugeren kører på.
Eftersom brugerens fysiske evner og måde at køre på er
forskellige fra person til person, kan den maksimale
hældningsgrad for sikker kørsel ikke angives her. Denne
hældningsgrad skal derfor fastslås af brugeren selv med hjælp
fra en ledsager for at undgå, at kørestolen tipper på skråninger.
Det anbefales på det kraftigste, at uerfarne brugere får monteret
antitipstøtter på kørestolen.
Huller i vejen eller ujævne overflader kan forårsage, at
kørestolen tipper, især ved kørsel op eller ned ad bakker.
Kørestolen må ikke anvendes på mudrede eller isglatte
kørselsflader. Kørestolen må ikke anvendes på steder, hvor der
ikke er adgang for fodgængere.
For at undgå skader på hænderne bør man lade være med at
gribe mellem egerne eller mellem baghjulet og bremsen, mens
kørestolen er i bevægelse.
Især ved brug af drivringe i letvægtsmetal er der risiko for, at
man brænder fingrene ved hårde opbremsninger, eller når der
bremses på lange skråninger.
Kørsel på trapper bør kun ske med hjælp fra en ledsager. Der
findes særligt udstyr til hjælp med f.eks. kørsel på ramper eller
af og på kørestolslifte, og dette bør anvendes videst muligt.
Hvis der ikke er egnet udstyr til rådighed, skal kørestolen tippes
bagover og skubbes - men aldrig bæres - hen over
forhindringen (dette kræver 2 ledsagere). For brugere, som
vejer mere end 100 kg, frarådes det, at man anvender denne
manøvre til forcering af trapper o.l.

20 EASY 160i
DANSK
Sørg for, at ledsageren kun holder i kørestolen ved hjælp af de
dele, der sidder forsvarligt fast (dvs. ikke fodstøtterne eller
sidestykkerne).
Når man anvender kørestolslift, skal man sørge for, at
eventuelle påmonterede antitipstøtter er placeret, så de ikke
rager ud over platformen.
Hvis man holder på en ujævn overflade eller ved overførsel til
og fra kørestolen (f.eks. ind og ud af en bil), skal bremserne
altid slås til for at sikre, at kørestolen holder helt stille.
Ved transport i et køretøj udstyret specielt til handicapbrug skal
passagererne for så vidt muligt altid bruge de fastmonterede
sæder og forsvarlige sikkerhedsseler i køretøjet. Det er kun ved
at følge denne metode, at man kan sikre passagerernes bedst
mulige beskyttelse i tilfælde af biluheld. Under forudsætning af,
at der anvendes sikkerhedsudstyr, som forhandles af SUNRISE
MEDICAL, samt et sikkerhedssystem udformet specielt til dette
formål, kan letvægtskørestole anvendes som sæde ved
handicaptransport i særligt indrettede motorkøretøjer.
(Yderligere oplysninger findes i kapitlet "Transport").
Afhængigt af svinghjulenes diameter og indstilling samt
kørestolens tyngdepunkt kan det forekomme, at svinghjulene
begynder at slingre ved høje hastigheder. Dermed risikerer
man, at svinghjulene blokeres, og at kørestolen tipper forover.
Sørg derfor for, at svinghjulene er justeret korrekt (se kapitlet
"Svinghjul"). Det er desuden særligt vigtigt, at man altid sørger
for at bremse og køre med nedsat hastighed under kørsel på
skråninger. Det anbefales desuden, at uerfarne brugere
anvender antitipstøtter.
Antitipstøtter monteres for at forhindre, at kørestolen tipper
bagover, uden at man har kontrol over den. De bør dog under
ingen omstændigheder anvendes i stedet for transithjul eller
ved transport af en passager i en kørestol, hvor baghjulene er
afmonteret.
Når du rækker ud efter noget (hvad enten det befinder sig foran,
ved siden af eller bag ved kørestolen), skal du altid sørge for, at
du ikke læner dig for langt ud, idet en eventuel ændring af
tyngdepunktet medfører risiko for, at kørestolen tipper eller
vælter. Hvis der hænges ekstra vægt (f.eks. en rygsæk el. lign.)
på kørestolens ryglænsrør, kan dette påvirke kørestolens
stabilitet bagtil. Det gælder især, hvis kørestolen anvendes i
kombination med ryglæn med tilbagelæning. Den ekstra vægt
kan få kørestolen til at tippe bagover med risiko for
personskade.
Hvis brugerens ben er amputeret ved låret, skal der anvendes
antitipstøtter.
Se efter, om dæktrykket er korrekt, inden du begynder at køre. I
baghjul bør det være mindst 3,5 bar (350 kPa). Det maksimale
tryk er angivet på dækket. Knæledsbremserne fungerer kun,
hvis der er tilstrækkelig højt dæktryk, og indstillingerne er udført
korrekt (se kapitlet "Bremser").
Hvis sædet og rygpolstringen er beskadiget, skal de udskiftes
med det samme.
Vær ekstra forsigtig i nærheden af åben ild, især glødende
cigaretter. Sædet og rygpolstringen er fremstillet af materialer,
som let kan antændes.
Hvis kørestolen udsættes for direkte sollys gennem længere tid,
kan dens enkelte dele (f.eks. stel, benstøtter, bremser og
sidestykker) blive meget varme (>41°C).
Sørg altid for, at quick-release-akslerne på baghjulene er
indstillet korrekt og forsvarligt fastlåst. Hvis knappen på quick-
release-akslen ikke er trykket ind, kan baghjulet ikke tages af.
ADVARSEL!
Knæledsbremsens funktion såvel som de generelle
køreegenskaber afhænger af dæktrykket. Kørestolen føles
betydeligt lettere og er nemmere at manøvrere, når baghjulene
er pumpet ordentligt op, og der er samme dæktryk i begge hjul.
ADVARSEL!
Sørg for, at der er slidbanemønster nok på alle dækkene!
Husk, at du til enhver tid skal overholde de gældende
færdselsregler, når du færdes i offentlig trafik.
ADVARSEL!
Pas altid på, at du ikke får fingrene i klemme, når du
arbejder med eller justerer kørestolen!
De kørestole, der er vist og beskrevet i denne brugervejledning,
er muligvis ikke nøjagtigt magen til din egen model. Dog er alle
vejledninger stadig fuldt ud relevante uanset de forskellige
detaljer, der måtte være.
Producenten forbeholder sig ret til at ændre enhver form for
vægtangivelser, mål eller andre tekniske data indeholdt i denne
vejledning uden forudgående varsel. Alle tal, mål og kapaciteter
vist i denne vejledning er omtrentlige og udgør altså ikke
tekniske specifikationer.
SUNRISE MEDICAL er godkendt i henhold til ISO 13485, som
bekræfter kvaliteten af vores produkter på alle stadier, fra
udvikling til produktion. Dette produkt opfylder de standarder,
der er angivet i EU-direktiverne. Ekstraudstyr og tilbehør kan
købes mod tillægspris.
Normalt bør enhver form for antitipstøtter, som er monteret på
kørestolen, indstilles forud for forcering af trin o.l., så støtterne
ikke kan komme i kontakt med forhindringen. I modsat fald
risikerer man at komme alvorligt til skade, hvis kørestolen
vælter. Efter forceringen skal antitipstøtterne indstilles, så de
sidder i den rette position igen.
Table of contents
Languages:
Other Quickie Wheelchair manuals

Quickie
Quickie Rumba Manual

Quickie
Quickie Neon Fixed Front User manual

Quickie
Quickie Zippie 7R Guide

Quickie
Quickie Easy 200 Manual

Quickie
Quickie Salsa M User manual

Quickie
Quickie SR 45 User manual

Quickie
Quickie Hula User manual

Quickie
Quickie QM-710 BD User manual

Quickie
Quickie Salsa R2 User manual

Quickie
Quickie Quickie Revolution User manual

Quickie
Quickie 2HP User manual

Quickie
Quickie GT User manual

Quickie
Quickie WheelDrive User manual

Quickie
Quickie 2 User manual

Quickie
Quickie Argon Ti Manual

Quickie
Quickie Helium Manual

Quickie
Quickie QM-710 User manual

Quickie
Quickie M6 User manual

Quickie
Quickie QM-710 User manual

Quickie
Quickie Life R Manual