Quicksilver 88688A25 Manual

88688A25
SINGLE HANDLE
TRIM CONTROL
INSTALLATION,
OPERATION AND
MAINTENANCE
INSTRUCTIONS
NOTICE to INSTALLER
After Completing Installation, These Instruc-
tions Should Be Placed with the Product For
the Owner’s Future Use.
These installation instructions provide complete in-
formation for installing the remote control. Please read
c
them carefully and thoroughly before starting installa-
tion.
24906
Index
Page
Notice to Installer/Owner
........................
2
Maintenance and Replacement Parts
.............
2
Selecting Remote Control Cables
.................
2
Introduction
....................................
3
Installation......................................
3
Remote Control Alteration for Port Installation
....
4
Control Module Linkage
......................
4
Control Handle
...............................
4
Repositioning Control Handle
....................
5
Starboard Side Control Module Cable
Installation
...................................
7
All Outboard Models thru 250 (3 Litre)
...........
7
Shift Cable
...................................
7
Throttle Cable
................................
7
Port Side Control Module Cable Installation
.......
8
All Outboard Models 35 hp thru 220 hp
........
8
Shift Cable
...................................
8
Throttle Cable
................................
8
Required Mounting Clearances...................
9
Locating and Drilling Mounting Area..............
9
Remote Control Mounting.......................
9
Electrical Connections
..........................
10
Operation.
.....................................
11
Printed in U.S.A.
1-
go-812627
l-195

Notice to Installer/Owner
Throughout this publication, and on your motor,
DANGER, WARNINGS and CAUTIONS (accompanied
by the international HAZARD Symbol
A
)
may be
used to alert the installer/ user to special instructions
concerning a particular service or operation that may
be hazardous if performed incorrectly or carelessly.
OBSERVE THEM CAREFULLY!
These “Safety Alerts” alone cannot eliminate the
hazards that they signal. Strict compliance to these
special instructions when performing the service, plus
“common sense” operation, are major accident pre-
vention measures.
ADANGER
DANGER
-
Immediate hazards which WILL result in
severe personal injury or death.
AWARNING
WARNING
-
Hazards or unsafe practices which
COULD result in severe personal injury or death.
ACAUTION
CAUTION
-
Hazards or unsafe practices which could
result minor personal injury or product or property
damage.
IMPORTANT:
-
Indicates information or instructions
that are necessary for proper operation and/or mainte-
nance.
Maintenance and
Replacement Parts
Maintenance and safety instructions are owner’s re-
sponsibility and must be performed at intervals speci-
fied, following:
Normal Service
-
Every 50 hrs. of operation or 60 days
(whichever comes first)
*Severe Service
-
Every 25 hrs. of operation or 30 days
(whichever comes first)
*Operation in a salt water area is considered “Severe
Service.”
1. Check fasteners, which secure remote control to
boat, to be sure that they are tight.
2.
Check set screws, which secure control handles to
remote control, to ensure they are torqued to 60 lb.
in. (7 N.m.)
3. Check electrical connections to be sure that they
are tight, and that harness is properly secured and
kept away from bilge water.
4. Inspection and lubrication of remote control
assembly should be performed once each year (by
your authorized dealer), or whenever remote con-
trol is disassembled, or if control operating effort
has increased. Lubricate with Quicksilver 2-4-C
Marine Lubricant or equivalent.
5.
Quicksilver throttle and shift control cables recom-
mended for use in this remote control.
Selecting Remote Control
Cables
Refer to outboard “Quicksilver Dealers’ Guide” to
determine correct length of control cables.
IMPORTANT: Remote control cables MUST BE THE
CORRECT LENGTH, sharp bends on too-short cables
result in “kinks”; too-long cables require unnecessary
bends and/or loops. Both conditions place extra stress
on the cables.
IMPORTANT: Check throttle and shift cables BEFORE
installing in control modules to ensure that set screws
in cable end guides are tight. Torque cable end guide
set screws to 20 to 25 Ibs. in.
(2.3
to
2.8
N.m.)
Shift Cable/Throttle Cable Lubrication Points
Use
Quicksilver 2-4-C Marine Lubricant.
I/
I
\
\
---
22005
a
-
Remote Control End
b
-
Engine End
c
-
Adjusting Barrel
d
-
Lubricant
-2-

Introduction
This console mount control provides complete one
hand operation of the shift and throttle control. The
control is equipped with a neutral start switch which
must be connected to prevent accidental in-gear start-
ing. The shift and throttle cables are not supplied with
control; order cables separately after position of con-
trol is determined.
Quicksilver throttle and shift control cables are recom-
mended for use in this remote control.
These installation instructions provide complete in-
formation for installing the remote control. Please read
them carefully and thoroughly before starting installa-
tion.
Installation
1. Determine position of remote control. Refer to
“Mounting Remote Control”.
IMPORTANT: Control mechanism will have to be
changed if control will be on port side. Refer to
“Remote Control Alteration”.
AWARNING
If control handle is removed and reinstalled for any
reason. The set screw in handle must be retorqued to
60 lb. in. (7 N.m). Failure to tighten screw securely
could allow control handle to disengage with subse-
quent loss of throttle and shift control.
2.
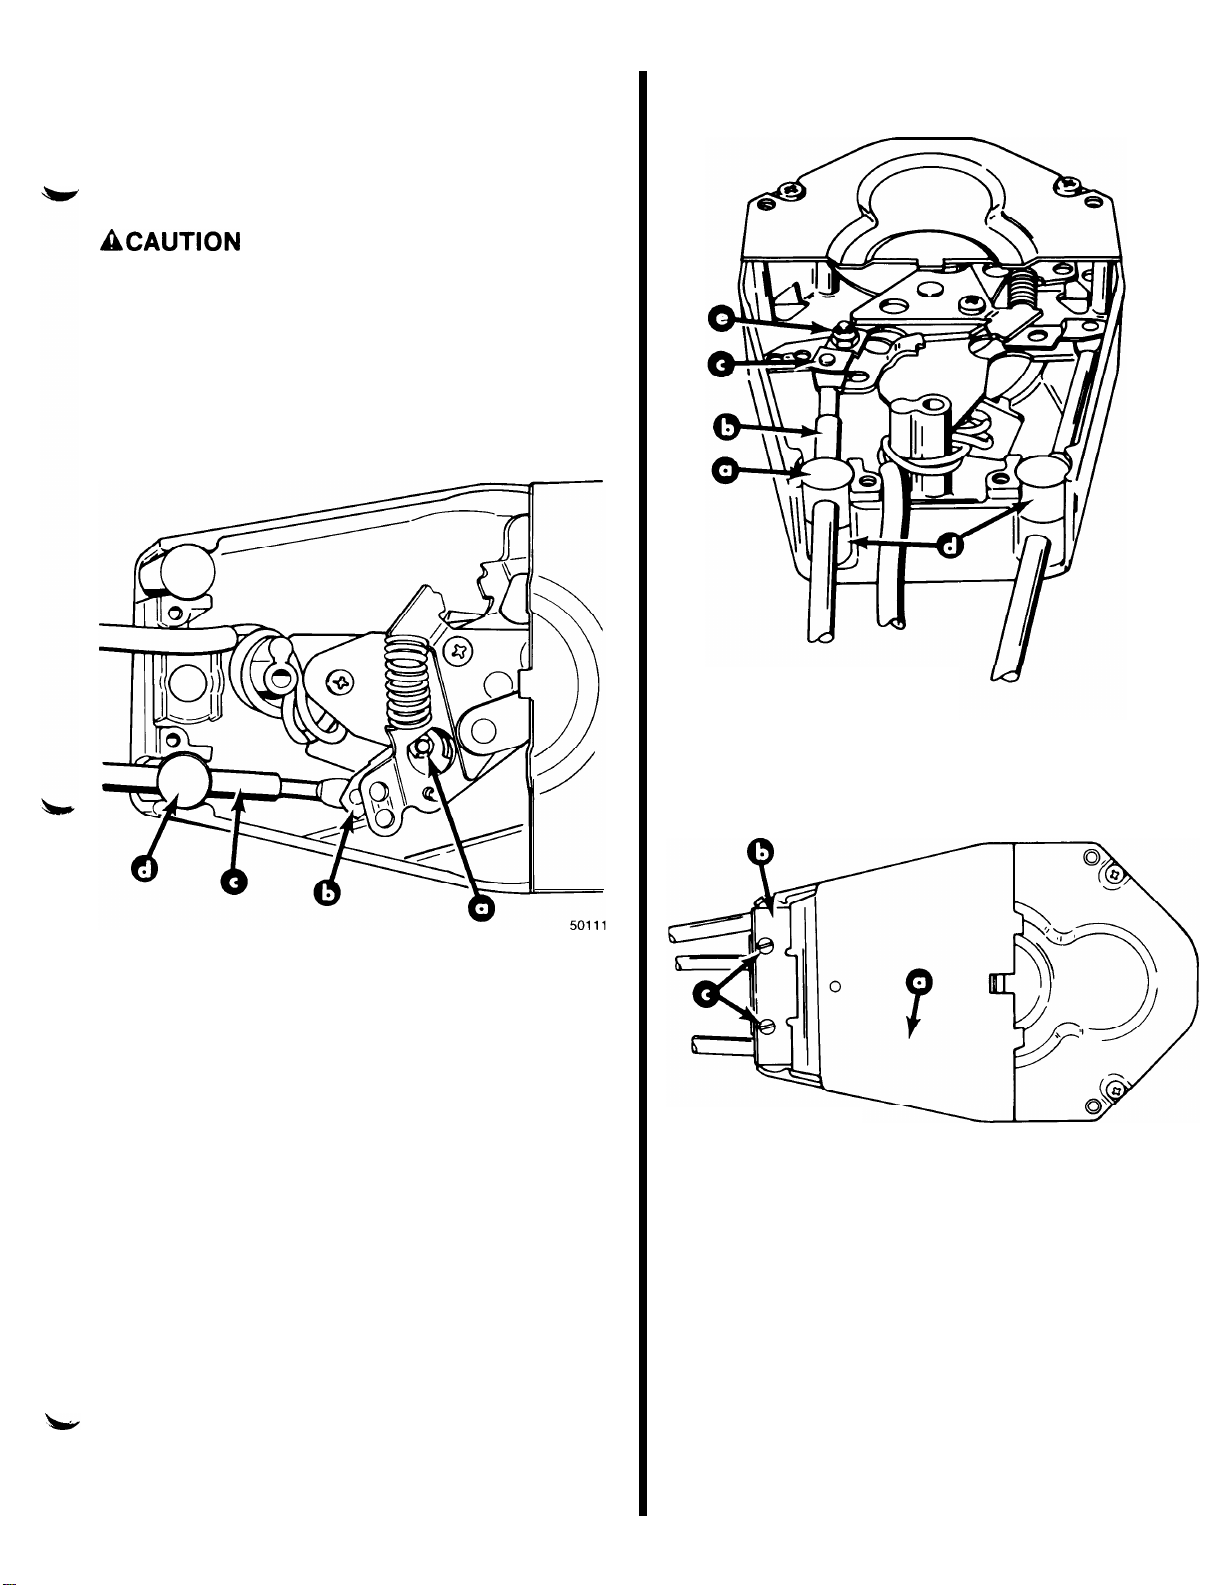
Install control cables to remote control. Refer to
correct cable installation procedure in this manual.
Note that cable installation is different, depending
on which side the control will be installed.
On some boat installations, it may be helpful to first
make the cutout for remote control (using the at-
tached template) and routing the control cables
thru the boat before installing cables to control.
Mount the remote control following instructions.
Make remote control wiring connections following
“Wiring Diagram”.
Install and adjust shift and throttle cables to power
package following instructions which accompany
the power package or refer to the Product Service
Manual.
Final Checks and Adjustments
a.
Re-check tightness of control handle set screw.
Set screw should be torqued to 60 lb. in. (7 N.m).
b. Before remote control is securely fastened,
make sure parts are in place. Check to see that
control cables are routed correctly.
ACAUTION
Do not try to shift remote control into “Reverse” on
outboard installations when outboard is not running.
Forcing the shift mechanism into reverse may damage
the mechanism.
C.
d.
e.
Operate control handle several times (see “Cau-
tion” preceding). Adjust control handle friction
adjustment screw to desired tension. Any bind-
ing or stiffness in the operation of the control
handle is usually caused by the following.
1
-
Bends or tension on control cables, close to
the control.
2
-
Excessive number of bends in cables.
3
-
Bends are too small in cables.
4
-
Tight engine linkage.
Adjust the control handle detent adjustment
screw to desired tension.
Check operation of neutral start switch. Engine
must only be able to start when control handle is
in neutral position. Make sure water intake in
lower unit is in water when starting engine.

Remote Control Alteration
for Port Installation
Throttle link and throttle spring must be changed when
control handle will be positioned on the right side of
remote control.
1.
2.
3.
Remove remote control module back cover.
Move control handle to position shown.
Reposition throttle link and spring to position
shown.
a
-
Control Handle
b
-
Throttle Link
c
-
Spring
ACAUTION
Spring is under pressure and may eject suddenly.
4.
Reinstall back cover with 2 screws. Torque screws
to 60 lb. in.
(7
N.m).
a
-
Throttle Link
b
-
Spring
Control Handle
Repositioning Control Handle Trim Switch for port
control installation.
1. Pry bezel from handle, pull trim switch
switch
180”
and install back into handle.
I
24982
out, turn
a
-
Bezel
b
-
Trim Switch
2. Discard bezel removed and install new bezel (from
parts bag).
Starboard Control
Port Control
Mounting Mounting
24906
25023
-4-

Repositioning Control Handle
NOTE: Repositioning of control handle (on control
shaft) is necessary only if the standard neutral position
of control handle is undesirable.
IMPORTANT:
When repositioning control handle (on
control shaft), position handle so that full forward and
reverse can be achieved.
AWARNING
Before repositioning control handle on control shaft,
be sure to disconnect the trim wire connector.
1. Disconnect the trim connection from the ignition
key switch connection.
ull
2
f!!
.
a
-
Trim Connection
b
-
Ignition Key Switch Connection
2.
Pry trim switch retainer/cover from handle.
a
-
Retainer/Cover
24980
3.
Pull trim switch out from handle and remove wires
from switch.
4.
Pull throttle only button from control shaft.
24906
a
-
Throttle Only Button
5. Position control handle to allow access to set
screw, loosen set screw.
6. Return control handle to neutral position and
remove handle from control shaft.
-5-

7. Rotate trim wires and trim wire rotator (on control
shaft) to the position that neutral is desired when
control handle is reinstalled.
50092
a
-
Trim Wires and Rotator
b
-
Spacer Disc
c
-
Standard Position of Trim Wires and Rotator
d
-
If Trim Wires and Rotator Are Moved to This Angle (or Any
Other Angle) from the Standard Position, the Control Handle
Must Also Be Installed (on Control Shaft) in the Same Angle
(thus Neutral is Changed to This Angie from Standard Neutral
Position)
8. Reinstall handle to control shaft (make certain full
forward and full reverse can be achieved) at desired
location.
a
-
Trim Wires
b
-
Control Handle
AWARNING
Control handle set screw must be torqued to specifica-
tion. Failure to tighten set screws securely could allow
control handle to disengage, with subsequent loss of
throttle shift control.
9. While holding in on hub of control handle, move
handle until access to set screw is achieved. Torque
control handle set screw to 60 lb. in. (7 N.m).
10. Push the “Throttle-Only” button onto control shaft.
\
50063
11.
Reconnect trim wires to terminals on trim switch.
50091
12. Place trim switch into handle and install trim switch
retainer/cover onto handle.
13.
Reconnect trim wire connection to ignition switch
connection.
-6-

Starboard Side Control
Module Cable Installation
All Outboard
Models
thru
250 (3
Litre)
ACAUTION
Before tightening cable fastener locknut, be sure that
pin on end of cable fastener is completely thru cable
end and shift/throttle lever. A pin, that is partially thru
cable and lever, may cause fastener to bend when
locknut is tightened.
Shift Cable
a
-
Locknut (Cable Fastener)
b
-
Cable Fastener
c
-
Shift Cable
d
-
Cable Anchor Barrel
Torque shift cable fastener locknut to 20 to 25 lb. in.
(2.3 to 2.8 N.m).
Throttle Cable
a
-
Throttle Anchor Barrel
b
-
Throttle Cable
c
-
Cable Fastener
50030
d
-
Spacers (From Parts Bag)
e
-
Cable Fastener Locknut
Torque throttle cable fastener locknut to 20 to 25 Ibs.
in. (2.3 to 2.8 N.m.)
a
-
Access Cover
b
-
Cable
Retainer
c
-
Screws
50030
Position access cover and cable retainer onto back of
control and secure both with 2 screws. Torque screws
to 60 lb. in. (7 N.m).
-7-

Port Side Control
Module Cable Installation
All Outboard Models thru 250 (3 Litre)
ACAUTION
Before tightening cable fastener locknut, be sure that
pin on end of cable fastener is completely thru cable
end and shift/throttle lever. A pin, that is partially thru
cable and lever, may cause fastener to bend when
locknut is tightened.
Shift Cable
a
-
Cable Fastener Locknut
b
-
Cable Fastener
c
-
Shift Cable
d
-
Cable Anchor Barrel
Torque cable fastener locknut to 20 to 25 lb. in.
(2.3-2.8 N.m).
Throttle Cable
50030
a
-
Cable Fastener Locknut
b
-
Cable Fastener
c
-
Throttle Lever
d
-
Spacer (From Parts Bag)
e
-
Throttle Cable
f
-
Cable Anchor Barrel
Torque cable fastener locknut to 20 to 25 lb. in.
(2.3-2.8 N.m).
a
-
Screws
b
-
Cable Retainer
c
-
Access Cover
Position access cover and cable retainer onto back of
control and secure both with 2 screws. Torque screws
to 60 lb. in. (7 N.m).
-8-

Required Mounting Clearance
(Metric: 1” = 25.4mm)
I/
25067
IMPORTANT:
The
control
cables
should extend
straight
downward for
at
Iea~t
3
11.
(lm) betoro bendlng, and cable bends should have
aI
least
a
12”
(30.4cm)
radius.
Thls will prevent blndlng of cables.
Locating and Drilling
Mounting Area
ACAUTION
Area directly under control must be free of obstruc-
tions (bulkhead, braces, etc.). Cables always must pro-
trude from rear of control, extending straight-down
and parallel to each other. Radius (at point where
cables are routed toward stern of boat) must not be less
than 12”
(30.5cm).
This will prevent placing a load or
bind on control cables that would result in hard shifting
or binding throttle action.
Locate area where control will be mounted in boat.
Be sure to allow sufficient clearance for control
handle when in full forward and full reverse posi-
tion.
Place Template (provided on last page) over area
where control is to be mounted.
Cut and drill mounting area as indicated on tem-
plate.
Remote Control Mounting
ACAUTION
This trim control can be connected only to Power
Trims that are equipped with a 2-solenoid trim pump. If
Power Trim is equipped with only one solenoid, a Trim
Solenoid Kit must be purchased and installed on
Power Trim pump.
i
1. Insert
wellnut
fasteners into dr
flange against the outer surface.
NOTE: It may be helpful to thread a
into fastener when inserting fastener
Mounting Screw
111)
Mounting Surface
I
lled
holes with
mounting screw
into drilled hole.
Wellnut
-9=F
2. Install mounting brackets on remote control with
two
2-1/4”
(57mm) long screws and locknuts, as
shown.
50129
a
-
Mounting Brackets
b
-
Screws
c
-
Locknuts
d
-
Protective Sleeve
e
-
Wiring Harness
3.
Make sure wiring harness and protective sleeve are
installed as shown.
ACAUTI~N
Protective sleeve must be positioned over the wires
and behind the mounting bracket, as shown, to prevent
wires from being pinched or cut by the mounting
bracket.
-9-

Route control cables and wiring harnesses thru
mounting base, then place remote control into posi-
tion on mounting base.
I
50128
Secure remote control to mounting surface with
four
1-1/2”
(38mm) long screws, tighten securely.
50129
6. Install cover on remote control by snapping into
place.
Electrical Connections
AWARNING
Failure to connect neutral start safety switch leads
properly could allow engine to start while in gear. If
engine starts while in gear, immediate boat movement
and a hazard to unseated occupants of boat or persons
and property outside of boat may result.
res
Together
with
Hex Nuts; Apply
rene to Connec-
de Rubber Sleeve
over Each Connection
24980
a
-
Yellow/Red from Key/Choke Switch
b
-
Yellow/Red from Engine Remote Wiring
c
-
Yellow/Red Neutral Safety Start Switch from Remote Control
IMPORTANT: When routing neutral start safety switch
harness, secure each harness every 18” (45.7cm). Be
sure that wiring does not rub or get pinched and that it
does not come in contact with water.

Operation
1.
2.
Control Handle:
Features full gear shift and throttle.
Shift into gear with a firm, quick motion. Do not
ease gears into or out of engagement. Approxi-
mately the first 40 degrees of control handle travel
(from neutral position) shifts the gears, the remain-
ing travel of the control handle advances throttle.
Throttle Only Button:
Allows engine throttle ad-
vancement without shifting engine. This is done by
disengaging the shift mechanism from the control
handle. Throttle-only button can be depressed only
when control handle is in neutral, and should be
used only to assist in starting the engine. Refer to
Operation and Maintenance Manual for correct
throttle setting for starting the engine.
3.
Control Handle Detent Tension Adjustment Screw:
Increases or decreases the tension on the control
handle detent. Turn detent screw in (clockwise) to
increase tension on detent.
4.
Control Handle Friction Adjustment Screw:
Adjust
control handle tension by turning adjustment screw
in (clockwise) to increase tension; turn screw out
(counterclockwise) to decrease tension. Adjust to
tension desired.
5. Trim/Tilt Switch:
Push toward “UP” to trim power
package out or push toward “DOWN” to trim in.
25023
11
ACAUTION
Check that water level is above water intake ports.
(Should water level fall below water intake ports, dam-
age from overheating or water pump impeller damage
could occur.)
NOTE: If the trim switch remains pushed toward the
“DOWN” position, after unit reaches its end of travel,
an overload cut-out switch will open and pump motor
will stop. To prevent cut-out switch from opening, it is
recommended that trim switch be released as soon as
unit reaches end of travel. If cut-out switch should
open, do not depress switch or button for approxi-
mately one minute. After this period of time, cut-out
switch will close (reset itself) and pump again may be
operated.

Template for Dual and Single
Console Controls
Centerline for Sing
r-
I
I
I
c
t
I
I
I
I
t
-
I
I
4
I
I
t
I
4
le
Control Outline of Remote Control Cover for Dual Control
-----
5-
f
-*
Y
3/8”Dia. for Dual Control
3/8”
(9.53mm)
Dia. for Single Control
Outline of Remote Control Cover for Single Control
1/4”
(.25”or 6.35mm) Dia. for Single Control
-
L__’
-_
-t
Centerline for Dual Control
ACAUTI~N
I
1/4”
Dia. for Dual Control
Area (located directly under mounting panel) must be free from obstructions
and must allow cables to form a gradual bend when routed toward stern of
boat.
-13-
Table of contents
Popular Marine Equipment manuals by other brands

True blue power
True blue power USBT102 Series Installation manual and operating instructions

MAP-Tech
MAP-Tech MAP Pilot installation manual

Lofrans
Lofrans PROJECT 2000 USA instruction manual

greenmarine
greenmarine AWM-1510 user manual

Rosslare
Rosslare BL-D40 instruction manual

Hochiki
Hochiki YBO-BS installation instructions

Lake Lite
Lake Lite Solar Marine Lite LL-SML Series manual

Cetrek
Cetrek Propilot 725 Installation & servicing manual

Autocall
Autocall A4098-5217 installation instructions

EMS
EMS FireCell FC-171-001 installation guide

Standard Horizon
Standard Horizon DS35 owner's manual

Incite Fire
Incite Fire HFW-SIM-01-AS manual