manuals.online logo
Brands
  1. Home
  2. •
  3. Brands
  4. •
  5. Quoizel
  6. •
  7. Outdoor Light
  8. •
  9. Quoizel SNN8409K Mounting instructions

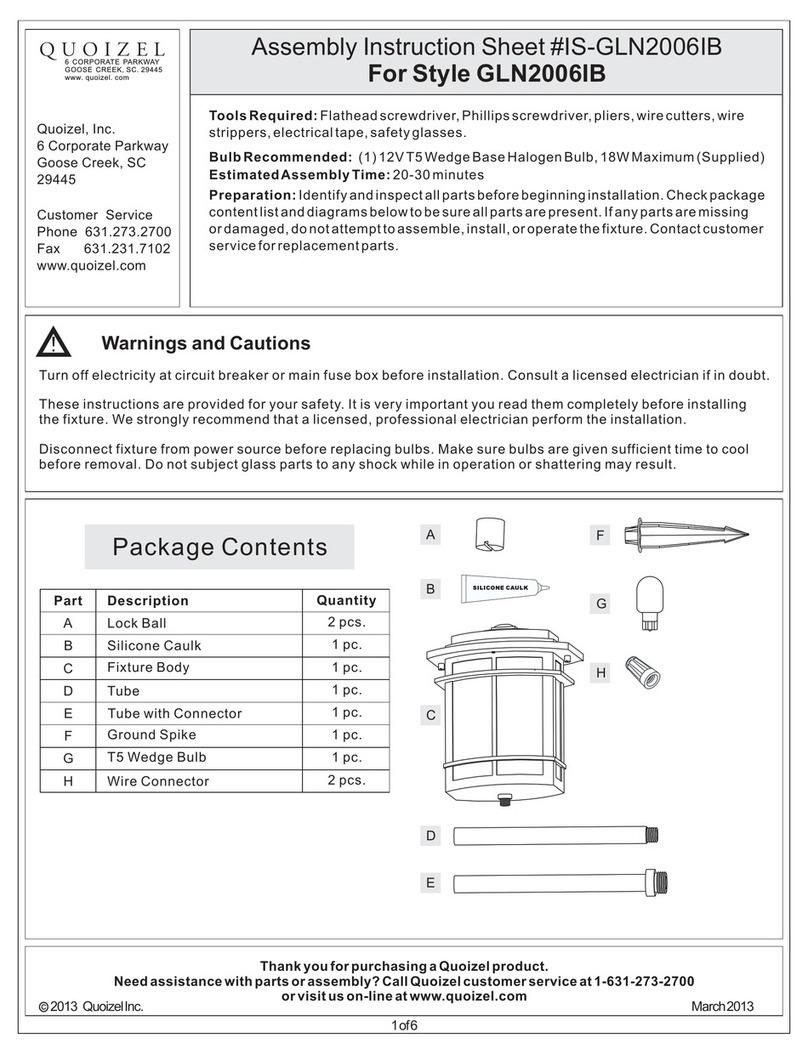
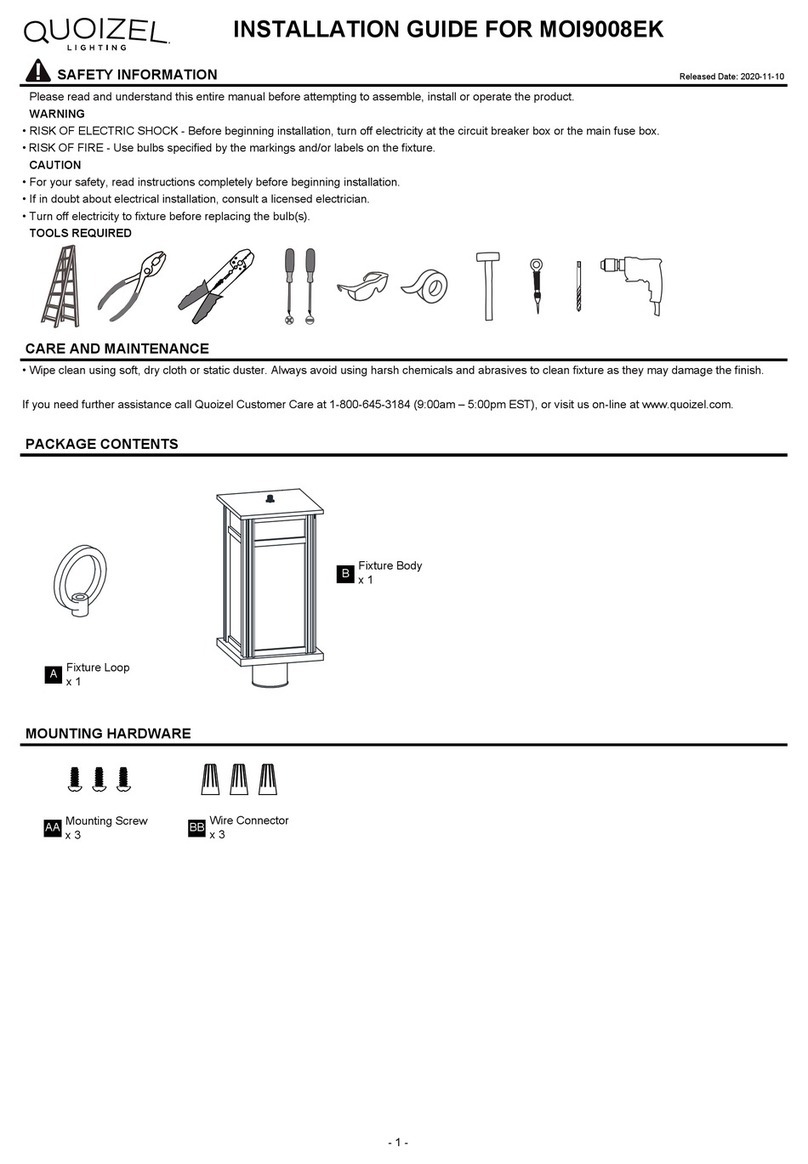
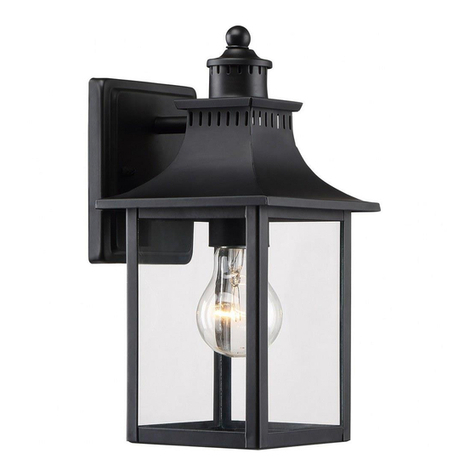
Quoizel SNN8409K Mounting instructions

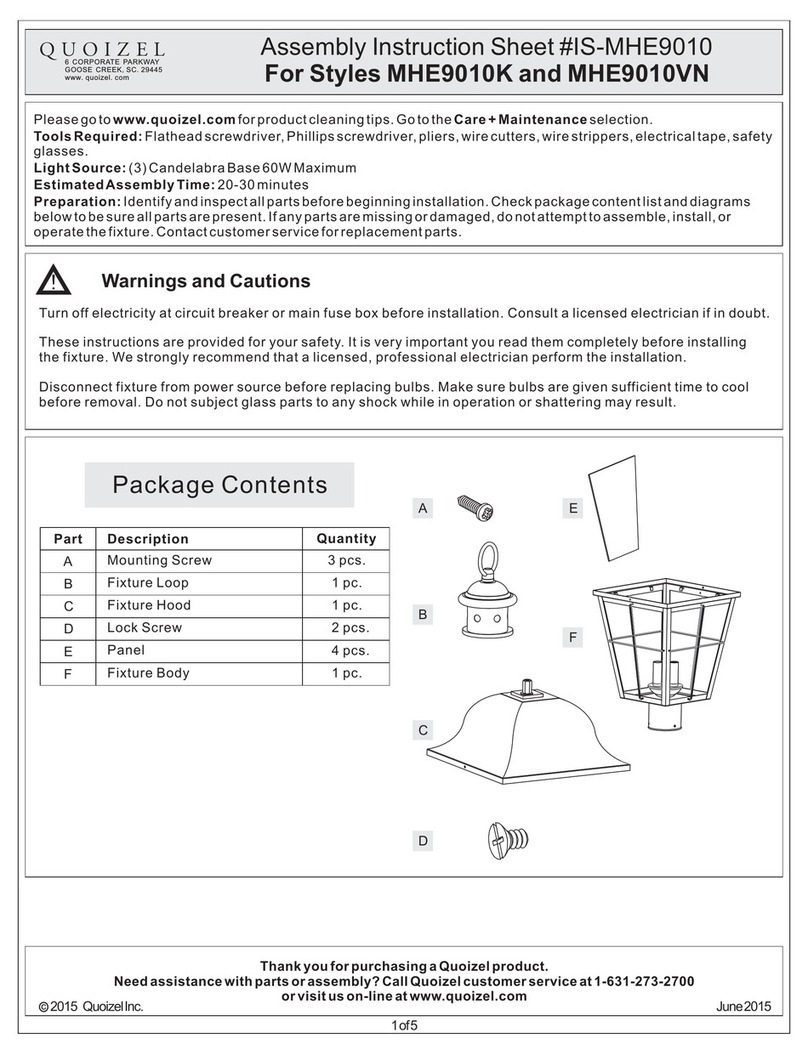
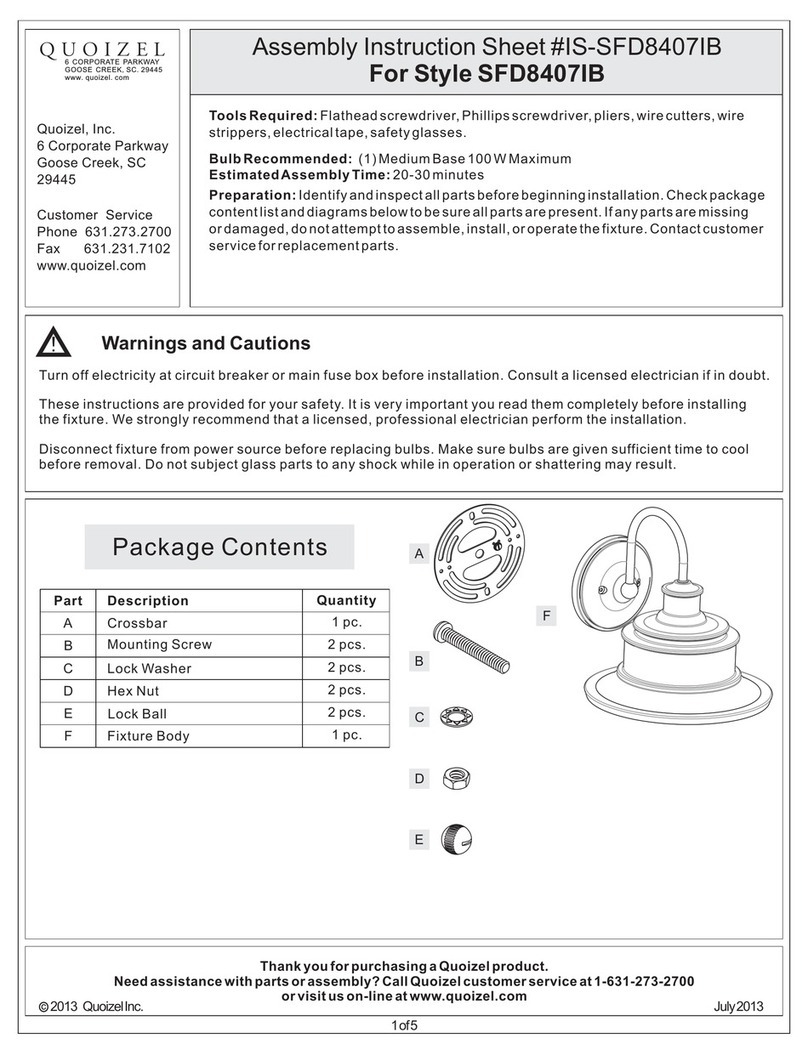
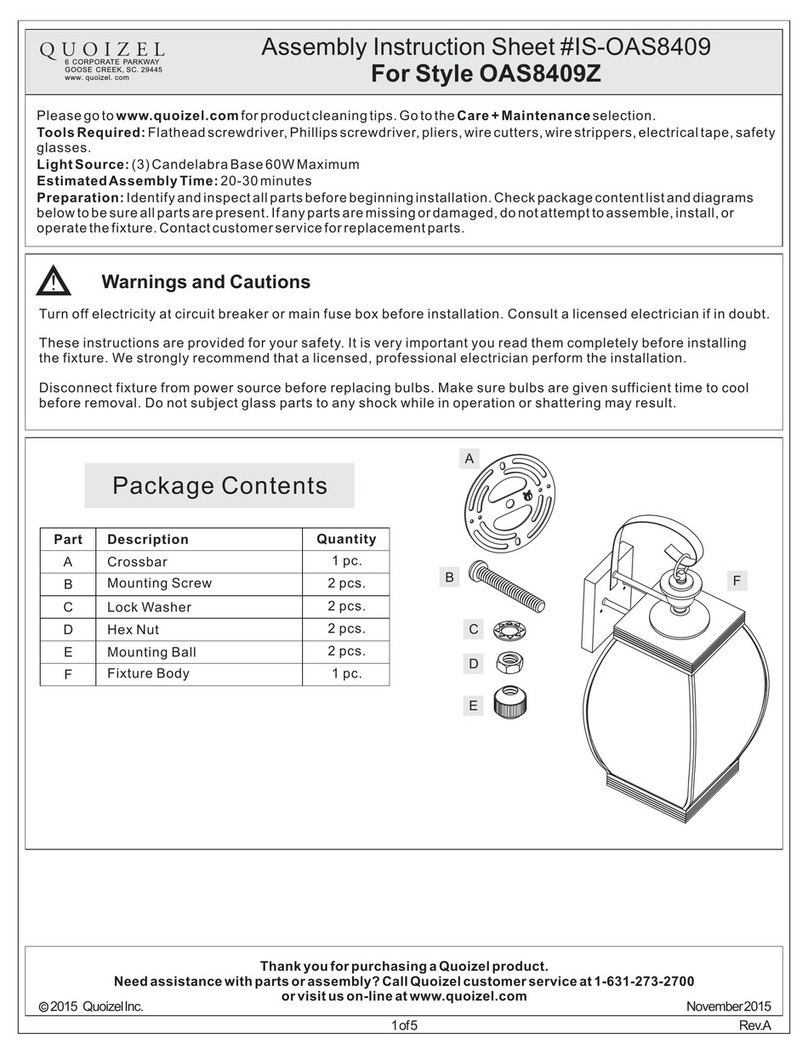
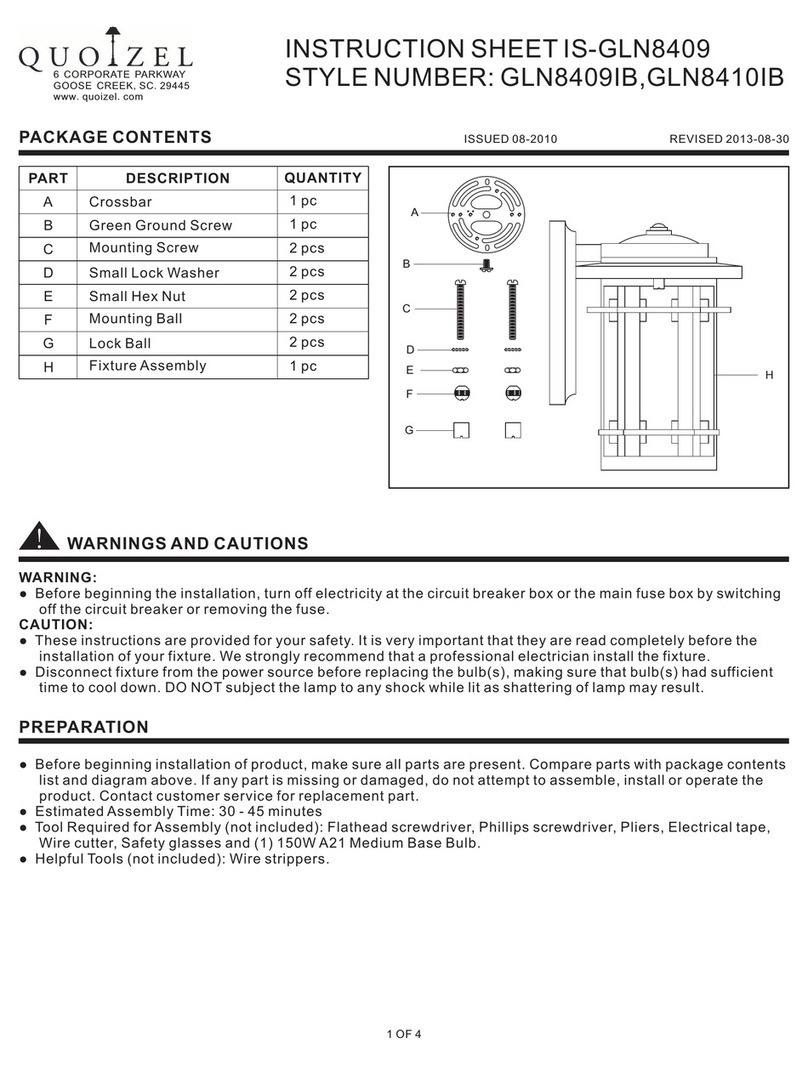
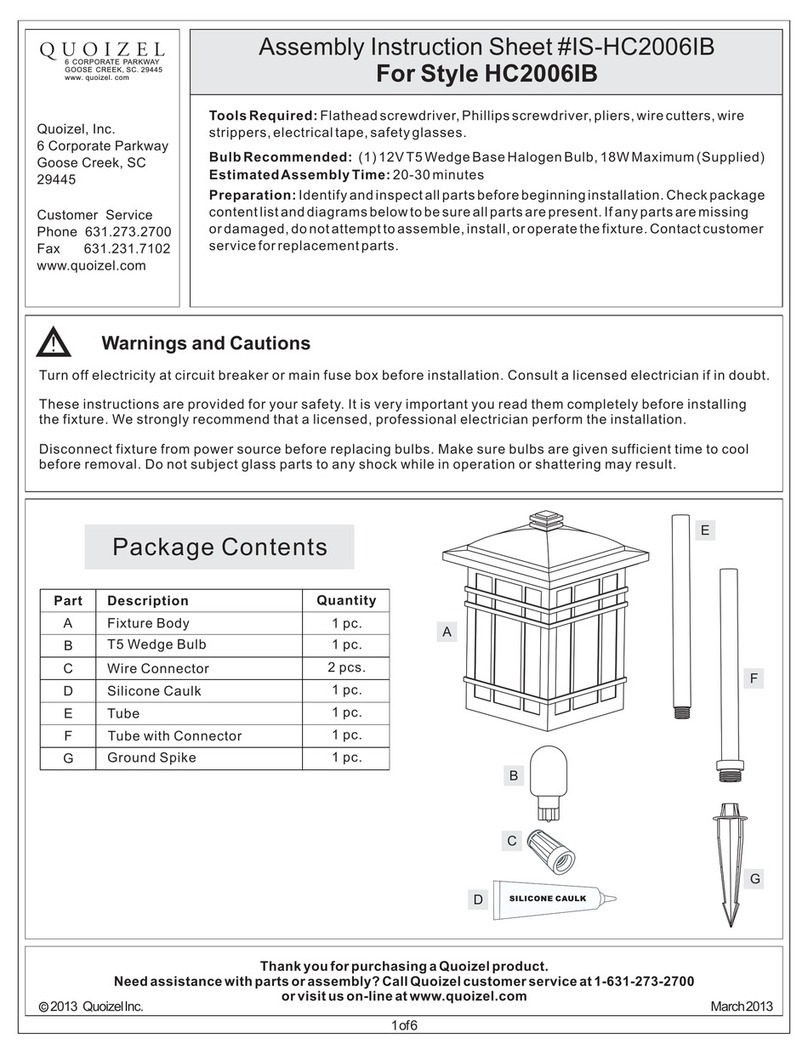
Part Description Quantity
A Crossbar 1pc.
2 pcs.
2 pcs.
2 pcs.
B
C
D
E
F
Hex Nut
Lock Washer
Package Contents
Quoizel, Inc.
6 Corporate Parkway
Goose Creek, SC
29445
Customer Service
Phone 631.273.2700
Fax 631.231.7102
www.quoizel.com
Warnings and Cautions
Turn off electricity at circuit breaker or main fuse box before installation. Consult a licensed electrician if in doubt.
These instructions are provided for your safety. It is very important you read them completely before installing
the fixture. We strongly recommend that a licensed, professional electrician perform the installation.
Disconnect fixture from power source before replacing bulbs. Make sure bulbs are given sufficient time to cool
before removal. Do not subject glass parts to any shock while in operation or shattering may result.
Thank you for purchasing a Quoizel product.
Need assistance with parts or assembly? Call Quoizel customer service at 1-631-273-2700
or visit us on-line at www.quoizel.com
A
B
C
D
E
Mounting Screw
Assembly Instruction Sheet #IS-SNN8409K
For Style SNN8409K
1of6
ToolsRequired:Flatheadscrewdriver, Phillips screwdriver,pliers,wirecutters,wire
strippers,electricaltape,safetyglasses.
EstimatedAssemblyTime:20-30 minutes
Preparation:Identifyandinspectallpartsbeforebeginninginstallation.Checkpackage
contentlistanddiagramsbelowtobesureallpartsarepresent.Ifanypartsaremissing
ordamaged,donotattempttoassemble,install,oroperatethefixture.Contactcustomer
serviceforreplacementparts.
6 CORPORATE PARKWAY
GOOSE CREEK SC 29445
www quoizel com
,.
..
F
1pc.
2 pcs.
Lock Ball
Fixture Body
2014 QuoizelInc. January2014
BulbRecommended: (1)MediumBase100WMaximum
SNN8409K
2of6
FINISH: MYSTIC BLACK
1
PART NUMBER
NOTE: ALL DIMENSIONS ARE ROUNDED UP TO THE NEAREST 1/2"
REPLACEMENT PART DESCRIPTION REQ.
NO.
(1)100W Medium
Base Bulb
(Not Supplied)
GND
2.4mm
13Ga
QUOIZEL R
10.5”
6”
8”
15”
9.5”
5”
Thank you for purchasing a Quoizel product.
Need assistance with parts or assembly? Call Quoizel customer service at 1-631-273-2700
or visit us on-line at www.quoizel.com
3of6
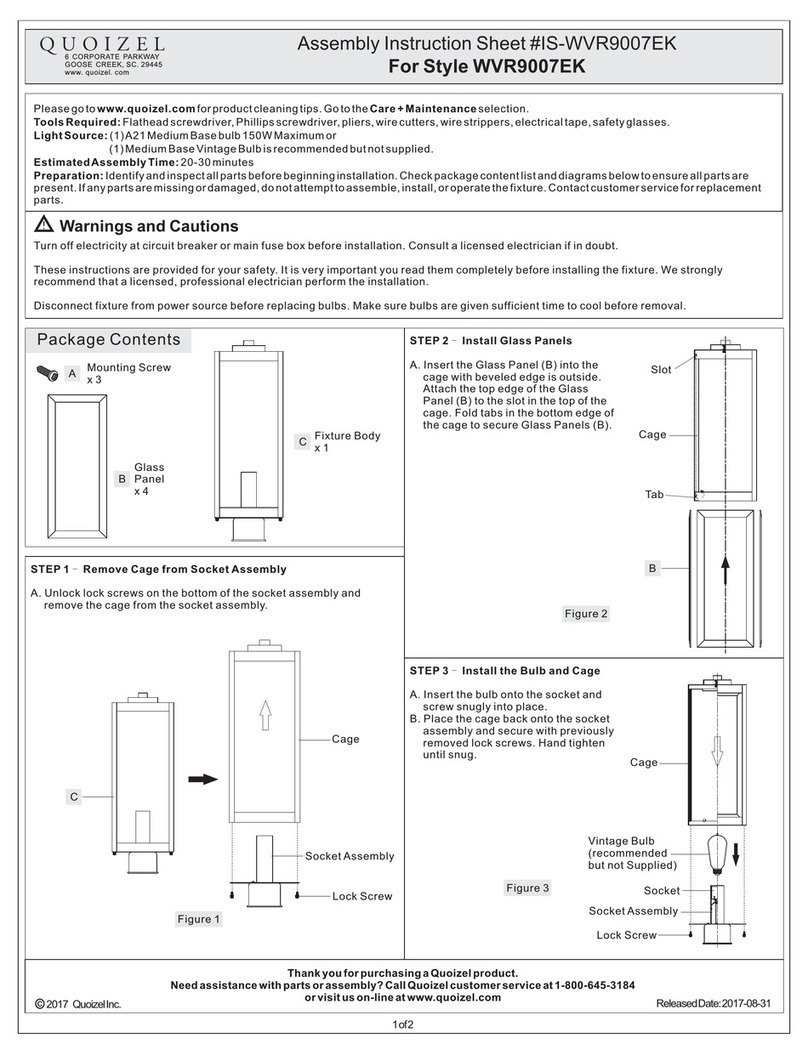
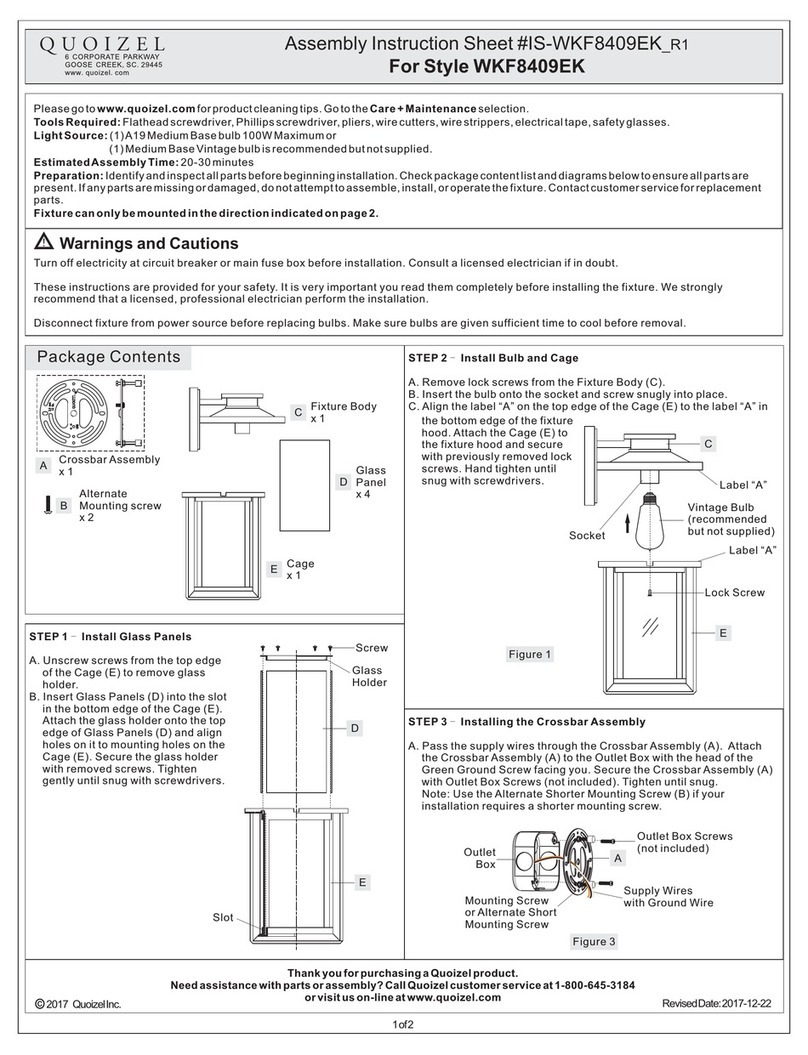
STEP 2 -Attach Crossbar to Outlet Box
A. Attach the Crossbar (A) to Outlet Box and secure by
threading Outlet Box Screws (not supplied) into the
Mounting Holes on the Outlet Box. Tighten until snug.
Crossbar
Outlet
Box
Outlet Box
Screw
Mounting
Hole
Figure 2
Assembly Instruction Sheet #IS-SNN8409K
For Style SNN8409K
Figure 1
Crossbar
Mounting
Screw
Lock Washer
Hex Nut
Backplate
STEP 1 -Attach Mounting Screws, Lock
Washers and Hex Nuts to Crossbar
A. Line up a set of holes on the Crossbar (A) and Holes on
the Backplate of the Fixture Body (F).
B. Thread Mounting Screws (B) into the holes on the
Crossbar (A), pass Lock Washers (C) and thread Hex
Nut (D) onto the Mounting Screws (B). Hand tighten
until snug.
6 CORPORATE PARKWAY
GOOSE CREEK SC 29445
www quoizel com
,.
..
Fixture
Body
2014 QuoizelInc. January2014
Thank you for purchasing a Quoizel product.
Need assistance with parts or assembly? Call Quoizel customer service at 1-631-273-2700
or visit us on-line at www.quoizel.com
4of6
Assembly Instruction Sheet #IS-SNN8409K
For Style SNN8409K
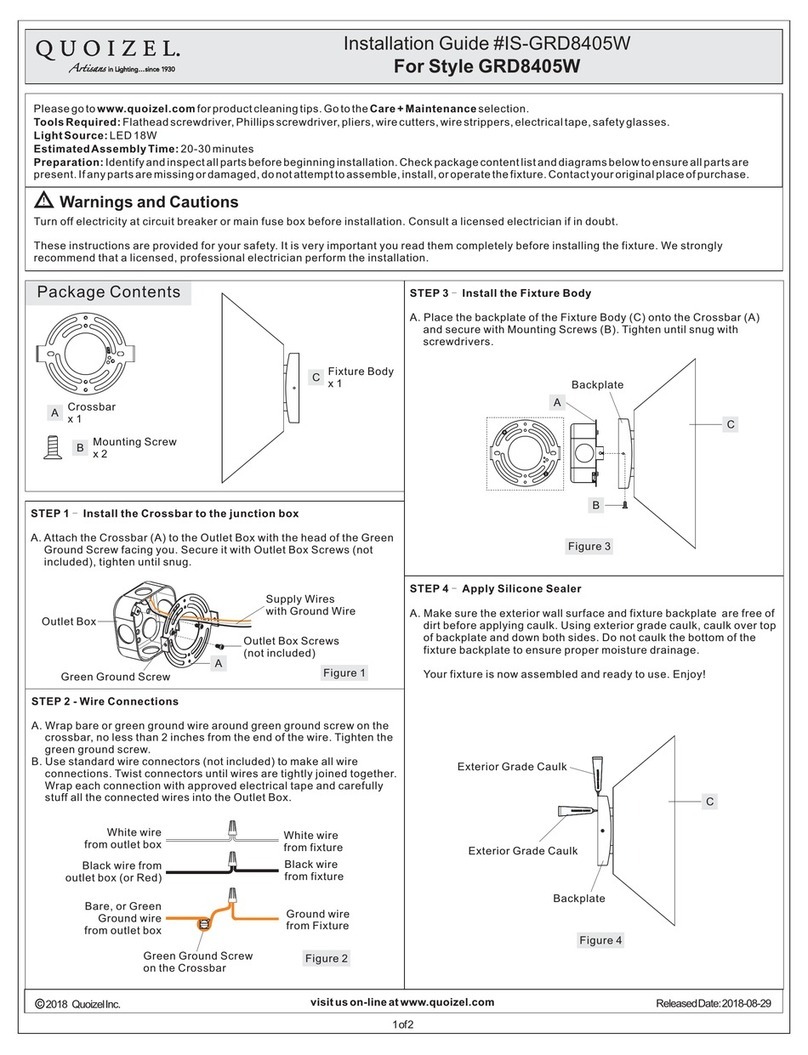
STEP 3 Make Wire Connections-
A. Use standard wire connectors to make all wire
connections. (Connectors are not included with fixture.)
Strip and prepare wire ends according to instructions
supplied with connectors.
B. Connect White Supply Wire from the Outlet Box to White
Wire from fixture.
C. Connect Black (or Red) Supply Wire from the Outlet Box
to Black Wire from fixture.
D. Connect Ground Wire from the Outlet Box to Ground
Wire from fixture.
E. Twist connectors until wires are tightly joined together.
F. Wrap each connection with approved electrical tape and
carefully stuff all the connected wires into the Outlet Box.
Figure 4
White wire from supply White wire from fixture
Black wire from supply
(or Red)
Black wire from fixture
Ground wire from supply Ground wire from fixture
Figure 5
6 CORPORATE PARKWAY
GOOSE CREEK SC 29445
www quoizel com
,.
..
Figure 3
Mounting
Screw
Lock Ball
Backplate
Fixture Body
2014 QuoizelInc. January2014
STEP 4 -Attach Fixture Body to Mounting
Screw
A. Place the Backplate of the Fixture Body (F) over the
Mounting Screws (B). Place caulk (not supplied) into
threads of Mounting Balls (E) and thread them onto the
Mounting Screws (B). Hand tighten until snug.
Thank you for purchasing a Quoizel product.
Need assistance with parts or assembly? Call Quoizel customer service at 1-631-273-2700
or visit us on-line at www.quoizel.com
5of6
Assembly Instruction Sheet #IS-SNN8409K
For Style SNN8409K
6 CORPORATE PARKWAY
GOOSE CREEK SC 29445
www quoizel com
,.
..
2014 QuoizelInc. January2014
Figure 6
Bulb
Socket
STEP 5 -Install Bulb
A. This fixture uses standard bulb with a medium screw base.
Maximum 100 watts.
B. Insert bulb and screw snugly into place.
STEP 6 Apply Silicone Sealer-
A. Make sure exterior wall surface and fixture backplate
are free of dirt before applying caulk. Using exterior
grade caulk, caulk over top of backplate and down
other side. Do not caulk bottom of fixture backplate to
ensure proper moisture drainage.
Your fixture is now assembled and ready to use.
Enjoy!
Exterior
Grade Caulk
Outdoor
Fixture
Backplate
Exterior
Wall Surface
Figure 7
Thank you for purchasing a Quoizel product.
Need assistance with parts or assembly? Call Quoizel customer service at 1-631-273-2700
or visit us on-line at www.quoizel.com
6of6
Assembly Instruction Sheet #IS-SNN8409K
For Style SNN8409K
6 CORPORATE PARKWAY
GOOSE CREEK SC 29445
www quoizel com
,.
..
2014 QuoizelInc. January2014
STEP 7 Remove the Cage from Fixture Hood-
A. By unscrewing the Lock Screws, remove the Cage from the
Fixture Hood.
REPLACE GLASS PANELS
Figure 9
Glass Panel
STEP 8 Replace Glass Panels-
A. Unscrew the Lock Screws on the top of the Cage. Remove
the Glass Holder from the Cage.
B. Remove the broken Glass Panel inside of the Cage and
insert the replacement Glass Panel.
C. Place the Glass Holder back onto the top of the Cage and
secure with Lock Screws. Hand tighten until snug.
Glass Holder
Cage
Lock Screw
STEP 9 Install the Cage-
A. Attach the Cage with Glass Panels back onto the Fixture
Hood and secure with Lock Screws. Hand tighten until snug.
Figure 8
Lock
Screw
Fixture
Hood
Cage with
Glass Panels
Figure 10
Lock Screw
Fixture Hood
Cage with
Glass Panels

Other Quoizel Outdoor Light manuals

Quoizel MIA8408EK User manual

Quoizel

Quoizel MIA8408EK User manual

Quoizel Lasalle LLE8407WT Mounting instructions

Quoizel

Quoizel Lasalle LLE8407WT Mounting instructions

Quoizel TML8405K Mounting instructions

Quoizel

Quoizel TML8405K Mounting instructions

Quoizel SDN8405IB Mounting instructions

Quoizel

Quoizel SDN8405IB Mounting instructions

Quoizel Westover WVR8305EK User manual

Quoizel

Quoizel Westover WVR8305EK User manual

Quoizel RNL9008WT Mounting instructions

Quoizel

Quoizel RNL9008WT Mounting instructions

Quoizel WVR9007EK Mounting instructions
Quoizel

Quoizel WVR9007EK Mounting instructions

Quoizel BDS8410AGV User manual

Quoizel

Quoizel BDS8410AGV User manual

Quoizel Oasis OAS8408Z Mounting instructions

Quoizel

Quoizel Oasis OAS8408Z Mounting instructions

Quoizel BKR8410IA User manual

Quoizel

Quoizel BKR8410IA User manual

Quoizel HAZ9009EK User manual

Quoizel

Quoizel HAZ9009EK User manual

Quoizel SNNL8411PN User manual

Quoizel

Quoizel SNNL8411PN User manual

Quoizel NY8316A Mounting instructions

Quoizel

Quoizel NY8316A Mounting instructions

Quoizel SNN8409PN Mounting instructions

Quoizel

Quoizel SNN8409PN Mounting instructions

Quoizel IS-MBH8409PN Mounting instructions

Quoizel

Quoizel IS-MBH8409PN Mounting instructions

Quoizel SNNL8409K User manual

Quoizel

Quoizel SNNL8409K User manual

Quoizel HRT8701MBK User manual

Quoizel

Quoizel HRT8701MBK User manual

Quoizel GRD8405W User manual

Quoizel

Quoizel GRD8405W User manual

Quoizel CSE8406PN Mounting instructions

Quoizel

Quoizel CSE8406PN Mounting instructions

Quoizel ABY8408OZ User manual

Quoizel

Quoizel ABY8408OZ User manual

Quoizel MHE8410K Mounting instructions

Quoizel

Quoizel MHE8410K Mounting instructions

Quoizel MBH8407PN Mounting instructions

Quoizel

Quoizel MBH8407PN Mounting instructions

Quoizel PRV8408K User manual

Quoizel

Quoizel PRV8408K User manual

Quoizel GLN2006IB Mounting instructions
Quoizel

Quoizel GLN2006IB Mounting instructions

Popular Outdoor Light manuals by other brands

muuto LEAN WALL LAMP manual

muuto

muuto LEAN WALL LAMP manual

modway EEI-5618 Assembly instructions

modway

modway EEI-5618 Assembly instructions

Allen + Roth 41997 quick start guide

Allen + Roth

Allen + Roth 41997 quick start guide

Kichler Lighting Linford 39535 manual

Kichler Lighting

Kichler Lighting Linford 39535 manual

LUMIEN D3A1-12W-27K-BZ instruction manual

LUMIEN

LUMIEN D3A1-12W-27K-BZ instruction manual

HEPER LH5005.595-US Installation & maintenance instructions

HEPER

HEPER LH5005.595-US Installation & maintenance instructions

LIGMAN OD-30012 installation manual

LIGMAN

LIGMAN OD-30012 installation manual

Philips CLEAN LIGHT TUV PL-L manual

Philips

Philips CLEAN LIGHT TUV PL-L manual

HEPER KREIS C Installation & maintenance instructions

HEPER

HEPER KREIS C Installation & maintenance instructions

FLINQ FQC8273 instruction manual

FLINQ

FLINQ FQC8273 instruction manual

Lacor 69420 Instructions for use and maintenance

Lacor

Lacor 69420 Instructions for use and maintenance

GoodHome G10616 manual

GoodHome

GoodHome G10616 manual

MAUL MAULjet 825 75 manual

MAUL

MAUL MAULjet 825 75 manual

Inspire PEKKO 5192401-G Assembly, Use, Maintenance Manual

Inspire

Inspire PEKKO 5192401-G Assembly, Use, Maintenance Manual

Tracon MFK20CCT user manual

Tracon

Tracon MFK20CCT user manual

Eaton Crouse-hinds series operating instructions

Eaton

Eaton Crouse-hinds series operating instructions

HUDSON VALLEY LIGHTING BRADY installation instructions

HUDSON VALLEY LIGHTING

HUDSON VALLEY LIGHTING BRADY installation instructions

Westinghouse Wrightsville 6580100 owner's manual

Westinghouse

Westinghouse Wrightsville 6580100 owner's manual

manuals.online logo
manuals.online logoBrands
  • About & Mission
  • Contact us
  • Privacy Policy
  • Terms and Conditions

Copyright 2025 Manuals.Online. All Rights Reserved.