Race Ramps RR-STR User manual

Rev. 03232020 RaceRamps.com Page 1of 3
Race RampsTM Super-Duty Service Ramps
Part #: RR-STR
Made in the USA
General Guidelines
•It is the user’s responsibility to read and follow all instructions.
•Keep these instructions with the product at all times and review before each use.
•It is the responsibility of this product’s owner to furnish the instructions to any person that borrows or
purchases the product.
•Inspect the product before use to ensure it is assembled properly and all parts are in safe working
order and free of defects.
•Never modify this product in any way.
•All circumstances cannot be addressed in these instructions. Please use common sense and practice
general safety measurements when using this product.
•Parts and/or instructions are subject to change without notice.
Safety
•Before using the ramps ensure other persons are clear of the vehicle and the ramps.
•Ensure that the ramps are free from damage before use.
•Do not exceed the rated weight capacity of 60,000 lbs maximum axle capacity.
•Do not use with tires that exceed the width of the ramp.
•Use only a single pair of wheel ramps at the front or rear; do not use two ramps on one side of the
vehicle.
•Only use on dry, level, hard surfaces. Do not use if tires are wet.
•Position the ramps in line with the wheels, with the steering wheel pointed straight and the incline
against the tire tread.
•Drive slowly and cautiously onto and off of the ramps. Never accelerate or brake suddenly.
•Another person, standing clear of the vehicle, should observe and guide the driver when using the
ramps.
•Do not disconnect brakes, engine, transmission components, drive train, drive shaft, universal joints,
or wheels while the vehicle is on the ramps.
•Always chock tires that are in contact with the ground upon the vehicle being positioned on the
ramps.
•Place the vehicle transmission in Park, or the lowest gear for manual transmissions, and engage the
parking brake.

Rev. 03232020 RaceRamps.com Page 2of 3
Operation
1. Inspect the ramps to make sure they are not damaged. Make sure your vehicle is compatible with the
ramps.
2. Position the ramps in line with the wheels, with the steering wheel pointed straight and the incline
against the tire tread.
3. Carefully ascend the ramps in a slow and controlled manner until the tires rest within the cradles.
Another person, standing clear and to the side of the vehicle, should guide the driver. Never
accelerate or brake suddenly.
4. Upon the vehicle tires resting safely within the cradle of the ramps, shut-off the engine. Place the
vehicle transmission in Park, or the lowest gear for manual transmissions, and engage the parking
brake. Exit the vehicle and securely chock the tires in contact with the ground in a manner that will
prevent the vehicle descending. Example: If the vehicle was driven forward as to place the front tires
on the ramps, wheel chocks shall be secured behind the rear tires.
5. Inspect the perimeter of the vehicle to ensure the vehicle is secure and stable prior to engaging in any
further activity.
6. In preparation for descending the ramps, verify the parking brake is engaged prior to the removal of
wheel chocks.
7. Enter the vehicle, apply the brake and start the engine. Upon verifying the vehicle brake is engaged,
disengage the parking brake.
8. Place the transmission in the appropriate position and slowly descend the ramps in a controlled
manner. Another person, standing clear and to the side of the vehicle, should guide the driver.
Tips for Ascending or Descending Ramps
For both manual and automatic transmission vehicles equipped with a hand brake, the vehicle operator
may cover the brake with the opposite foot, gradually applying and releasing for improved control of the
vehicle. For both manual and automatic transmissions vehicles equipped with a hand brake, apply and
release the hand brake to improve control of the vehicle.
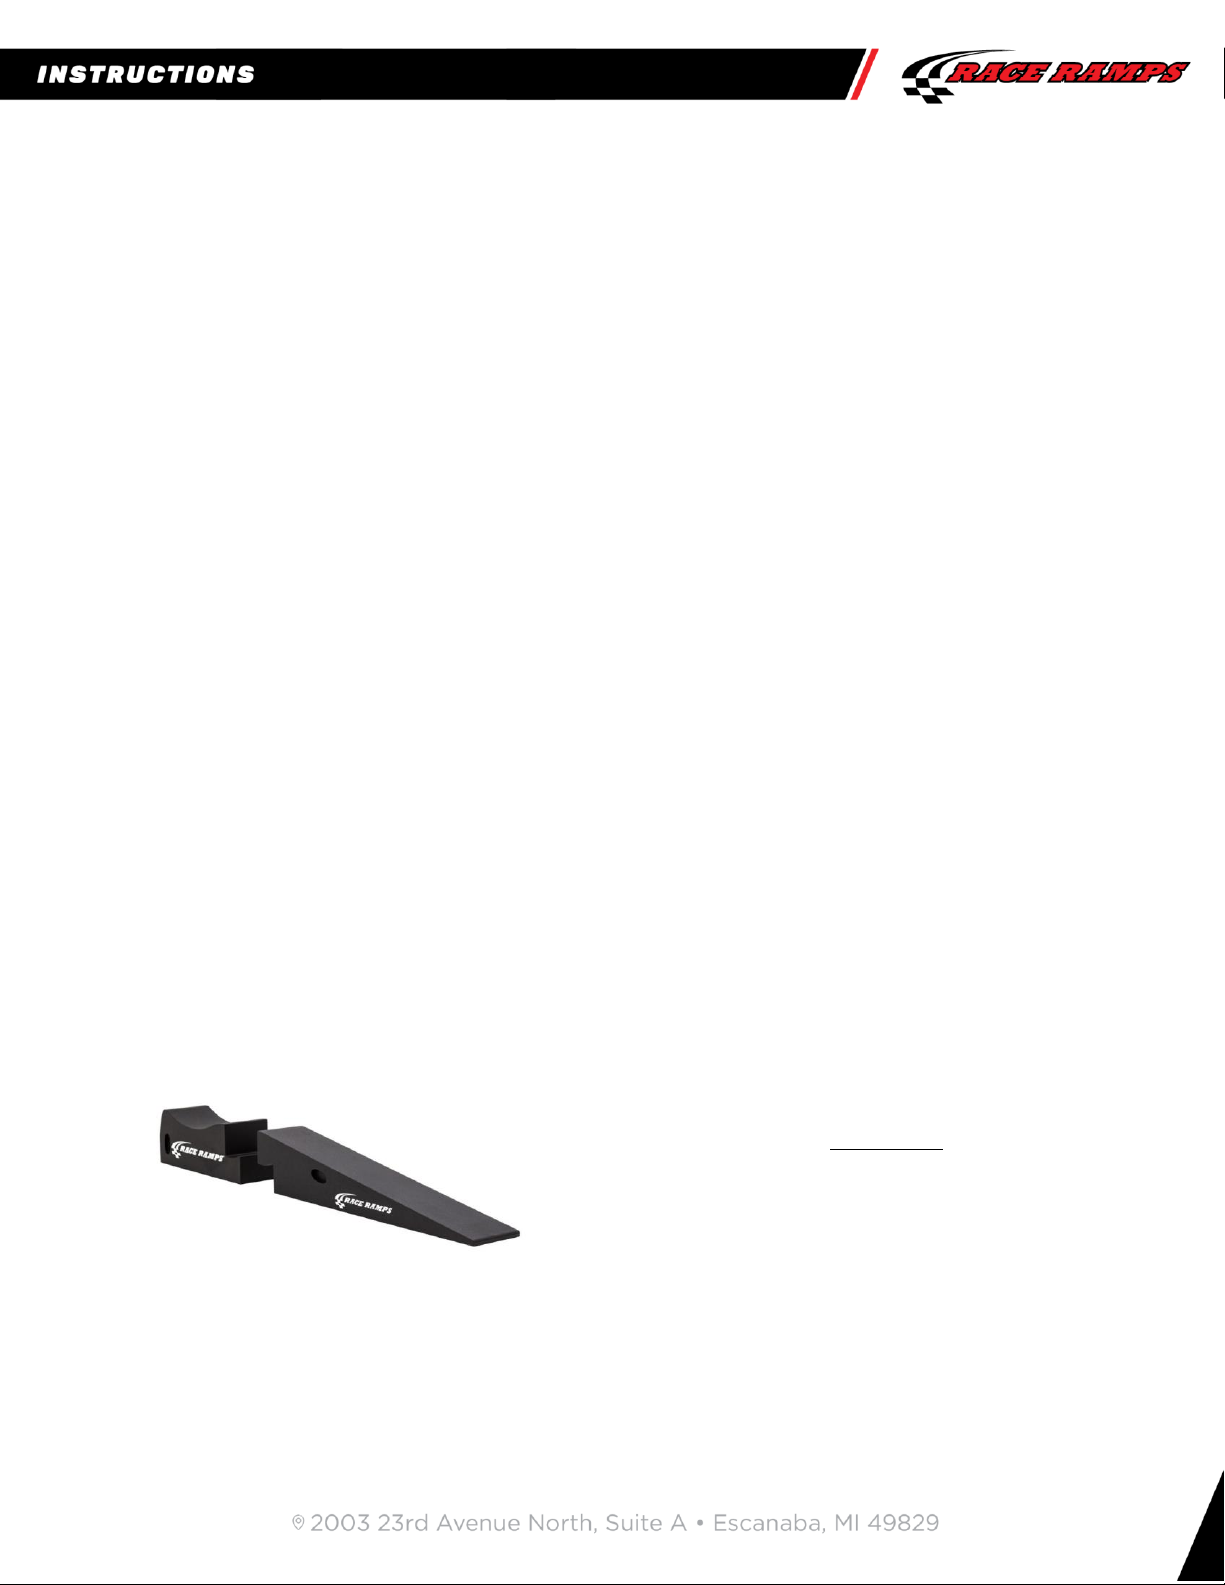
Guide for Using a 2-Piece Ramp
•The incline portion of the ramp may be removed for
more access to the underside of the vehicle.
•The incline may be removed ONLY AFTER following
Step 5 under the Operation section.
•Before proceeding to Step 6 under the Operation section,
ensure that the incline piece is properly interlocked back
into its original position.

Rev. 03232020 RaceRamps.com Page 3of 3
Race RampsTM Super-Duty Service Ramps Extensions
Part #: RR-EX-STR
Made in the USA
The RR-STR is designed with a 10-degree angle of approach. When a
reduced incline is needed, the RR-EX-STR is used in conjunction with
the RR-STR and reduces the angle of approach to 8.07-degrees.
•To use the ramp extensions, place each
piece as illustrated in the image.
•Follow all operation instructions (page 2)
accordingly.
Product Warranty and Liability
Race Ramps purchased from an authorized dealer or directly from Race Ramps LLC are backed by a one-
year warranty. Our warranty is strictly limited to the repair or replacement of manufacturer defects and
does not cover damage to a car, personal injury, labor, or any other damage or injury. Race Ramps LLC is
not responsible for the damage caused by improper or unintended use. In no event shall Race Ramps LLC
be responsible for consequential damage or costs. The warranty shall terminate one year from the date of
purchase by the original owner and is not transferable. Because we are continuously conducting research
and development, specifications are subject to change without notice. Those items sold by Race Ramps
LLC, but manufactured by other companies are subject to the manufacturer’s warranty and policy.
Questions? Please contact Race Ramps at 800-213-
5883 or email support@raceramps.com.
This manual suits for next models
1
Table of contents
Popular Service Equipment manuals by other brands

Davco
Davco SHOP PRO FXP Technical manual

Beta
Beta 960PI Instructions for use

Garmat
Garmat 99270 Installation, operation & maintenance manual

Black Hawk Automotive
Black Hawk Automotive Banner B2036 Operating instructions & parts manual

Power Fist
Power Fist 8741464 user manual

Heal-Tech
Heal-Tech FI Cleaner user manual