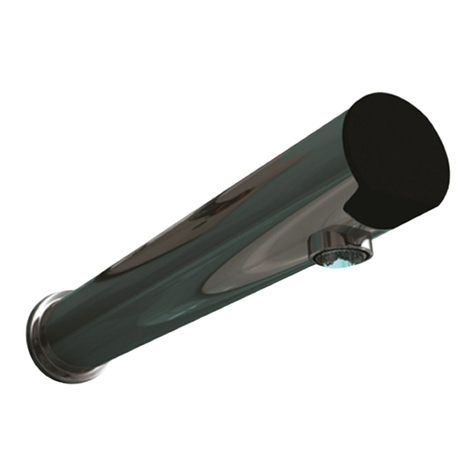
rada Safetherm User manual

1
IMPORTANT
Installer: This manual is the property of the customer
and must be retained with the product for maintenance
and operational purposes.
PRODUCT MANUAL
Safetherm
rada

2
CONTENTS
Introduction .............................................................................................3
Safety : Warnings ....................................................................................3
Pack Contents Checklist ........................................................................ 5
Specications ..........................................................................................7
Pressures ............................................................................................. 7
Temperatures .......................................................................................7
Thermostatic Shut-down ...................................................................... 8
Connections .........................................................................................8
Important Points ................................................................................... 8
Dimensions.........................................................................................10
Installation ............................................................................................. 11
Panel Mounting .................................................................................. 12
Basin Mounting...................................................................................14
Operation ...............................................................................................16
Commissioning .....................................................................................17
Maximum Temperature Setting ..........................................................17
Fault Diagnosis......................................................................................19
Maintenance...........................................................................................21
Planned Maintenance.........................................................................21
Thermostatic Cartridge Renewal........................................................22
Filter Renewal .................................................................................... 23
Checkvalve Cartridge Renewal..........................................................24
Spare Parts ............................................................................................ 25
Notes ......................................................................................................27
Customer Care.......................................................................................28

3
Warning!
Products manufactured by us are safe provided they are installed, used and maintained
in good working order in accordance with our instructions and recommendations.
Caution!
1. Read all of these instructions.
2. Retain this guide for later use.
For Type 3 installations, valves are only to be used for applications covered by
their approved designations, refer to the TMV3 Requirements Manual.
3. Pass on this guide in the event of change of ownership of the installation
site.
4. Follow all warnings, cautions and instructions contained in this guide.
5. The plumbing installation must comply with the requirements of UK Water
Regulations/Bye-laws (Scotland), Building Regulations or any particular
regulations and practices, specied by the local water supplier. The installation
should be carried out by a plumber or contractor who is registered or is
a member of an association such as:
i) Institute of Plumbing (IOP), throughout the UK.
Congratulations on purchasing a quality Rada product. To enjoy the full potential of
your new product, please take time to read this guide thoroughly; having done so,
keep it handy for future reference.
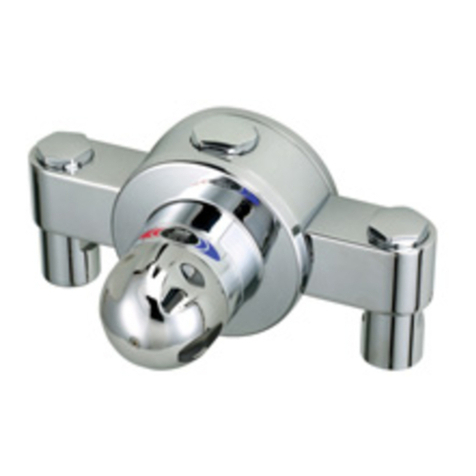
The Rada Safetherm is an exposed thermostatic control for connection to entry
pipework from various directions. The thermostatic control incorporates a wax capsule
temperature sensing unit. This provides an almost immediate response to changes
in pressures or temperature of the incoming water supplies to maintain the selected
temperature. An adjustable maximum temperature stop is provided which limits the
temperature to the desired level. The Safetherm also includes checkvalves, lters
and inlet ow regulators limiting the outlet ow to 8 L/Min.
The Rada Safetherm has been certied for use in UK Healthcare premises as a
Type 3 valve under the BUILDCERT TMV3 scheme. For Healthcare* installations
refer to the TMV3 Requirements Manual. This product also complies with the Water
Supply (water ttings) Regulations 1999.
*Healthcare applications are hospitals, aged person facilities, residential care homes,
etc. and any other application where the user is similarly at risk.
The approved designations for Type 3 Valves are as follows:
Model Designation Code
Rada Safetherm HP-WE, LP-WE
INTRODUCTION
SAFETY : WARNINGS

4
ii) National Association of Plumbing, Heating and Mechanical Services
Contractors (NAPH & MSC), England and Wales.
iii) Scottish and Northern Ireland Plumbing Employers’ Federation (SNIPEF),
Scotland and Northern Ireland.
6. Anyone who may have difculty understanding or operating the controls of any
appliance should be attended whilst operating. Particular consideration should
be given to the young, the elderly, the inrm, or anyone inexperienced in the
correct operation of the controls.
The use of the word “failsafe” to describe the function of a thermostatic mixing valve
is both incorrect and misleading. In keeping with every other mechanism it cannot
be considered as being functionally infallible.
Provided that the thermostatic mixing valve is installed, commissioned, operated
within the specication limits and maintained according to this Manual, the risk of
malfunction, if not eliminated, is considerably reduced.
Malfunction of thermostatic mixing valves is almost always progressive in nature
and will be detected by the use of proper temperature checking and maintenance
routines.
Certain types of system can result in the thermostatic mixing valve having excessive
‘dead-legs’ of pipework. Others allow an auxiliary cold water supply to be added
to the mixed water from the mixing valve. Such systems can disguise the onset of
thermostatic mixing valve malfunction.
Ultimately, the user or attendant must exercise due diligence to make sure that the
delivery of warm water is at a stable, safe temperature. This is particularly important
in such healthcare procedures as supervised bathing of patients unable to respond
immediately to unsafe temperatures.
Safetherm Options
The following table indicates temperature control options available for the
Safetherm.
Installation Temperature Adjustment Description
Panel Adjustable Temperature Control Safetherm
Basin Adjustable Temperature Control

5
PACK CONTENTS CHECKLIST
1 x Safetherm Tap Control
(Panel Mount)
1 x TMV3 Requirements
Manual
1 x ‘O’ Key
2 x Olives
2 x Compression Nuts
2 x Back Nuts
Tick the appropriate boxes to familiarize yourself with the part names and to
conrm that the parts are included.
Safetherm Panel
1 x 2.5 mm A/F
Hexagon Wrench
1 x 3 mm A/F
Hexagon Wrench
2 x 'O' Seals
1 x Flat Face
Connector Pack
2 x Grub Screws
2 x Inlet
Connector
2 x Concealing
Shroud
~
®
h @
({)
0
0
0
@

6
Safetherm Basin
1 x Safetherm Tap Control
(Basin Mount)
2 x Olives
2 x Compression Nuts
2 x Back Nuts
1 x ‘O’ Key
1 x 2.5 mm A/F
Hexagon Wrench
1 x 3 mm A/F
Hexagon Wrench
2 x 'O' Seals
2 x Grub Screws
2 x Large Rubber Washer
2 x Deck Mount Ring
2 x Deck Mount Plate
2 x Back Plate
1 x Flat Face
Connector Pack
2 x 'O' Seals
2 x Inlet
Connector
2 x Concealing
Shroud
2 x Extension
Sleeve
2 x Extension
Tube
1 x TMV3 Requirements
Manual
® @
CS)
@)
({)
®
0 g
0
~ ~

7
SPECIFICATIONS
For Type 3 Valves, the supply conditions specied in the TMV3 Requirements Manual
take precedence over the operating parameters which follow.
Pressures
• Max Static Pressure: 10 Bar.
• Max Maintained Pressure: 5 Bar.
• Min Maintained Pressure (Gravity System): 0.1 Bar.
(0.1 bar = 1 Metre head from cold tank base to tap outlet).
• For optimum performance supplies should be nominally equal.
Temperatures
• Factory Pre-set (Blend): 41°C.
• Optimum Thermostatic Control Range: 35°C to 43°C (achieved with supplies
of 15°C cold, 65°C hot and nominally equal pressures).
• Recommended Hot Supply: 60°C to 65°C Note! The thermostatic control
can operate at higher temperatures for short periods without damage,
however this could detrimentally affect thermostatic performance. For safety
and performance reasons it is recommended that the maximum hot water
temperature is limited to 65°C.
• Cold Water Range: up to 25°C.
• Minimum Recommended Differential between Hot Supply and Outlet
Temperature: 12°C.
• Please refer to section: ‘Type 3 Valves - Application for Type 3 Valves.
0
1
2
3
4
5
6
7
8
01 23
45
Supply Pressure (bar)
Flow Rate (l/min)
0.5 1.52.5 3.54.5
~
L,-
/~
/
J
I
I

8
Thermostatic Shut-down
• For safety and comfort the thermostat will shut off the thermostatic control
within 2 Seconds if either supply fails (achieved only if the blend temperature
has a minimum differential of 12°C from either supply temperature).
Connections
• Inlets: 15 mm Compression or 1/2" BSP at face.
• Standard connections are: hot - left, cold - right.
• The inlet connectors are xed at 200 mm centres.
Important Points
1. The installation, commissioning and maintenance of this product must be
carried out in accordance with the instructions given in the manual, and must
be conducted by designated, qualied and competent personnel.
2. Installations must comply with all Local/National Water Supply Authority
Regulations/Bye-laws, and Building and Plumbing (UK:BS6700) Regulations.
3. Rada products are precision engineered and should give continued and superior
performance, provided:
a. They are installed, commissioned, operated and maintained in
accordance with these recommendations
b. Periodic attention is given as necessary to maintain the product in
good functional order. Recommended guidelines are given in section:
‘Maintenance’.
4. Warning! Continued use of this product in conditions outside the limits listed
in this section can severely affect the performance and reduce the effective
service life, and can present potential risk to users.
5. Suitable for use with most modulating instantaneous gas water heaters.
For information on other specic applications or suitability, contact Kohler Mira
Ltd or your local agent.
6. Disinfectants and Other Chemicals: In applications where system chemical
disinfection is practised, chlorine can be used (calculated chlorine concentration
of 50 mg/l (ppm) maximum in water, per one hour dwell time, at service interval
frequency). Such procedures must be conducted strictly in accordance with all
relevant Guidelines/Approved Codes of Practice.

9
Note! the use of ammonia or any ammonia type chemicals ( e.g. as found in
some solder uxes) can attack brass material which may lead to premature
failure.
If in any doubt as to the suitability of chemical solutions, contact Kohler Mira
Ltd or your local agent.
Normal Operating Conditions are considered as:
1. Inlet dynamic pressures nominally balanced to within ten percent of each other
during ow.
2. A differential of approximately 50°C between the hot and cold inlet temperatures,
and with differentials of 15 - 35°C between the blend setting and either
supply.
3. Daily usage of 1 - 6 hours.
4. Installation and usage environment not subject to extremes of temperature,
unauthorised tampering or willful abuse.

10
All dimensions are nominal and in millimetres
260
200
260
200
105
115
50 Ø 42
131.5
1/2” BSP
175
115
131.5
50
1/2” BSP
175
296
Ø 60
Dimensions

11
1. Before commencing, make sure that the installation conditions comply with the
information given in section: ‘Specications’. For Type 3 valves, refer to the
the TMV3 Requirements Manual.
2. Care must be taken during installation to prevent any risk of injury or
damage.
3. Layout and sizing of pipework MUST be such that nominally equal inlet supply
pressures are achieved and effects of other draw-offs are minimised.
4. The Rada Safetherm is suitable for installation as part of a gravity-fed plumbing
system. Minimum inlet pressures of 0.1 bar (1 metre head) are required,
though inlet pressures of 1 bar (10 metre head) are recommended for optimum
performance. If minimum inlet pressures are not available then it will be
necessary to install a pump.
5. When used with a high pressure system above 5 bar maintained pressure,
a pressure reducing valve will be necessary. It is important that the system
pressures are within the range specied for the Safetherm.
If the system pressure is not known then the system pressure MUST be
measured.
Pressures are those present at the inlet to the appliance either whilst running
(maintained) or in the off state (static). Nearby hot and cold taps connected to
the same proposed feed pipes as the appliance can be used to measure the
static pressure. No other tting or appliance should be in use at this time.
6. Conveniently situated isolating valves MUST be fitted to the supply
pipework.
7. If the control is to be used with a fully modulating multipoint water heater, fully
modulating combination boiler, thermal store or unvented system an expansion
vessel must be tted to accommodate the expansion of water in the domestic
hot water supply (this may already be part of the system, check the details on
the boiler/heater or contact the boiler/heater manufacturer).
8. Supply pipes MUST be ushed to clear debris before connecting the control.
Note! The Rada Safetherm is supplied with hot left and cold right inlet
connections as standard.
INSTALLATION

12
Panel Mounting
Warning! Make sure that there are no buried cables or pipes in the wall before
drilling.
21 mm
200 mm
Back Nut
Compression Nut
Inlet
Connector
1. Temporarily assemble the inlet
connectors with the inlet elbows
tightening both grubscrews with a
2.5 mm hexagonal key.
2. Mark the positions of the holes for
the inlet connectors on the panel and
then drill two Ø21 mm holes for the
inlet connectors.
3. Fit the 'O' seal to the rear face of the
inlet connectors then install the inlet
connectors through the Ø21 mm
holes and loosely t the back nuts.
4. Install the hot and cold supply
pipework ensuring that the pipe ends
align with the inlet connectors.
5. Fit the compression nuts and olives
or the at face connectors onto the
supply pipes and connect the supply
pipes to the inlet connectors.
Conrm that the inlet connectors are
level and the specied distance apart
then use a suitable wrench to tighten
the back nuts.
Note! Use the ats provided on the
inlet connectors to hold the connectors
in position while tightening the back
nuts.
Inlet
Connector
Heat
Shroud
2.5 mm Hexagonal
Key
Inlet
Elbow
Olive
Grubscrew
'O' Seal
Compression Nut
Olive
Inlet
Connector

13
Concealing
Shroud
6. Turn the isolators to the OFF position
then turn on the water supply and
check for leaks.
Note! The isolation valve is located
in the body of the inlet connector.
To isolate the water supply, turn the
screw slot on the isolation valve a
quarter turn.
7. Fit the heat shrouds to the inlet
connectors. Note! The access
window of the heat shroud must
align with the isolation valve.
8. Slide the concealing shrouds along
the elbows then t the tap control
to the inlet connectors. Use a 2.5
mm hexagonal key to tighten both
grubscrews and secure the tap
control to the inlet connectors.
9. Turn the isolators to the ON position
and check for leaks.
10. Slide the concealing shroud back
and screw onto the heat shroud to
conceal the grubscrews.
11. Set the maximum temperature
refer to section: 'Commissioning -
Maximum Temperature Setting'.
The access window
of the heat shroud
must align with the
isolation valve.
Heat
Shroud
OFF ON

14
1. Slide the 'O' seal along the threaded
section of the inlet connector then
screw the inlet connector and the
deck mount plate together.
2. Insert the inlet connectors through
the basin holes.
3. Fit the large rubber washers and back
plates then loosely t the back nuts.
4. Install the hot and cold supply
pipework. Make sure that the pipe
ends align with the inlet connectors.
5. Install the compression nuts and
olives or the at face connectors onto
the supply pipes and connect the
supply pipes to the inlet connectors.
Confirm that the inlet connectors
are the specified distance apart
then use a suitable wrench to tighten
the back nuts. Note! Use the ats
provided on the inlet connectors to
hold the connectors in position while
tightening the back nuts.
6. Turn the isolators to the OFF position
then turn on the water supply and
check for leaks. Note! The isolation
valve is located in the body of the
inlet connector. To isolate the water
supply, turn the screw slot on the
isolation valve a quarter turn.
Basin Mounting
200 mm
Inlet Connector
Olive
Compression
Nut
'O' Seal
Large Rubber
Washer
Deck Mount
Plate
'O' Seal
Deck Mount
Plate
'O' Seal
Back Plate
Back Nut
Inlet Connector

15
Concealing
Shroud
Heat
Shroud
Elbow
Extension
Deck Mount
Ring
7. Fit the deck mount rings over the inlet
connectors.
8. Fit the heat shrouds to the inlet
connectors. Note! The access
window of the heat shroud must
align with the isolation valve.
8. Screw the elbow extensions onto
the inlet connectors and tighten with
a 10 mm hexagonal key. Slide the
concealing shrouds onto the elbow
extensions.
9. Fit the tap control onto the elbow
extensions pushing down to make
sure it is correctly seated. Use a
2.5 mm hexagonal key to tighten
the grubscrews and secure the tap
control to the inlet connectors.
10. Turn the isolators to the ON position
and check for leaks.
11. Slide the concealing shroud back
to the basin surface to conceal the
grubscrews.
10. Set the maximum temperature
refer to section: 'Commissioning -
Maximum Temperature Setting'.
OFF ON
The access window
of the heat shroud
must align with the
isolation valve.
ij
§
--
~
:<
.
••
v~
-"
~ (
~

16
OPERATION
Rada Safetherm uses a single sequential control lever for on/off and temperature
control.
The control lever operates anti-clockwise in the following sequence:
• Off
• On
• Cool
• Warm
• Maximum Preset Temperature
OFF
30°
120°
Maximum
Preset I

17
COMMISSIONING
Commissioning must be carried out in accordance with these instructions, and must
be conducted by designated, qualied and competent personnel.
Exercising the Thermostat
Thermostatic mixing valves with wax thermostats are inclined to lose their
responsiveness if not used. Valves which have been in storage, installed but not
commissioned, or simply not used for some time should be exercised before setting
the maximum temperature or carrying out any tests.
Note! Make sure that the hot and cold water supplies are available at the inlets.
1. Move the tap control lever rapidly from cold to hot and hot back to cold several
times, pausing at each extreme.
2. Operate the tap control and check:
a. Flow rate is sufcient for the purpose
b. Temperature(s) obtainable are acceptable.
3. Adjust the temperature of the mixed water in accordance with the instructions
(refer to the section: 'Commissioning: Maximum Temperature Setting' ).
For Type 3 valves refer to the table in the TMV3 Requirements Manual.
It is advisable to establish a performance check at this time, which should be noted
for future reference as part of a Planned Maintenance Programme. The procedure
should be chosen to imitate both typical and difcult operating conditions, such as
any supply pressure uctuations that may be likely. An ideal method is to locate
another outlet on the common cold water supply close to the mixing valve (operating
this outlet should cause a drop in supply pressure), and note the subsequent effect
on blend temperature (should be no more than a 2° C change).
Maximum Temperature Setting
Before using the thermostatic control the maximum temperature must be checked
to make sure that it is at a safe level. It has been preset to approximately 41°C at
the factory but due to variations in site conditions the maximum temperature may
need adjustment.
Note! Make sure that the hot water temperature is at least 55°C and that there is
sufcient supply.
1. Turn the tap to the maximum temperature and maximum ow setting (i.e. fully
anticlockwise) and allow the temperature to stabilise.
If the temperature is too hot or too cold adjust as follows:

18
2. Carefully remove the concealing cap, unscrew the grubscrew using a 2.5 mm
hexagonal key (supplied) and pull off the control lever.
3. Unscrew the hub retaining screw with a 2.5 mm hexagon key.
Note! Do not remove the hub.
4. Insert the 2.5 mm hexagon key into the centre of the spindle and engage with
the recessed temperature adjusting screw.
5. Rotate the hexagon key until the required maximum temperature is obtained
at the tap outlet. Anticlockwise to increase the temperature, or clockwise to
decrease the temperature (¼turn = approximately 1°C).
Maximum Temperature Setting
Control
Lever
Hub Retaining
Screw
Hub
+
-
2.5 mm
Hexagonal Key
2.5 mm
Hexagonal Key
Grubscrew
Concealing Cap
1
2
6. Once the desired maximum blend temperature has been achieved turn off the
tap control by rotating the hub fully clockwise.
Note! Do not remove the hub.
7. Ret the hub retaining screw.
8. Ret the control lever.
9. Push the control lever down (1), and tighten the grubscrew (2) and ret the
concealing cap.
10. Check that the temperature is correct.

19
FAULT DIAGNOSIS
Symptom Cause/Rectication
1. Only hot or cold
water from tap
outlet.
a. Inlet supplies reversed. Check.
b. No hot water reaching control. Check.
c. Check lters and inlet ttings for blockage.
d. Installation conditions continuously outside operating
parameters: refer to the section: 'SPECIFICATIONS'
and symptom 2.e.
e. Refer to symptom 5.
2. Fluctuating or
reduced flow
rate.
Normal function of thermostatic control when operating
conditions are unsatisfactory;
a. Check lters and inlet/outlet ttings for ow restriction.
b. Make sure that minimum ow rate is sufcient for supply
conditions.
c. Make sure that maintained inlet pressures are nominally
balanced and sufcient.
d. Make sure that inlet temperature differentials are
sufcient.
e. (Subsequent to rectication of supply conditions) Check
thermostatic performance; renew thermostatic cartridge
if necessary.
3. No flow from
tap outlet.
a. Check lters and inlet/outlet ttings for blockage.
b. Hot or cold supply failure; thermostat holding correct
shutdown function: rectify, and refer to symptom 2.e.
c. Thermostatic cartridge faulty. Check and renew if
necessary.
4. Blend
temperature
drift.
Indicates operating conditions changed.
a. Refer to symptom 2.
b. Hot supply temperature uctuation.
c. Supply pressure uctuation.
d. Thermostatic cartridge faulty. Check and renew if
necessary.
5. Hot water in
cold supply or
vice versa.
Indicates check valves require maintenance, refer to the
section: 'MAINTENANCE'.

20
Symptom Cause/Rectication
6. Maximum
blend
temperature
setting too hot
or too cool.
a. Indicates incorrect maximum temperature setting; refer
to the section: 'COMMISSIONING'.
b. As symptom 4.
c. As symptom 5.
7. Water leaking
from control
body.
Seal(s) worn or damaged.
a. Obtain service pack and renew all seals.
b. If leak persists renew thermostatic cartridge.
8. Control
Lever stiff to
operate.
a. Impaired movement of internal components. Renew the
thermostatic cartridge.
b. Supply pressures too high. Fit pressure reducing valve.
Refer to the section: 'SPECIFICATIONS' for acceptable
operating pressures.
c. Pressure build up. This may be due to domestic hot
water expansion. Fit domestic hot water expansion
vessel (available from your local stockist). If one already
tted, it may be deated and require repressurization.
9. Drip from tap
outlet.
a. A small amount of water may be retained in the valve
after the tap control has been turned off. This is quite
normal and should drain after a few minutes.
10. Safetherm
noisy during
operation.
a. The inlet supply pressures may be unbalanced. Fit a
drop tight Pressure Reducing Valve (PRV) just after
the incoming mains stopcock, effectively balancing the
hot and cold supply pressures. Ideally set the PRV to
3.0 bar.
b. The inlet supply pressures may be high. The maximum
maintained pressure should not exceed 5 bar. If greater,
t a drop tight PRV installed as detailed above.
Table of contents
Other rada Plumbing Product manuals
Popular Plumbing Product manuals by other brands

Casa Lusso
Casa Lusso Ollie OL150 installation instructions

Moen
Moen T2812 manual

CRISTINA
CRISTINA ELEVATION CRIEL257 installation instructions

Franke
Franke F5 F5LT1010 Installation and operating instructions

Hans Grohe
Hans Grohe Axor Citterio M 100 1jet Air 34610000 quick start guide

Brizo
Brizo MultiChoice T60P Series owner's manual