10
1147005-W2-B
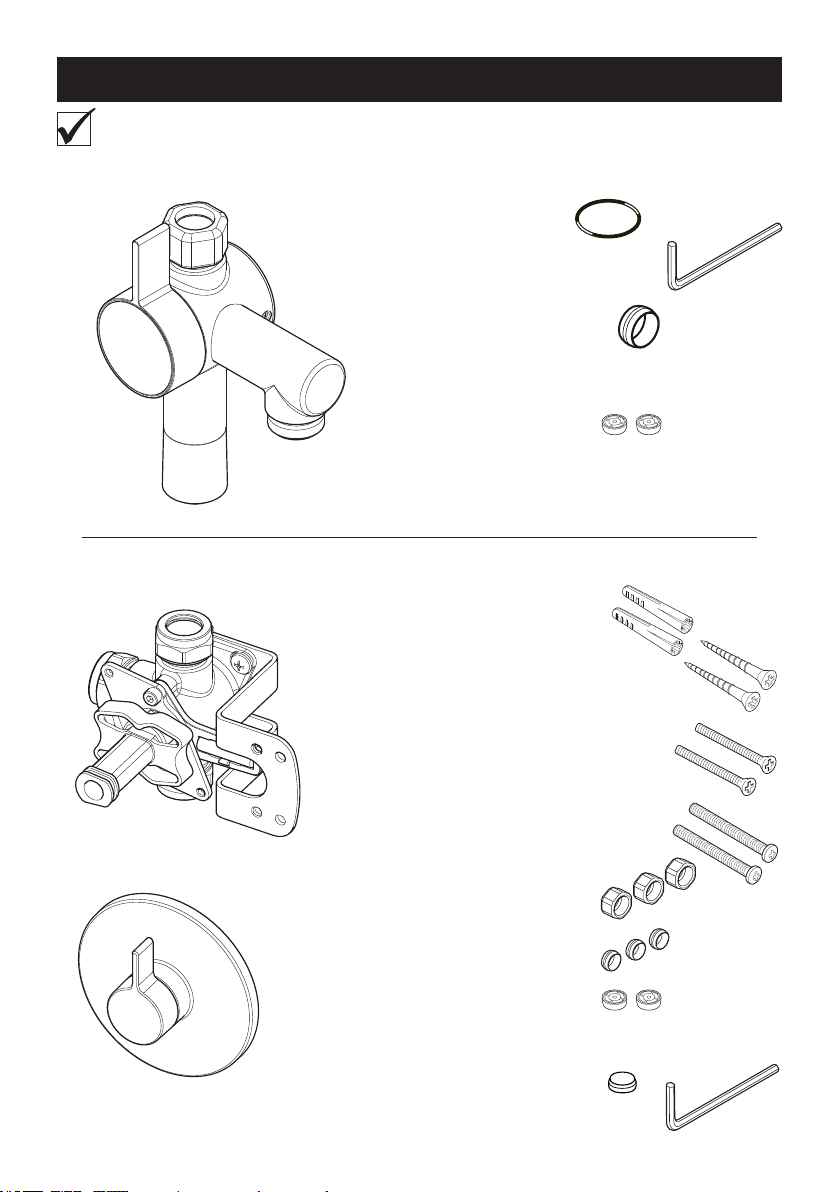
3. Drill two Ø6 holes suitable for the wall plugs
and N° 8 x 1¼" xing screws.
4. Install the diverter assembly into the prepared
cavity and secure with the two N° 8 x 1¼" xing
screws supplied.
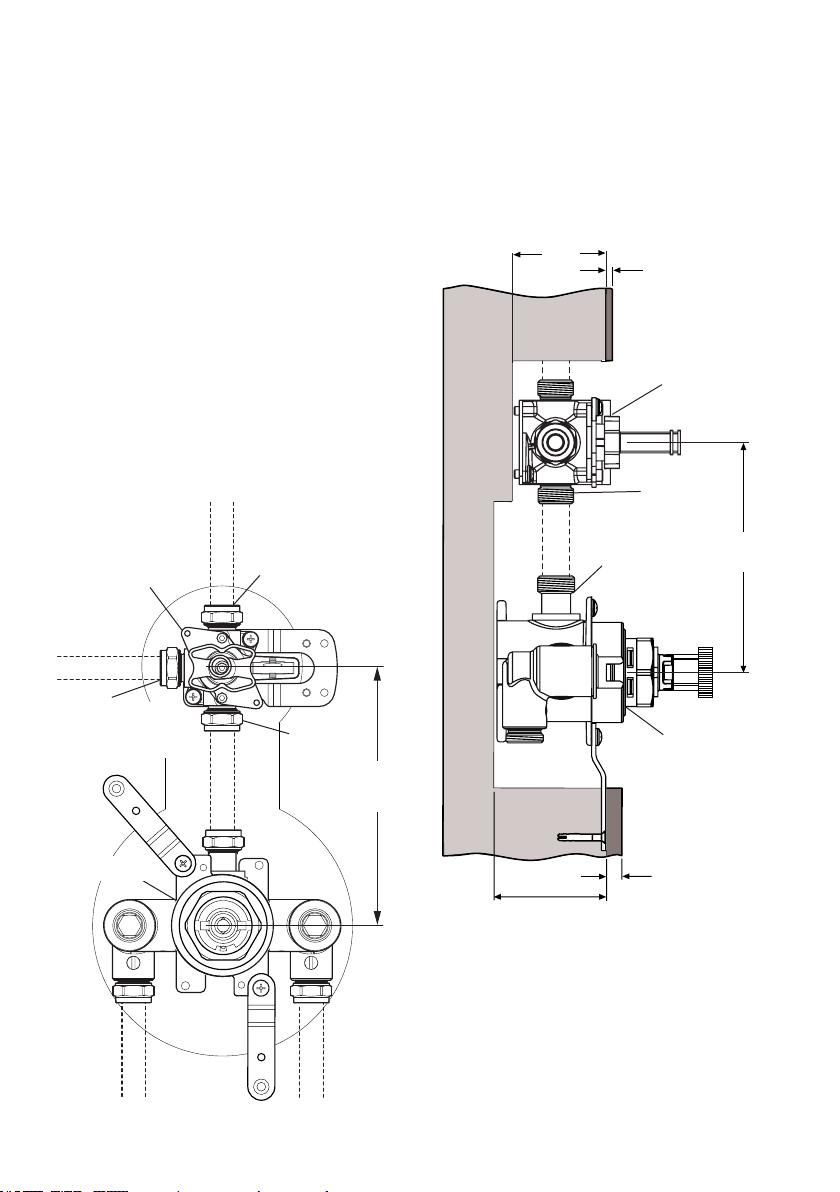
Note! Use the spirit level included to ensure
the diverter is mounted level.
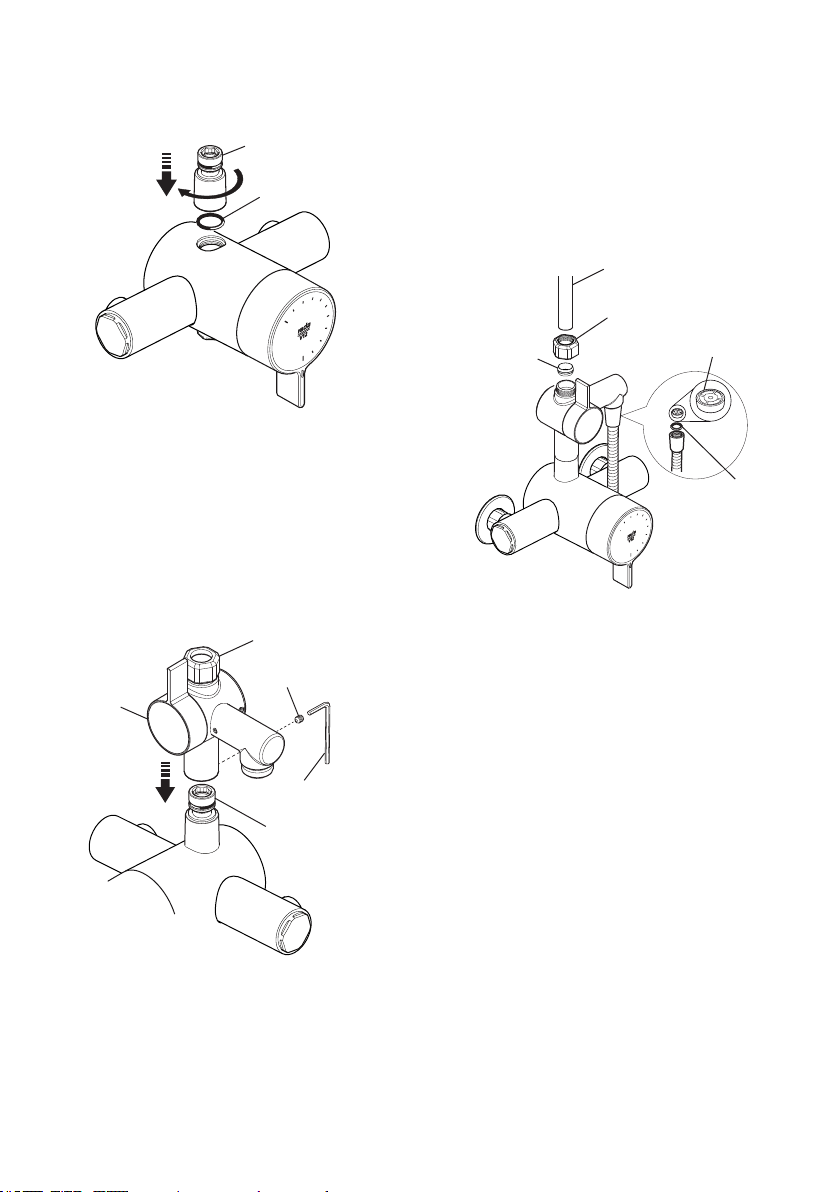
4. Install the 15 mm compression nuts and olives
(supplied) to the diverter connections.
5. Connect the outlet of the Rada V12 mixer to
the diverter inlet with a length of 15 mm copper
tube and fully tighten the compression nuts.
6. Connect the outlet pipework, and install your
shower ttings (refer to your Shower Fittings
Product Manual).
7. Turn on the water supply and check all joints
for leaks.
8. Finish the wall.
9. Install the concealing plate assembly (refer to
section 'Concealing Plate Assembly').
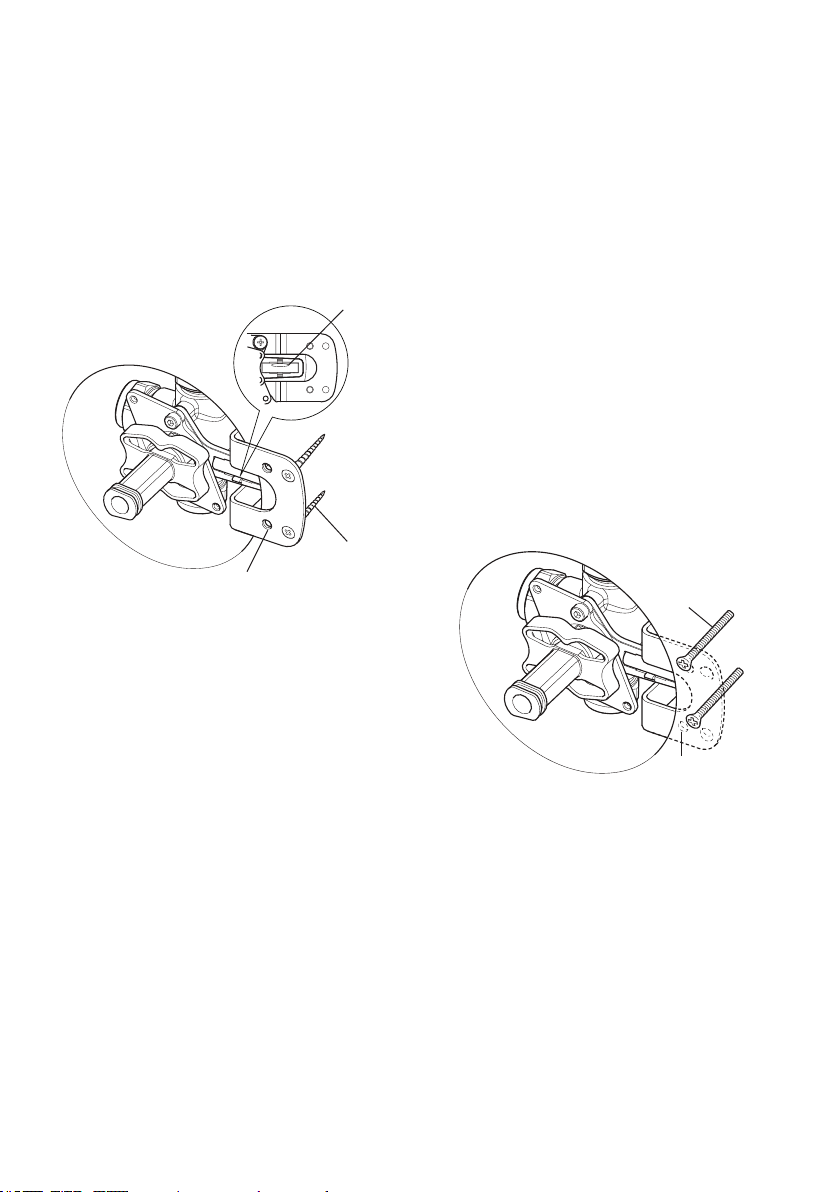
Panel Fixing using Securing Bracket
Note! For laminated panels the diverter must
be positioned from the rear of the panel. Panel
thickness must be between 4 and 30 mm (if
a thicker panel is used, it will be necessary to
recess the bracket into the rear of the panel).
Important! Make sure that there is a minimum
clearance of 60 mm behind the laminated panel
to house the diverter.
1. Carefully cut out the laminated panel.
2. Drill two holes suitable for the M5 x 40 xing
screws.
Note! Use the spirit level included to ensure
the diverter is mounted level.
3. Install the diverter assembly into the prepared
cavity and secure with the two M5 x 40 xing
screws supplied.
Panel Fixing Hole
M5 x 40
Fixing
Screw
5. Install the 15 mm compression nuts and olives
(supplied) to the diverter connections.
6. Connect the outlet of the Rada V12 mixer to
the diverter inlet with a length of 15 mm copper
tube and fully tighten the compression nuts.
7. Connect the outlet pipework, and install your
shower ttings (refer to your Shower Fittings
Product Manual).
8. Turn on the water supply and check all joints
for leaks.
9. Finish the wall (plaster and tile to the nished
wall thickness).
Important! Make sure that you use the
cardboard building-in shroud when nishing
the wall. This will protect the diverter and make
sure that you tile up to the correct diameter.
10.Install the concealing plate assembly (refer to
section 'Concealing Plate Assembly').
Panel Fixing
Hole
N° 8 x 1¼"
Fixing Screws
Spirit Level