manuals.online logo
Brands
  1. Home
  2. •
  3. Brands
  4. •
  5. Radica Games
  6. •
  7. Toy
  8. •
  9. Radica Games SKANNERZ TV User manual

Radica Games SKANNERZ TV User manual

WARNING: EPILEPSY AND SEIZURES
READ BEFORE OPERATING YOUR SKANNERZ TV
A few people may experience epileptic seizures when viewing flashing lights or patterns
in our daily environment. These persons may experience seizures while watching TV
pictures or playing video games. Players who have not had any seizures may nonethe-
less have an undetected epileptic condition.
Consult your physician before playing video games if you have an epileptic condition
or experience any of the following symptoms while playing video games: altered vision,
eye or muscle twitching, other involuntary movements, loss of awareness of your sur-
roundings, mental confusion and/or convulsions.
SETTING UP
BATTERY INSTALLATION (Four (4) “AA” (LR6) and Three
(3) AAA (LR03) Batteries Needed)
On the back of the main unit, remove the battery compartment and insert four (4) “AA”
batteries as indicated inside the compartment (alkaline batteries recommended).
Replace the battery compartment door. Do not over-tighten.
On the bottom of the handheld scanner, remove the battery compartment and insert
three (3) “AAA” batteries as indicated inside the compartment (alkaline batteries rec-
ommended). Replace the battery compartment door. Do not over-tighten.
NOTE : Batteries in the Main Unit should give you about 10 hours of game play (if alkaline
batteries are used). The game will not operate normally when the batteries begin to run
low. The screen may be blurred and resetting the game may not work. Be sure to install
fresh batteries. The handheld scanner has a low battery indicator.
WARNING!!!
In order not to lose your monsters, when unplugging the handheld scanner from the
main unit, or after scanning, wait 30seconds to allow the scanner enter sleep mode
before batteries are replaced.
ADULT SUPERVISION IS RECOMMENDED WHEN INSTALLING BATTERIES.
CONNECTING TO YOUR TV
To connect ScannerzTV directly to a TV, the TV must be equipped with audio and
video input jacks. They are commonly found on the front of the TV near the contrast,
color, and picture adjustment controls; or on the back of the TV near the antenna and
cable/satellite jacks.
Insert the yellow video plug from the game into the Video-In (yellow) jack on the TV.
Insert the white audio plug from the game into the left Audio-In (white) jack on the TV.
Set your TV to the appropriate video input mode. (See your TV’s operating manual for
details.)
CONNECTING TO YOUR VCR
If your TV doesn’t have audio and video input jacks, you can connect ScannerzTV to
your VCR.
Insert the yellow video plug from the game into the Video-In (yellow) jack on the VCR.
Insert the white audio plug from the game into the left Audio-In (white) jack on the VCR.
Set your TV and VCR to the appropriate video input mode. (See your TV and VCR
operating manuals for details.)
NOTE : If your TV or VCR does not have AV inputs, a “Y” adapter may be purchased
separately at any electronics store.
ADULT SUPERVISION IS RECOMMENDED WHEN CONNECTING CABLES TO A TV
AND VCR.
BUTTON FUNCTIONS: MAIN UNIT CONSOLE
Note: If only one (1) handheld controller is attached, the Main Unit functions as the 2nd
player controller.
• [Power]
- Turns game On/Off.
MODEL 76015
For 1 or 2 players / Ages 8 and up
INSTRUCTION MANUAL
P/N 823A2500 Rev.A
E
• [D-Pad] (8-way directional control)
- Navigates through options in menu screens.
- Controls monster movement in Battle and during Duels.
• [A] button
- Confirms selections in menu screens.
- Activates weapon during arena combat.
• [B] button
- Goes back one level in menu screens.
- Brings up item/options menu during Battle.
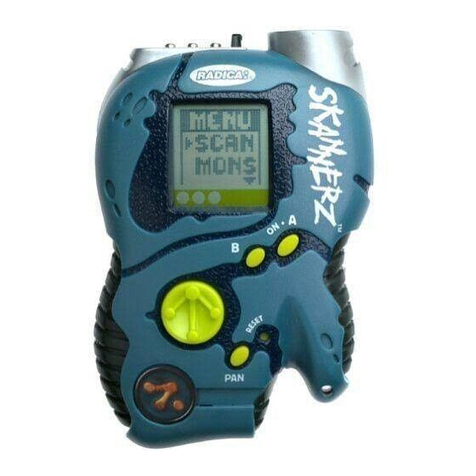
BUTTON FUNCTIONS: HANDHELD SCANNER
• [D-Pad] (8-way directional control)
- Navigates through options in menu screens.
- Controls monster movement in Battle and during Duels.
• [A] button
- Turns scanner On to scan UPC codes.
- Confirms selections in menu screens.
- Activates weapon during arena combat.
• [B] button
- Goes back one level in menu screens.
- Brings up item/options menu during Battle.
• LEDs (Red & Green)
- Indicates result of scans.
SCANNING
Collecting monsters and items is performed by scanning UPC codes with a handheld
scanner/controller in a manner similar to previous Skannerz products. The scanner abil-
ity of the controller unit only functions when it’s not attached to the main console.
• When disconnected, the player must press [A] to ‘wake’ the unit.
• When the unit wakes the Scanning light turns on, the Green light flashes twice, and
the “Ready” alert sound confirms that the scanner is active.
• If the player does not scan a UPC code for 10 seconds, the scanner unit turns off and
the player has to press [A] again to wake it.
• For best results, make sure to start scanning in a blank area (one without any bar-
code stripes), and smoothly sweep the scanning sensor over the stripes. Skannerz
read codes best when you move the unit so it takes about a second to cross the
whole barcode. Don’t sweep the Skannerz sensor back and forth.
• If the player scans a UPC code, the Scan sound plays and the following happens:
- If the scan is successful (entire UPC code read) –
- If the UPC code produces an item, Item Acquired plays and the Green LED turns
on for 3 seconds.
- If the player has already collected this item the Already acquired sound plays
(Note: The player can keep up to 5 Health potions in their inventory at any time)
- If the UPC code produces a ‘Tech’ monster, the Tech sound plays and…
- If the player has not already collected this monster the green LED turns on for
3 seconds.
- If the player has already collected this monster the green and red LED flashes
quickly for 3 seconds and the Already acquired sound plays.
- If the UPC code produces a ‘Power’ monster, the Power sound plays and…
- If the player has not already collected this monster the green LED turns on for
3 seconds.
- If the player has already collected this monster the green and red LED flashes
quickly for 3 seconds and the Already acquired sound plays.
- If the UPC code produces a ‘Magic’ monster, the Magic sound plays and…
- If the player has not already collected this monster the green LED turns on for
3 seconds.
- If the player has already collected this monster the green and red LED flashes
quickly for 3 seconds and the Already acquired sound plays.
- If the scan is unsuccessful (partial UPC code read), the Bad Read sound plays and
the red LED flashes quickly for 3 seconds.
• If a player scans a monster they already have, any stats that have been improved via
training are NOT lost.
•
If the player presses and holds both [A] and [B] for 2 seconds, the Green and Red
LEDs flash to indicate the number of monsters that the player has in their stable. The
Green LED represents 10s and the Red LED represents 1s, with each LED (Green
first, then Red) flashing as many times as needed to convey the number. For example,
43 would be indicated by the Green LED flashing four times and then the Red LED
flashing three times (4x10 + 3x1 = 43), while 68 would be indicated by the Green LED
flashing six times and then the Red LED flashing eight times (6x10 + 8x1 = 68).
• The scanner unit has a low battery indicator that warns the player if they need to
change the scanner’s batteries (to prevent loss of all their monsters). If the battery
is low, when the player presses [A] to activate the scanner the scanner LED will flash
repeatedly (rather then staying on). The player will have a short period of time in
which to change the batteries without losing their monsters.
• WARNING!!!
In order not to lose your monsters, when unplugging the handheld scanner from the
main unit, or after scanning, wait 30seconds to allow the scanner enter sleep mode
before batteries are replaced.
Scanner/Console Connection
The majority of monsters downloaded from the handheld unit to the main console occur
when the unit is turned on:
-
If both scanners are plugged in then the player with their scanner unit in the left port is
considered the ‘Blue Player’ and the player with their scanner unit in the right port is
considered the ‘Red Player’. Monsters are then downloaded from the handheld units.
- If there’s only one scanner plugged in (in either port) then that player is considered
to be the ‘Blue Player’ and monsters are then downloaded.
-
If neither player has a scanner unit plugged in when the unit is turned on, then a mes-
sage appears that tells where the player is meant to connect their handheld unit:”
- If a player inserts a scanner then the game goes immediately to the ‘data down-
load’ screen and then the Main Menu.
•
If either player unplugs their scanner then a menu appears asking the player to re-
connect – assuming the player plugs it back in then the game continues where they
left off (if a different scanner is plugged then this will be treated as a ‘new player join-
ing’ event, as outlined above). The player may also choose the option to quit (which
takes them back to the Main Menu) so if one player is still connected then they may
continue playing but against the CPU.
•
Data upload from the main console to the handheld unit happens at the following points:
-
After a two-player Battle, when the winning player captures one of the rival’s monsters.
- After a Duel, when the winning player receives their statistics.
MAIN MENU
• The player(s) have the following options in the menu screen (note: If no controllers
are attached to the main console, the player(s) will not be able to navigate the menu
options):
- Battle – Player(s) select this mode in order to play 1-2 player Battle games (this is
the default selection). If either player has collected fewer than 3 monsters (i.e. less
than needed to fight a Battle), then this option will not be available.
- Duel – Player(s) select this mode in order to play training Duels.
- Bestiary – Player(s) select this mode to view any monsters collected.
- Options – Player(s) select this mode to change game options.
Using the D-Pad either on the handheld controller (1) or on the main console, the player
navigates through the menu options. Once the player has chosen an option, select it
using the [A] button on the controller or the main console.
At any point during menu navigation, pressing [B] on either the controller or the main
console returns you one menu screen.
Playing ScannerzTV
There are two main modes in Skannerz TV: Battle and Duel. Each mode has several
different play options. In addition, the player can view their Bestiary (i.e. their collection
of monsters).
•
Battle – In this mode the player can construct their own custom monster ‘army’ and
send it into battle against either the computer or a friend on a chess-style grid. Each
player takes turns moving their monsters. When one monster lands on another, then
a Duel commences to determine who survives. There are several different game varia-
tions that players can choose between, such as Flag Grab and Infected (see below).
-
To move a monster, the player first moves the cursor using the [D-Pad] so that it’s
under the desired creature and then ‘selects’ it by pressing [A]:
- The selected monster now becomes highlighted.
- Moving the cursor around at various squares tells where the player can move
their monster. Green = an allowed move. Red = the move is not allowed.
- Squares containing the player’s own monsters cannot be landed on and so are
not highlighted.
-
The player can ‘de-select’ the monster by moving the cursor under it and pressing
[A] again, leaving them free to choose another monster.
- The player now selects a square for the monster to move to by highlighting it with
the cursor and pressing [A]:
- If the square is not valid (i.e. it’s not highlighted) then an alert sounds and the
player must select another square.
-
If the square is valid and empty then the monster moves to its new position.
-
If the square is valid and contains a rival monster then there’s a Duel.
- If the Duel resolves in the attacker’s favor then the player sees the enemy mon-
ster disappearing and their monster moving to take its place.
- If the Duel resolves in the defender’s favor then the player sees their own
monster disappearing.
-
If playing a friend but with only one controller plugged in, then each player builds
their army from the same collection of monsters (i.e. those stored on the controller)
– the second player controls the game using the main console.
- However, if the friend has their own controller plugged in then each player builds
their army from their own unique monster collection. What’s more, players may win
or lose monsters to their rival depending upon the outcome of the Battle.
• Duel – In this mode player(s) can send single monsters against one another in a fast-
paced arcade-style combat. Those monsters that win their Duels may also have their
statistics improved.
- During a Duel, each player’s aim is to reduce their opponent’s Health to zero by
attacking them.
- At the top of the screen is a display showing:
- Monster Name
- ID Number
- Health – Shown as both a bar that depletes as the monster takes damage. When
the bar reaches zero the monster is defeated.
- Reload – This bar instantly drops to zero when a monster attacks, then gradually
‘fills up’ according to the monster’s Reload stat. While this bar is only partially filled
the monster cannot attack. Once the bar is full it starts pulsating – this means that
the monster can now attack again.
- Power-Up Indicator – If a monster is affected by an item then a relevant icon ap-
pears in the stat bar.
- Players Duel until either of the monsters is defeated. When a monster is defeated,
the victor is declared on the monitor screens, the winning monster performs a
small victory celebration, the losing monster fades away. Pressing [A] returns the
players to the Battle screen.
• Bestiary – In the Bestiary the player can scan through the monsters they’ve col-
lected to date, and examine their appearance, behaviour and statistics.
• Options – Player(s) select this option to change game settings.
GAME VARIATIONS
Armageddon
Armageddon is a ‘last man standing’-style Battle variant in which victory is achieved by
eliminating all of the opponent’s monsters:
• Player(s) place their monsters in opposite corners of the selected game map, as
indicated below,
• Each player then takes turns moving their monsters and starting a Dual.
• Play continues until all the monsters from one team have been defeated. The player
with monsters remaining is declared the victor.
Flag Grab
In a Flag Grab game, player(s) attempt to capture the opponent’s flag marker and return
it to their side of the board:
•
Player(s) place their monsters on opposite sides of the selected game map. In addition
each team has is a flag marker placed on the side of the game board (indicated in purple
below; this square is also highlighted on the board during play).
• Each player then takes turns moving their monsters and starting a Dual.
• If a monster ends its turn on the square bearing the opposite team’s flag then that
monster is considered to have ‘captured the flag’ – an icon appears above its head.
• If a monster holding the opposite team’s flag is defeated, the flag is ‘dropped’ and
returns to its home square.
• Although monsters may occupy the same square as their team’s flag, they cannot
pick it up and move it. Monsters occupying the same square as their team’s flag are
considered to be guarding the flag.
•
If the monster currently holding the flag ends its move on its base (the highlighted
square where their own flag was originally placed) while their own flag is on its base
too, then the flag is considered ‘captured’ and that player wins.
Power
[D-Pad]
(8-way
directional
control)
[A] button
[B] button
[D-Pad]
(8-way
directional
control)
[A] button
[B] button
Conquer
In the Conquer game, victory is achieved by defeating the opponent’s ‘King’ monster:
• Player(s) place their monsters in all 4 corners of the selected game map.
• The monster placed on the ‘crown square’ (highlighted on the board) is automatically
declared the king.
• Each player then takes turns moving their monsters and starting a Dual.
•
If a player defeats their opponent’s ‘King’ monster then they are declared the victor.
Infected
In an Infected game a monster is deemed to be infected with a magical plague
until it defeats another monster in a duel. Every turn a monster has plague counts
against that team’s score:
• Player(s) place their monsters on opposite sides of the selected game map.
• After all monsters have been place, one monster is randomly chosen to be infected
– this is indicated by an animated icon floating over its head.
• The Health, Reload and Force stats of the monster that is currently infected are
doubled so that the monster becomes very powerful.
• Each player then takes turns moving their monsters and starting a Dual.
•
The infected monster’s task is to hunt down a rival monster and engage it in a Duel:
- If the infected monster wins the Duel then the rival monster is removed from the
board as normal and one of the opponent’s team is randomly declared infected.
-
If the infected monster loses the Duel then their monster is removed from the board
and another member of their team is randomly declared infected.
- If a team’s monsters have all been defeated then the game ends and the team with
the highest score is declared the winner.
• Both teams start with 20 points, as displayed on the display:
- Every turn a point is removed from the team with the infected monster.
- If a team’s score hits 0 then the opposing team is declared the victor.
Skull Scramble
In the Skull Scramble game, victory is achieved by moving a magic skull to the opposite
team’s edge of the battle map:
• Player(s) place their monsters on opposite sides of the selected game map. In addi-
tion a skull ‘marker’ is placed at the centre of the board.
• Each player then takes turns moving their monsters and starting a Dual.
• If a monster ends its turn on the square bearing the skull then that monster is consid-
ered to be ‘holding the skull’ – an animated skull icon now appears above its head.
• If the monster holding the skull is defeated in a Duel, the victorious monster now
takes possession of the skull.
•
If the monster holding the skull successfully reaches the opposite team’s goal square
(i.e the corner square on that player’s side of the board; this square is highlighted on
the board for emphasis) then their team is declared the winner.
Upgrading Statistics – Single Player
If the player defeats their opponent then they may be able to upgrade their stats.
•
There are only three stats that may be upgraded: Heath, Damage and Reload
•
To upgrade stats, the player must Duel and defeat an opponent with at least one stat
higher than their monster’s. In addition, only those stats may be upgraded (if there’s
more than one then the one to be upgraded is chosen randomly).
• The Difficulty level selected also affects stats upgrades:
- Easy – No upgrade
- Medium – 1 point upgrade
- Hard – 2 point upgrade (never beyond that monster’s Max stat value).
Upgrading Statistics – Two-Player
This is near identical to the single-player version: whoever wins the dual gets one of
their stats (chosen randomly) upgraded by a single point.
Player Colors
So that each player can quickly and easily identify which monster is theirs during a Bat-
tle or a Duel, each monster is tinted slightly different:
• Player 1 – All the monsters have a blue color, and during the game this player is
referred to as the ‘Blue Player’.
• Player 2 – All the monsters have a red color, and during the game this player is
referred to as the ‘Red Player’.
Note: when monsters are viewed on the Bestiary screen and during duals, they are
seen in their ‘true colors’.
Options
On this screen the player can select from the following options:
• Battle Animation On/Off – If this is set to ‘On’, the player sees monsters move from
square to square on the battleground; if this is set to ‘Off’ then monsters ‘snap move’
from square to square.
• Music Volume – Music Volume is represented by a bar, the length of which can be
altered using the [D-Pad] to change the volume.
• Sound FX Volume – Sound FX Volume is represented by a bar, the length of which
can be altered using the [D-Pad] to change the volume.
Items
In addition to collecting monsters, scanning certain UPC codes gives the player items:
Items can be used during any battle game at the beginning of a player’s turn. Pressing
[B] while on the Battle screen brings up an Options menu, one of which is ‘Use Item’.
Highlight this option with the [D-Pad] and selecting it with [A] brings up an overlay
• The player cycles between items with the [D-Pad] – as this happens, the monitor
read-out changes to explain what the item does – and when the desired one is high-
lighted it can be selected by pressing [A].
• There are three ‘classes’ of item:
- Defensive – These items affect the player’s monsters:
- After selecting a defensive item, the screen returns to the Battle map.
-
With the [D-Pad] the player guides a cursor onto one of their monsters.
- Once the desired monster is highlighted, pressing [A] activates the item.
- Offensive – These items affect the opponent’s monsters:
- After selecting an offensive item, the screen returns to the Battle map.
-
With the [D-Pad] the player guides a cursor onto an enemy monster.
- Once the desired monster is highlighted, pressing [A] activates the item.
- Environmental – These items affect all monsters on the battle map. Once the item
is selected its effects apply immediately.
• There are 20 items the player can collect and then use in Battle.
- Health Potions ( Defensive) – When the player uses this item on a monster, the
monster’s health is restored to full.
- Boots Of Speed (Defensive) – When the player uses this item, the monster can
move up to 5 spaces on the Battle map. If the monster engages in a Duel, their
arena speed is also increased. Boots Of Speed’s effect lasts for a single turn.
-
Book Of The Dead (Offensive & Defensive; Battle only) – When this item is used,
a defeated monster from each team is resurrected. The player who used the Book
chooses the monsters both from their own team and the opponent’s.
-
Ring Of Strength (Defensive) – When the player uses this item on a monster, the
monster’s Force doubles. The effects of the Ring last for a single turn.
- Vortex (Offensive & Defensive) – When the player uses this item they can teleport
any monster to any space on the Battle map. Note: monsters that are currently
holding a flag (in Capture The Flag) or a skull (in Advance) cannot be teleported.
- Lightning Bolt (Offensive) – When the player uses this item on an opponent’s
monster, its health is reduced by 50%.
- Spider’s Web (Offensive) – When the player uses this item on an opponent’s
monster, the monster is not able to move on the Battle map (this effect does not
carry over into Duels). The effect lasts for three turns.
- Aura Of Confusion (Offensive) – When the player uses this item on an opponent’s
monster, the monster’s controls are reversed during Duels (i.e. pressing [Up]
makes the monster go down, pressing [Down] makes the monster go up, pressing
[Left] makes the monster go right, and pressing [Right] makes the monster go left.)
The effects last for a single turn.
- Gravity Hex ( Environmental) – When this item is used, all flying monster are
immobilized on the Battle map (on both armies). Furthermore, if a flying monster
engages in a Duel while the effects of a Gravity Hex are in place, the monster’s
speed is reduced and it essentially becomes ground-moving (i.e. it now takes
damage from things like lava pools, etc). The effect lasts for three turns.
- Meteor Shower (Environmental; Battle only) – When this item is used, a meteor
shower occurs. The meteor shower causes damage to a random number of mon-
sters from either team. Once selected, the meteor shower is instant.
- Horn Of Plenty (Defensive) – Raises the Health of every monster in the player’s
army by 50%.
- Titan Armour (Defensive) – Boosts the selected monster’s stats to their Max
value for a single turn/rest of Duel (note that Health remains boosted)
- Gauntlets of Dexterity (Defensive) – Doubles the monster’s Reload Rate for a
single turn/rest of Duel.
-
Dwarven Ale (Offensive) – Gives a monster High Inertia for a single turn/rest of Duel.
-
Magic Rune (Environmental; Battle only) – Gives Magic monsters a combat ‘boost’
against Tech monsters and doubles their usual boost against Power monsters. Lasts
for three turns, can only be played on the Battle board.
-
Tech Upgrade (Environmental; Battle only) – Gives Tech monsters a combat ‘boost’
against Power monsters and doubles their usual boost against Magic monsters. Lasts
for three turns, can only be played on the Battle board.
-
Power Surge (Environmental; Battle only) – Gives Power monsters a combat
‘boost’ against Magic monsters and doubles their usual boost against Tech mon-
sters. Lasts for three turns, can only be played on the Battle board.
- Chaos Storm (Environment; Battle only) – Reverses the
Magic>Power>Technology combat advantage triangle for three turns.
- Glyph Of Warding (Defensive) – Protects a monster from harm for a turn (where
they can not be attacked on the Battle board) or for a limited time during a Duel.
Can’t be used on a monster carrying a flag or a skull.
- Stones of Henge (Environmental; Battle only) – Causes a random number of
pillars to erupt on the Battle board for three turns; any monsters standing on a
pillared square cannot move or attack, and monsters cannot move into squares
with pillars on.
•
While most of the items may only be used once (without re-scanning the item), the player
is able to store up to 5 Health Potions. The number collected is shown by a small number
overlaying the icon, which decreases every time a Health Potion is used.
•
If the player highlights a monster which is still under an item’s effect, an icon in the
monitor display indicates this (i.e. if a monster has an Aura Of Confusion cast on it, a
small icon indicating this will appear whenever it is highlighted).
• A monster can only be under the effects of one item at a time – an item’s effect
supersedes that of any previous items.
TROUBLE SHOOTING
TV
To locate your auxiliary channel, which is usually not 3 or 4, but a gaming channel found
between 2 and 99 (example 2, 1, 0, 99), first try 00 to see if it is the auxiliary channel.
Channels downwards from 3 until a Line 1 or Line 2, Video 1 or Video 2, Front, Aux,
AV, etc., appears on screen, then push the power button on the game and it should
automatically come on if you have selected the correct channel. If this does not work,
another way to determine your auxiliary channel is to take a look at your television
remote. There may be a button on the remote that may take you directly to the correct
channel. The buttons you are looking for may be labeled Input, AUX, AV, Line, TV/Video,
or Video. If your remote has one of these buttons, turn your television back to Channel
3 and select that button. The power button on the game should be turned on in order
for the game to appear on the television. If your television remote does not have any of
these buttons, and channel 00 is not working, you may need to search the main menu
for a way to determine your auxiliary channel. If none of these methods have helped
you locate your auxiliary channel, you may need to check your owner’s manual and/or
contact a local television repair company.
VCR
When connecting to a VCR, you must first start with a blue background showing on
your television screen. To obtain a blue screen, try inserting a videotape into the VCR,
let it start to play, then hit the stop button. This may give you a blue screen, then you
can channel down to your auxiliary channel. If the blue screen still does not appear, try
entering your TV and/or VCR main menu and see if it gives you options to select a blue
screen background. Many times if you enter the main menu on your television you can
change the setting from cable to video and display a blue screen. Also if you have an
older television, you may locate a hidden door on your television that has color, picture,
horizontal, vertical, and cable, antennae buttons. If your television includes this panel,
you can select the antennae/cable button and see the blue screen appears. If you have
tried all of these options and are still unsuccessful connecting the console, then you may
need to check your VCR owner’s manual or contact the manufacturer to find out how to
set up your VCR for console games.
Remember, you can’t play our games through a cable box or satellite, so if you own one
of these make sure it is turned off before connecting the game. You can connect our
games through DVD players with the same connection as a VCR.
If you still have difficulty with setup or operation of your game, please call our players
helpline mentioned at the end of this manual.
If you choose to use an AC Adapter we suggest the following :
Recommended Adaptor Output :
-Voltage: 6 Volts DC
-Current: 300 mA (minimum)
Polarity: Negative Center
Plug Size: 5.5 mm outside diameter, 2.1 inside diameter.
AC Adapters are available at most electronic stores.
If you use the product with a transformer, regularly examine for damage to the cord,
plug, enclosure and other parts. In the event of any damage, do not use the toy with
the transformer.
CAUTION
• As with all small batteries, the batteries used with this device should be kept
away from small children who might still put things in their mouths. If a bat-
tery is swallowed, consult a physician immediately.
• Be sure you insert the battery correctly and always follow the device and bat-
tery manufacturer’s instructions.
• Do not dispose of batteries in fire.
• Batteries might leak if improperly installed, or explode if recharged, disassem-
bled or heated.
•
Sometimes, a build-up of static electric (from carpets, etc) may cause the game
to stop working. Just reset the game by switching the power button off for a few
seconds and it will work again.
•
The unit may malfunction when there is radio interference on the power line and
signal line. The unit will revert to normal operation when the interference stops.
• In an environment with radio frequency interference, the product may mal-
function and require user to reset the product.
MAINTENANCE
• Handle this device carefully.
• Store this device away from dusty or dirty areas.
• Keep this device away from moisture or extreme temperature.
• Do not disassemble this device. If a problem occurs, press the Reset button, or
remove and replace the batteries to reset the device, or try new batteries. If prob-
lems persist, consult the warranty information located at the end of this instruction
manual.
• Use only the recommended battery type.
• Do not mix old and new batteries.
• D
o not mix alkaline, standard (carbon-zinc) or rechargeable (nickel-cadmium)
batteries.
• Do not use rechargeable batteries.
• Do not attempt to recharge non-rechargeable batteries.
• Remove any exhausted batteries from the device.
• Do not short-circuit the supply terminals.
• Insert batteries with the correct polarity.
• This product is not suitable for children under 36 months.
• Use only with the recommended transformer type.
• Disconnect the transformer before cleaning the console or controller.
• The transformer is not a toy.
•
Transformers used with the toy are to be regularly examined for damage to the
cord,plug, enclosure and other parts. In the event of such damage, the toy must not
be used with this transformer until the damage has been repaired.
• The toy is not to be connected to more than one power supply.
• Packaging should be kept as it contains important information.
Please retain this for future reference.
This device complies with Part 15 of the FCC Rules. Operation is subject to the fol-
lowing two conditions: (1) this device may not cause harmful interference and (2) this
device must accept any interference received, including interference that may cause
undesired operation.
WARNING: Changes or modifications to this unit not expressly approved by the party
responsible for compliance could void the user’s authority to operate the equipment.
NOTE : This equipment has been tested and found to comply with the limits for a Class B
digital device, pursuant to Part 15 of the FCC Rules. These limits are designed to provide
reasonable protection against harmful interference in a residential installation. This
equipment generates, uses and can radiate radio frequency energy and if not installed
and used in accordance with the instructions, may cause harmful interference to radio
communications. However, there is no guarantee that interference will not occur in a
particular installation. If this equipment does cause harmful interference to radio or tel-
evision reception, which can be determined by turning the equipment off and on, the user
is encouraged to try to correct the interference by one or more of the following measures:
• Reorient or relocate the receiving antenna.
• Increase the separation between the equipment and receiver.
• Connect the equipment into an outlet on a circuit different from that to which the
receiver is connected.
• Consult the dealer or an experienced radio TV technician for help.
6-MONTH LIMITED WARRANTY FOR USA
(This product warranty is valid in the United States and Canada only)
Radica Games Limited warrants this product for a period of 6 months from the original
purchase date under normal use against defective workmanship and materials (bat-
teries excluded). This warranty does not cover damage resulting from accident,
unreasonable use, negligence, improper service or other causes not arising out of
defects in material or workmanship. Radica Games Limited will not be liable for any
costs incurred due to loss of use of this product or other incidental or consequential
costs, expenses or damages incurred by the purchaser. Some states do not allow the
exclusion or limitation of incidental or consequential damages, so the above limitations
may not apply to you. This warranty gives you specific legal rights and you may also
have other legal rights, which vary from state to state.
During this 6-month warranty period, the game will either be repaired or replaced (at
our option) without charge to the purchaser when returned prepaid with proof of date
of purchase to: Radica USA, Ltd., 13628-A Beta Road, Dallas, Texas 75244, USA.
Please remove the batteries and wrap the unit carefully before shipping. Please include
a brief description of the problem along with your return address and mail it postage
prepaid.
IMPORTANT: Before returning the unit for repair, test it with fresh alkaline batteries.
Even new batteries may be defective or weak and low battery power is a frequent cause
of unsatisfactory operation.
6 MONTH PRODUCT WARRANTY FOR UK
(This product warranty is valid in the United Kingdom only)
All products in the RADICA® range are fully guaranteed for a period of 6 months from
the original purchase date under normal use, against defective workmanship and
materials (batteries excluded). This warranty does not cover damage resulting from ac-
cident, unreasonable use, negligence, improper service or other causes not arising out
of defects in material or workmanship.
In the unlikely event that you do experience a problem within the first 6 months, please
telephone the Technical Support team: Tel. 0871 222 8278. Calls are charged at 10p
per minute and will show up on your standard telephone bill. Helpline hours are
2pm-11pm, Monday to Friday.
IMPORTANT: Always test the product with fresh alkaline batteries. Even new batteries may
be defective or weak and low battery power is a frequent cause of unsatisfactory operation.
THIS WARRANTY IS IN ADDITION TO YOUR STATUTORY RIGHTS.
CREDITS
Publisher – Radica
Programmer/Author - Hi-Score TV Limited
Production Company - Hi-Score TV Limited
Distributed in the USA by:
RADICA USA Ltd.
13628-A Beta Road
Dallas, TX 75244-4510
RADICA : ®
SKANNERZ TV IS A TRADEMARKS
OF RADICA GAMES LTD.
©2006 RADICA GAMES LTD.
PRODUCT SHAPE™
ALL RIGHTS RESERVED
Distributed in the UK by:
RADICA UK Ltd.
The Old Stables, Munns Farm,
Cole Green, Hertfordshire,
SG14 2NL, England

This manual suits for next models

1

Other Radica Games Toy manuals

Radica Games 76002 User manual

Radica Games

Radica Games 76002 User manual

Radica Games LIGHTED POKER 74004 User manual

Radica Games

Radica Games LIGHTED POKER 74004 User manual

Radica Games Pearl Quest M1291 User manual

Radica Games

Radica Games Pearl Quest M1291 User manual

Radica Games 75052 User manual

Radica Games

Radica Games 75052 User manual

Radica Games Sport Bass Fishin' 71014 User manual

Radica Games

Radica Games Sport Bass Fishin' 71014 User manual

Radica Games JUNIOR BASS FISHIN’ User manual

Radica Games

Radica Games JUNIOR BASS FISHIN’ User manual

Radica Games 75071 User manual

Radica Games

Radica Games 75071 User manual

Radica Games Battle RBZ 73026 User manual

Radica Games

Radica Games Battle RBZ 73026 User manual

Radica Games Elvis Slot 71042 User manual

Radica Games

Radica Games Elvis Slot 71042 User manual

Radica Games RC71103 User manual

Radica Games

Radica Games RC71103 User manual

Radica Games Othello 8047 User manual

Radica Games

Radica Games Othello 8047 User manual

Radica Games 73050 User manual

Radica Games

Radica Games 73050 User manual

Radica Games 75005 Pocket Poker User manual

Radica Games

Radica Games 75005 Pocket Poker User manual

Radica Games Tournament Golf 73017 User manual

Radica Games

Radica Games Tournament Golf 73017 User manual

Radica Games 74006 Lighted Slots User manual

Radica Games

Radica Games 74006 Lighted Slots User manual

Radica Games 75058 User manual

Radica Games

Radica Games 75058 User manual

Radica Games Twinkleberries User manual

Radica Games

Radica Games Twinkleberries User manual

Radica Games 74012 User manual

Radica Games

Radica Games 74012 User manual

Radica Games Fliptop Blackjack User manual

Radica Games

Radica Games Fliptop Blackjack User manual

Radica Games 75055 User manual

Radica Games

Radica Games 75055 User manual

Radica Games 75036 User manual

Radica Games

Radica Games 75036 User manual

Radica Games Password Journal 75015 User manual

Radica Games

Radica Games Password Journal 75015 User manual

Radica Games Girl Tech Keepsafe Secrets 75074 User manual

Radica Games

Radica Games Girl Tech Keepsafe Secrets 75074 User manual

Radica Games 76014 User manual

Radica Games

Radica Games 76014 User manual

Popular Toy manuals by other brands

MTHTrains Premier Alco RS-11 Road Switcher Diesel... Operator's manual

MTHTrains

MTHTrains Premier Alco RS-11 Road Switcher Diesel... Operator's manual

Faller 120223 quick start guide

Faller

Faller 120223 quick start guide

SYMA S107H user manual

SYMA

SYMA S107H user manual

Monogram KIT 4010 Assembly manual

Monogram

Monogram KIT 4010 Assembly manual

LEXIBOOK RPB2000 instruction manual

LEXIBOOK

LEXIBOOK RPB2000 instruction manual

Airigami PAPIER AVION 9GBOE20B04 quick start guide

Airigami

Airigami PAPIER AVION 9GBOE20B04 quick start guide

LEGO 21206 instructions

LEGO

LEGO 21206 instructions

Fisher-Price Little People Take Turns Skyway FXK58 Assembly guide

Fisher-Price

Fisher-Price Little People Take Turns Skyway FXK58 Assembly guide

LEGO Creator 31026 instruction manual

LEGO

LEGO Creator 31026 instruction manual

LEGO Animal Allies user manual

LEGO

LEGO Animal Allies user manual

BNF Blade 130 S instruction manual

BNF

BNF Blade 130 S instruction manual

Quadro mdb A0269 Construction manual

Quadro mdb

Quadro mdb A0269 Construction manual

Volvo DRIVe Owner's manual supplement

Volvo

Volvo DRIVe Owner's manual supplement

Hasbro NERF RIVAL FORERUNNER XXIII-1200 quick start guide

Hasbro

Hasbro NERF RIVAL FORERUNNER XXIII-1200 quick start guide

Mega Construx Wellie Wishers FMN27 manual

Mega Construx

Mega Construx Wellie Wishers FMN27 manual

Trends Audio Peppa Pig Peppa’s Smart Tablet  PP04 instruction manual

Trends Audio

Trends Audio Peppa Pig Peppa’s Smart Tablet PP04 instruction manual

Eduard Spitfire Mk.Vc S.A. quick start guide

Eduard

Eduard Spitfire Mk.Vc S.A. quick start guide

Fisher-Price Lil Kawasaki 76921 Owner's manual with assembly instructions

Fisher-Price

Fisher-Price Lil Kawasaki 76921 Owner's manual with assembly instructions

manuals.online logo
manuals.online logoBrands
  • About & Mission
  • Contact us
  • Privacy Policy
  • Terms and Conditions

Copyright 2025 Manuals.Online. All Rights Reserved.