Radio Shack TRS-80 User manual

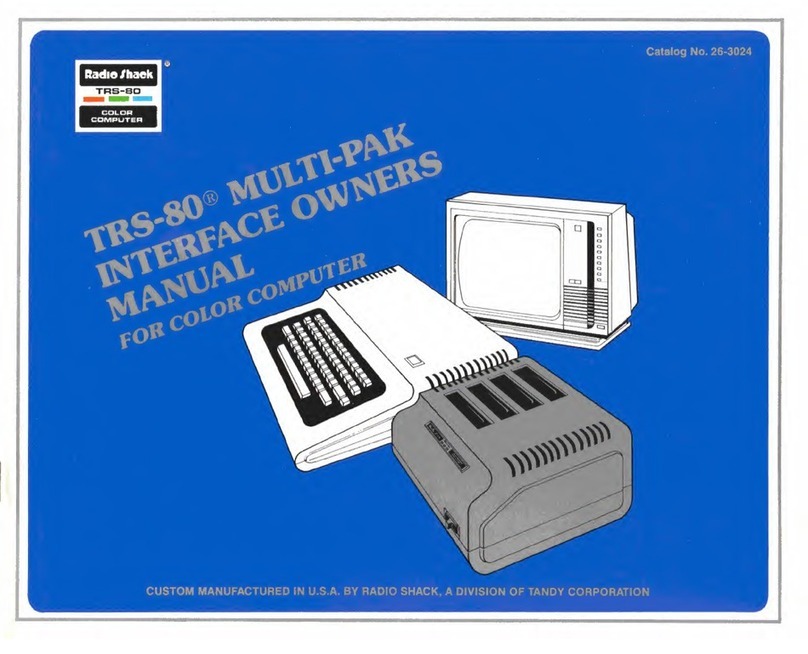
PC-4 CASSETTE INTERFACE
OWNERS MANUAL
CATALOG NO. 26-3651
CUSTOM MANUFACTURED FOR RADIO SHACK. ADIVISION OF TANDY CORPORATION

iJM ^£. *i ttk i^r >'n'Tlltl.w^. —...
—
<£-
cc
cc
o
u_l
5~^
Q*E
°-2- Sc?f8 -oEo
HIS *O2J-* H,„|rr
11^ S^Ji-
§
ccgo£Eg>-g
qcirt n
f
t
cc
o
Oo—?poz a:
<>_ oj/*o Ot-
oi -riu Co -m"1
ifipa:(/i ao^=oi5
15°5 o|Sjg ^zEi°iiSlo
•C <J _<->
>26_< o<m^»-
<uO__ ^2
liaiii
o
S
cc
«
3
S
1
>Ocu CJ cc CO £
„jcJC|S -
'
5S ? *„75
c? —
<a
*E
!~ §3 Ic S|c/> !! §£"
«™a
1|oo^SE|£9°:| g-|g|
;? :
5Ssclf°;'sfS">So
2
II E-I
cc
3~s
cc °o'" >"z""" U':crD-
J
E1
£i'
'"St:
.$§i ,; &.:;.

a. :. —
1-}
Ni
a1
3§5S
:, a"
:DC -: mS€ £g
<UJ
£«, o-L. s•Q§1 ?o
&Eg
3s§
:
:
sbr|s2s°s
.. j
-1 ... °O°r!:' oit
a_
--•V ESIf.-: -; aIact g
<s>2 -
li 1
5= gi
s£ sis
:fi|-
£!I: k1
"-:
•i |2~Ss
:
IS-ss §|
E.3 5=S3
-*
is6
f™5 ^
5S| Jg-'Sfof.
o o
!t
<o S|||°^
or> £<t oc o|i Hi
oo
E5
ij
!=«;=> Eo2=3
ac a- q< i

Thank you very much for purchasing the tape recorder interface.
This interface is an exclusive adapter for connecting any ordinary
tape recorder to the Radio Shack PC-4 pocket computer.
If the cassette interface is connected incorrectly, neither
the computer or the cassette recorder will be damaged;
however, programs or data may not be saved or loaded.
More importantly, valuable data may be erased.
In order to avoid this, please become thoroughly familiar
with the operating procedures outlined in this manual.
Also refer to the computer operation manual.
-4-

Contents
Description 6
How to Connect to the Computer 7
Power Source 8
Functions 9
Requirements for Connecting Tape Recorder 10
Precautions in Connecting Tape Recorder .*11
Setting up for Recording and Playback 12
Program SAVE/LOAD 13
Data PUT/GET 15
All programs SAVE/LOAD 18
File Check 20
Specifications 21
-5-

iPower switch
(If the power switch is turned
on, the remote will operate.)
2Connector for Computer
3Guide for fitting Computer
4Black plug
5White plug
6Gray plug
7For fitting aconnector cap
|Battery lid
yComputer lock/release control
LOCK: Locks the Computer
in place
FREE: Al lows the Computer
to be removed

How to Connect to the Computer
(Precautions)
•Prior to connecting, insure that the power switches of
computer and the cassette interface are off.
•Be careful not to bend the cassette interface connector pins.
the
(1)
(2)
(3)
li
(5)
Turn the computer's power switch off.
Turn the computer lock/release control of the cassette
interface to the FREE position.
Align the top of the computer with the "«" marks.
Line up the connectors of the cassette interface and of the
computer and slide the computer in the direction of the
arrow.
Turn the lock/release control to the LOCK position.
iiiimiiiir
ii ter
-a-
f-:iiiiiiinni:ir
.. [DEE
DODI
DDDI
aaaauDonon _
|'« ri njii nr» r. nfj DDOI
•>•ii ri miiuli ri a«T
-7-

Power Source
This adapter uses two AA size manganese dry batteries (Cat.
No. 23-582 or equiv.) tor portable operation. When the bat-
teries run out, the portable operation function will not work
properly. In such case, replace the batteries with new ones.
Installing/Replacing the Batteries
1) Remove the battery lid at the rear of the adapter, by pushing
the knurled area in the direction indicated by the arrow.
2) Remove batteries, and replace them with new batteries.
Observe polarity when putting in new batteries.
CAUTION: Installing the batteries with reverse polarity may
cause them to burst and result in serious damage to
the unit.
3) Replace the lid by pushing it in the opposite direction of the
arrow. You will hear aclick when the lid is back in its locked
position.
#
1
AOPEN
o|H +J UJfl
ffl B.l o
Note: 'When replacing the batteries, replace them all.
Replace the batteries every two years even if the port-
able operation function still works properly.
'Do not throw used batteries in afire. They may explode.
8-

Functions ~~J
1
)
Saves aprogram on atape (SAVE).
2) Loads aprogram on atape into the computer (LOAD).
3) Transfers the contents of the data memories into the tape
(PUT).
4) Transfers data from atape into the data memories of the
computer (GET).
5) Transfers all the programs in the computer into the tape at
once (SAVE A).
6) Transfers all the programs on atape into the computer (LOAD
A).
-9-

Requirements for Connecting Tape Recorder
The cassette interface can be connected to:
Tape recorders that use cassette or microcassette tapes.
Requirements for the tape recorder:
Our portable cassette recorder Minisette-9 (Cat. No. 14-812) is
aperfect mate. However, if you are going to use other tape
recorder, take note of following.
1) The input terminal of the tape recorder (the MICROPHONE
terminal or equivalent) must be (1) 10 kohm or greater in
input impedance, and (2) 3mV or higher in minimum input
level.
2) The output terminal of the tape recorder (the EARPHONE,
MONITOR terminal or equivalent) must be (1) 10 ohms or less
in output impedance, and (2) 2.5 Vor greater in output level.
3) The remote control terminal of the tape recorder (or equiva-
lent) must have aspecification of 24 Vdc, 1Aor less.
4) Total distortion must bo 15% or less.
Most cassette tape recorders currently on the market (radio
cassette recorders, etc.) satisfy these requirements. If your tape
recorder differs slightly, it may still work with the cassette
interface. Note that mismatching will not damage either the
adapter or the tape recorder.
Note: *Use plug adapters (available at Radio Shack store) if
necessary.
*The requirement for the remote control terminal is
important. Make sure that it is met. If not, the
remote control function of the cassette interface may be
damaged.
10-

Precautions in Connecting Tape Recorder
For proper operation, check the following:
•The jacks of the tape recorder must be free from rust and
damage.
•The magnetic head must be clean and not excessively worn.
•We recommend our 26-301 cassette tape made specially for
computer purpose, but magnetic tapes available on the market
may also be used. The frequency response should be fairly
good.
•The magnetic tape must be free from scratches and creases.
Avoid using the first and last 30 seconds of the tape.
•Connect the computer securely to the cassette interface, and
do not remove it in the middle of operation. Before removing
the computer, turn off its power switch.
•Use the same tape recorder for recording and playback. Al-
though this is rare, if you do not use the same tape recorder,
you may not be able to transfer data.
•Take good care of recorded tapes. Tapes that are not stored
properly may not reproduce data.
•When connecting acomputer to the cassette interface, turn
off all power switch, and then connect the computer securely.
•If the connector pins are touched by hand, they may become
bent or dirty and prevent proper connection. Also, static
electricity from the human body may damage the internal
circuitry, so avoid touching the connector pins. When not in
use, cover with the two connector caps.
-11 -

Setting up for Recording and Playback
Connections
•Connect the white plug of the cassette interface to the
MICROPHONE jack of the tape recorder. If you are using
astereo tape recoreder, connect it to the right channel.
•Connect the black plug of the cassette interface to the EAR-
PHONE, MONITOR, or EXTERNAL SPEAKER jack. In case
of astereo tape recorder, use the same channel as used for
recording.
•Connect the gray plug to the remote control jack of the tape
recorder.
•Normally, the system (cassette interface and tape recorder)
works properly with all three plugs connected to the cassette
interface. However, some tape recorders may develop noise
when the white and black plugs are connected at the same
time. If so, connect only the white plug when recording (com-
puter to tape), and only the black plug when playing back
(tape to computer).
Recording level adjustment
If your tape recorder has an automatic level control, turn it on.
»lf not, adjust the level control manually as follows:
Record test data, and, while doing so, adjust the level control so
that the VU meter reads zero.
Note: If the level meter deflection is extremely wide, do not
use that particular tape recorder.
'Output level adjustment
•Set the volume control higher than you would usually when
listening to music. The position of the volume control should
be between the middle and maximum points. (Usually the
maximum point works best.)
•In the case of astereo tape recorder, turn the balance control
to the extreme position of the channel you are using (i.e. the
channel the black plug is connected to).
-12-

•If your tape recorder has amicrophone-mixing feature, turn the
SOURCE level control to maximum, and the MICROPHONE
level control to minimum.
Miscellaneous adjustment
•Set the TONE, BASS, and TREBLE controls to amedium level.
•Set the tape selector in accordance with the type of tape.
Program SAVE LOAD
Saving Programs
To save aprogram on atape, operate the computer as follows:
SAVE ["file name"] (Items within the brackets can be omitted.)
When P0 is specified as the program area, P0 program will be
saved, and if P3 is specified, P3 program will be saved, and so
forth. File name is acharacter or numeral string enclosed within
quotation marks (" "); and the string must be eight elements
or less in length.
Example: "A", "35", "PRG-1", "PC-4"
This SAVE command saves only the program in aspecific pro-
gram area. If you want to save all the programs (PO through P9)
at once, use the SAVE Acommand (see P. 18).
Procedure
1
)
Turn on the power.
2) Advance or rewind the tape to the position you want to start
recording, and note the reading of the tape counter.
3) Start the tape recorder in the RECORD mode.
4) Operate the computer as follows:
SAVE ["file name"] H)
5) The tape recorder automatically stops when the saving process
is completed. (If your tape recorder does not have remote
control capability, stop the tape recorder manually.)
Note: The SAVE command can be input only manually; it
cannot be included in aprogram to perform the operation
automatically. -13-

Loading Programs
To load aprogram from atape into the computer, operate as
follows:
LOAD ["file name"]
(Items within the brackets can be omitted.)
When P1 is specified as the program area, the program will be
loaded into program area "P1". As in the SAVE command,
"file name" can be omitted; in this case the first program found
on the tape will be loaded. This command can be used only
manually, and cannot be included in programs.
Procedure —Manual operation
1
)
Turn on the power.
2) Using the tape counter find the tape location two or three
counts ahead of the file you want to load.
3) (Only for systems with remote control capability) Start the
tape recorder in the PLAYBACK mode.
4) Operate the computer as follows:
LOAD ["file name"] (exe)
5) (Only for systems without remote control capability) Start
the tape recorder in the PLAYBACK mode.
6) The tape recorder stops automatically when the loading
process is completed. (If your system does not have remote
control capability, stop the tape recorder manually.)
Readout on the display
While loading: pp ;ppg _•]
program file file name
When loaded (in case of "RUN" mode): READY Pn
-14-

Note: The loading process can be carried out even when the
program area is not cleared of the old program.
However, the old program will be erased starting with the
first line number of the new program to be loaded.
(Example)
Old program in PO
10 INPUT A
S
90 PRINT B
100 FOR 1=1TO 100
300 PRINT C
New program loaded
100 INPUT X
i
200 PRINT Y
After loading
10 INPUT A
\
90 PRINT B
100 INPUT X
200 PRINT Y
Data PUT GET
Recording data on atape is done by the PUT
command.
To "put" data, operate as follows:
PUT ["file name"] variable
(The item within the brackets can be omitted.)
The variable in the command can range from $, A, B up to
Zor Z(n). If you want to put (record), for instance, Athrough
Z, enter "A, Z" for "variable".
(Example)
To "put" $, A, B, C, D: PUT ["file name"] $, A, D
Athrough Z; PUT ["file name" jA, Z
Athrough Zand Z(1) through Z(50):
PUT ["filename"| A, Z(50)
-15-

When you want to "put", for instance, Athrough Z, do not enter
"Z, A" instead of "A, Z"; this will cause an error.
(Example) PUT H, AError
Retrieving data from atape is done by the GET
command.
To "get" data, operate as follows:
GET ["file name") variable
(The item within the brackets can be omitted.)
Variable is expressed in the same manner as in the PUT command
-for example, "$, A", "$, A, Z".
The PUT and GET commands can be programed, or
executed manually.
•Procedure for Manual Operation
<Putting data >
1) Turn on the power.
2) Advance or rewind the tape to the point where you want to
start recording, and note the reading of the tape counter.
3) Start the tape recorder in the RECORD mode.
4) Operate the computer as follows:
PUT ["file name"] variable H)
5) When the "putting" process is completed, the tape recorder
stops automatically. (If your tape recorder does not have re-
mote control capability, stop the tape recorder manually.)
<Getting data >
1
)
Turn on the power.
2) Using the tape counter, find the tape location two or three
counts ahead of the file you want to "get".
3) (Only for systems with remote control capability) Start the
tape recorder in the PLAYBACK mode.
4) Operate the computer as follows:
-16-

GET ["file name") variable H
5) (Only for systems without remote control capability) Start
the tape recorder in the PLAYBACK mode.
6) When all the data are retrieved, the tape recorder stops auto-
matically. (If your system does not have remote control capa-
bility, stop the tape recorder manually.)
Note: If you try to GET more data than you PUT previously,
an error will occur.
•Procedure for Programed Operation
Tape recorders with remote control capability can be operated
automatically by the computer. But those without remote
control capability must be operated carefully in order to adjust
for timing.
The following procedure assumes that the tape recorder is con-
trolled automatically.
(Example) Program to PUT Program to GET
10 GET "D" A, Z
490 PUT "D" A, Z
500 END
<Putting data >
1) Turn on the power.
2) Advance or rewind the tape to the point where you want to
start recording, and note the reading of the tape counter.
3) Start the tape recorder in the RECORD mode.
4) Run the program in which you have written aPUT command.
5) When the program advances to the PUT command, the tape
recorder starts recording. When the PUT operation finishes,
the tape recorder stops automatically.
<Getting data >
1) Turn on the power.
2) Using the tape counter, find the tape location two or three
counts ahead of the file you want to "get".
3) Start the tape recorder in the PLAYBACK mode.
4) Run the program in which you have written aGET command.
-17-

5) When the program advances to the GET command, the tape
recorder starts playing back. When the GET operation finishes,
the tape recorder stops automatically.
Readout on the display while retrieving data:
VF :D
Data file File name
As in the SAVE and LOAD commands for programs, file name
can be omitted in the PUT and GET commands.
All programs SAVE LOAD
The SAVE (or LOAD) command previously discussed saves (or
loads) only one program in aspecific program area. If your pro-
gram consists of two or more program areas, it is convenient to
be able to save or load all the programs at one time.
The format of the commands are:
SAVE A"file name" lr .,
LOAD A"file name" (Flle name can be omitted.)
Procedure to "SAVE A"
1
)
Turn on the power.
2) Advance or rewind the tape to the point where you want to
start recording, and note the reading of the tape counter.
3) Start the tape recorder in the RECORD mode.
4) Operate the computer as follows:
SAVE A"file name" H
5) When all the programs and data are saved, the tape recorder
stops automatically. (If your tape recorder does not have re-
mote control capability, stop the tape recorder manually.)
-18-

Procedure to "LOAD A"
1
)
Turn on the power.
2) Using the tape counter, find the tape location two or three
counts ahead of the file you want to "load all".
3) (Only for systems with remote control capability) Start the
tape recorder in the PLAYBACK mode.
4) Operate the computer as follows:
LOAD A"file name" H
5) (Only for systems without remote control capability) Start
the tape recorder in the PLAYBACK mode.
6) When all the pertinent programs and data are loaded, the tape
recorder stops automatically. (If your tape recorder does not
have remote control capability, stop it manually.)
The SAVE A and LOAD Acommands can be used only
manually (interactively), and cannot be included in programs.
Read out on the display while loading all programs:
RF :ZZ
All program file file name
Note: When the LOAD Acommand is executed, all the pro-
grams in the computer are cleared and the new programs
will be loaded.
-19-

File Check
The VER (verify) command checks whether the programs and
data have been saved correctly. The format of the command is:
VER "file name" (File name can be omitted.)
Procedure
1
)
Turn on the power.
2) Using the tape counter, find the tape location two or three
counts ahead of the file you want to check.
3) (Only for systems with remote control capability) Start the
tape recorder in the PLAYBACK mode.
4) Operate the computer as follows:
VER "file name" H
5) (Only for systems without remote control capability) Start
the tape recorder in the PLAYBACK mode.
6) The tape recorder stops automatically when the checking
process is completed. (If your tape recorder does not have
remote control capability, stop it manually.)
Note: If an error message appears, or the display does not go
further than "—"to show the file number, the verifying
process is not working properly. Make sure all the condi-
tions for the loading process are met (output level of the
tape recorder, connection of plugs, etc.), then go through
the checking procedure once again. If this does not im-
prove the situation, go through the saving procedure
again.
This checking process does not verify all the data by
comparing the computer and the tape step by step,
but only checks the parity of the data on the tape to
make sure the data follow the prescribed format. Differ-
ences in programs or data contents between the com-
puter and the tape do not necessarily result in an error.
20-
Other manuals for TRS-80
46
This manual suits for next models
1
Table of contents
Other Radio Shack Recording Equipment manuals

Radio Shack
Radio Shack Modem I TRS-80 User manual

Radio Shack
Radio Shack 44-233A User manual

Radio Shack
Radio Shack 14-1198 User manual

Radio Shack
Radio Shack 1500474 User manual

Radio Shack
Radio Shack Digital Recorder User manual

Radio Shack
Radio Shack 20-second digital Recording Pen User manual

Radio Shack
Radio Shack Micro-43 User manual

Radio Shack
Radio Shack Modem I TRS-80 User manual

Radio Shack
Radio Shack TRS-80 User manual

Radio Shack
Radio Shack 43-2208 User manual